
ESP32 - SW520D Tilt Sensor
The SW520D tilt sensor module has the capability to detect tilt or orientation changes in its surroundings. It can be utilized to create tilt-responsive projects like an alarm that activates when an object is disturbed or a servo motor that responds to orientation changes.
In this tutorial, we will learn how to use the ESP32 and a SW520D tilt sensor to detect tilt. We will delve into the following:
- Connecting the SW520D tilt sensor to the ESP32
- Programming the ESP32 to detect tilt using the SW520D tilt sensor.
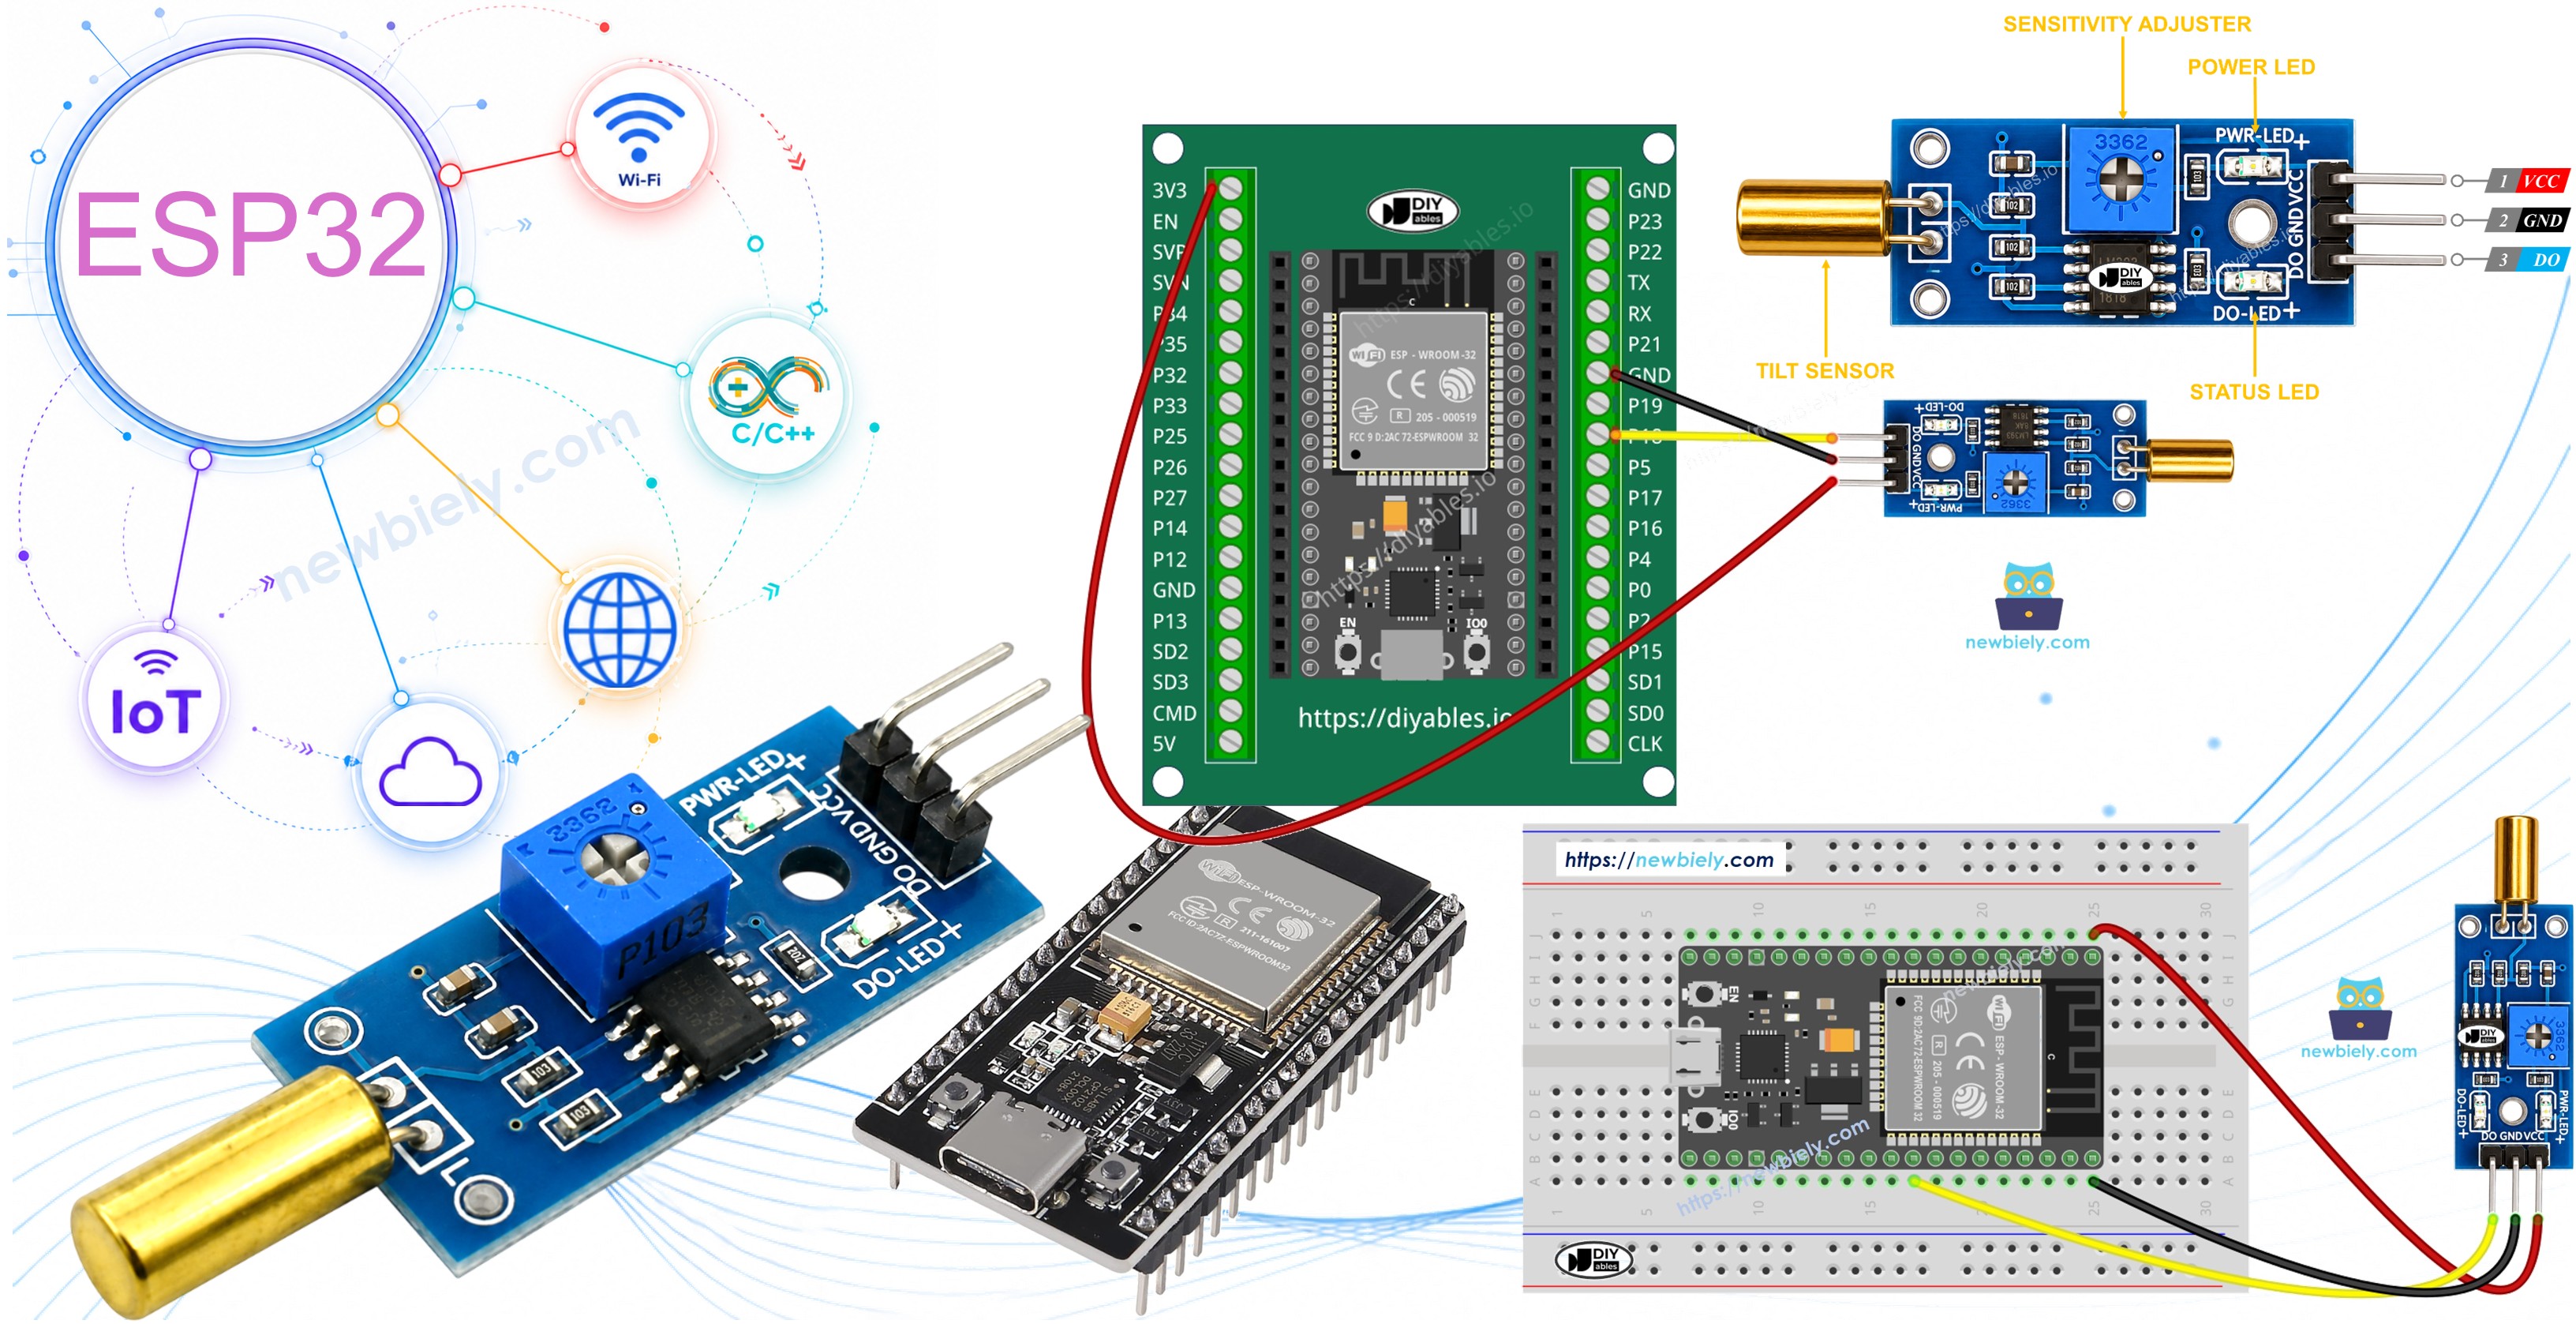
Following that, you have the flexibility to modify the code to trigger an LED or a light (using a relay) upon tilt detection, or even enable a servo motor to rotate.
This tutorial shows how to program the ESP32 using the Arduino language (C/C++) via the Arduino IDE. If you’d like to learn how to program the ESP32 with MicroPython, visit this ESP32 MicroPython - SW520D Tilt Sensor tutorial.
Hardware Used In This Tutorial
Or you can buy the following kits:
| 1 | × | DIYables ESP32 Starter Kit (ESP32 included) | |
| 1 | × | DIYables ESP32 S3 Starter Kit (ESP32 S3 included) | |
| 1 | × | DIYables Sensor Kit (18 sensors/displays) |
Introduction to SW520D Tilt Sensor
The SW520D tilt sensor module can be used to detect tilt or orientation changes in the surrounding environment. Inside the module, there is a small metal ball that rolls between two electrical contacts depending on the tilt angle. The module outputs a simple digital signal (ON/OFF), which makes it easy to interface with the ESP32.
The SW520D Tilt Sensor Pinout
The SW520D tilt sensor has three pins:
- VCC pin: needs to be connected to VCC (3.3V to 5V)
- GND pin: needs to be connected to GND (0V)
- DO pin: is an output pin: HIGH when the sensor is upright and LOW when the sensor is tilted. This pin needs to be connected to ESP32's input pin.
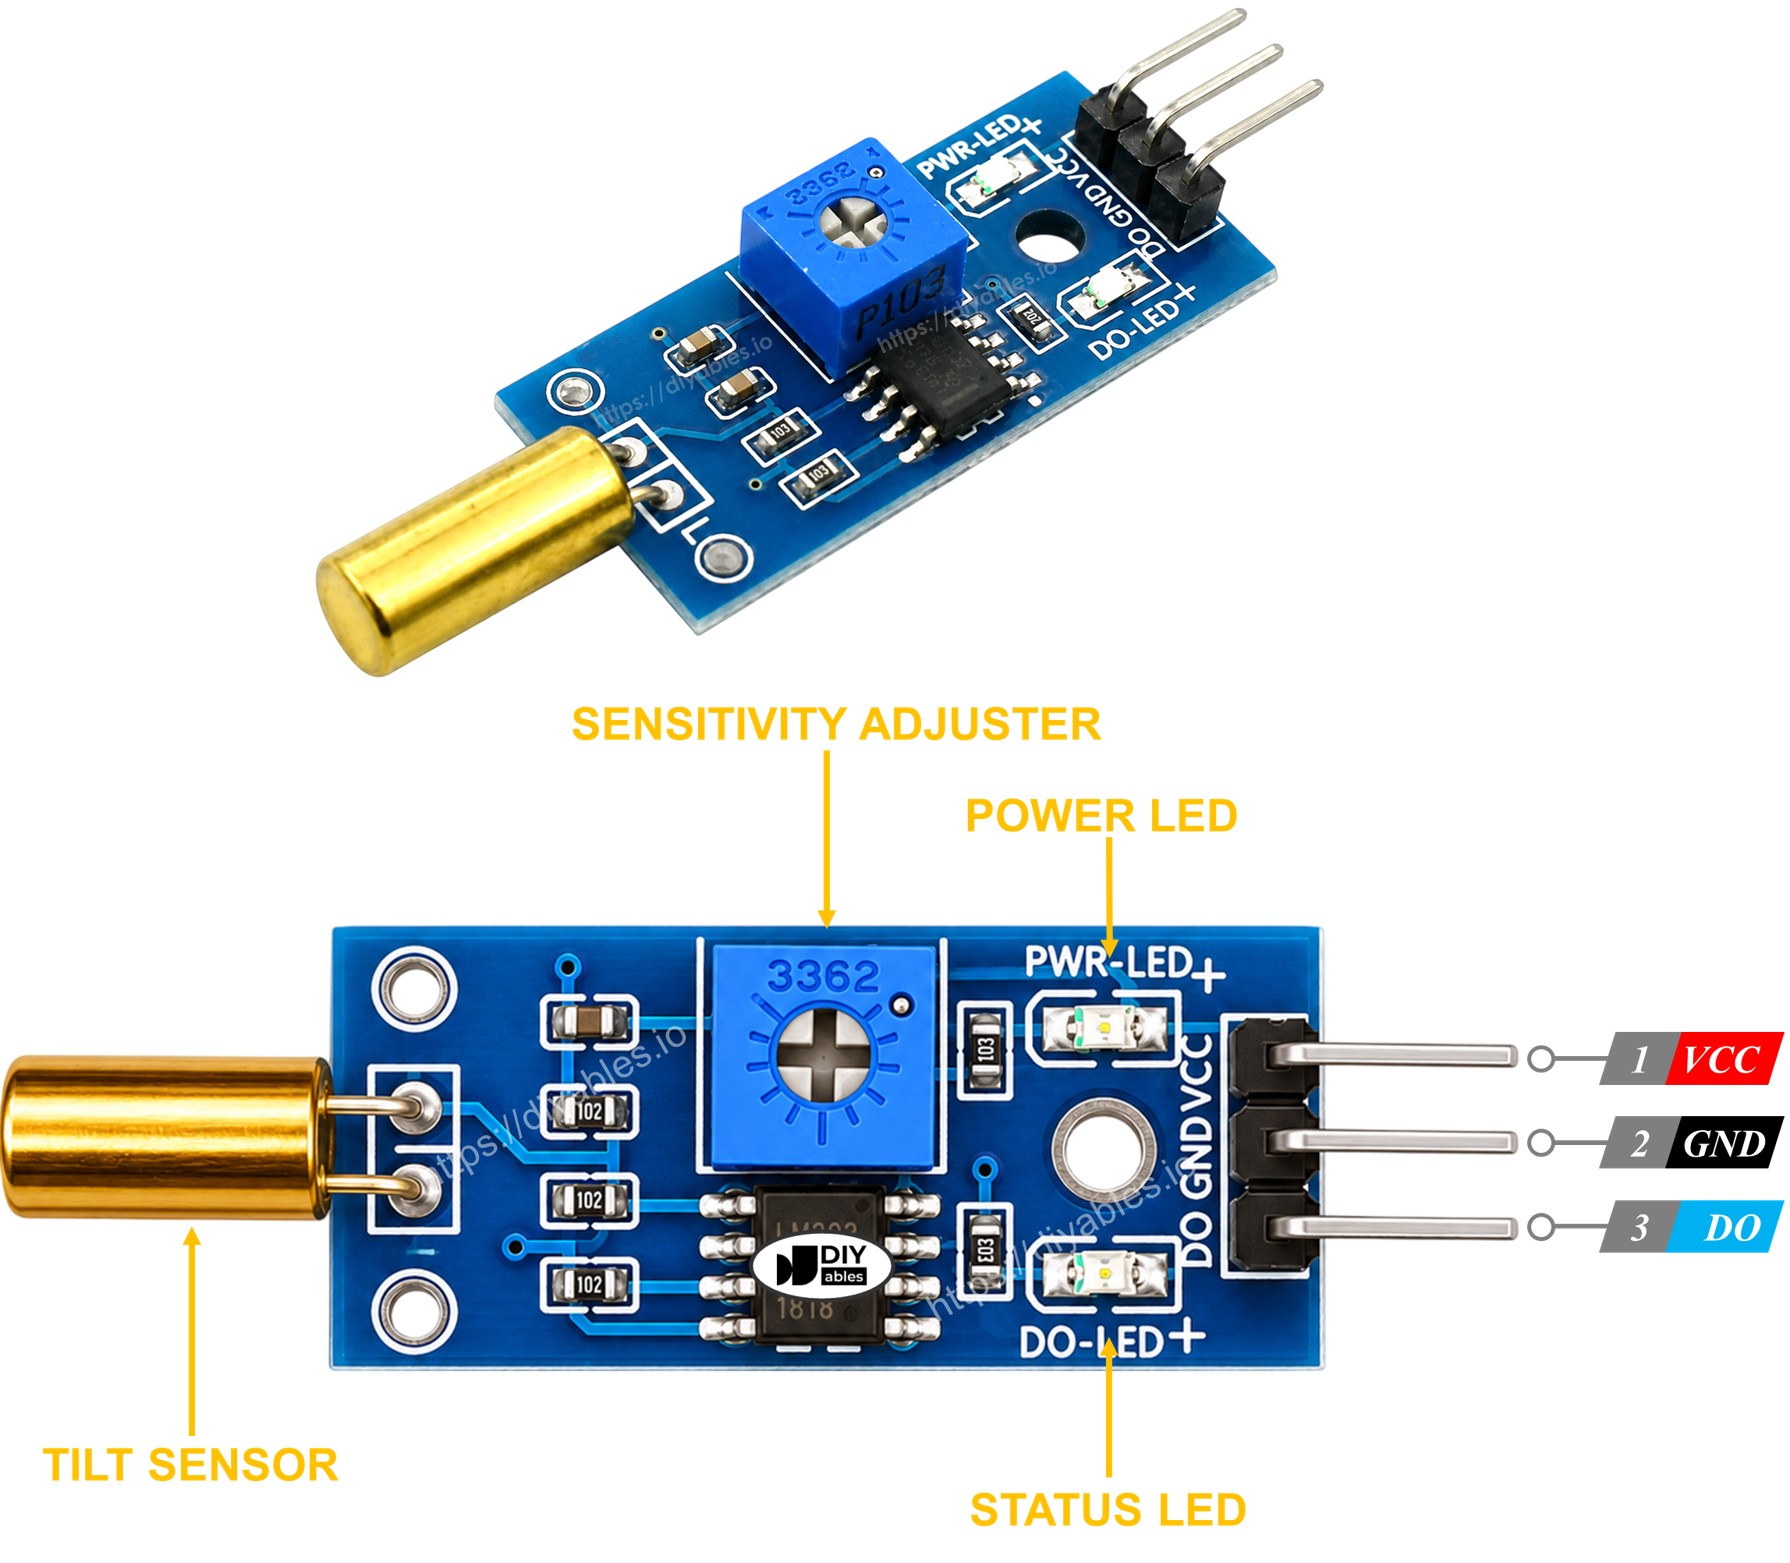
The SW520D tilt sensor module has two LED indicators:
- One LED indicator shows the power status.
- Another LED indicator shows the tilt state, turning on when the sensor is upright and off when it is tilted.
How It Works
Here's how the output pin of the sensor behaves:
- When the sensor is upright, the metal ball inside closes the contact, and the output pin is set to HIGH.
- When the sensor is tilted, the metal ball inside opens the contact, and the output pin is set to LOW.
Wiring Diagram
- How to connect ESP32 and SW520D tilt sensor using breadboard
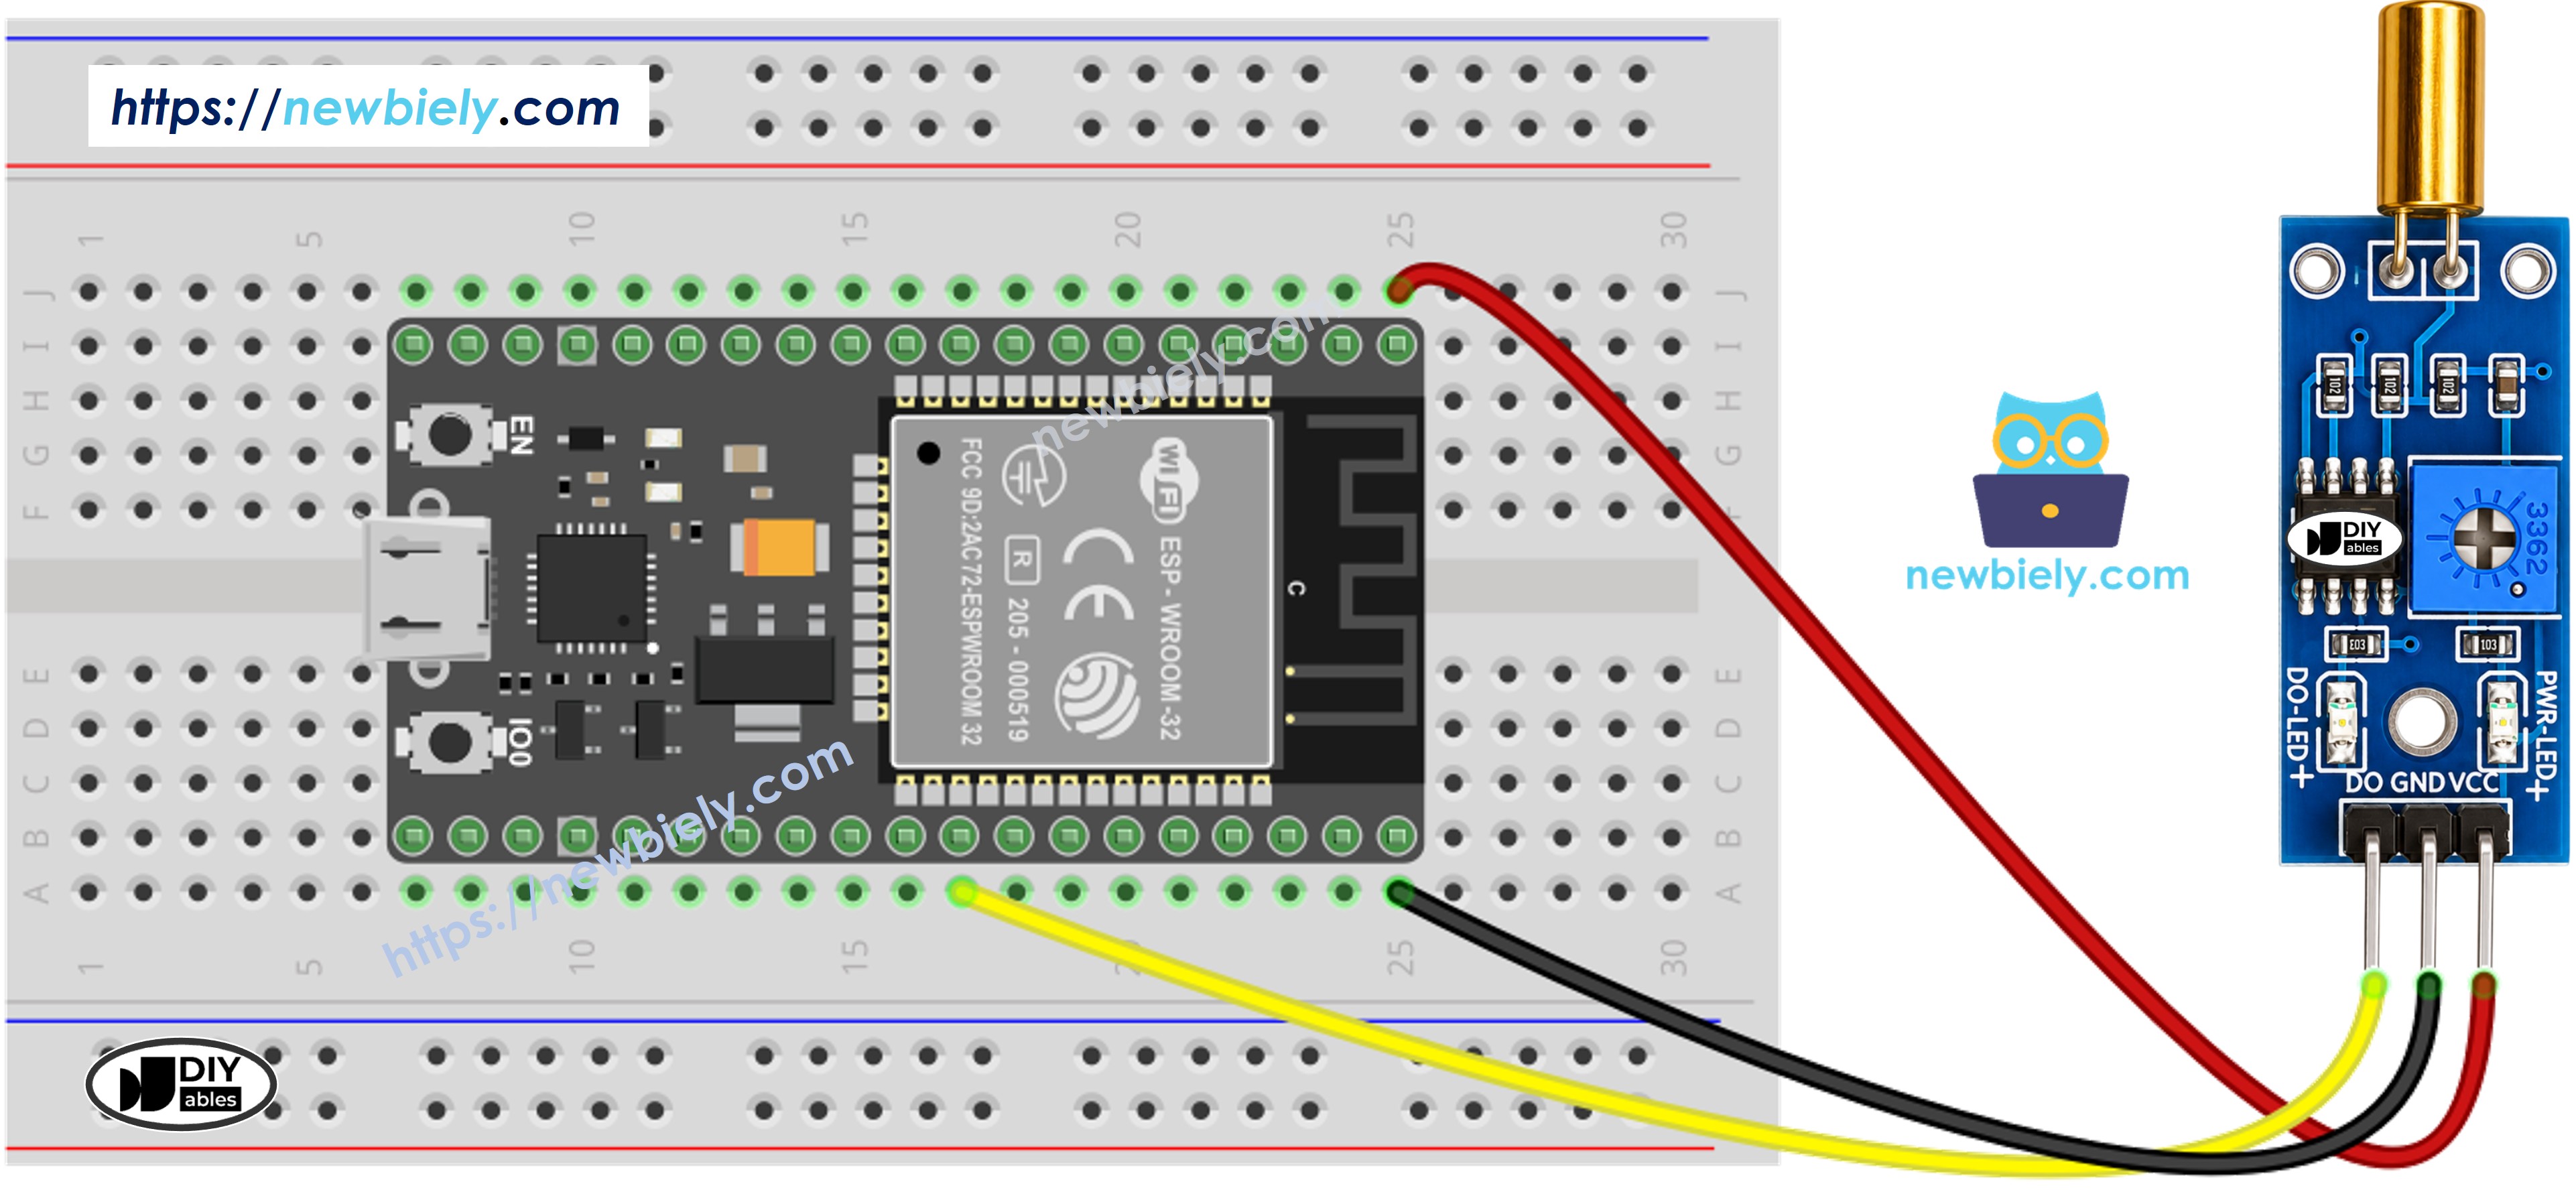
This image is created using Fritzing. Click to enlarge image
- How to connect ESP32 and SW520D tilt sensor using screw terminal block breakout board
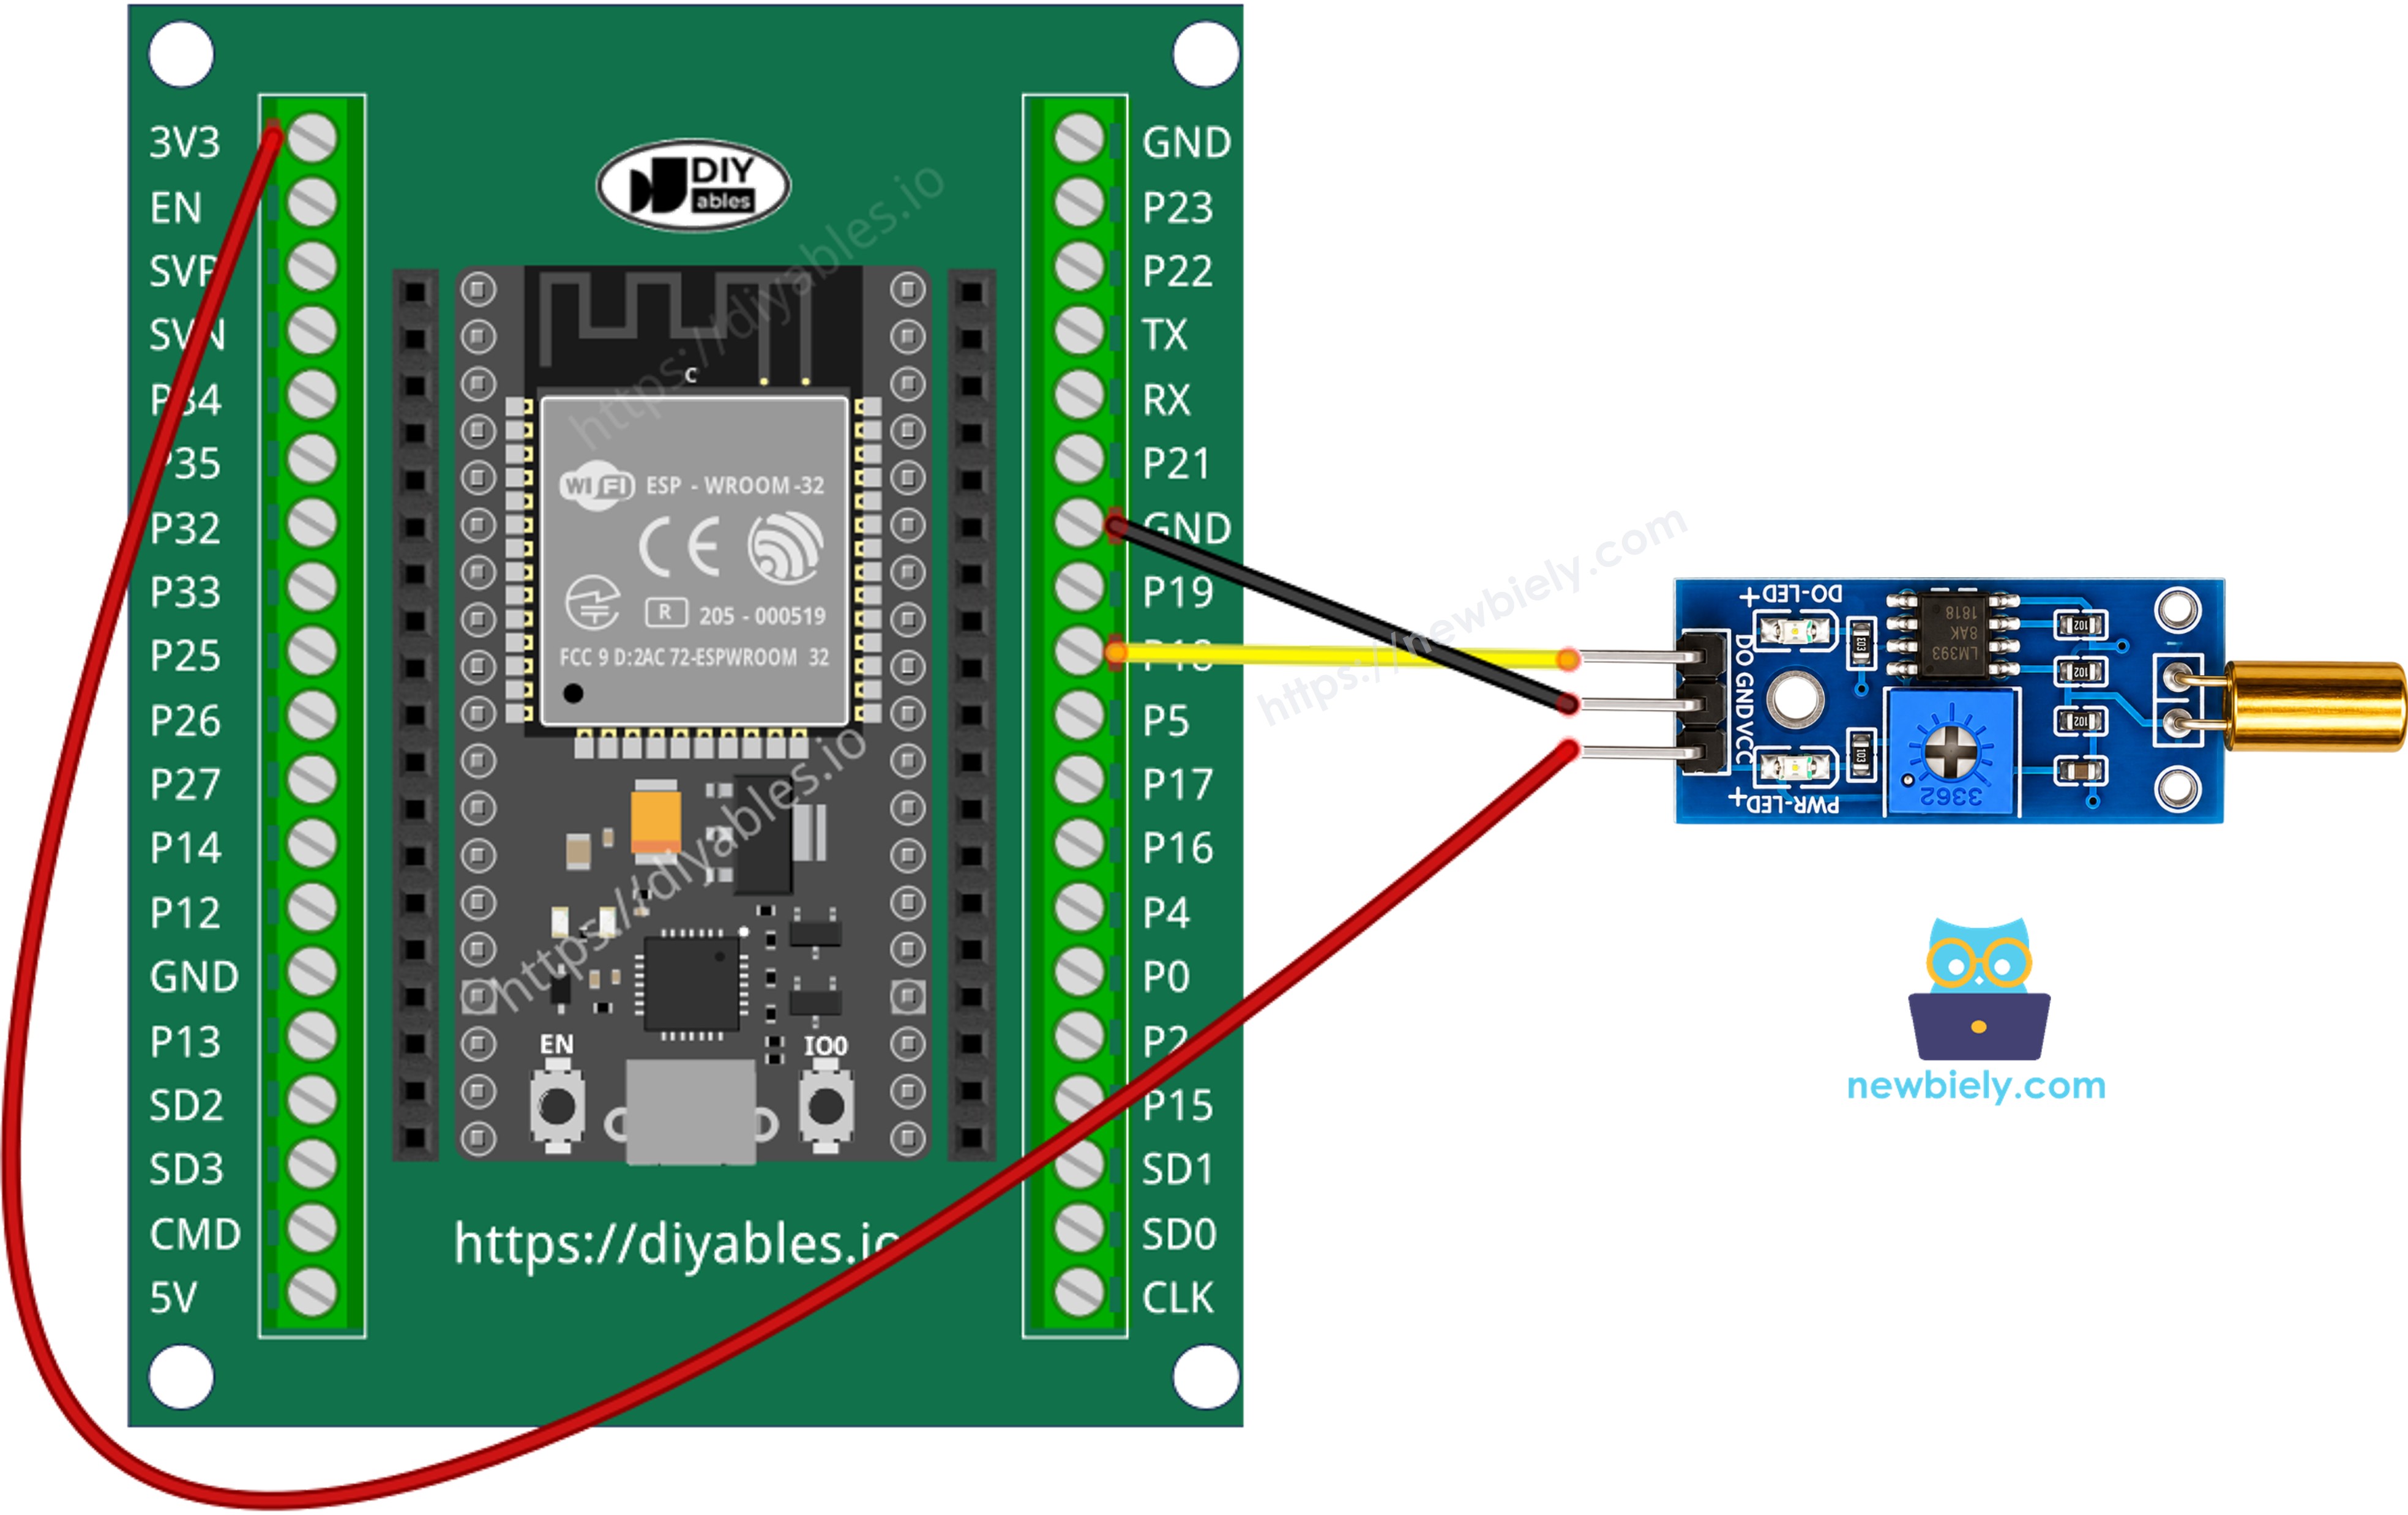
If you're unfamiliar with how to supply power to the ESP32 and other components, you can find guidance in the following tutorial: The best way to Power ESP32 and sensors/displays.
How To Program For SW520D Tilt Sensor
- Initializes the ESP32 pin to the digital input mode by using pinMode() function. For example, pin GPIO18
- Reads the state of the ESP32 pin by using digitalRead() function.
ESP32 Code - Detecting the tilt
Quick Instructions
- If this is the first time you use ESP32, see how to setup environment for ESP32 on Arduino IDE.
- Copy the above code and open with Arduino IDE
- Click Upload button on Arduino IDE to upload code to ESP32
- Tilt the SW520D sensor back and forth
- See the result on Serial Monitor.
Now, we have the freedom to personalize the code and make it trigger an LED or a light when a tilt is detected. We can even make a servo motor rotate according to the tilt input. For more detailed guidance and step-by-step instructions, you can refer to the tutorials provided at the end of this tutorial.
Troubleshooting
If you encounter any issues with the SW520D tilt sensor's functionality, please consider the following troubleshooting steps:
- Check the orientation: The SW520D is sensitive to its mounting orientation. Make sure it is installed in the correct upright position for reliable detection.
- Reduce vibrations: Mechanical vibrations can affect the tilt sensor's performance. To minimize false triggers, try mounting the sensor on a stable surface.
- Check the wiring: Make sure the VCC, GND, and DO pins are connected correctly.
- Check the power supply: Ensure that the power supply is clean and stable for consistent readings.
Video Tutorial
Making video is a time-consuming work. If the video tutorial is necessary for your learning, please let us know by subscribing to our YouTube channel , If the demand for video is high, we will make the video tutorial.