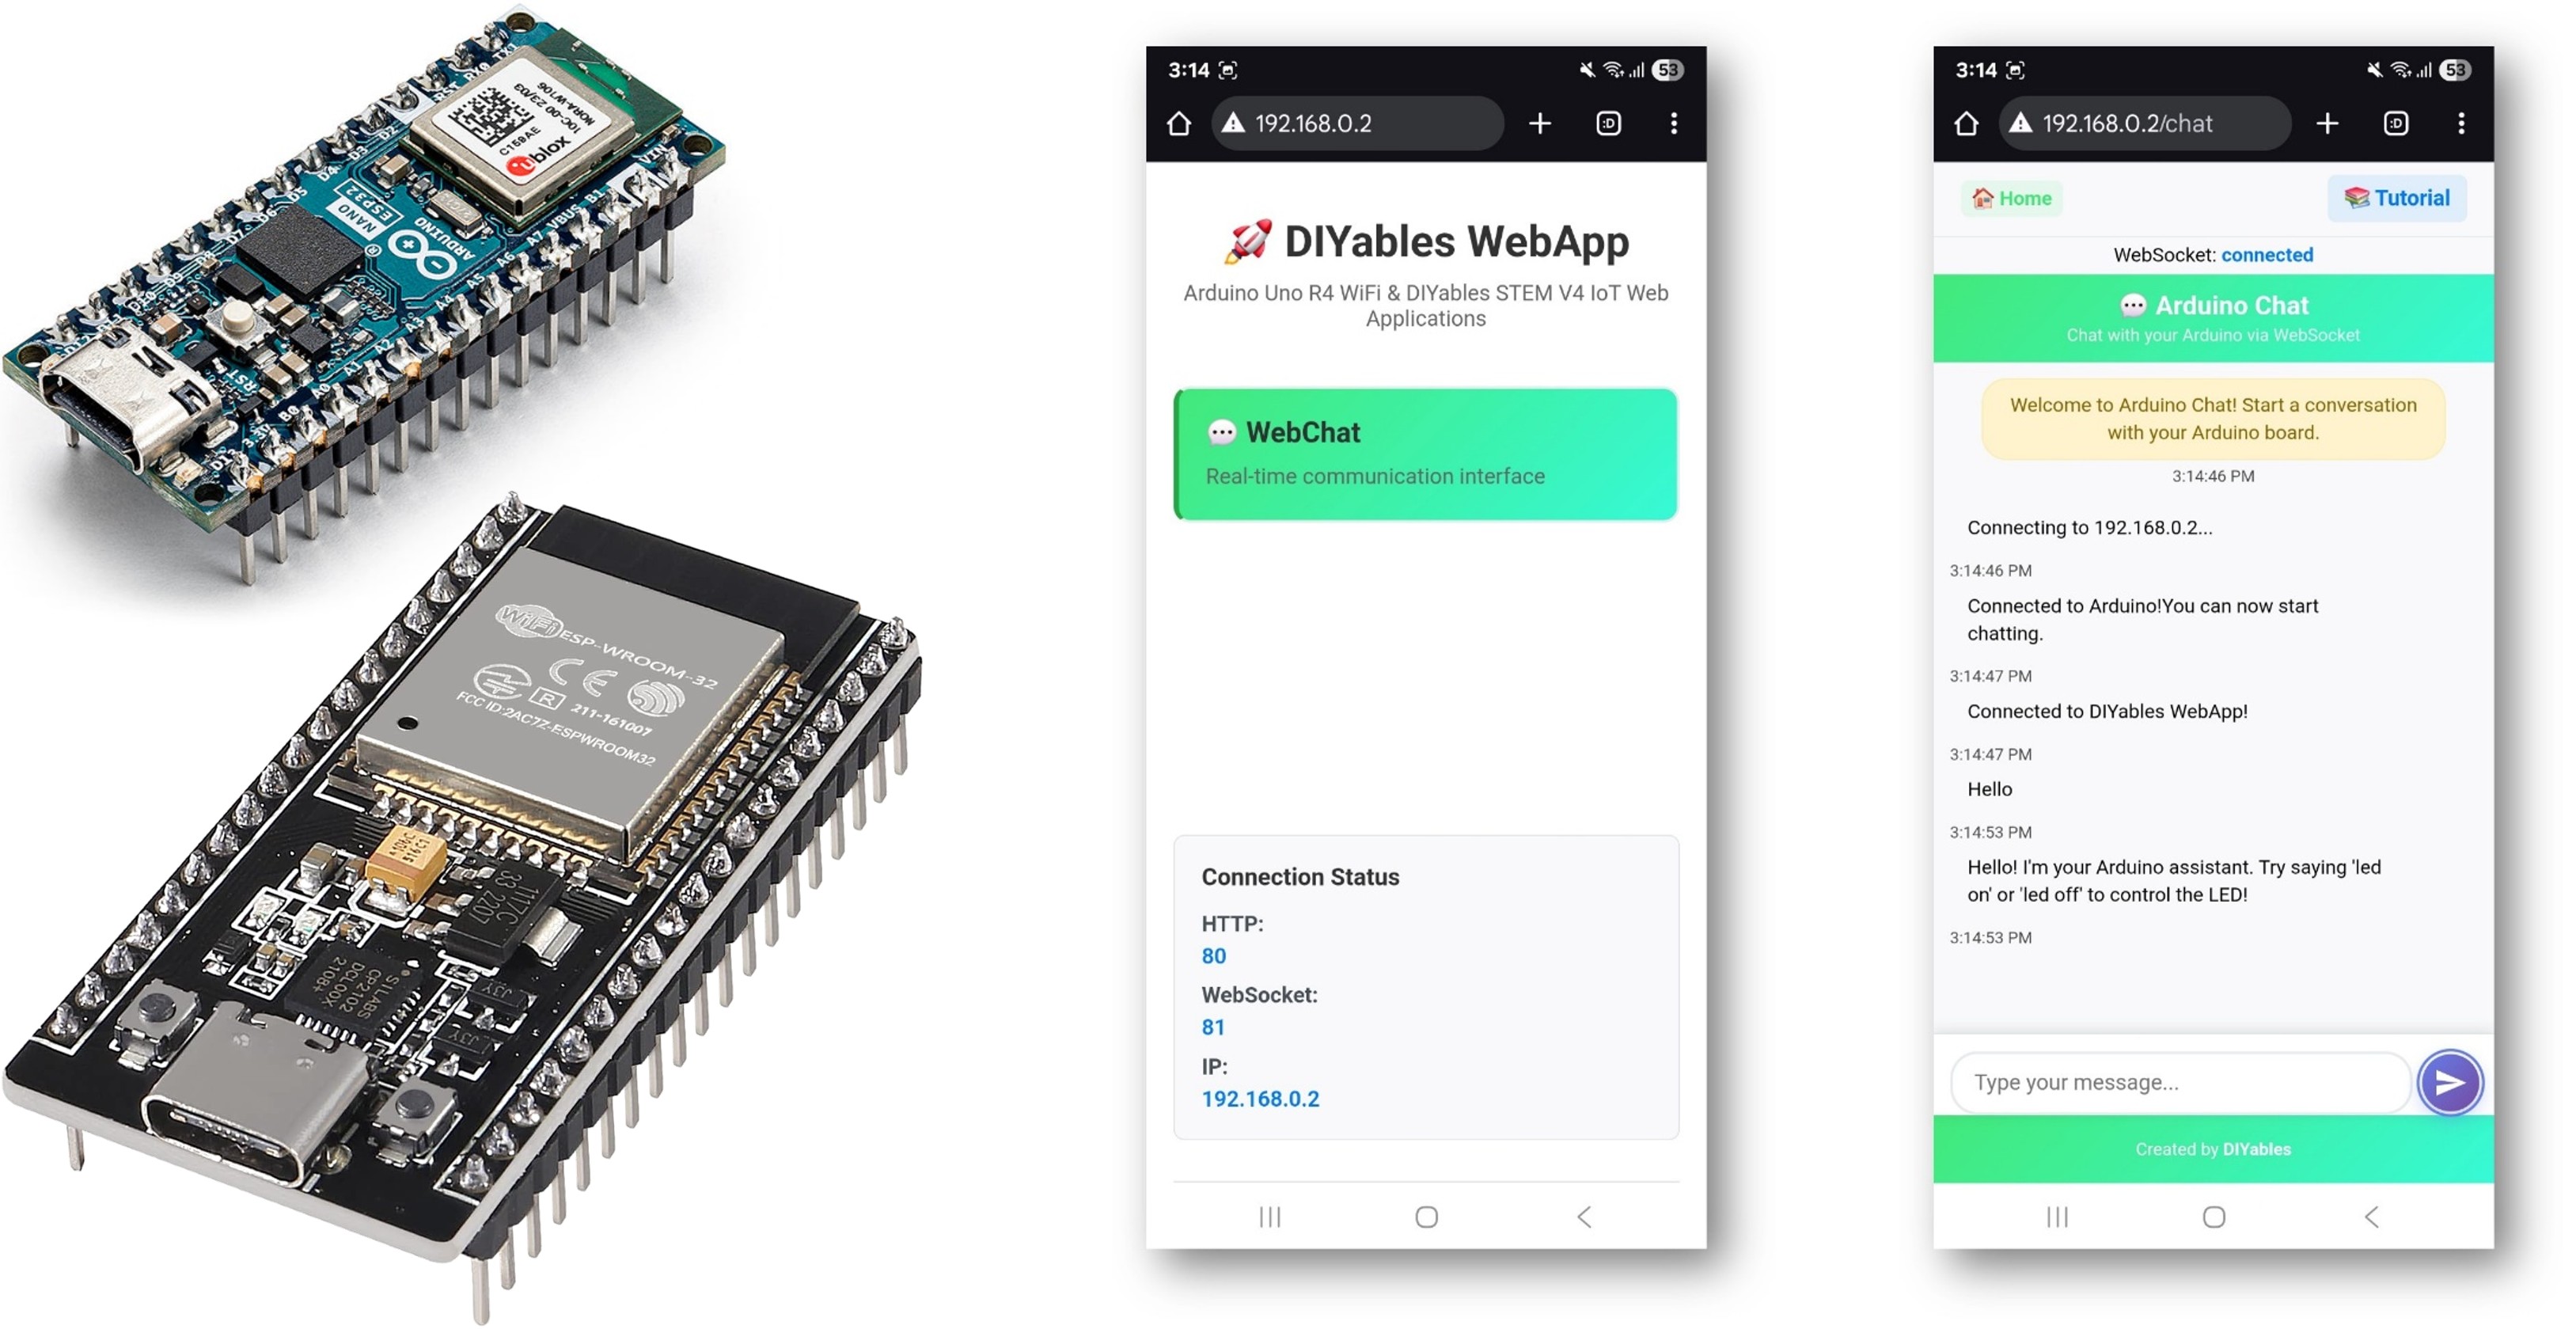
The WebChat example demonstrates how to create an interactive chat interface between a web browser and Arduino. Designed for ESP32 educational platform with enhanced IoT capabilities and seamless integration with built-in sensors. The ESP32 can respond intelligently to messages and control hardware based on chat commands.
Watch this step-by-step video tutorial demonstrating how to use WebChat with the DIYables ESP32 WebApps app:
Disclosure: Some of the links in this section are Amazon affiliate links, meaning we may earn a commission at no additional cost to you if you make a purchase through them. Additionally, some links direct you to products from our own brand, DIYables .
Click Upload button on Arduino IDE to upload code to ESP32
Open the Serial Monitor
Check out the result on Serial Monitor. It looks like the below
Newbiely | Arduino IDE 2.3.8
──
☐
✕
File
Edit
Sketch
Tools
Help
ESP32 Dev Module
Newbiely.ino
···
8Serial.println("Hello World!");
Output
Serial Monitor
Message (Enter to send message to 'ESP32 Dev Module' on 'COM15')
New Line
9600 baud
DIYables WebApp - WebChat Example
INFO: Added app /
INFO: Added app /chat
DIYables WebApp Library
Platform: ESP32
Network connected!
IP address: 192.168.0.2
HTTP server started on port 80
Configuring WebSocket server callbacks...
WebSocket server started on port 81
WebSocket URL: ws://192.168.0.2:81
WebSocket server started on port 81
==========================================
DIYables WebApp Ready!
==========================================
📱 Web Interface: http://192.168.0.2
🔗 WebSocket: ws://192.168.0.2:81
📋 Available Applications:
🏠 Home Page: http://192.168.0.2/
💬 WebChat: http://192.168.0.2/chat
==========================================
Ln 11, Col 1
ESP32 Dev Module on COM15
2
If you do not see anything, reboot ESP32 board.
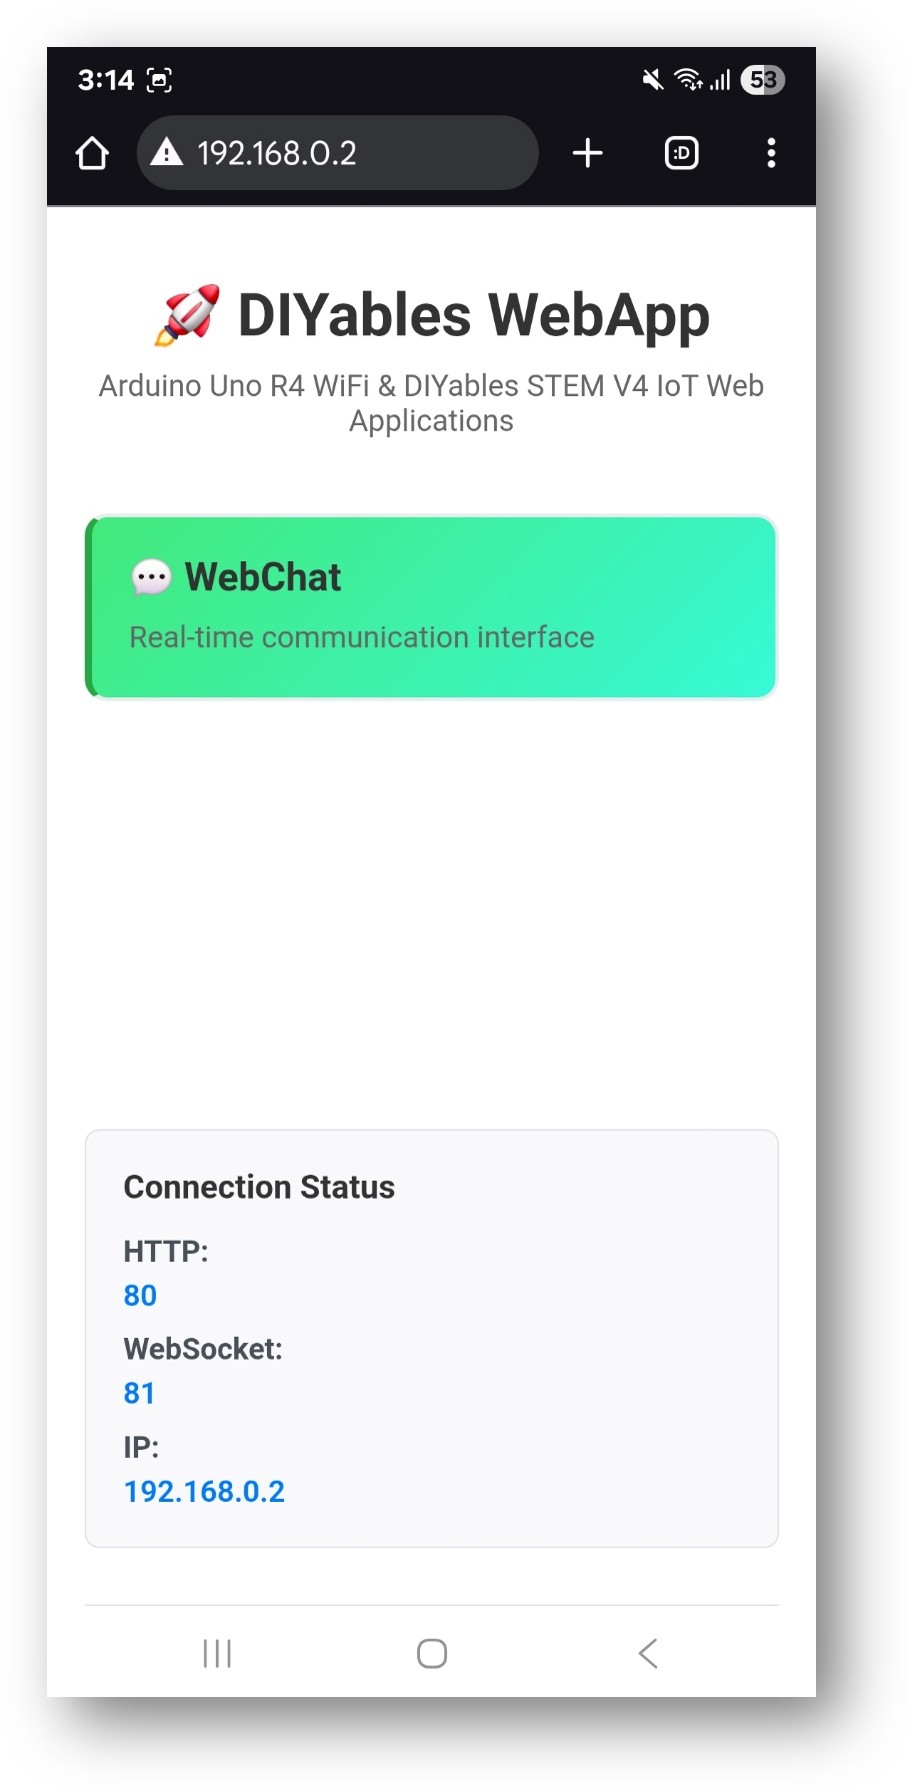
Take note of the IP address displayed, and enter this address into the address bar of a web browser on your smartphone or PC.
Example: http://192.168.0.2
You will see the home page like below image:
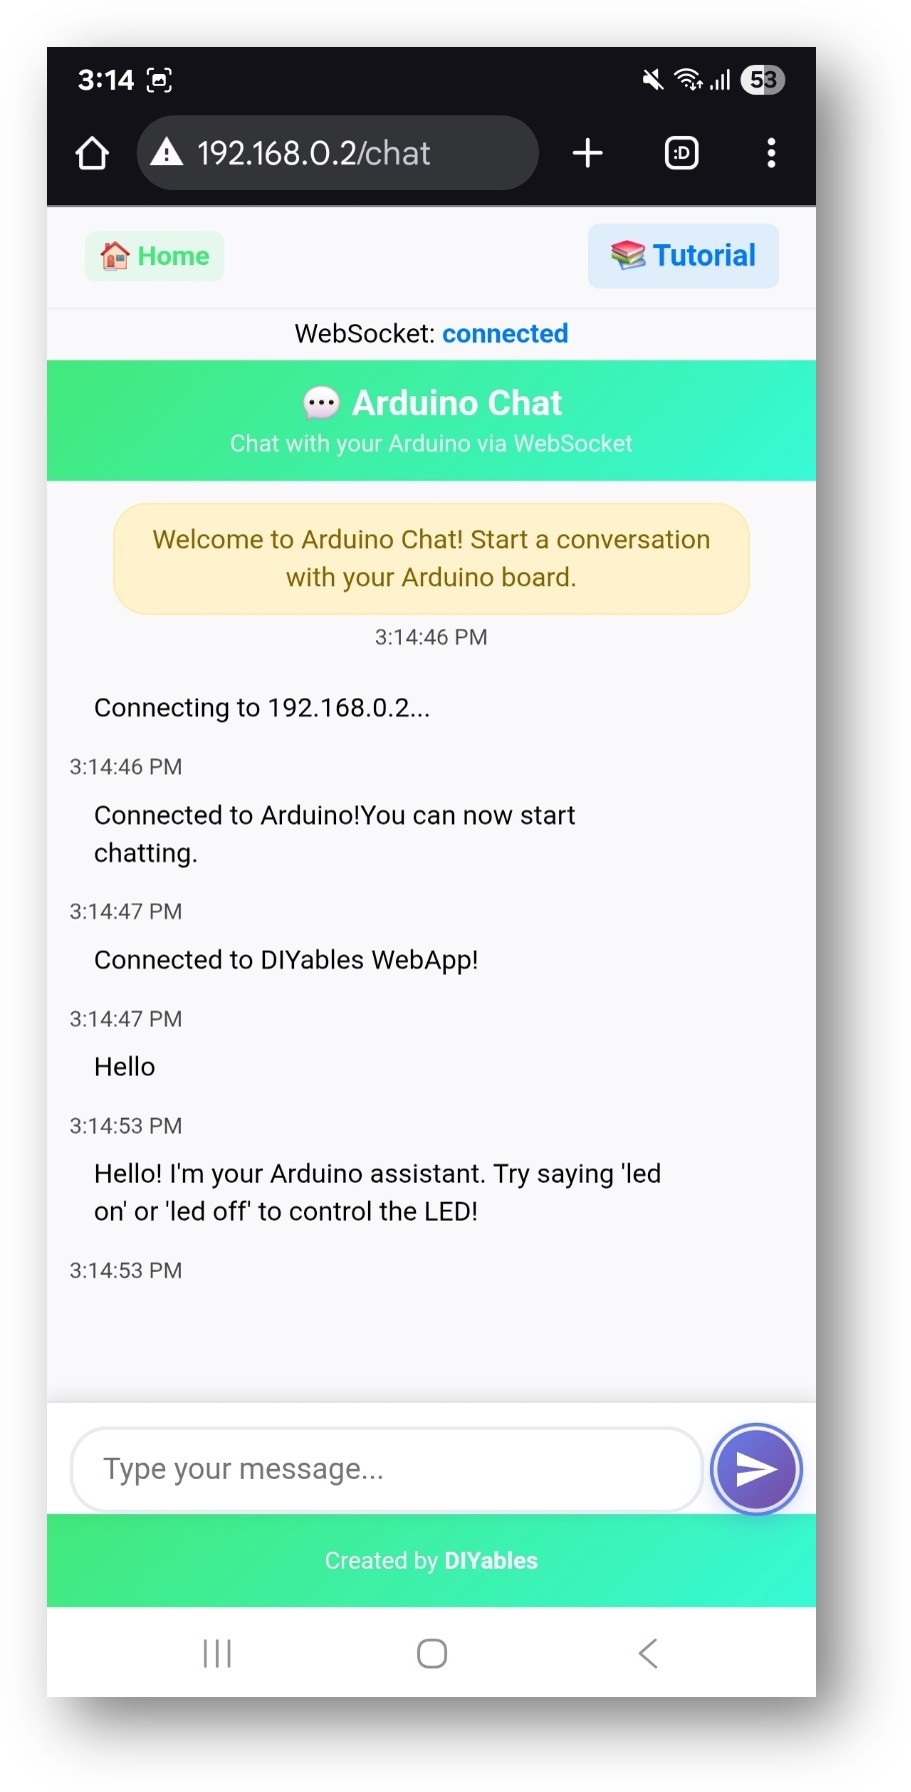
Click to the Chat link, you will see the Web Chat app's UI like the below:
Or you can also access the page directly by IP address followed by /chat. For example: http://192.168.0.2/chat
Start chatting with your Arduino! Type your name when prompted and try commands like "led on", "hello", or "help" to interact with your Arduino.
How to Use
Starting a Conversation
Open the chat interface in your browser
Type your name when prompted
Start chatting with your Arduino!
Chat Commands
The ESP32 recognizes these special commands:
LED Control
"led on" or "turn on led" → Turns on built-in LED
"led off" or "turn off led" → Turns off built-in LED
"blink" or "blink led" → Makes LED blink
Information Commands
"hello" or "hi" → Friendly greeting
"help" → Shows available commands
"time" → Shows ESP32 uptime
"status" → Shows system status
Questions
"how are you?" → ESP32 shares its status
"what can you do?" → Lists capabilities
"what is your name?" → ESP32 introduces itself
Example Conversation
You: Hello
ESP32: Hi there! I'm your assistant. What's your name?
You: My name is John
ESP32: Nice to meet you, John! I'm ready to help.
You: led on
ESP32: LED turned ON for you, John! 💡
You: what can you do?
ESP32: I can control LEDs, respond to your messages, and remember your name. Try saying 'help' for commands!
You: help
ESP32: Available commands:
* 'led on/off' - Control LED
* 'blink' - Blink LED
* 'status' - Show system info
* 'time' - Show uptime
Creative Customization - Build Your Interactive Assistant
Transform this basic chat example into something amazing! The modular design allows you to adapt and expand the functionality to create your own unique interactive ESP32 assistant.
Code Structure
Main Components
WebApp Server: Manages HTTP and WebSocket connections
Chat Page: Provides the web interface
Message Handler: Processes incoming chat messages
Response Generator: Creates intelligent replies
Key Functions
// Handle incoming chat messagesvoid handleChatMessage(String message, String clientId) {// Process message and generate response}// Send message to web interfacevoid sendChatResponse(String response, String clientId) {// Send response via WebSocket}
Adding Custom Commands
To add new chat commands, modify the handleChatMessage function:
if (message.indexOf("your_command") >= 0) { response = "Your custom response";// Add your custom action here}
Customization Options
Modify ESP32 Personality
Edit the response messages to change Arduino's personality:
String greetings[] = { "Hello! How can I help you today?", "Hi there! Ready to chat?", "Greetings! What's on your mind?"};
Please feel free to share the link of this tutorial. However, Please do not use our content on any other websites. We invested a lot of effort and time to create the content, please respect our work!