ESP32 - MP3 Player
In this guide, we'll discover how to create an MP3 player using an ESP32, an MP3 player module, a Micro SD Card, and a speaker. The MP3 files, which can be music or recorded audio, are kept on the micro SD Card. The ESP32 will be programmed to send commands to control the MP3 player module which song to pick from the SD Card, convert it into sound, and then send that sound to the speaker. We'll dive into the following aspects:
- How MP3 player works
- Connecting the speaker and MP3 player modules to the ESP32
- Programming the ESP32 to play a song stored on the micro SD Card
- Adding play, pause, next, and previous buttons.
Afterward, you can take the code a step further by incorporating a potentiometer or rotary encoder to adjust the volume.
This tutorial shows how to program the ESP32 using the Arduino language (C/C++) via the Arduino IDE. If you’d like to learn how to program the ESP32 with MicroPython, visit this ESP32 MicroPython - MP3 Player tutorial.
Hardware Used In This Tutorial
Or you can buy the following kits:
| 1 | × | DIYables ESP32 Starter Kit (ESP32 included) | |
| 1 | × | DIYables Sensor Kit (18 sensors/displays) |
Introduction to Serial MP3 Player Module and Speaker
Serial MP3 Player Module Pinout
A serial MP3 player module has three interfaces:
- The interface to ESP32 includes 4 pins:
- RX pin: data pin, needs to be connected a TX pin of ESP32
- TX pin: data pin, needs to be connected a RX pin of ESP32
- VCC pin: power pin, needs to be connected to VCC (3.3V or 5V)
- GND pin: power pin, needs to be connected to GND (0V)
- The interface to the speaker is a 3.5mm Aux output female jack.
- The interface to the Micro SD Card is a Micro SD Card Socket in the back of the module.
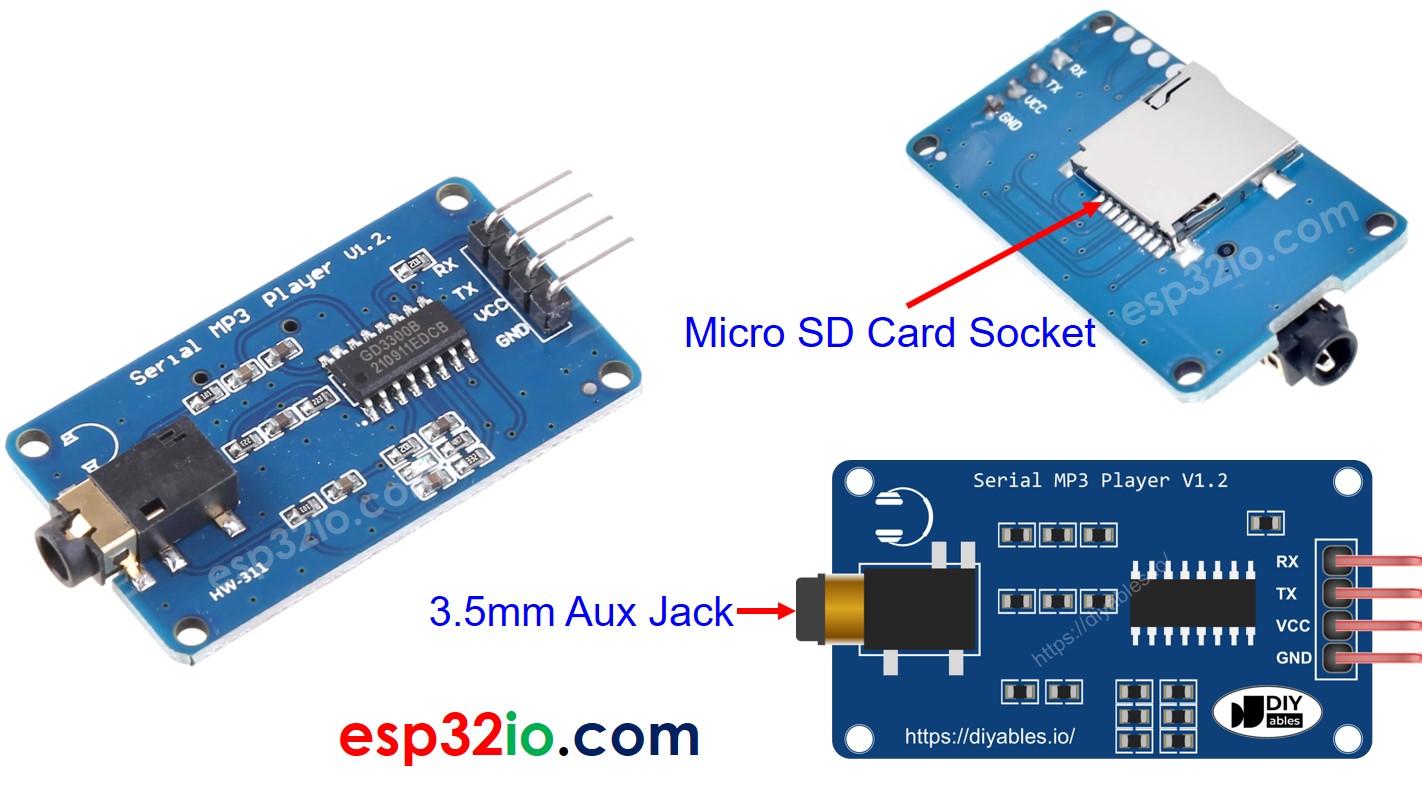
Speaker Pinout
A speaker usually has two interfaces:
- Audio signal interface: it is 3.5mm Aux male connector that connects to the MP3 player module
- Poweer interface: it can be USB, 5V power adapter or any other power interface
How It Works
To get started, make sure you have the following:
- Gather a collection of songs or recorded audio that you want to play and store them on a micro SD Card.
- Insert the micro SD Card into the MP3 player module.
- Connect the MP3 player module to the ESP32 and connect the speaker to the MP3 player module. Also, ensure the speaker is connected to a power source.
Each MP3 file on the micro SD Card gets a ID, starting from 0. Then, you can tell the ESP32 to do various things with the MP3 player module, such as:
- Play: Start playing the selected song.
- Pause: Pause the song.
- Play Next: Move to the next song.
- Play Previous: Go back to the previous song.
- Change Volume: Adjust how loud the music is.
When the MP3 player module gets a command, it reads the MP3 file from the micro SD Card, turns it into an audio signal, and sends that signal to the speaker using a 3.5mm Aux connection.
Wiring Diagram
- How to connect ESP32 and mp3 player using breadboard

This image is created using Fritzing. Click to enlarge image
- How to connect ESP32 and mp3 player using screw terminal block breakout board
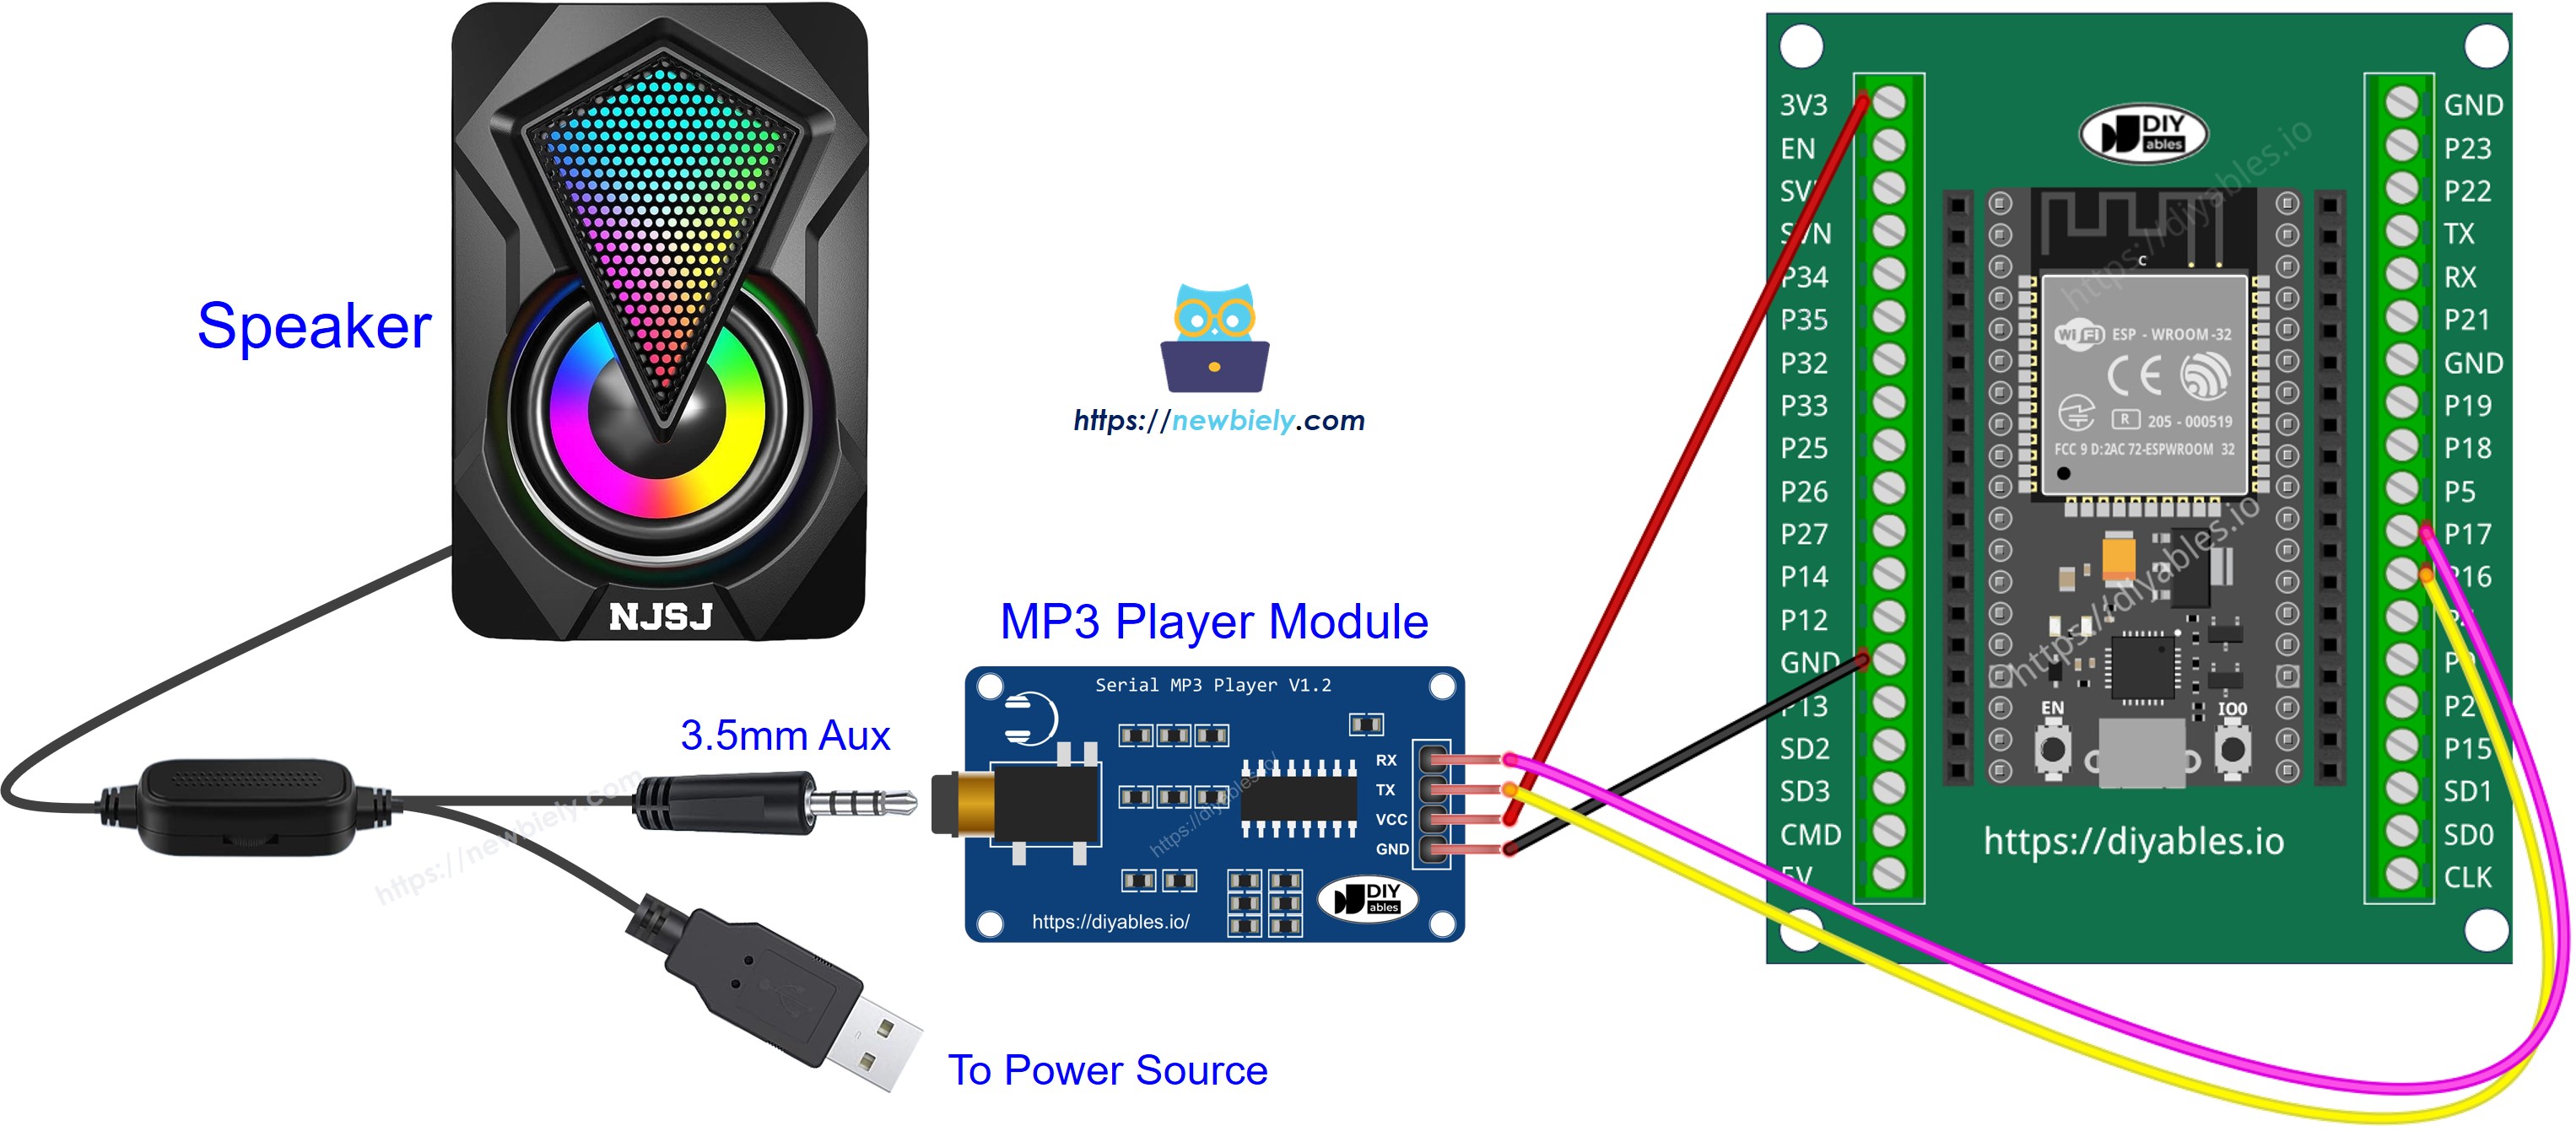
If you're unfamiliar with how to supply power to the ESP32 and other components, you can find guidance in the following tutorial: The best way to Power ESP32 and sensors/displays.
ESP32 Code - Play Music
The below code plays the first song stored on the Micro SD Card.
Quick Instructions
- If this is the first time you use ESP32, see how to setup environment for ESP32 on Arduino IDE.
- Follow the instructions on the How It Works
- Copy the above code and open with Arduino IDE
- Click Upload button on Arduino IDE to upload code to ESP32
- Enjoy the music
ESP32 Code - Play Music with control buttons
The below code is an upgrade of the previous code. It adds foyr buttons to let you interact with MP3 player.
The wiring diagram for the above code:
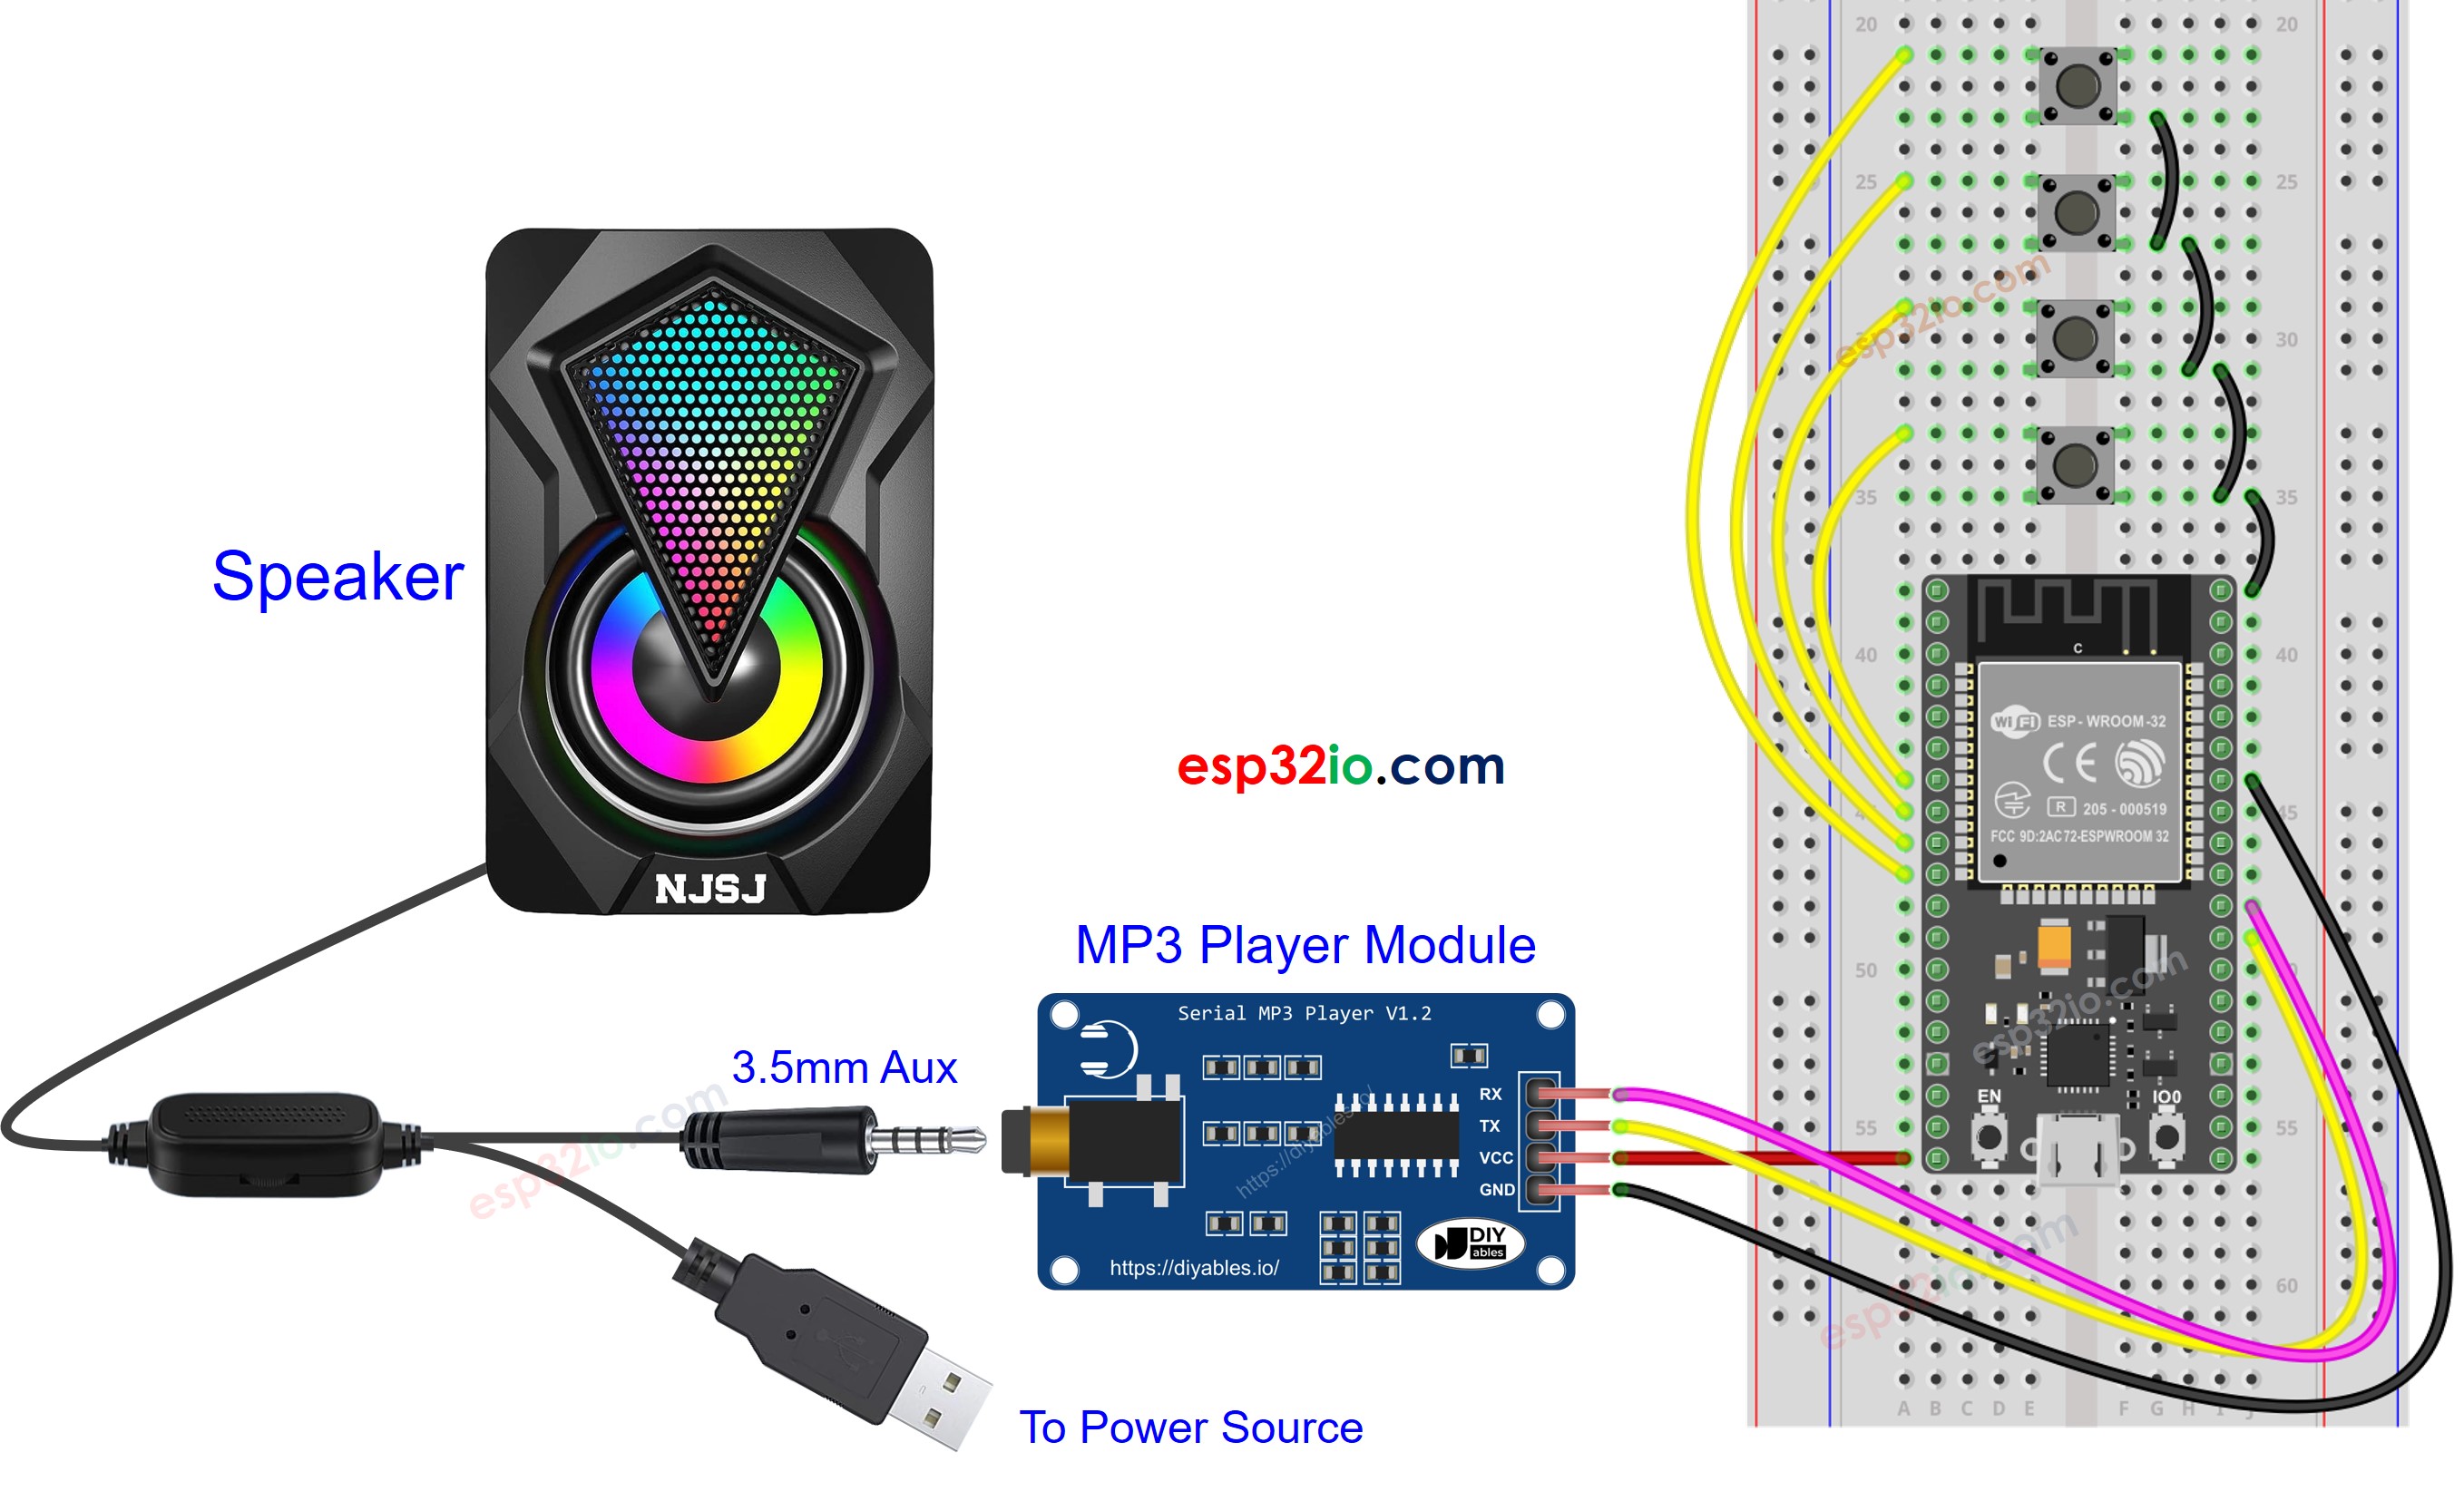
This image is created using Fritzing. Click to enlarge image
Now, you can modify the projects to add more functions, for example:
- Add a potentiometer to control the volume, see ESP32 Potentiometer tutorial
- Add an IR remote controller, see ESP32 IR Remote Controller tutorial
- Add a RFID reader and card to make RFID MP3 player, see ESP32 RFID tutorial
Video Tutorial
Making video is a time-consuming work. If the video tutorial is necessary for your learning, please let us know by subscribing to our YouTube channel , If the demand for video is high, we will make the video tutorial.