ESP32 - Control Servo Motor via Web
This tutorial instructs you on how to use the ESP32 to control a servo motor via the web from a browser on your smartphone or PC. We'll use something called WebSocket to control the servo motor smoothly and dynamically through a graphical web user interface.
The video below is a demonstration:
Now, why use WebSocket? Here's the idea:
- Without WebSocket, every time you want to change the angle of the servo, you have to reload the page. Not great!
- But with WebSocket, we set up a special connection between the webpage and the ESP32. This means we can send the angle value to the ESP32 in the background, without reloading the page. That makes the servo move smoothly and in real-time. Pretty cool, huh?
Let's start!
Hardware Used In This Tutorial
Or you can buy the following kits:
| 1 | × | DIYables ESP32 Starter Kit (ESP32 included) | |
| 1 | × | DIYables Sensor Kit (18 sensors/displays) |
Buy Note: In case of using multiple servo motors, it is recommended to use the PCA9685 16 Channel PWM Servo Driver Module to save MCU pins and simplify the wiring process.
Introduction to Servo Motor and WebSocket
We have specific tutorials about servo motor and WebSocket. Each tutorial contains detailed information and step-by-step instructions about hardware pinout, working principle, wiring connection to ESP32, ESP32 code... Learn more about them at the following links:
- ESP32 - Servo Motor tutorial
- ESP32 - WebSocket tutorial
How It Works
The ESP32 code creates both a web server and a WebSocket Server. Here's how it works:
- When you enter the ESP32's IP address in a web browser, it requests the webpage (User Interface) from the ESP32.
- The ESP32's web server responds by sending the webpage's content (HTML, CSS, JavaScript).
- Your web browser then displays the webpage.
- The JavaScript code within the webpage establishes a WebSocket connection to the WebSocket server on the ESP32.
- Once this WebSocket connection is established, if you turn the handle on the webpage, the JavaScript code quietly sends the angle value to the ESP32 through this WebSocket connection in the background.
- The WebSocket server on the ESP32, upon receiving the angle value, controls the servo motor accordingly.
In a nutshell, the WebSocket connection enables the smooth, real-time control of the servo motor angle.
Wiring Diagram between Servo Motor and ESP32
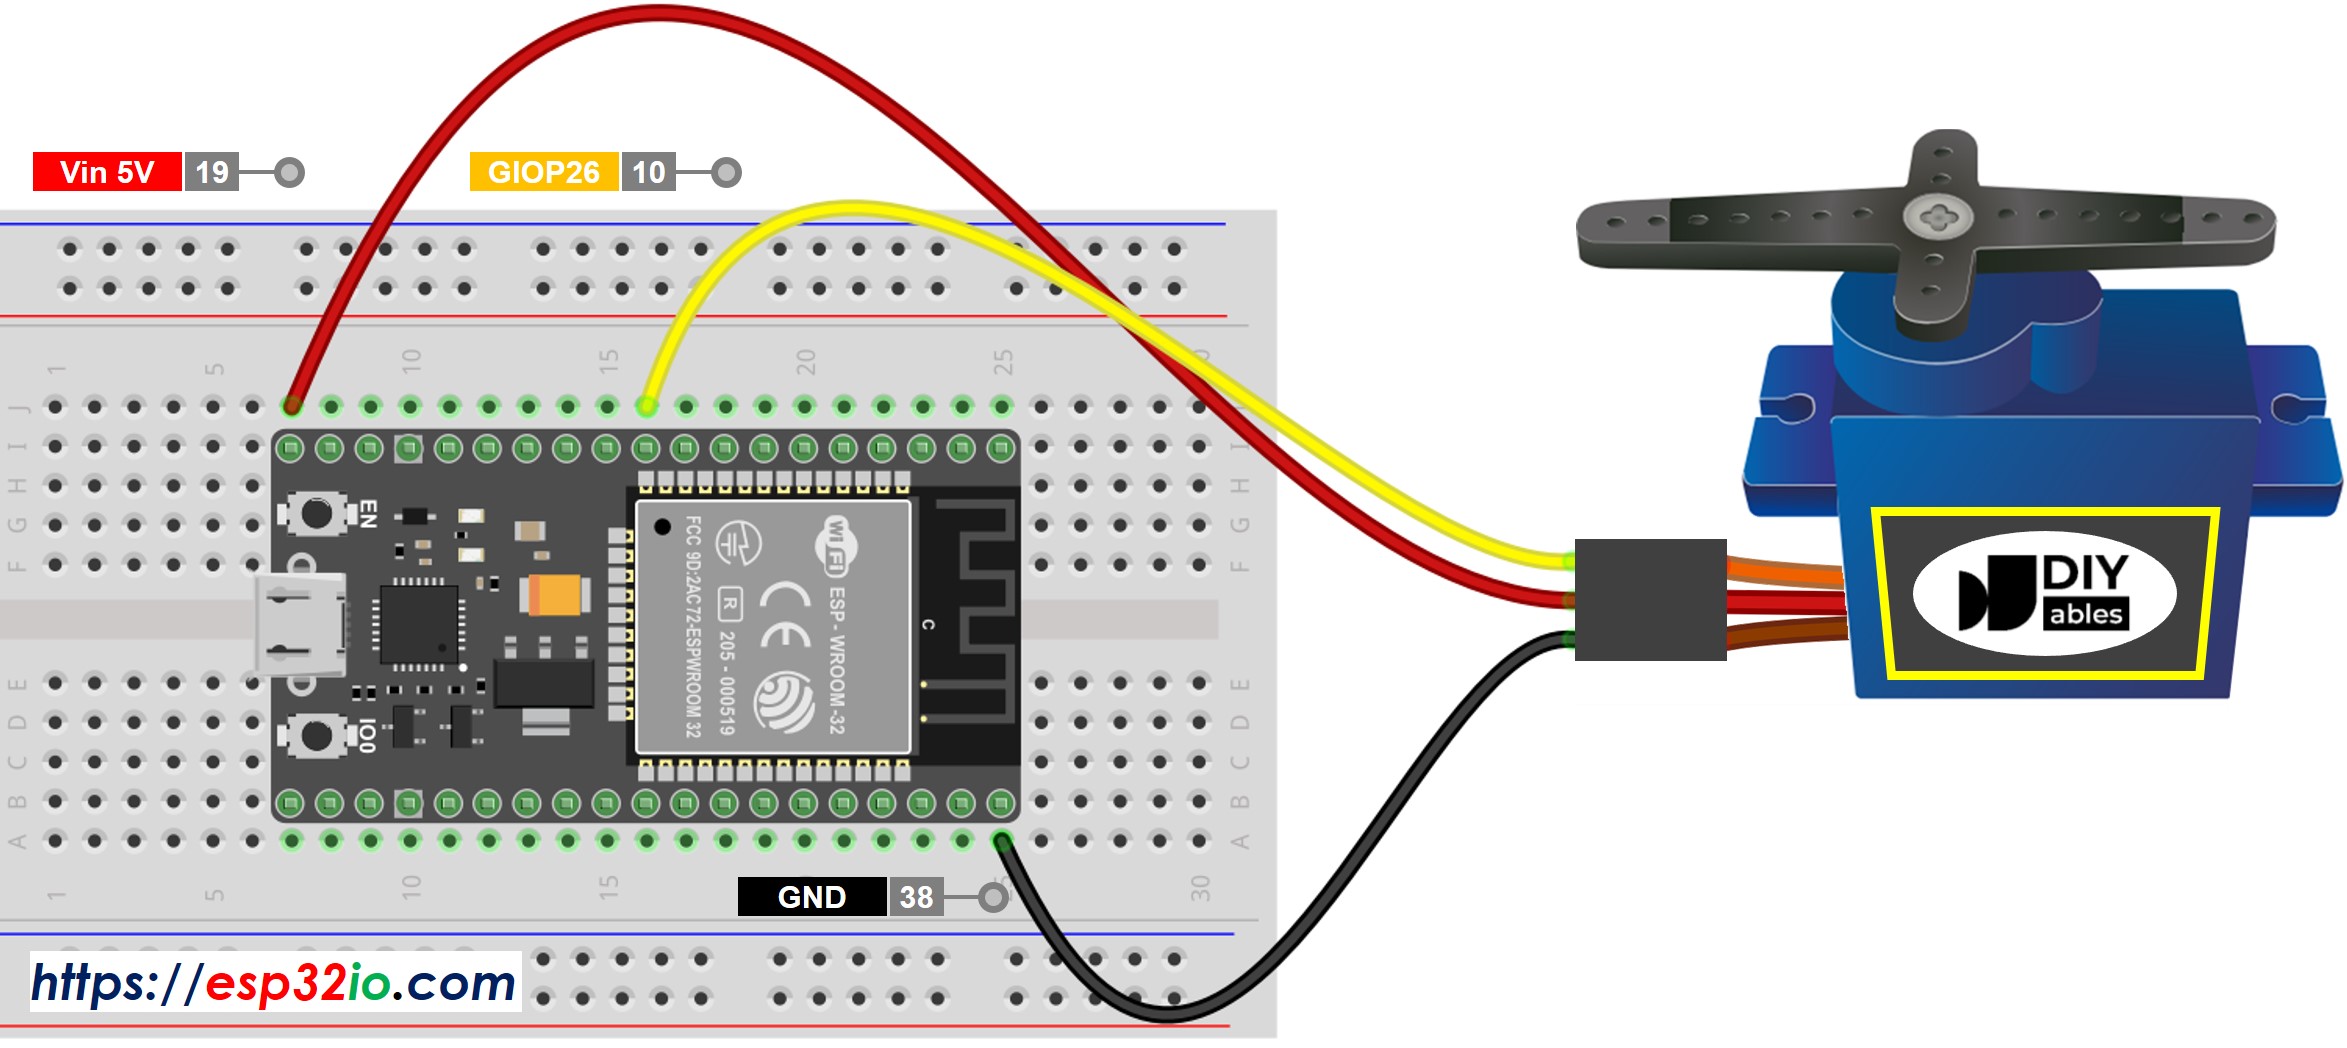
This image is created using Fritzing. Click to enlarge image
For the sake of simplicity, the above wiring diagram is used for the testing or learning purposes, and for small-torque servo motor. In practice, we highly recommend using the external power supply for the servo motor. The below wiring diagram shows how to connect servo motor to an external power source.
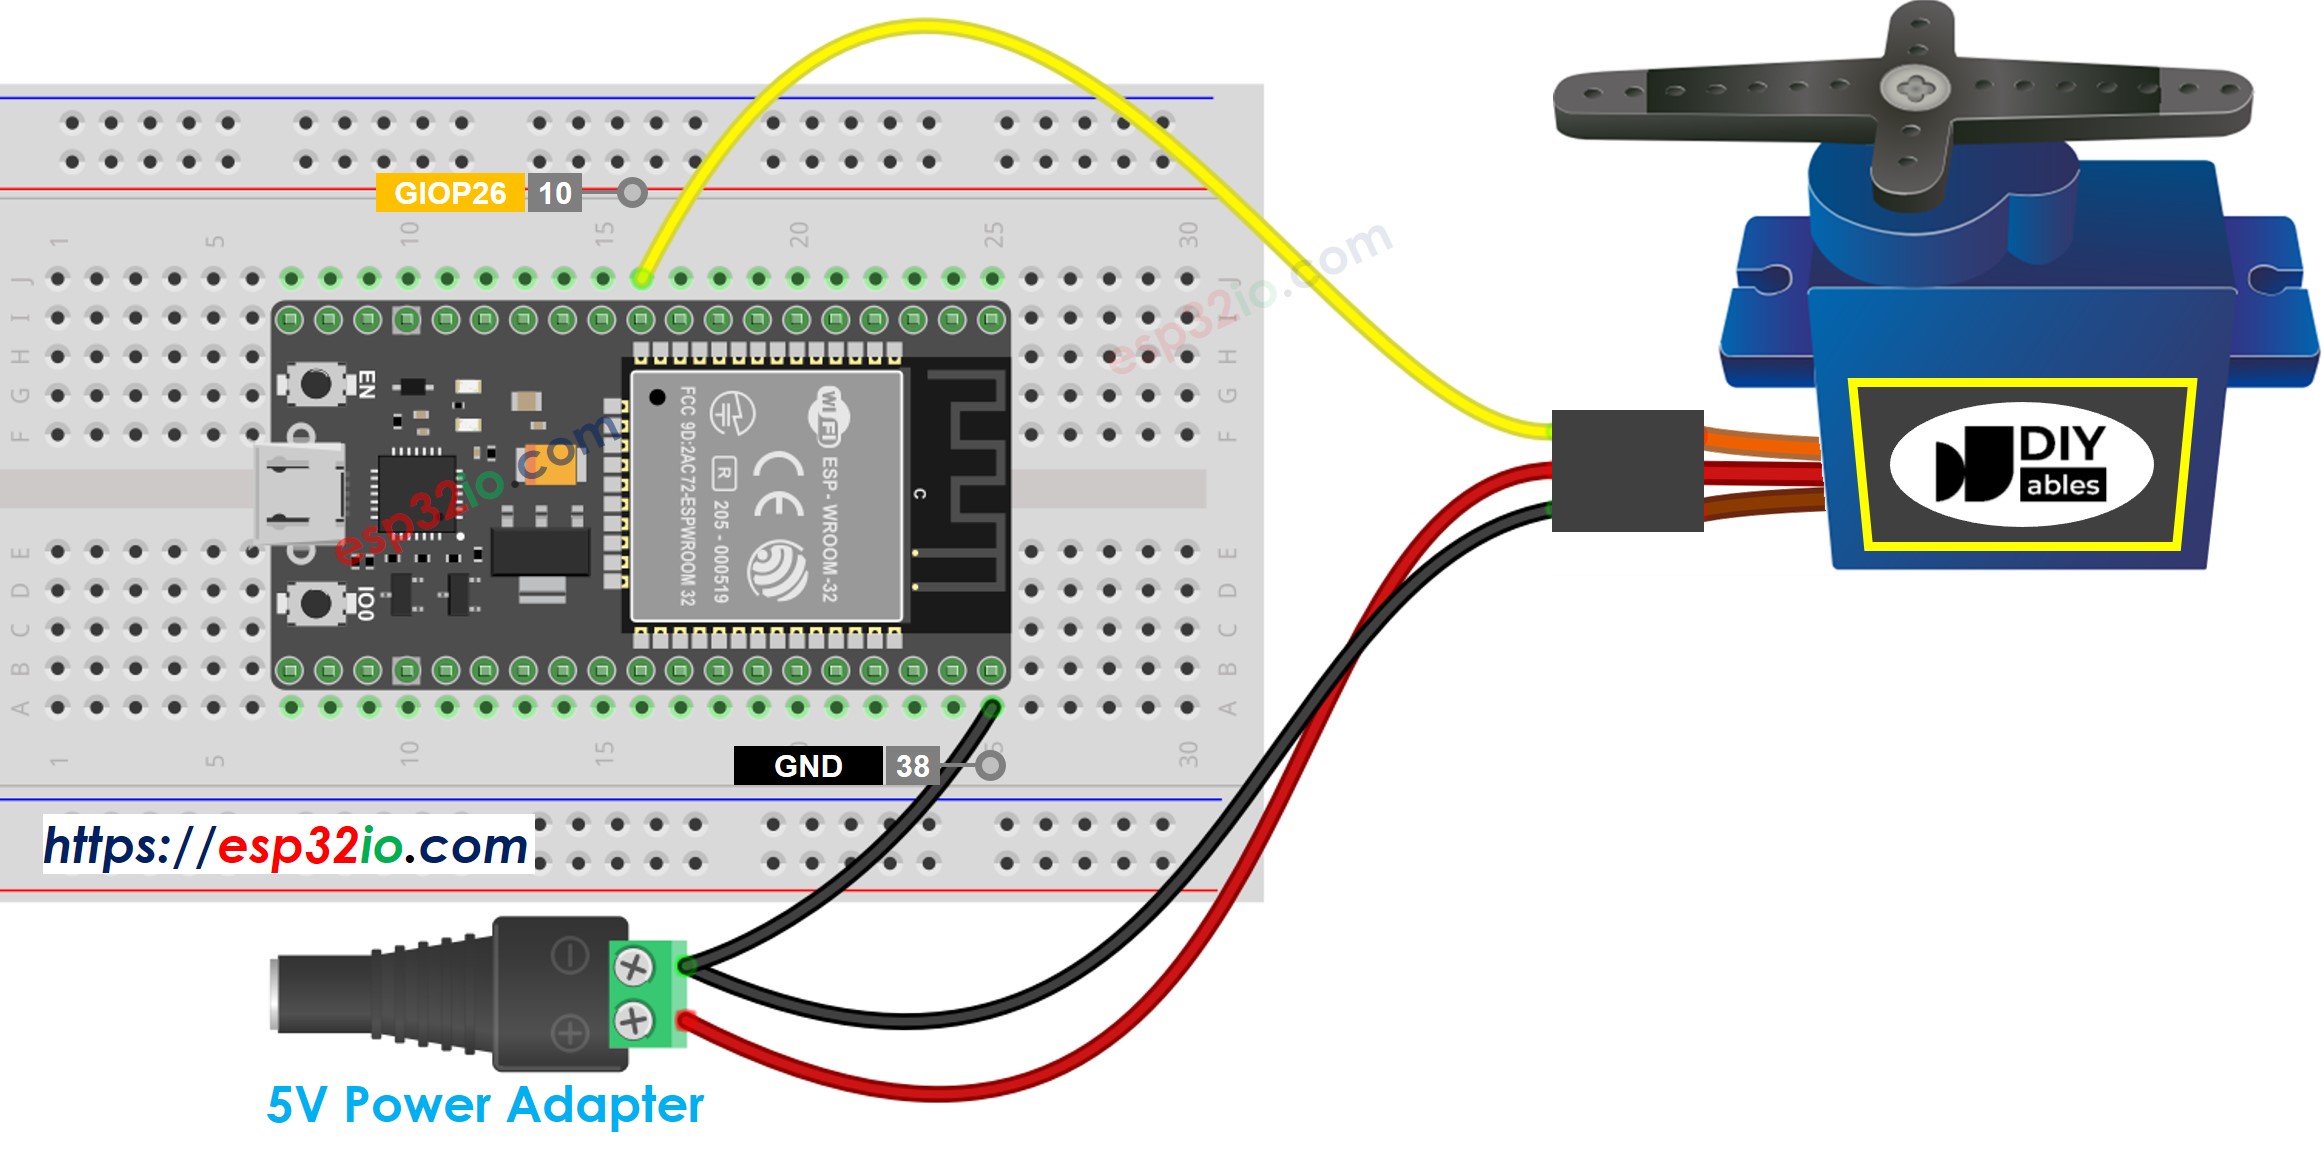
This image is created using Fritzing. Click to enlarge image
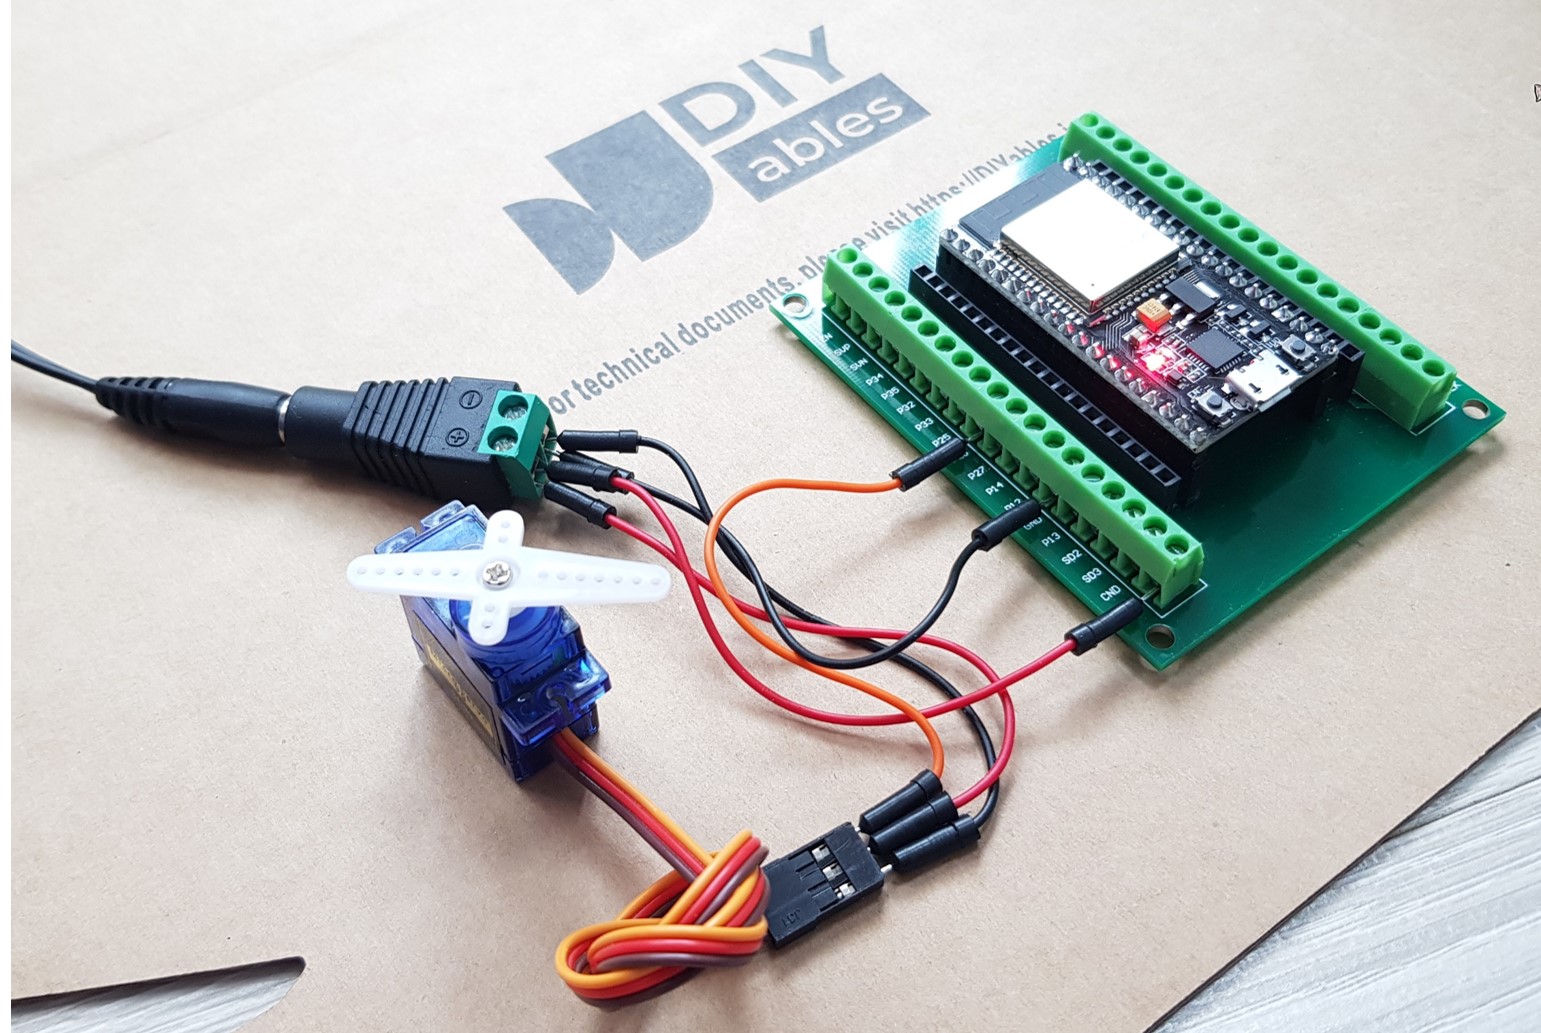
The below show a real wiring between servo motor and ESP32.
If you're unfamiliar with how to supply power to the ESP32 and other components, you can find guidance in the following tutorial: The best way to Power ESP32 and sensors/displays.
ESP32 Code
The webpage's content (HTML, CSS, JavaScript) are stored separately on an index.h file. So, we will have two code files on Arduino IDE:
- An .ino file that is ESP32 code, which creates a web sever and WebSocket Server, and control servo motor
- An .h file, which contains the webpage's content.
Quick Instructions
- If this is the first time you use ESP32, see how to setup environment for ESP32 on Arduino IDE.
- Do the wiring as above image.
- Connect the ESP32 board to your PC via a micro USB cable
- Open Arduino IDE on your PC.
- Select the right ESP32 board (e.g. ESP32 Dev Module) and COM port.
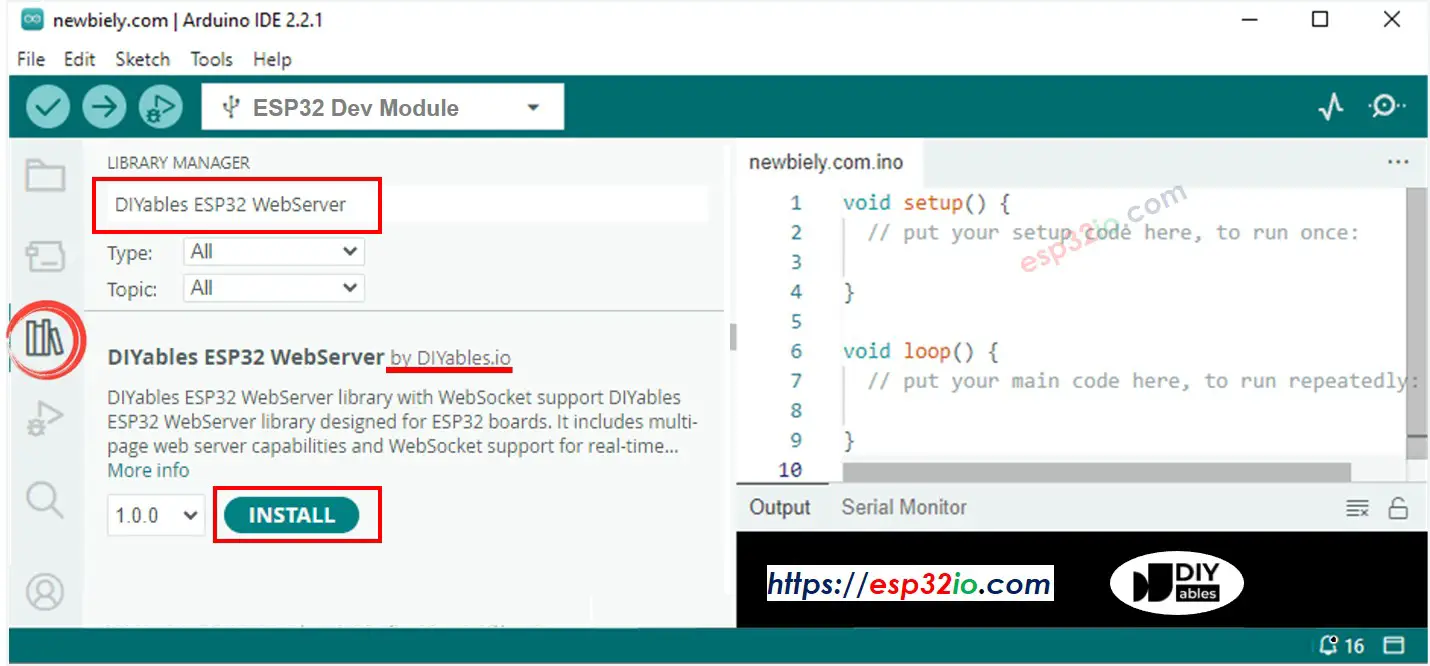
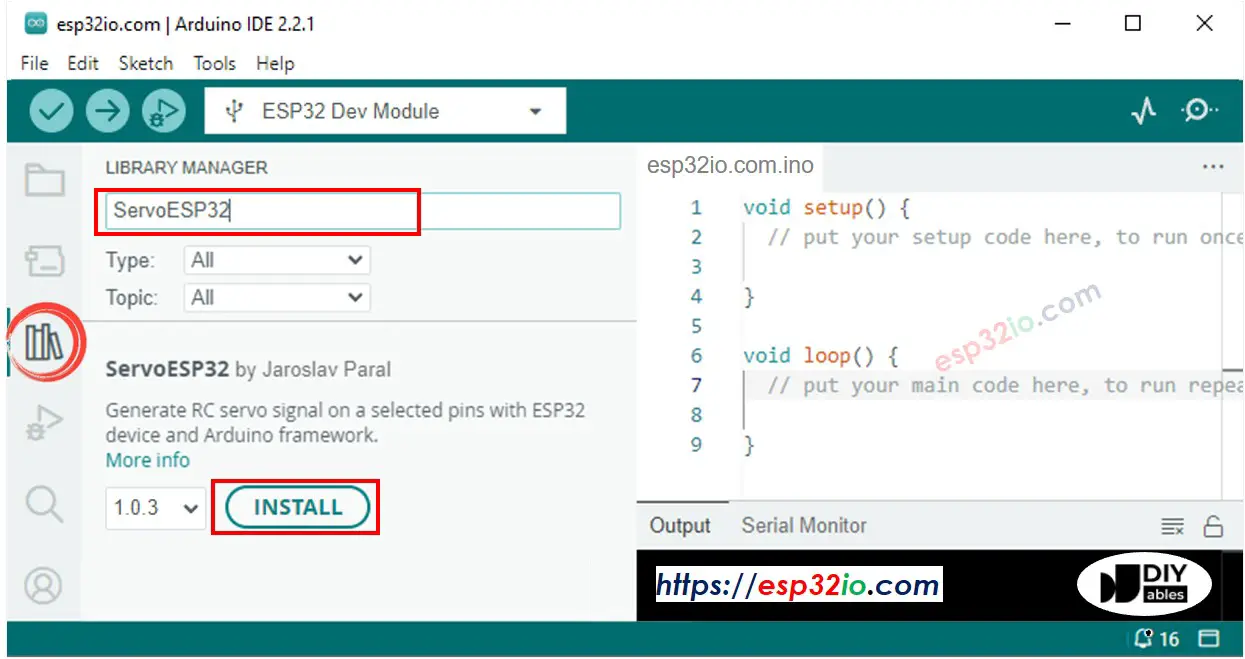
- Open the Library Manager by clicking on the Library Manager icon on the left navigation bar of Arduino IDE.
- Search “DIYables ESP32 WebServer”, then find the Web Server library created by DIYables.
- Click Install button to install the Web Server library.
- Type ESP32Servo on the search box, then look for the servo library by Kevin Harrington,John K. Bennett.
- Click Install button to install servo motor library for ESP32.
- On Arduino IDE, create new sketch, Give it a name, for example, esp32io.com.ino
- Copy the below code and open with Arduino IDE
- Modify the WiFi information (SSID and password) in the code to match your own network credentials.
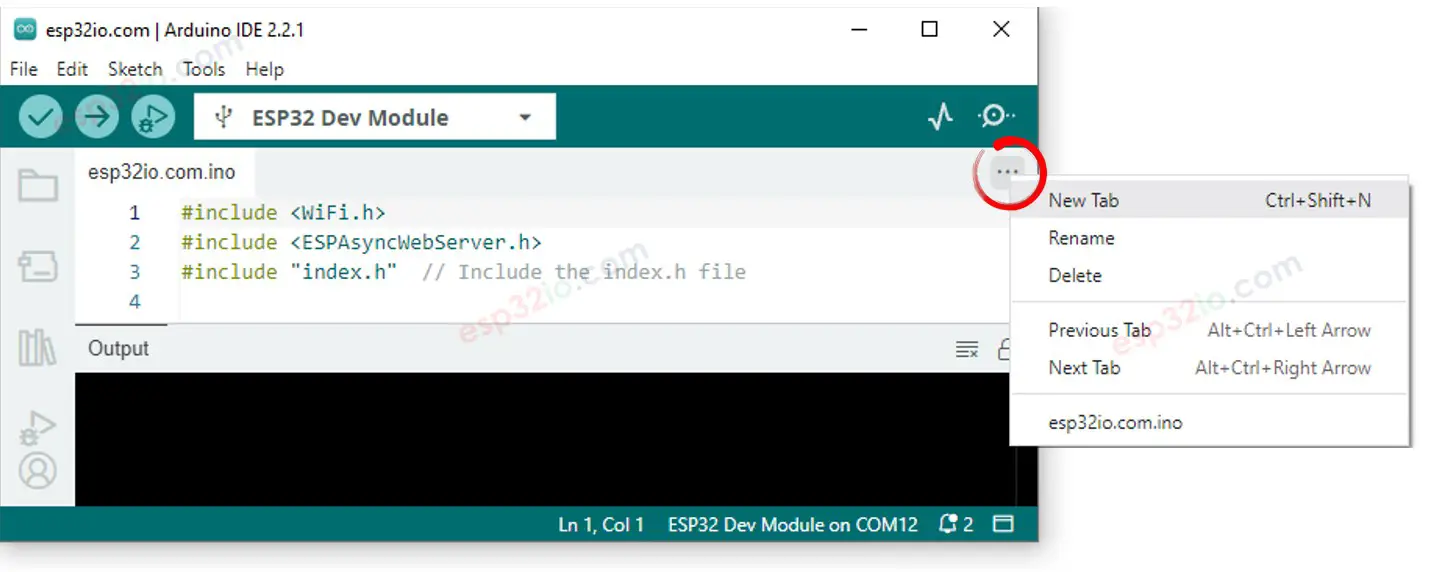
- Create the index.h file On Arduino IDE by:
- Either click on the button just below the serial monitor icon and choose New Tab, or use Ctrl+Shift+N keys.
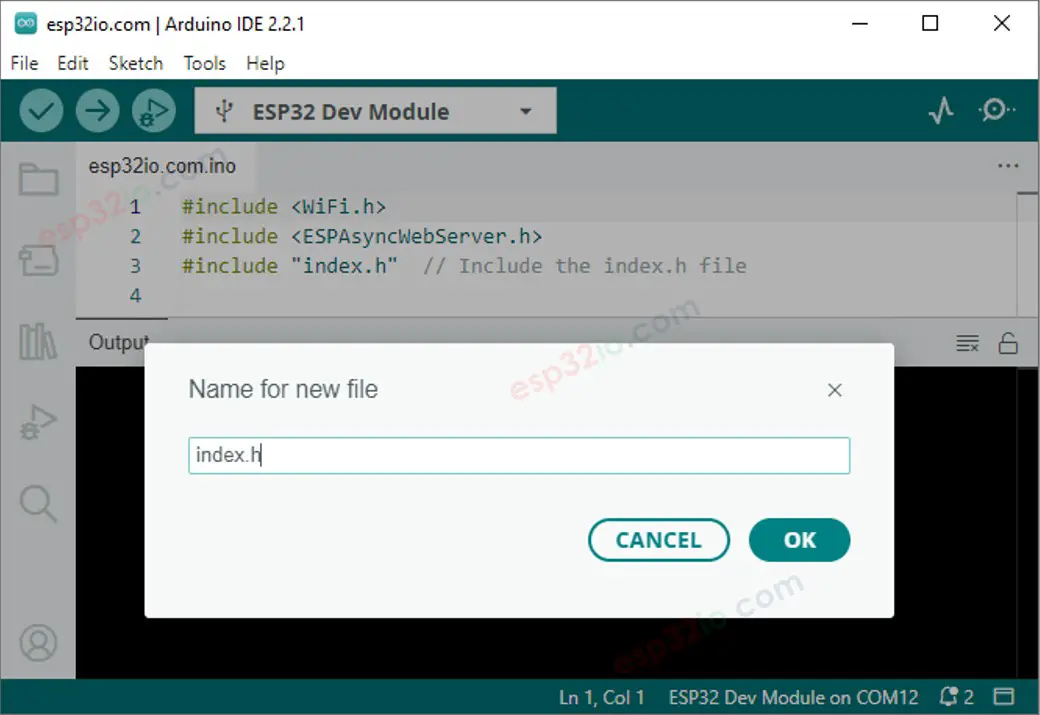
- Give the file's name index.h and click OK button
- Copy the below code and paste it to the index.h.
- Now you have the code in two files: esp32io.com.ino and index.h
- Click Upload button on Arduino IDE to upload code to ESP32
- Open the Serial Monitor
- Check out the result on Serial Monitor.
- Take note of the IP address displayed, and enter this address into the address bar of a web browser on your smartphone or PC.
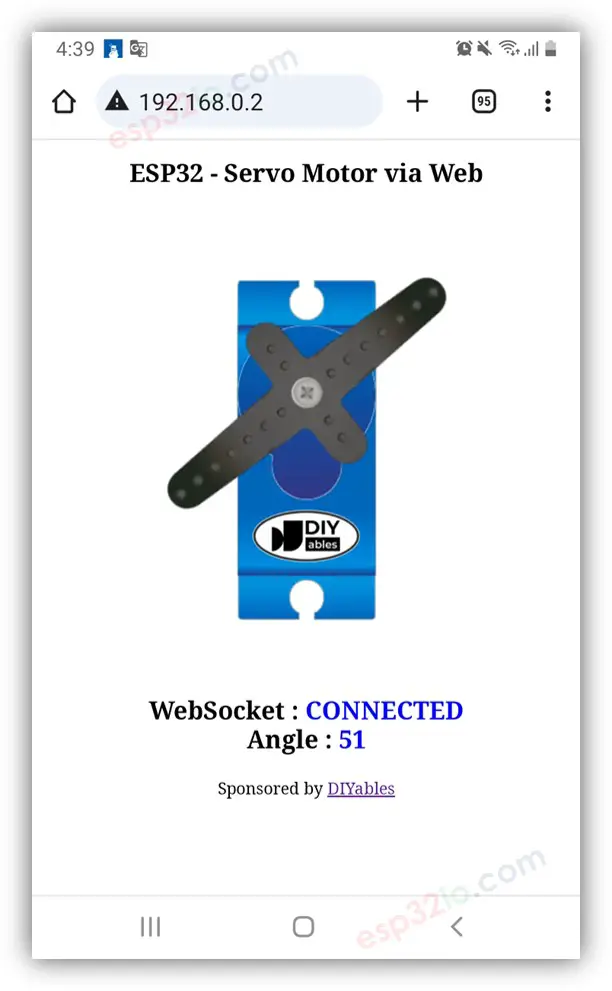
- You will see the webpage it as below:
- The JavaScript code of the webpage automatically creates the WebSocket connection to ESP32.
- Now you can control the servo motor's angle via the web interface.
- If you modify the HTML content in the index.h and does not touch anything in esp32io.com.ino file, when you compile and upload code to ESP32, Arduino IDE will not update the HTML content.
- To make Arduino IDE update the HTML content in this case, make a change in the esp32io.com.ino file (e.g. adding empty line, add a comment....)
To save the memory of ESP32, the images of servo motor are NOT stored on ESP32. Instead, they are stored on the internet, so, your phone or PC need to have internet connection to load images for the web control page.
※ NOTE THAT:
Line-by-line Code Explanation
The above ESP32 code contains line-by-line explanation. Please read the comments in the code!