ESP32 - Keypad Door Lock
This tutorial will guide you on how to create a door lock system with a password using a keypad and solenoid lock. The system will unlock the door when the correct password is entered and will keep the door unlocked for 20 seconds before automatically relocking it. The ESP32 code is also capable of supporting multiple passwords.
※ NOTE THAT:
In addition to this tutorial, we also have other tutorials on door lock systems available:
Hardware Used In This Tutorial
Or you can buy the following kits:
| 1 | × | DIYables ESP32 Starter Kit (ESP32 included) | |
| 1 | × | DIYables Sensor Kit (18 sensors/displays) |
Introduction to Keypad and Solenoid Lock
We have separate tutorials that focus specifically on keypads and solenoid locks. Each tutorial provides detailed information and step-by-step instructions on hardware pinout, working principle, wiring connections to ESP32, ESP32 code, and more. For more information on these tutorials, please refer to the following links:
Wiring Diagram
- ESP32 - Door lock with keypad, solenoid lock
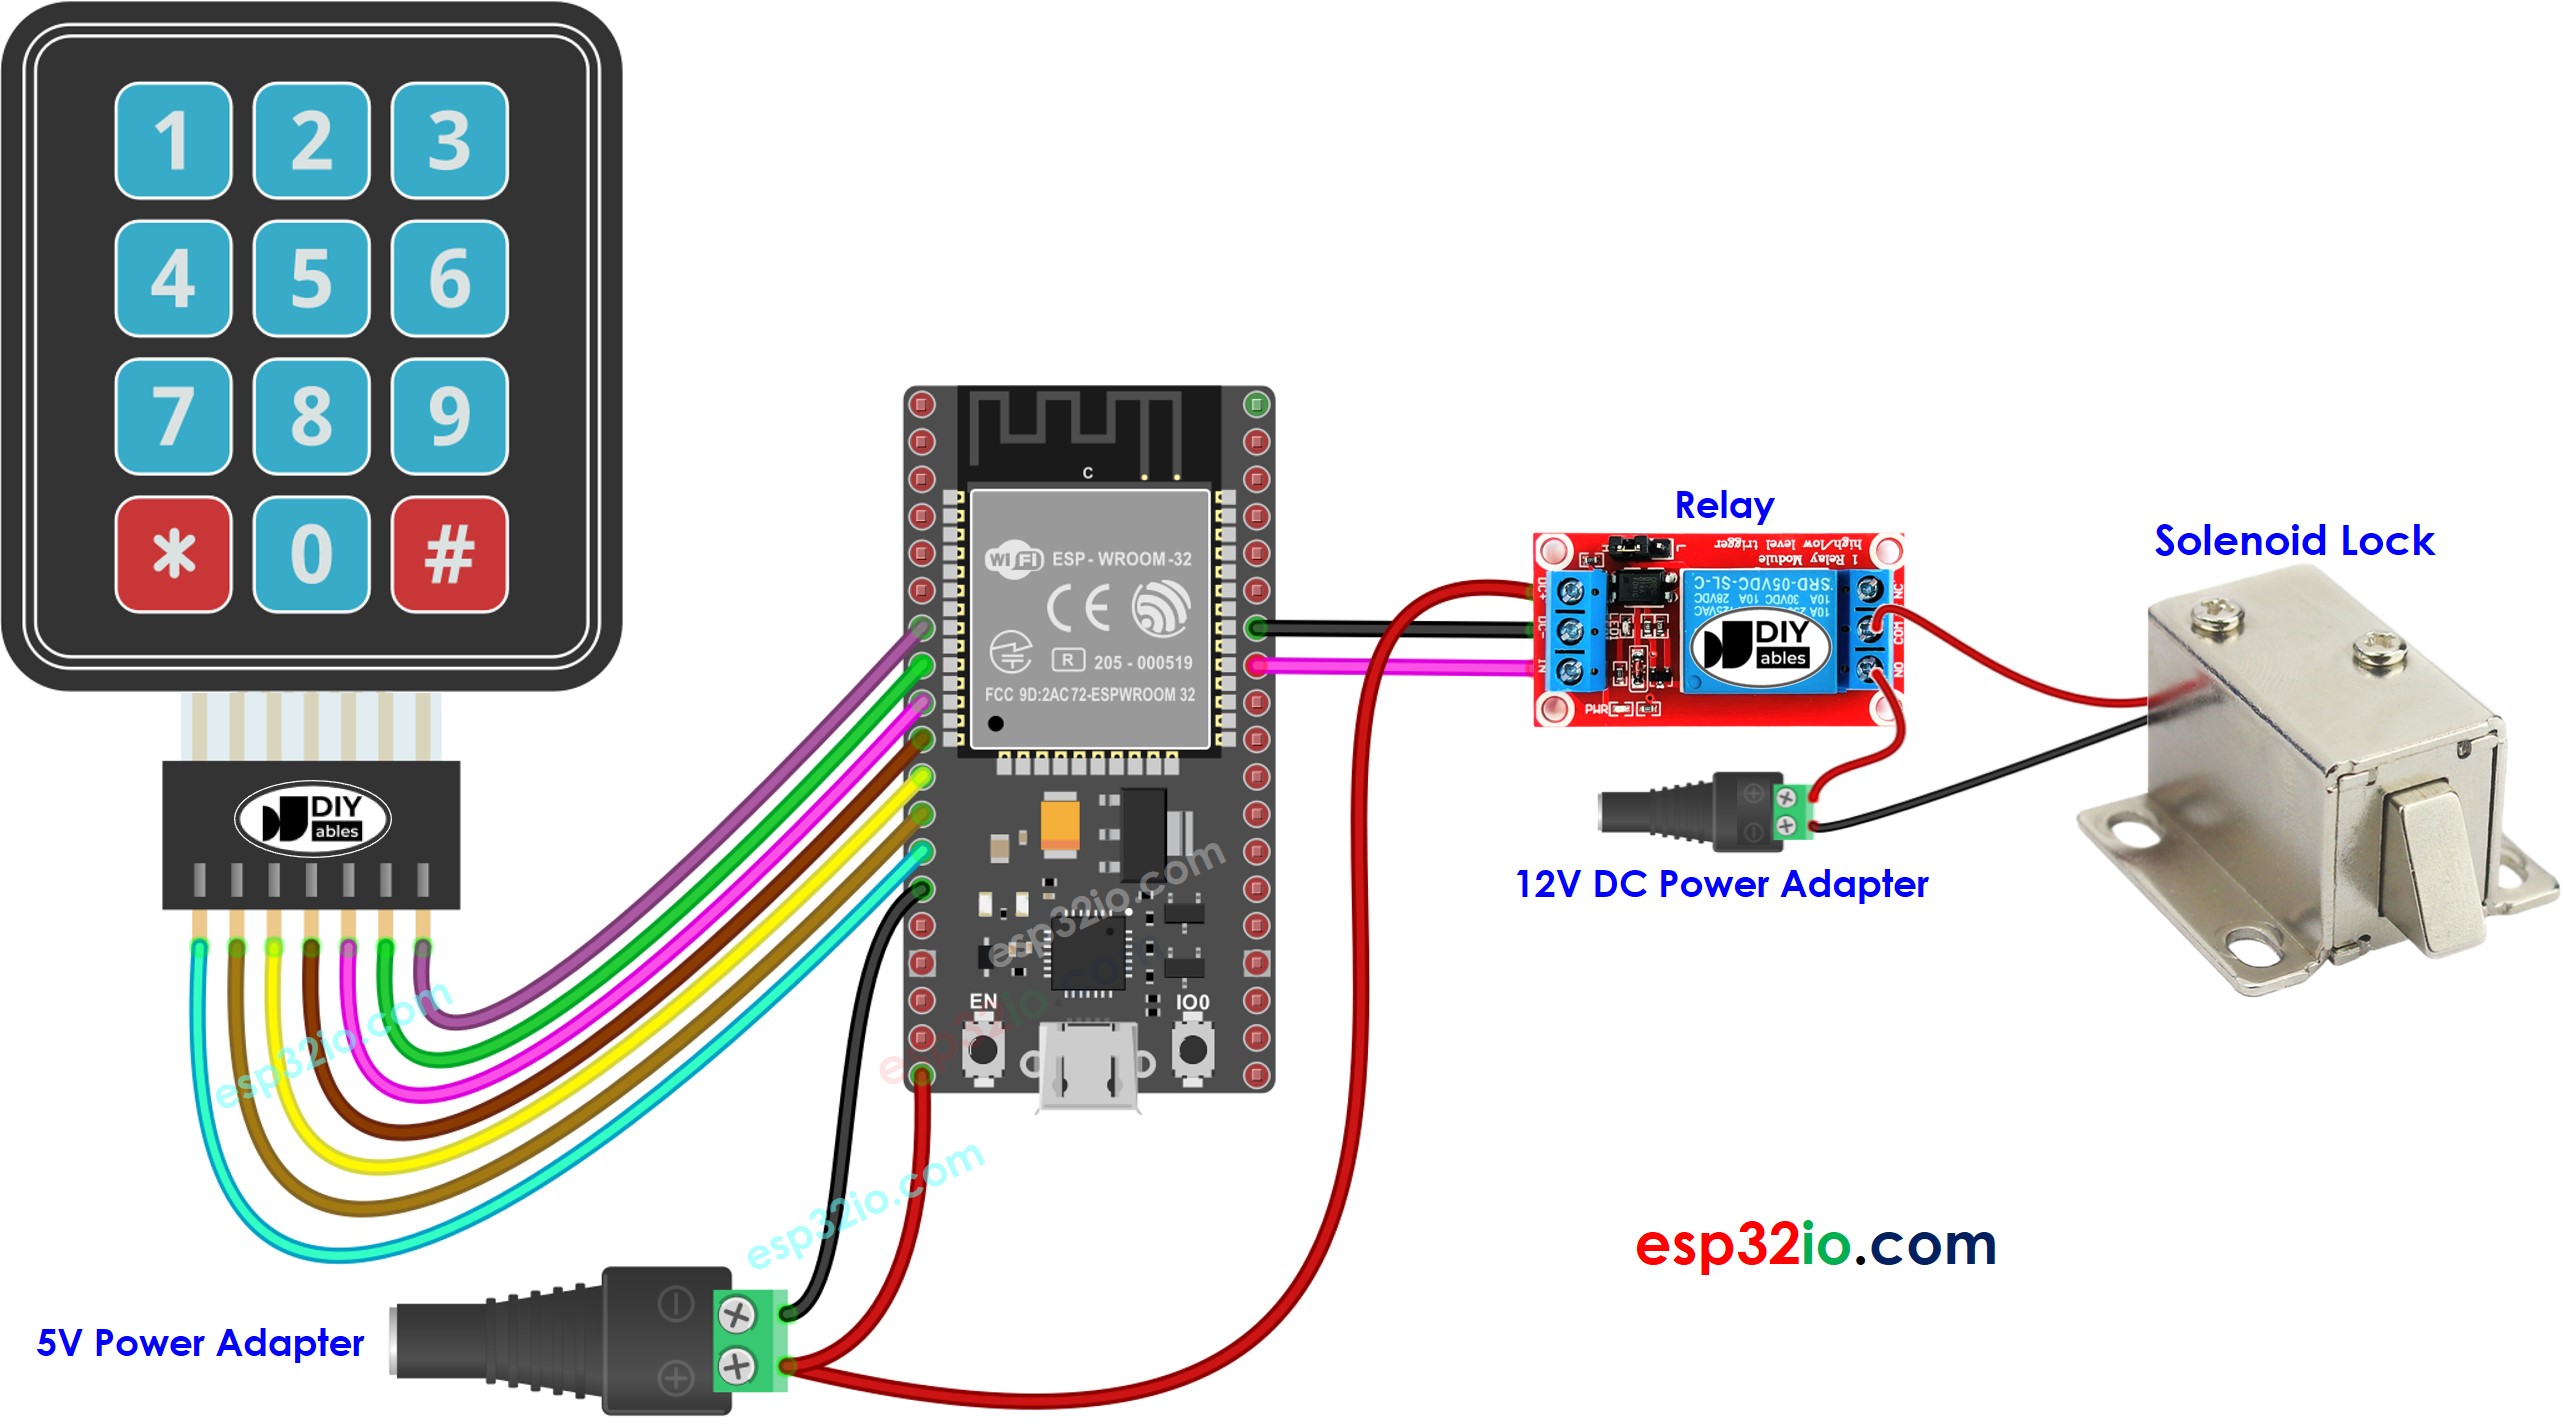
This image is created using Fritzing. Click to enlarge image
If you're unfamiliar with how to supply power to the ESP32 and other components, you can find guidance in the following tutorial: The best way to Power ESP32 and sensors/displays.
ESP32 Code - Door lock system with password using keypad, solenoid lock
Quick Instructions
- Connect the ESP32 to your PC using a USB cable.
- Open the Arduino IDE, select the appropriate board and port.
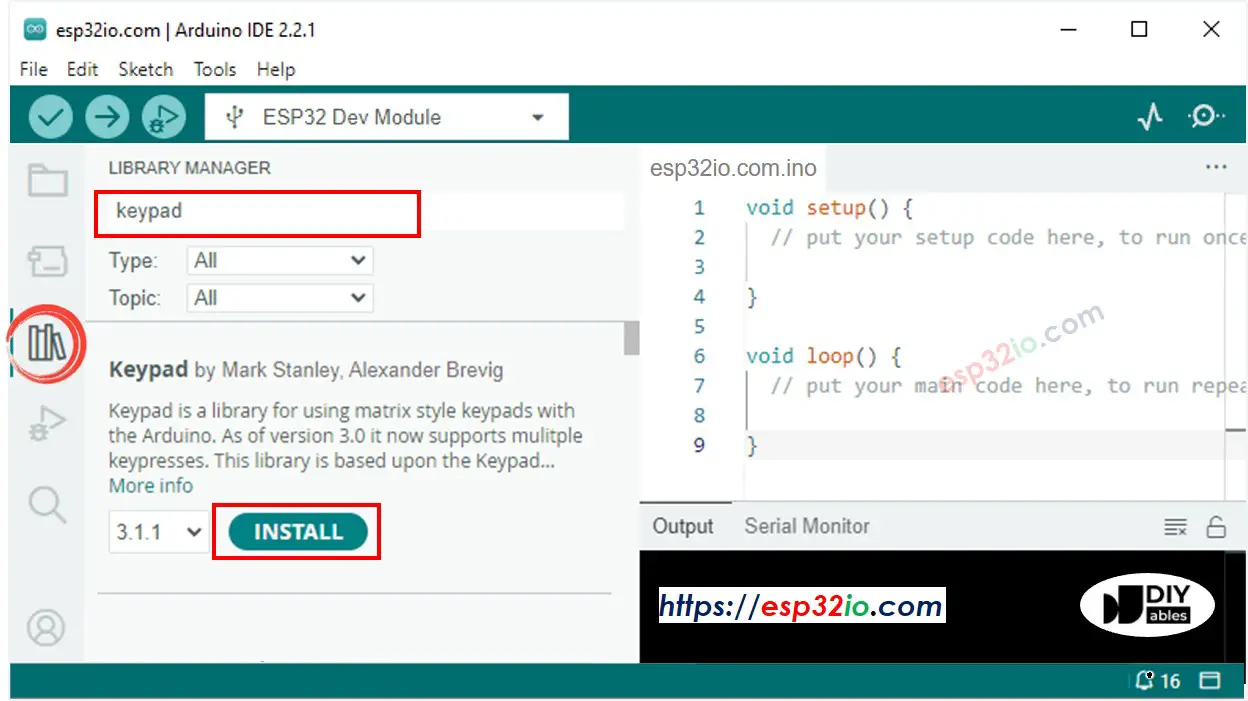
- Click to the Libraries icon on the left bar of the Arduino IDE.
- Search for the “keypad” library, then find the keypad library created by Mark Stanley and Alexander Brevig.
- Click the Install button to install the keypad library.
- Copy the provided code and paste it into the Arduino IDE.
- Compile and upload the code to the ESP32 board by clicking the Upload button in the Arduino IDE.
- Open the Serial Monitor in the Arduino IDE.
- Press the keys 12345 and then press #
- Press the keys 1234567 and then press #
- Observe the state of the lock tongue for 20 seconds.
- Observe the output on the Serial Monitor.
Code Explanation
In this system, valid passwords are pre-programmed into the ESP32 code. An input string is used to store the password entered by users. The keypad has two special keys, * and #, that are used for clearing and terminating the input password. The system operates as follows:
- When a key other than the special keys is pressed, it is added to the input string.
- When the * key is pressed, the input string is cleared and the password input process can be restarted.
- When the # key is pressed:
- The input string is compared to the pre-defined passwords. If it matches one of the pre-defined passwords, the relay is activated to unlock the door.
- Regardless of whether the password is correct or not, the input string is cleared for the next input.
- In the above code, To make it simple, we used the delay function. It is better to use millis() instead of delay(). See How to use millis() instead of delay()
- You can add a piezo buzzer to make the beep sound each time keypad is pressed.
- In the above codes, the door is locked again after 20 seconds. You can replace it by a door sensor. The door is locked when the door sensor detect the door is closed by user.
※ NOTE THAT:
Video Tutorial
Making video is a time-consuming work. If the video tutorial is necessary for your learning, please let us know by subscribing to our YouTube channel , If the demand for video is high, we will make the video tutorial.