ESP32 - Cooling System using DS18B20 Temperature Sensor
This tutorial instructs you how to make a cooling system using ESP32, DS18B20 temperature sensor and fan. In detail:
- If the temperature read from DS18B20 sensor is above a threshold, ESP32 automatically turns the cooling fan on.
- If the temperature read from DS18B20 sensor is below another threshold, ESP32 automatically turns the cooling fan off.
Hardware Used In This Tutorial
Or you can buy the following kits:
| 1 | × | DIYables ESP32 Starter Kit (ESP32 included) | |
| 1 | × | DIYables Sensor Kit (18 sensors/displays) |
Buy Note: Numerous DS18B20 sensors available in the market are of poor quality. We strongly advise purchasing the sensor from the DIYables brand via the link above; we conducted tests, and it performed reliably.
Introduction to Cooling Fan and DS18B20 Temperature Sensor
We have specific tutorials about DS18B20 temperature sensor and fan. Each tutorial contains detailed information and step-by-step instructions about hardware pinout, working principle, wiring connection to ESP32, ESP32 code... Learn more about them at the following links:
Wiring Diagram
- Wiring diagram with breadboard
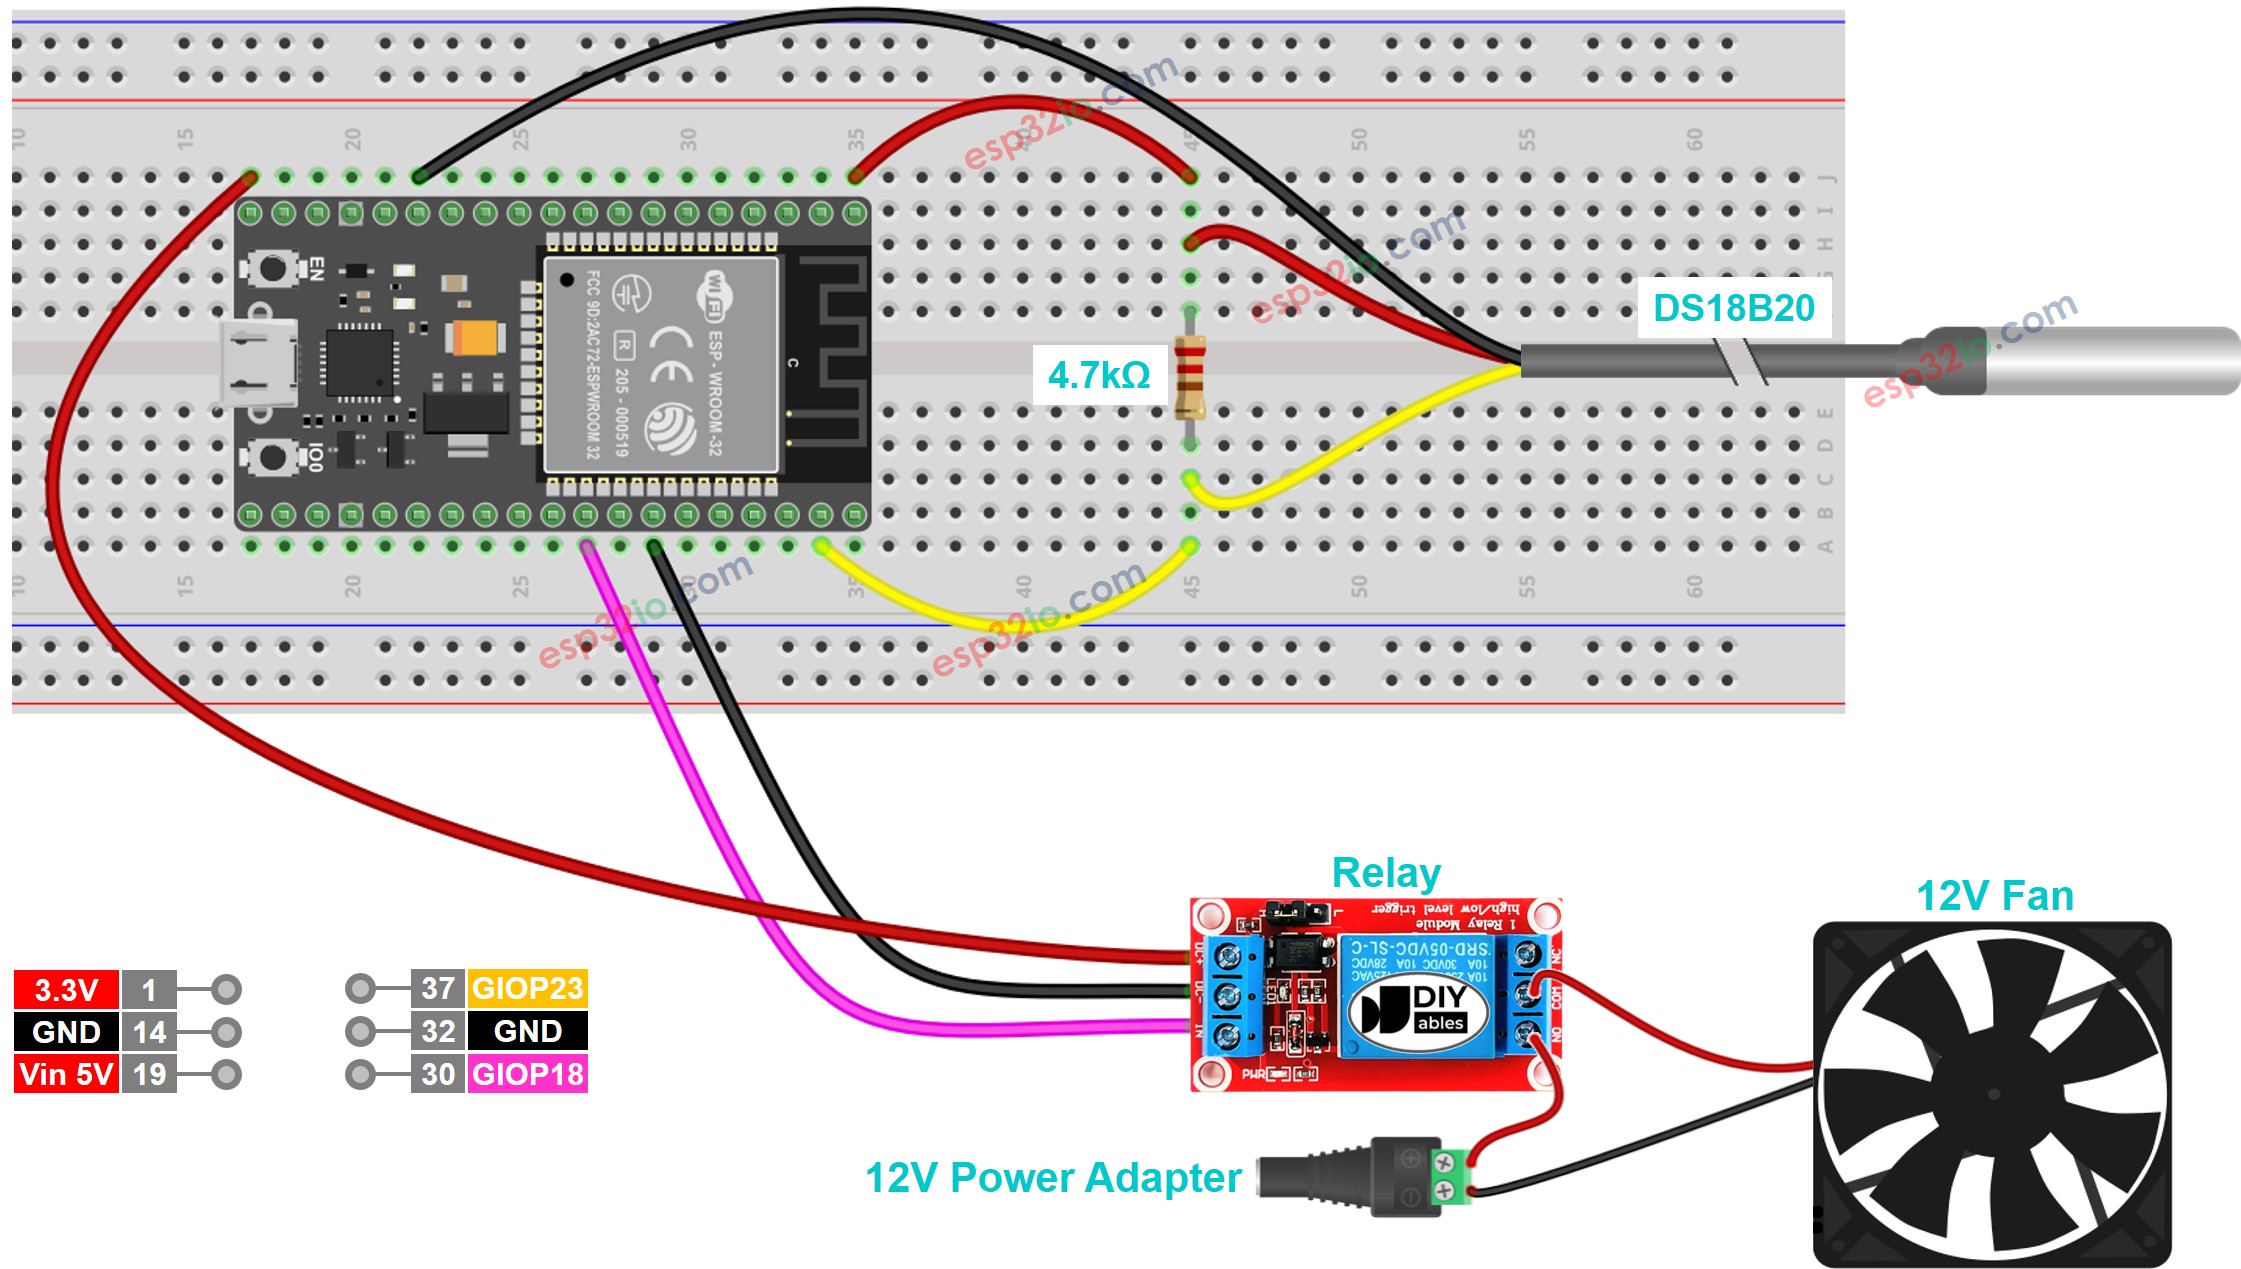
This image is created using Fritzing. Click to enlarge image
- Wiring diagram with adapter (recommended)
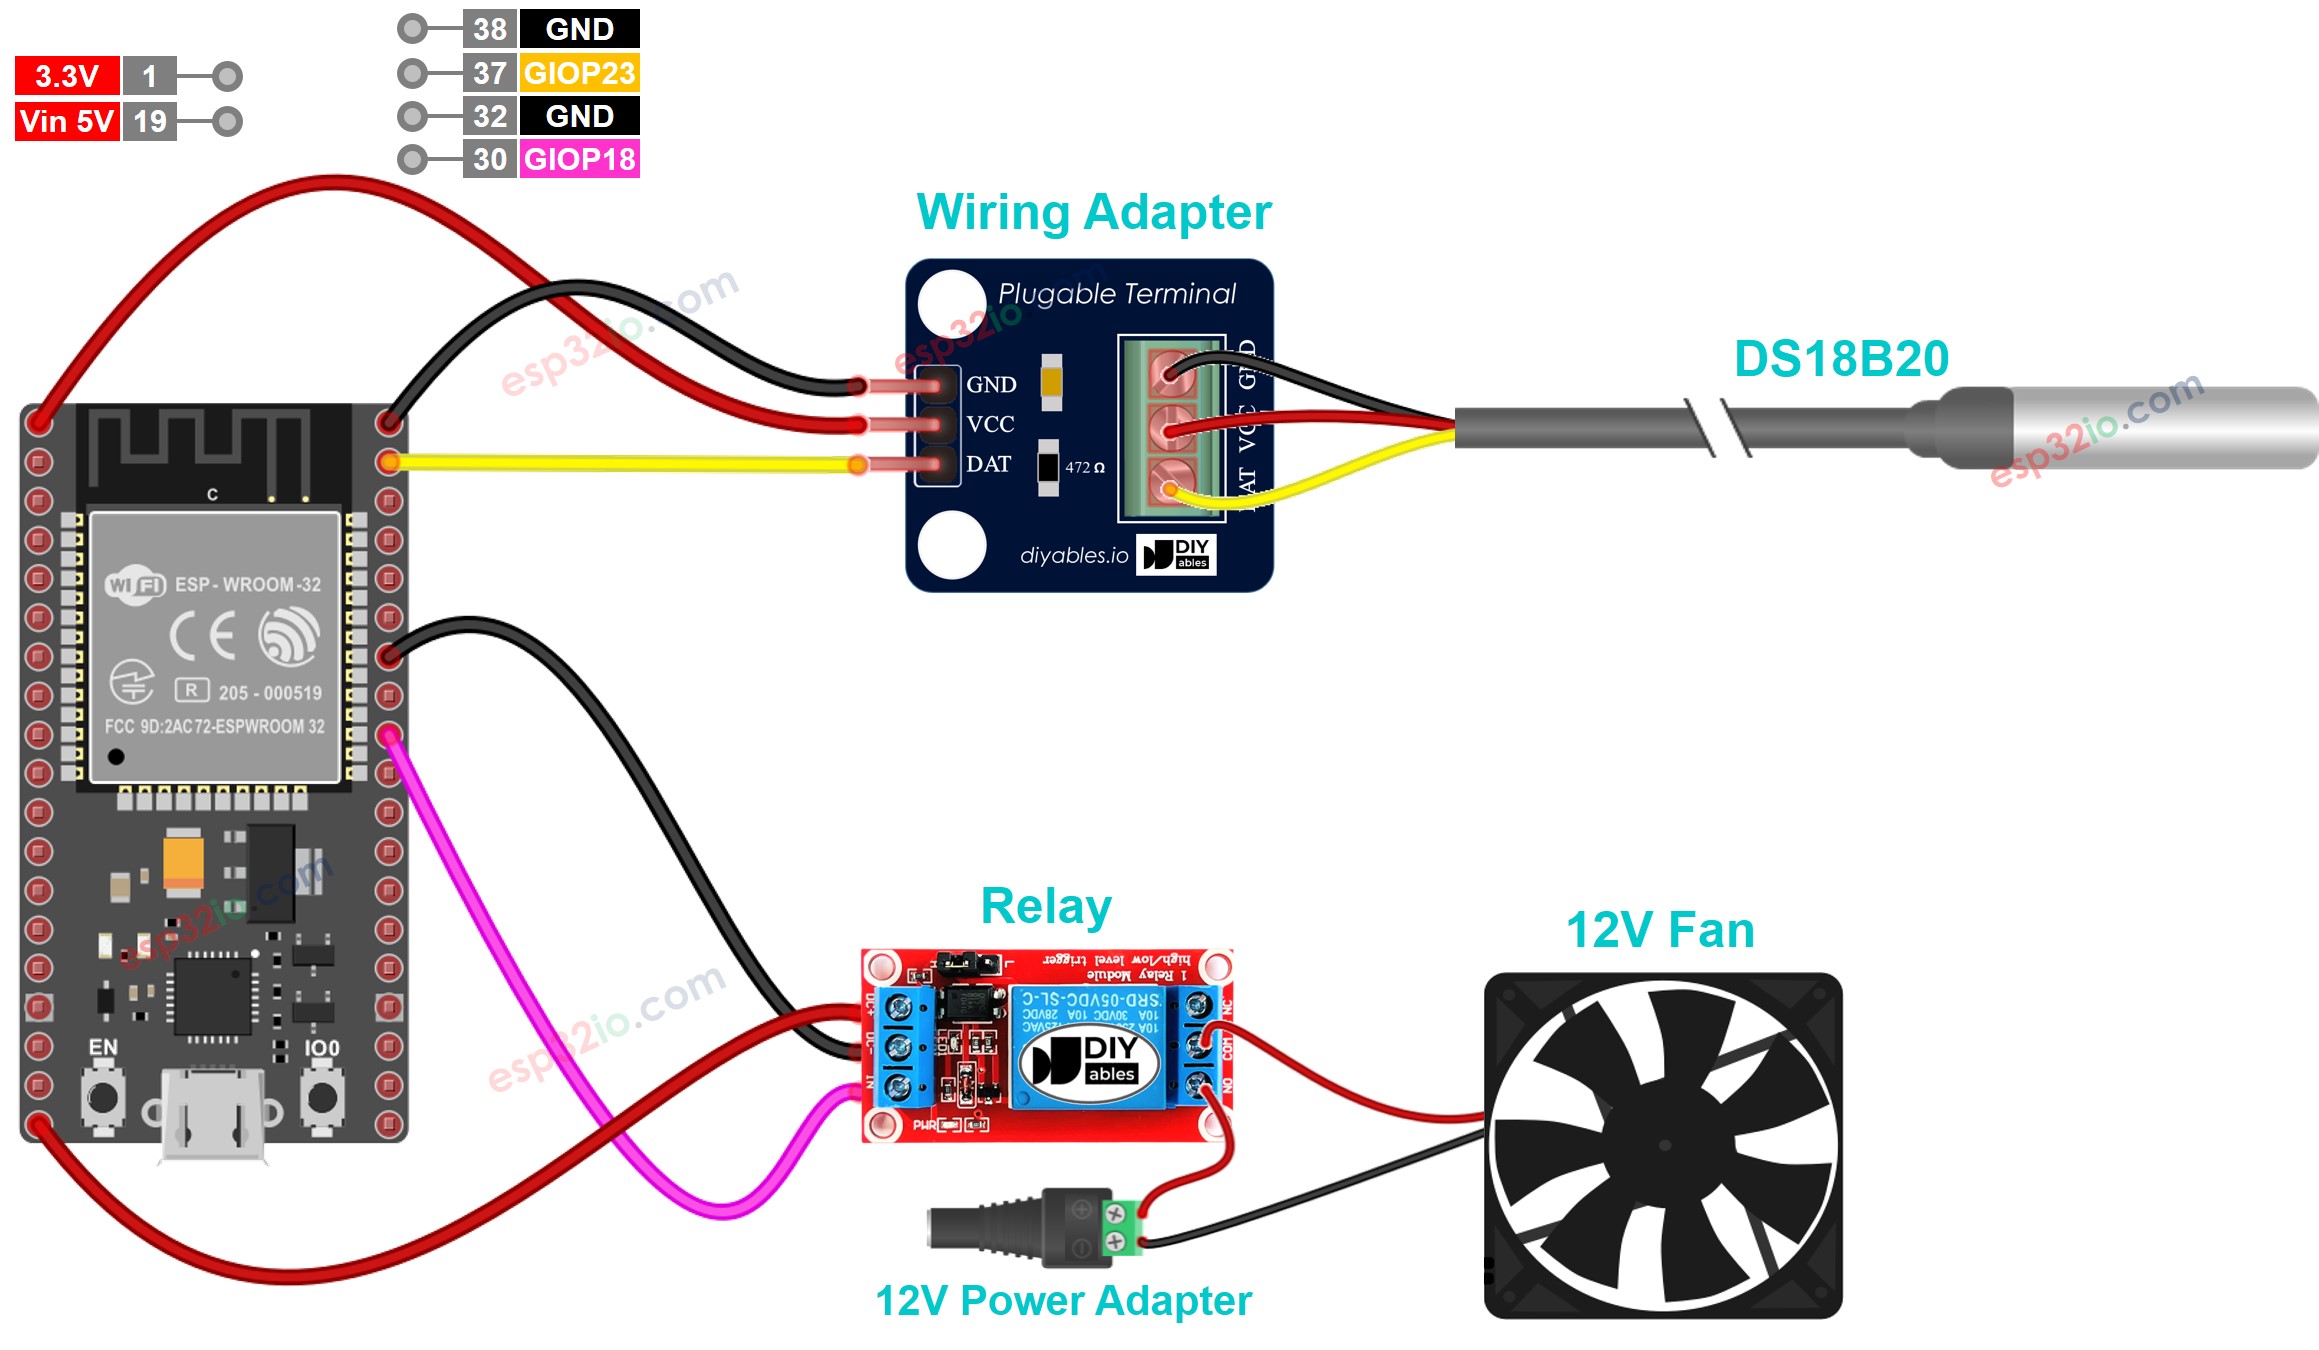
This image is created using Fritzing. Click to enlarge image
For ease of connection, it's advisable to purchase a DS18B20 sensor that comes with a wiring adapter equipped with a built-in resistor, eliminating the need for an additional resistor in the wiring.
If you're unfamiliar with how to supply power to the ESP32 and other components, you can find guidance in the following tutorial: The best way to Power ESP32 and sensors/displays.
How System Works
- The ESP32 reads the temperature from the DS18B20 temperature sensor
- If the temperature is above an upper threshold, ESP32 automatically turns the fan on
- If the temperature is below a lower threshold, ESP32 automatically turns the fan off
ESP32 keeps checking the temperature infinitely.
The lower threshold and upper threshold can be the same value.
ESP32 Code
The above ESP32 code automatically turns the fan on if the temperature is above 30°C, and keeps the fan on until the temperature is below 15°C
Quick Instructions
- If this is the first time you use ESP32, see how to setup environment for ESP32 on Arduino IDE.
- Do the wiring as above image.
- Connect the ESP32 board to your PC via a micro USB cable
- Open Arduino IDE on your PC.
- Select the right ESP32 board (e.g. ESP32 Dev Module) and COM port.
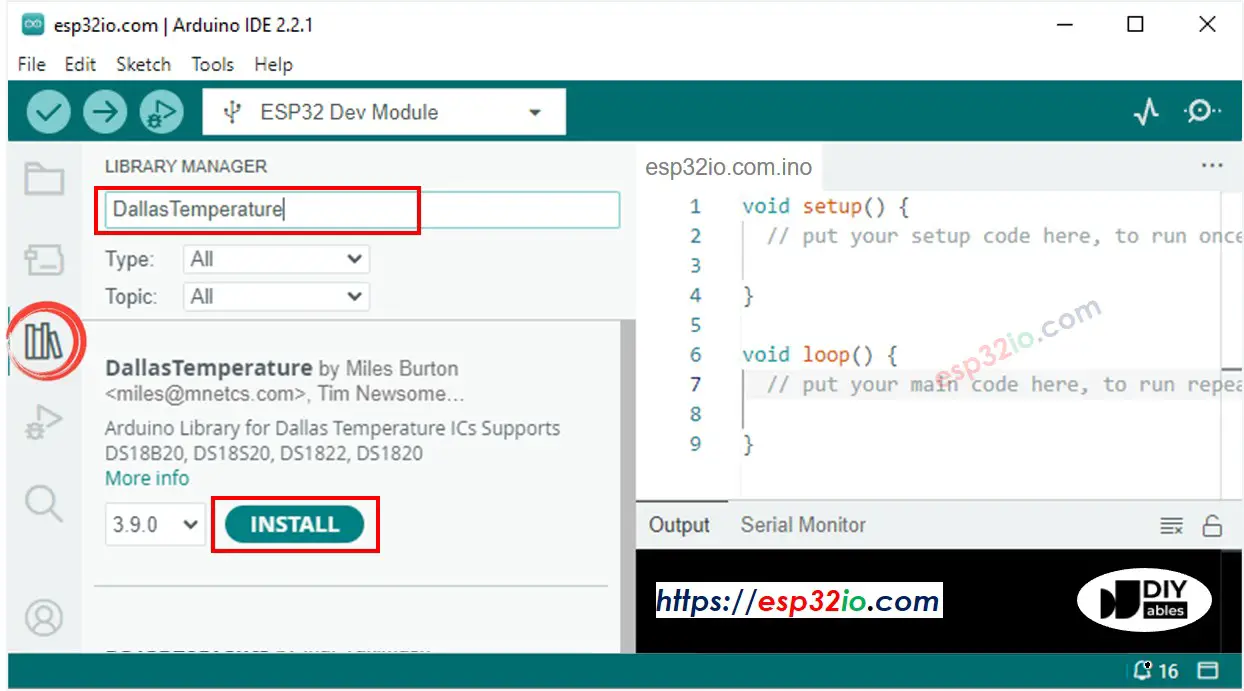
- Click to the Libraries icon on the left bar of the Arduino IDE.
- Search “DallasTemperature” on the search box, then look for the DallasTemperature library by Miles Burton.
- Click Install button to install DallasTemperature library.
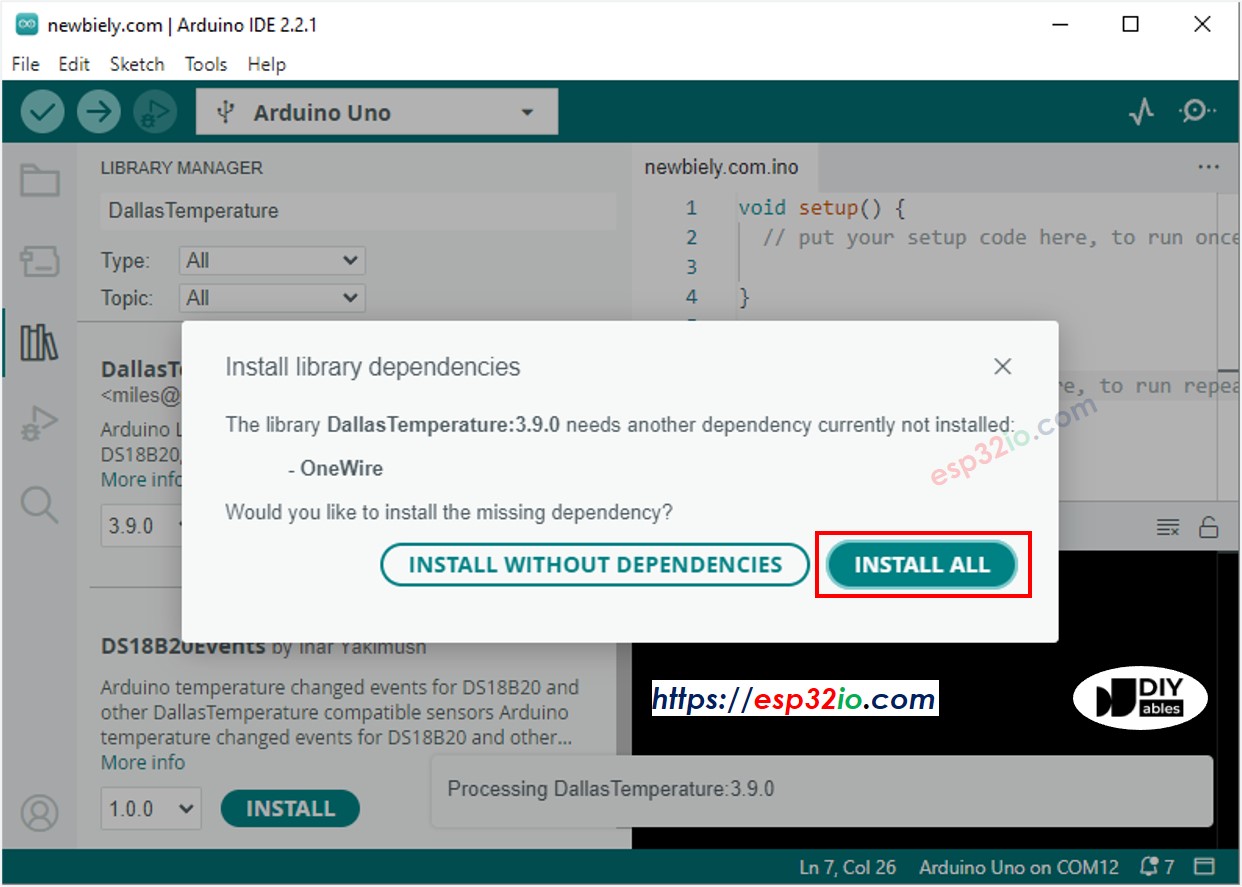
- You will be asked to install the dependency. Click Install All button to install OneWire library.
- Copy the above code and paste it to Arduino IDE.
- Compile and upload code to ESP32 board by clicking Upload button on Arduino IDE
- Make the sensor colder or hotter. For example, putting the sensor near a hot cup of coffee
- Check the fan's state
Advanced Knowledge
- The algorithm used on above tutorial to control the tmperature is called the on-off controller (also known as the "bang-bang" controller, or the signaller). This algorithm is simple to implement and works well in temperature control.
- An alternative for the above algorithm is the PID controller. The PID controller makes the desired temperature more stable. However, it is very difficult to understand and implement. Therefore, the PID controller is not widely used in temperature control.
Video Tutorial
Making video is a time-consuming work. If the video tutorial is necessary for your learning, please let us know by subscribing to our YouTube channel , If the demand for video is high, we will make the video tutorial.