ESP32 - Software Installation
Hardware Used In This Tutorial
Or you can buy the following kits:
| 1 | × | DIYables ESP32 Starter Kit (ESP32 included) | |
| 1 | × | DIYables Sensor Kit (18 sensors/displays) |
IDE INSTALLATION
To program for ESP32 board, we need:
- A text editor to write the code (human-readable code)
- A compiler to compile the code (human-readable code) to the binary code (ESP32-understandable code)
- A programmer to upload the binary code to ESP32
It seems to be complicated ⇒ don't worry, The Arduino IDE does all for you. you just need to:
- Install this Arduino IDE
- Write the ESP32 code (human-readable code)
- Click a button on the Arduino IDE to compile and upload the code to ESP32 board.
Arduino IDE is available for Windows, Mac OS X and Linux. We need to do the following steps:
- Download the Arduino IDE via this link and install it.
- After installing Arduino IDE, we can use it to program for Arduino immidiately. However, in order to program for ESP32, we need to do some environment configuration on Arduino IDE
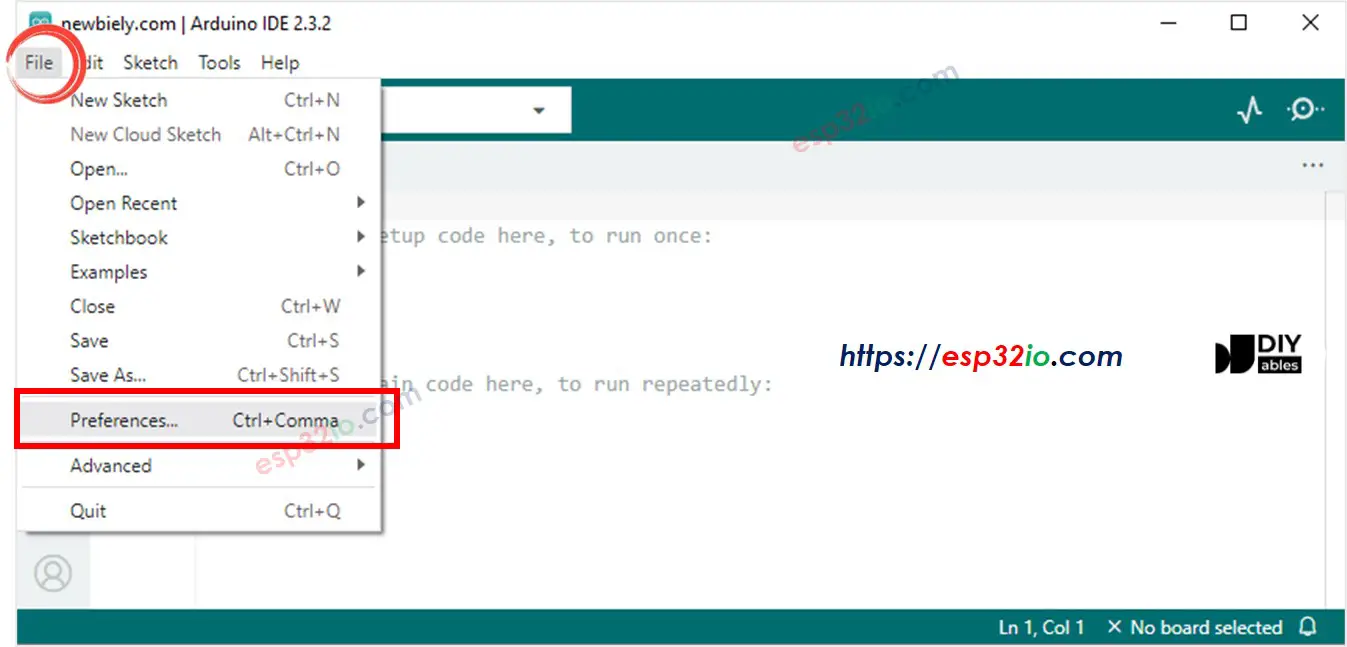
- Open Arduino IDE
- Go to File Preferences on Arduino IDE
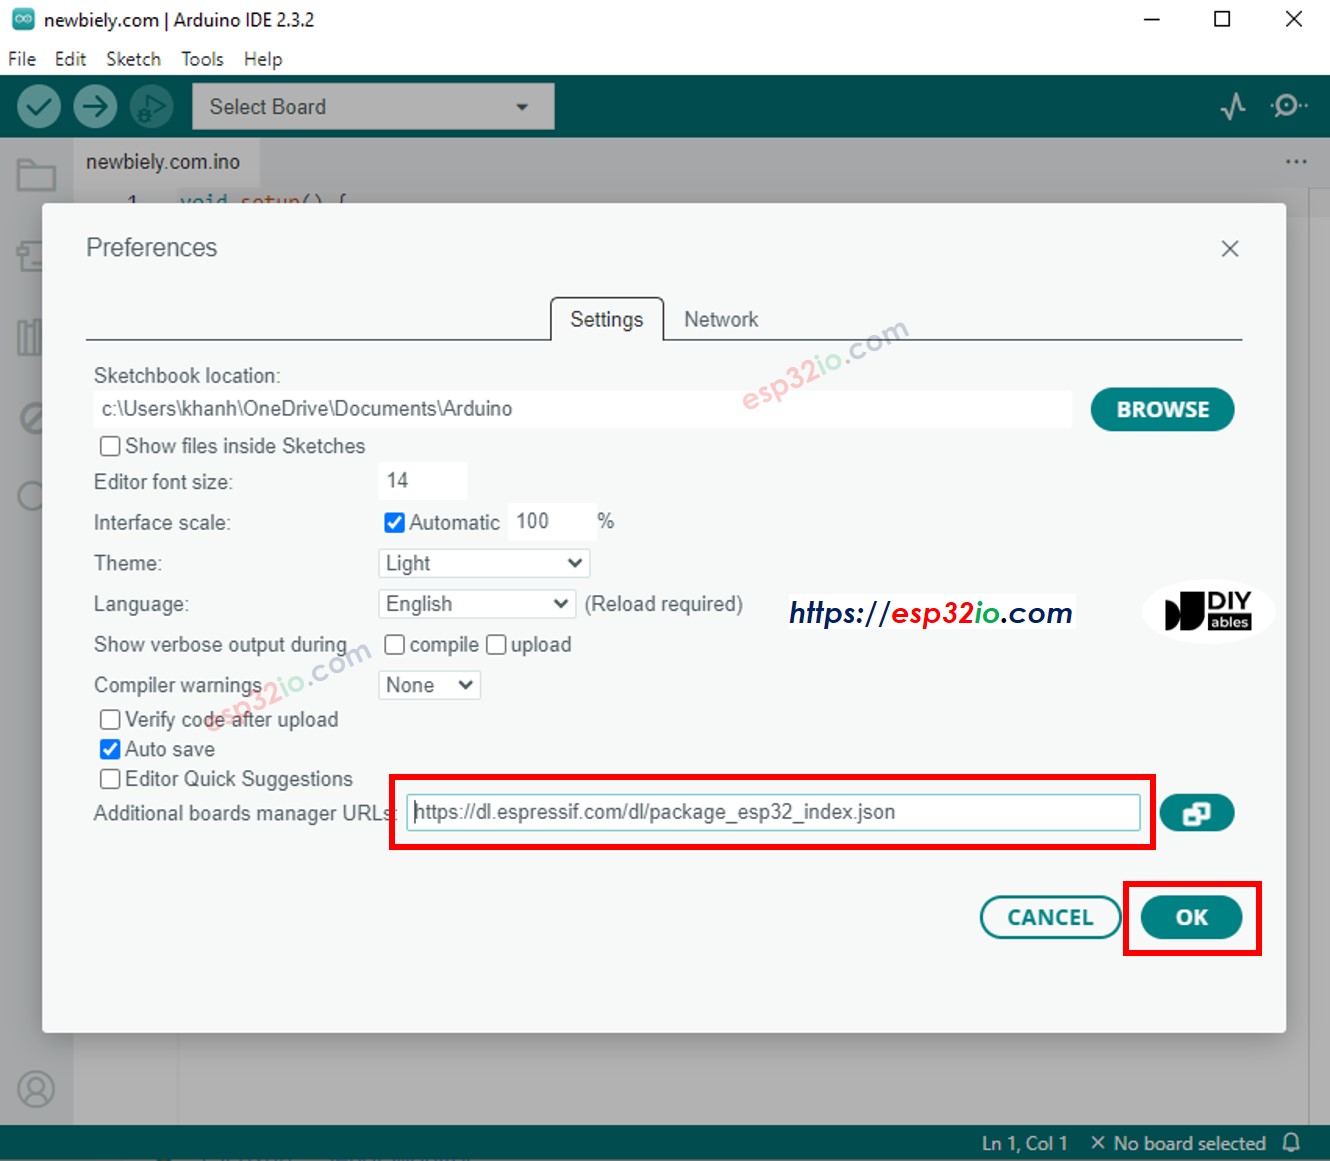
- Copy below text:
- Paste the coppied text into the Additional Board Manager URLs field as shown in the figure below. Then, click the OK button
※ NOTE THAT:
Note: In case you use the ESP8266 and ESP32, you can separate the URLs with a comma as follows:
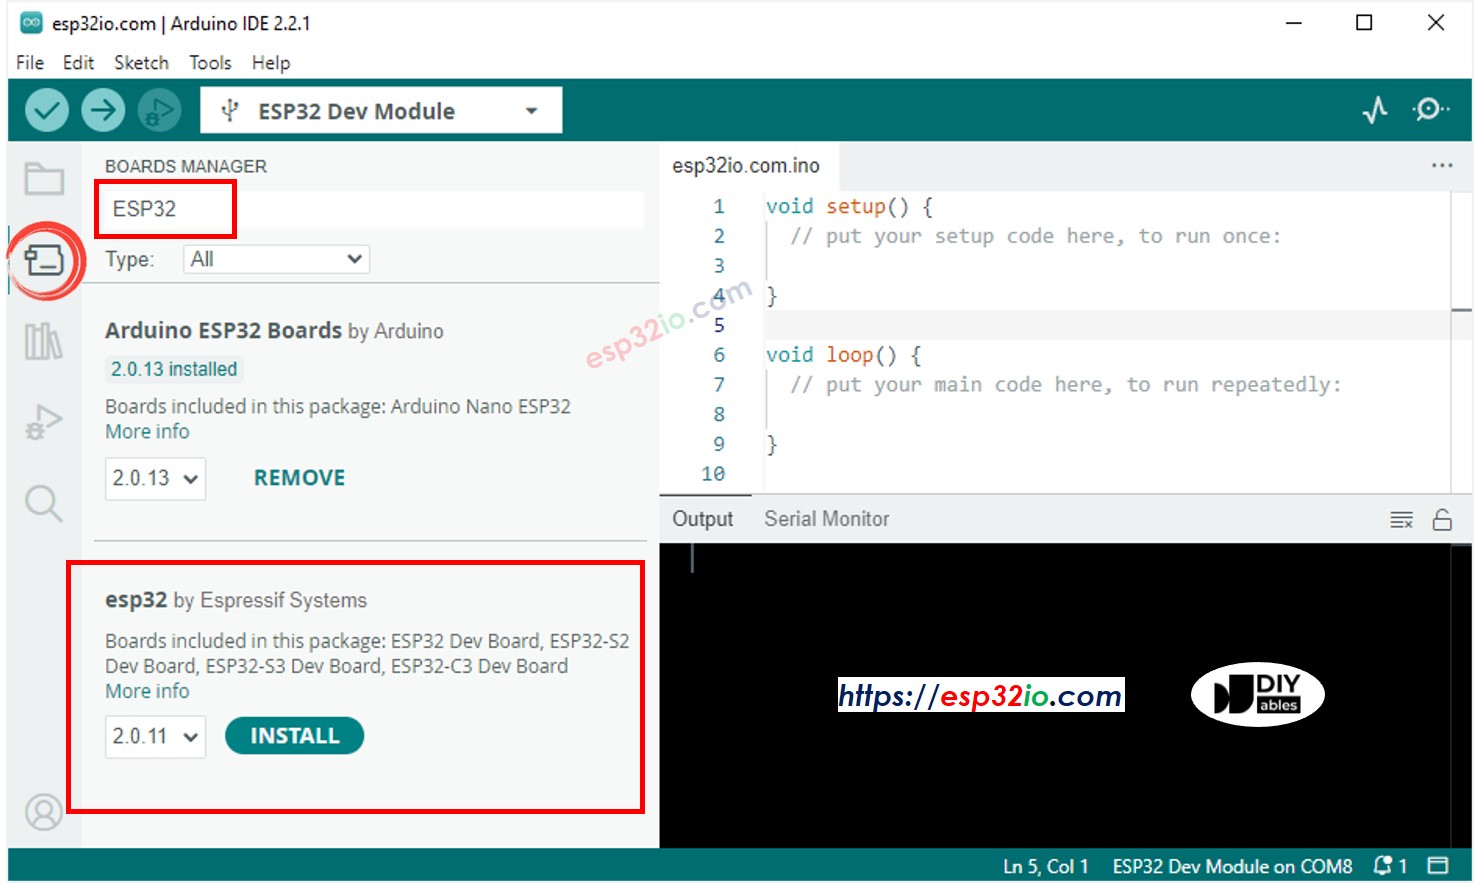
- Open the Boards Manager by clicking on the Board Manager icon on the left navigation bar of Arduino IDE
- Type “ESP32”, then click Install button for the “ESP32 by Espressif Systems“
DRIVER INSTALLATION
ESP32 boards from different vendors may use different USB-to-serial chips, which affect driver compatibility. Some common chips include CH340, CP210x, and FTDI. The driver you need depends on the chip used by your specific board.
In this tutorial, we are using the ESP32 board from DIYables, which uses the CP210x USB-to-serial chip.
In most cases, the Arduino IDE will automatically recognize the DIYables ESP32 board. However, if it doesn’t, you may need to install the driver manually by following these steps:
1. Download the Driver
Download the CP210x driver from one of the following links:
2. Extract the Driver Files
Unzip the downloaded file to a folder on your computer. Note that the package does not include an automatic installer.
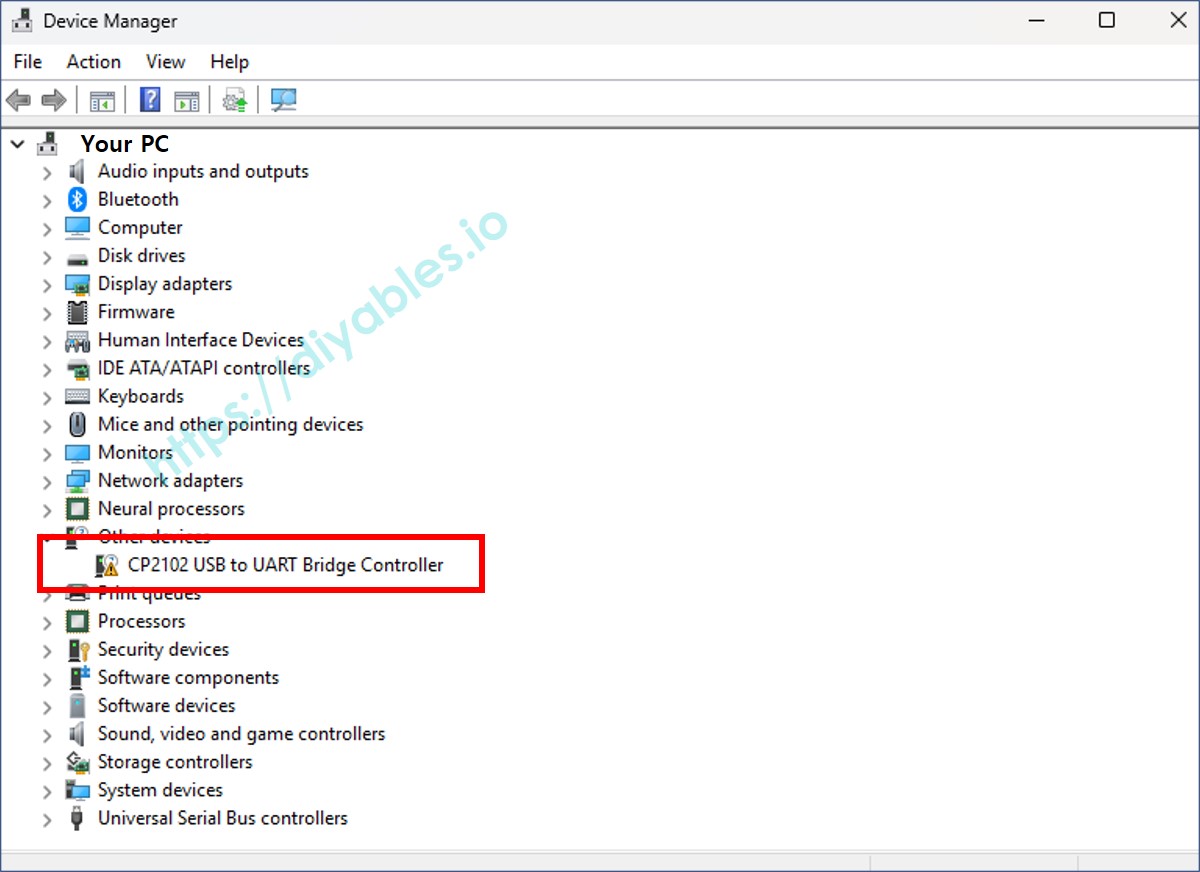
3. Open Device Manager
- Press Windows + X and select Device Manager, or search for "Device Manager" in the Start menu.
- In the Device Manager window, look under Ports (COM & LPT) for a device labeled USB Serial Port or similar.
4. Connect the ESP32 Board
- Plug the DIYables ESP32 board into your computer using a USB cable.
- Watch the Ports (COM & LPT) section to identify the new COM port that appears. This indicates your ESP32 has been detected.
5. Install or Update the Driver
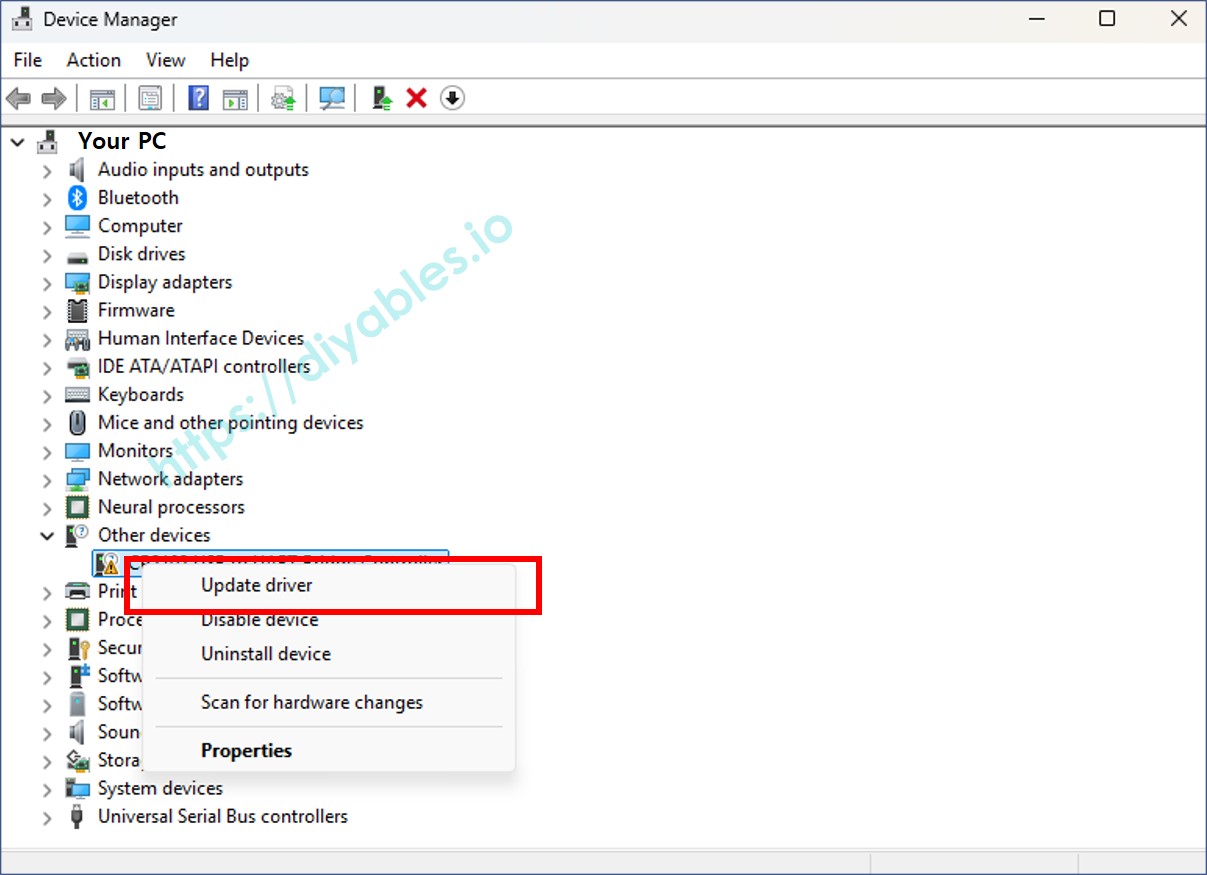
- Right-click the detected serial device (e.g., "USB Serial Port") and choose Update driver.
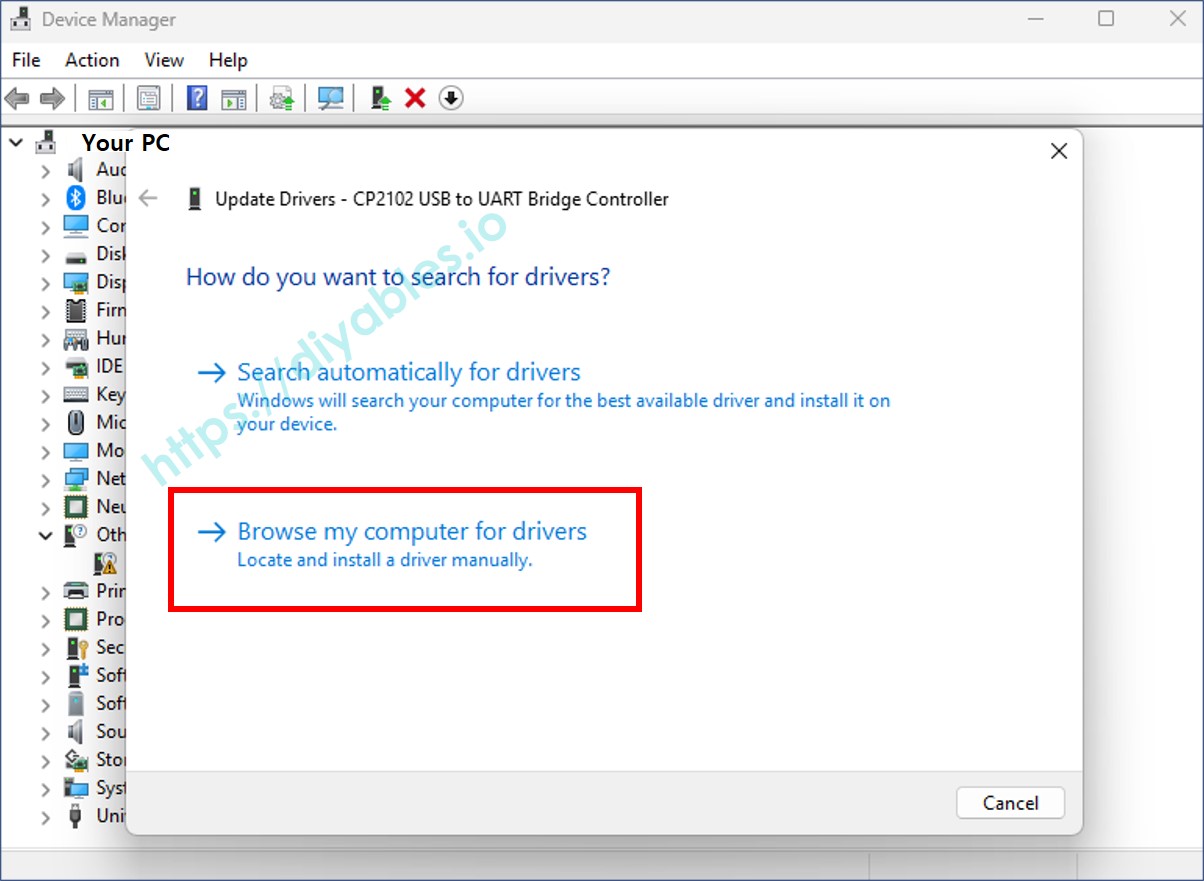
- In the window that opens, select Browse my computer for drivers.
6. Select the Extracted Driver Folder
- Click Browse, then navigate to the folder where you extracted the driver files.
- Click Next and follow the on-screen instructions to complete the installation.
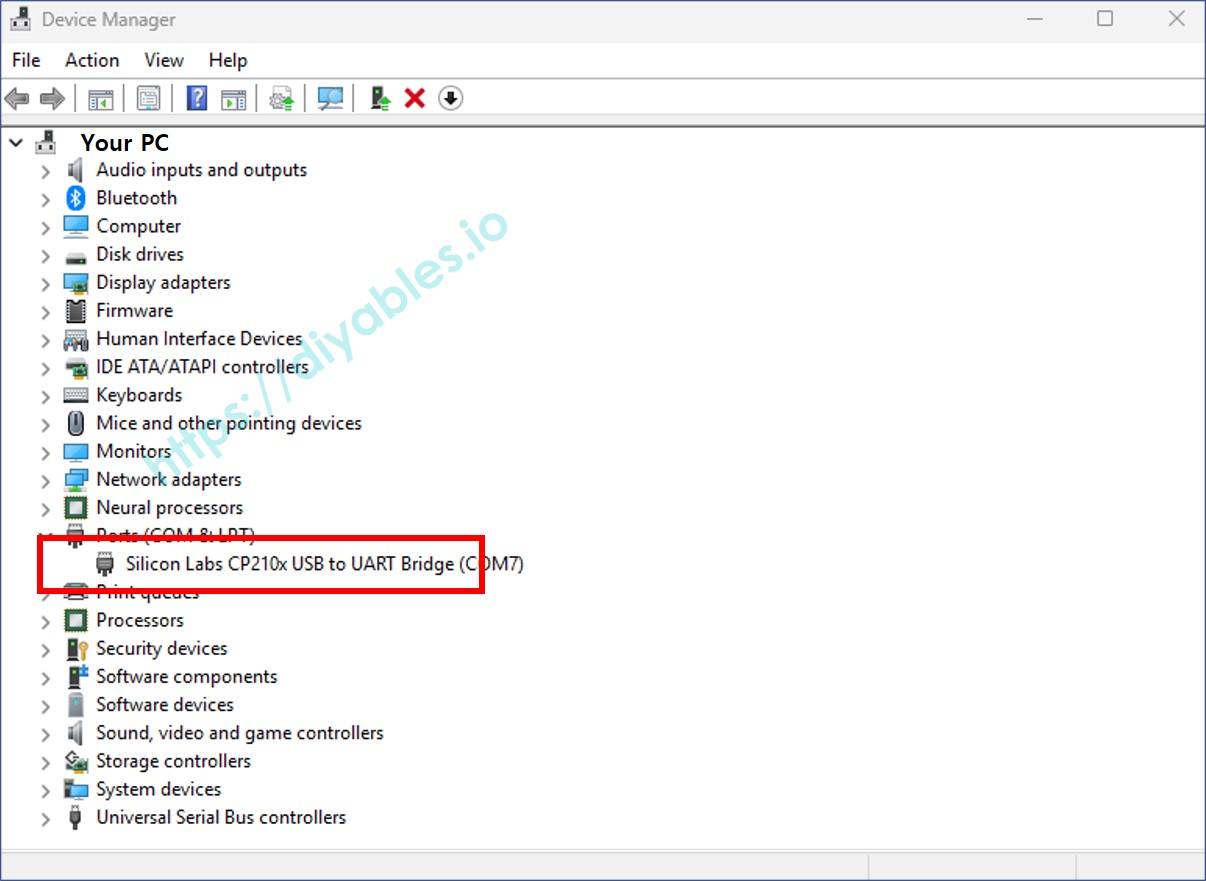
7. Confirm Installation
Once the driver is installed successfully, your ESP32 device should appear correctly under Ports (COM & LPT) in Device Manager.
Note: If the installation fails or doesn’t work, try uninstalling any existing driver associated with that COM port before reinstalling the new driver.
SELECTING THE BOARD IN ARDUINO IDE
- Connect the DIYables ESP32 board to your computer using a USB cable.
- Open the Arduino IDE.
- Select ESP32 Dev Module as the board and choose the correct COM port.

The software installation is done. The next step is to run first program on ESP32 board: ESP32 - Hello World program.