This tutorial guides you on programming an ESP32 to utilize multiple buttons simultaneously without relying on the delay() function. The tutorial offers code in two methods:
ESP32 multiple buttons with debounce
ESP32 multiple buttons with debounce using the array.
We will demonstrate with four buttons. However, you can readily adjust the code for two buttons, three buttons, five buttons, or even more.
Disclosure: Some of the links in this section are Amazon affiliate links, meaning we may earn a commission at no additional cost to you if you make a purchase through them. Additionally, some links direct you to products from our own brand, DIYables .
Introduction to Button
We have specific tutorials about button. Each tutorial contains detailed information and step-by-step instructions about hardware pinout, working principle, wiring connection to ESP32, ESP32 code... Learn more about them at the following links:
Applications needing to detect state changes (pressed/released)
Fortunately, the ezButton library simplifies this process by handling debounce and button events internally. This spares users from managing timestamps and variables when using the library. Moreover, employing an array of buttons can improve code clarity and brevity.
/* * This ESP32 code is created by esp32io.com * * This ESP32 code is released in the public domain * * For more detail (instruction and wiring diagram), visit https://esp32io.com/tutorials/esp32-multiple-button */#include <ezButton.h>#define BUTTON_PIN_1 25 // The ESP32 pin GPIO25 connected to the button 1#define BUTTON_PIN_2 26 // The ESP32 pin GPIO26 connected to the button 2#define BUTTON_PIN_3 27 // The ESP32 pin GPIO27 connected to the button 3#define BUTTON_PIN_4 14 // The ESP32 pin GPIO14 connected to the button 4ezButtonbutton1(BUTTON_PIN_1); // create ezButton object for button 1ezButtonbutton2(BUTTON_PIN_2); // create ezButton object for button 2ezButtonbutton3(BUTTON_PIN_3); // create ezButton object for button 3ezButton button4(BUTTON_PIN_4); // create ezButton object for button 4voidsetup() {Serial.begin(9600);button1.setDebounceTime(100); // set debounce time to 100 millisecondsbutton2.setDebounceTime(100); // set debounce time to 100 millisecondsbutton3.setDebounceTime(100); // set debounce time to 100 milliseconds button4.setDebounceTime(100); // set debounce time to 100 milliseconds}voidloop() {button1.loop(); // MUST call the loop() function firstbutton2.loop(); // MUST call the loop() function firstbutton3.loop(); // MUST call the loop() function first button4.loop(); // MUST call the loop() function first// get button state after debounceint button1_state = button1.getState(); // the state after debounceint button2_state = button2.getState(); // the state after debounceint button3_state = button3.getState(); // the state after debounceint button4_state = button4.getState(); // the state after debounce/* Serial.print("The button 1 state: "); Serial.println(button1_state); Serial.print("The button 2 state: "); Serial.println(button2_state); Serial.print("The button 3 state: "); Serial.println(button3_state); Serial.print("The button 4 state: "); Serial.println(button4_state); */if (button1.isPressed())Serial.println("The button 1 is pressed");if (button1.isReleased())Serial.println("The button 1 is released");if (button2.isPressed())Serial.println("The button 2 is pressed");if (button2.isReleased())Serial.println("The button 2 is released");if (button3.isPressed())Serial.println("The button 3 is pressed");if (button3.isReleased())Serial.println("The button 3 is released");if (button4.isPressed())Serial.println("The button 4 is pressed");if (button4.isReleased())Serial.println("The button 4 is released");}
Connect the ESP32 board to your PC via a micro USB cable
Open Arduino IDE on your PC.
Select the right ESP32 board (e.g. ESP32 Dev Module) and COM port.
Do the wiring as above image.
Connect the ESP32 board to your PC via a USB cable
Open Arduino IDE on your PC.
Select the right ESP32 board (e.g. ESP32) and COM port.
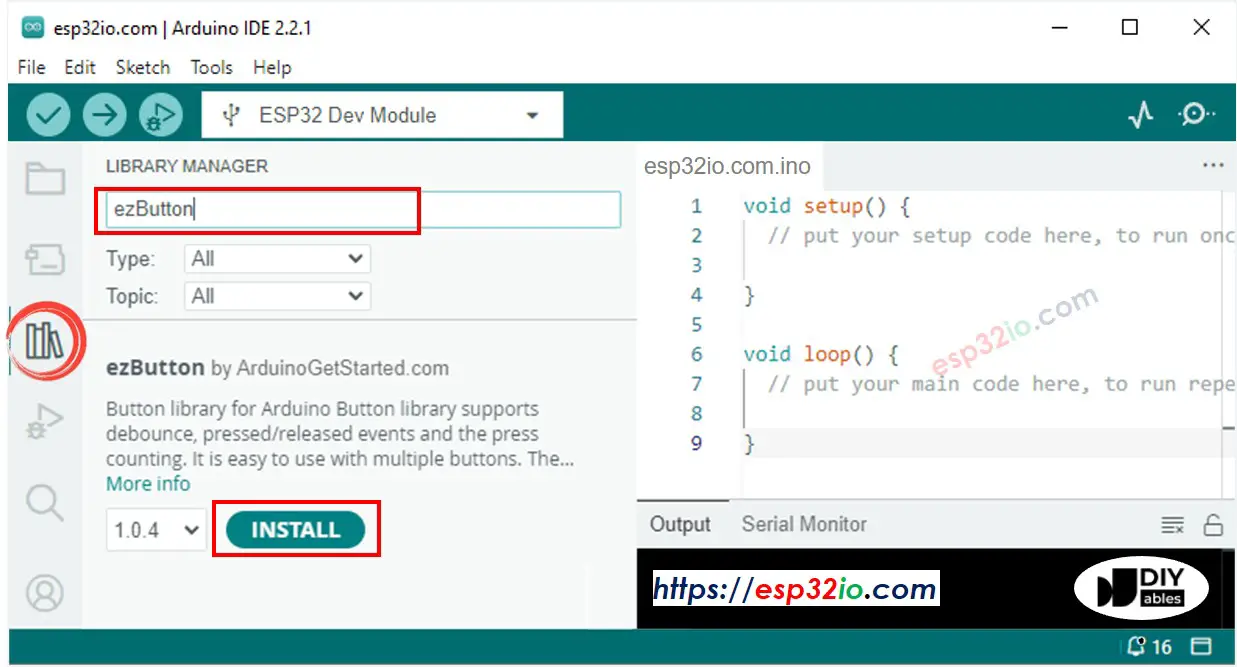
Click to the Libraries icon on the left bar of the Arduino IDE.
Search “ezButton”, then find the button library by ESP32GetStarted
Click Install button to install ezButton library.
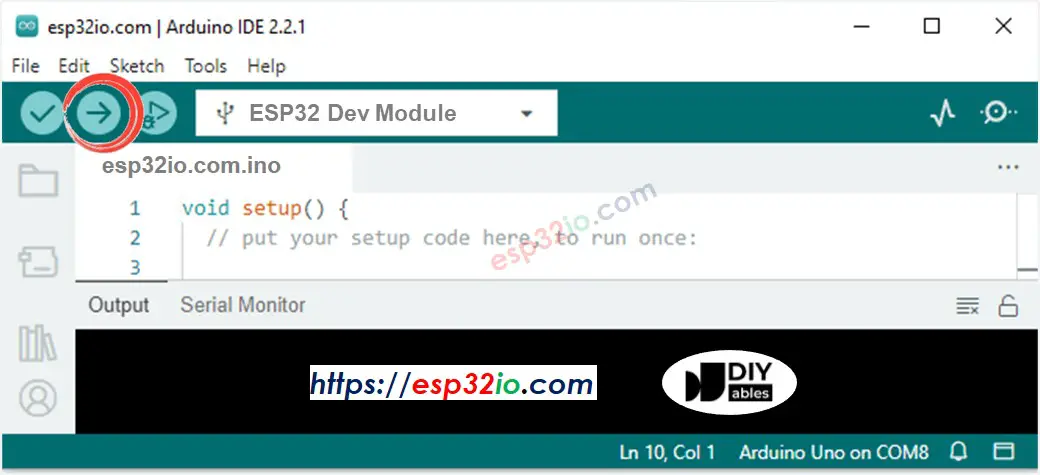
Copy the above code and paste it to Arduino IDE.
Compile and upload code to ESP32 board by clicking Upload button on Arduino IDE
Open Serial Monitor on Arduino IDE
Press and release the button one by one
Newbiely | Arduino IDE 2.3.8
──
☐
✕
File
Edit
Sketch
Tools
Help
ESP32 Dev Module
Newbiely.ino
···
8Serial.println("Hello World!");
Output
Serial Monitor
Message (Enter to send message to 'ESP32 Dev Module' on 'COM15')
New Line
9600 baud
The button 1 is pressed
The button 1 is released
The button 2 is pressed
The button 2 is released
The button 3 is pressed
The button 3 is released
The button 4 is pressed
The button 4 is released
Ln 11, Col 1
ESP32 Dev Module on COM15
2
ESP32 Code - Multiple Buttons using array
We can enhance the provided code by utilizing an array of buttons. The following code demonstrates how this array manages button objects.
/* * This ESP32 code is created by esp32io.com * * This ESP32 code is released in the public domain * * For more detail (instruction and wiring diagram), visit https://esp32io.com/tutorials/esp32-multiple-button */#include <ezButton.h>#define BUTTON_NUM 4 // the number of buttons#define BUTTON_PIN_1 25 // The ESP32 pin GPIO25 connected to the button 1#define BUTTON_PIN_2 26 // The ESP32 pin GPIO26 connected to the button 2#define BUTTON_PIN_3 27 // The ESP32 pin GPIO27 connected to the button 3#define BUTTON_PIN_4 14 // The ESP32 pin GPIO14 connected to the button 4ezButtonbuttonArray[] = {ezButton(BUTTON_PIN_1),ezButton(BUTTON_PIN_2),ezButton(BUTTON_PIN_3),ezButton(BUTTON_PIN_4)};voidsetup() {Serial.begin(9600);for (byte i = 0; i < BUTTON_NUM; i++) {buttonArray[i].setDebounceTime(100); // set debounce time to 100 milliseconds }}voidloop() {for (byte i = 0; i < BUTTON_NUM; i++) buttonArray[i].loop(); // MUST call the loop() function firstfor (byte i = 0; i < BUTTON_NUM; i++) {// get button state after debounceint button_state = buttonArray[i].getState(); // the state after debounce/* Serial.print("The button "); Serial.print(i + 1); Serial.print(": "); Serial.println(button_state); */if (buttonArray[i].isPressed()) {Serial.print("The button ");Serial.print(i + 1);Serial.println(" is pressed"); }if (buttonArray[i].isReleased()) {Serial.print("The button ");Serial.print(i + 1);Serial.println(" is released"); } }}
Video Tutorial
Making video is a time-consuming work. If the video tutorial is necessary for your learning, please let us know by subscribing to our YouTube channel , If the demand for video is high, we will make the video tutorial.
Please feel free to share the link of this tutorial. However, Please do not use our content on any other websites. We invested a lot of effort and time to create the content, please respect our work!