ESP32 - LCD 20x4
In this ESP32 LCD 20x4 I2C tutorial, we will learn how to connect an LCD 20x4 (Liquid Crystal Display) to the ESP32 board via I2C Interface.
This tutorial shows how to program the ESP32 using the Arduino language (C/C++) via the Arduino IDE. If you’d like to learn how to program the ESP32 with MicroPython, visit this ESP32 MicroPython - LCD 20x4 tutorial.
Hardware Used In This Tutorial
Or you can buy the following kits:
| 1 | × | DIYables ESP32 Starter Kit (ESP32 included) | |
| 1 | × | DIYables Sensor Kit (30 sensors/displays) | |
| 1 | × | DIYables Sensor Kit (18 sensors/displays) |
Introduction to LCD I2C 20x4
Pinout
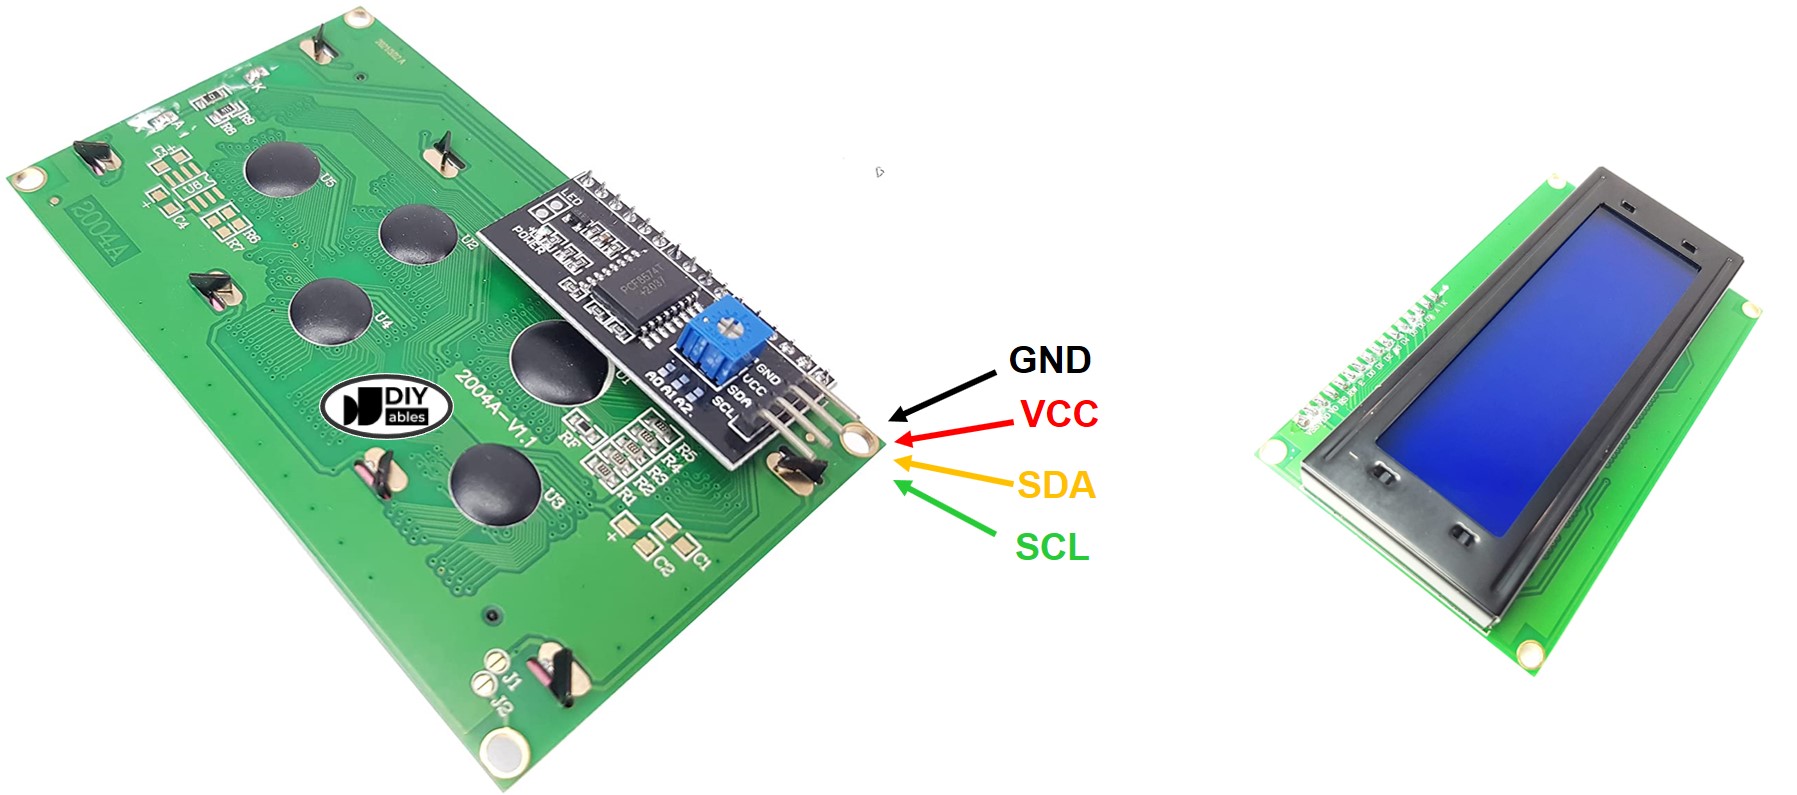
LCD 20x4 I2C uses I2C interface, so it has 4 pins:
- GND pin: needs to be connected to GND (0V).
- VCC pin: the power supply for the LCD, needs to be connected to VCC (5V).
- SDA pin: I2C data signal
- SCL pin: I2C clock signal
LCD Coordinate
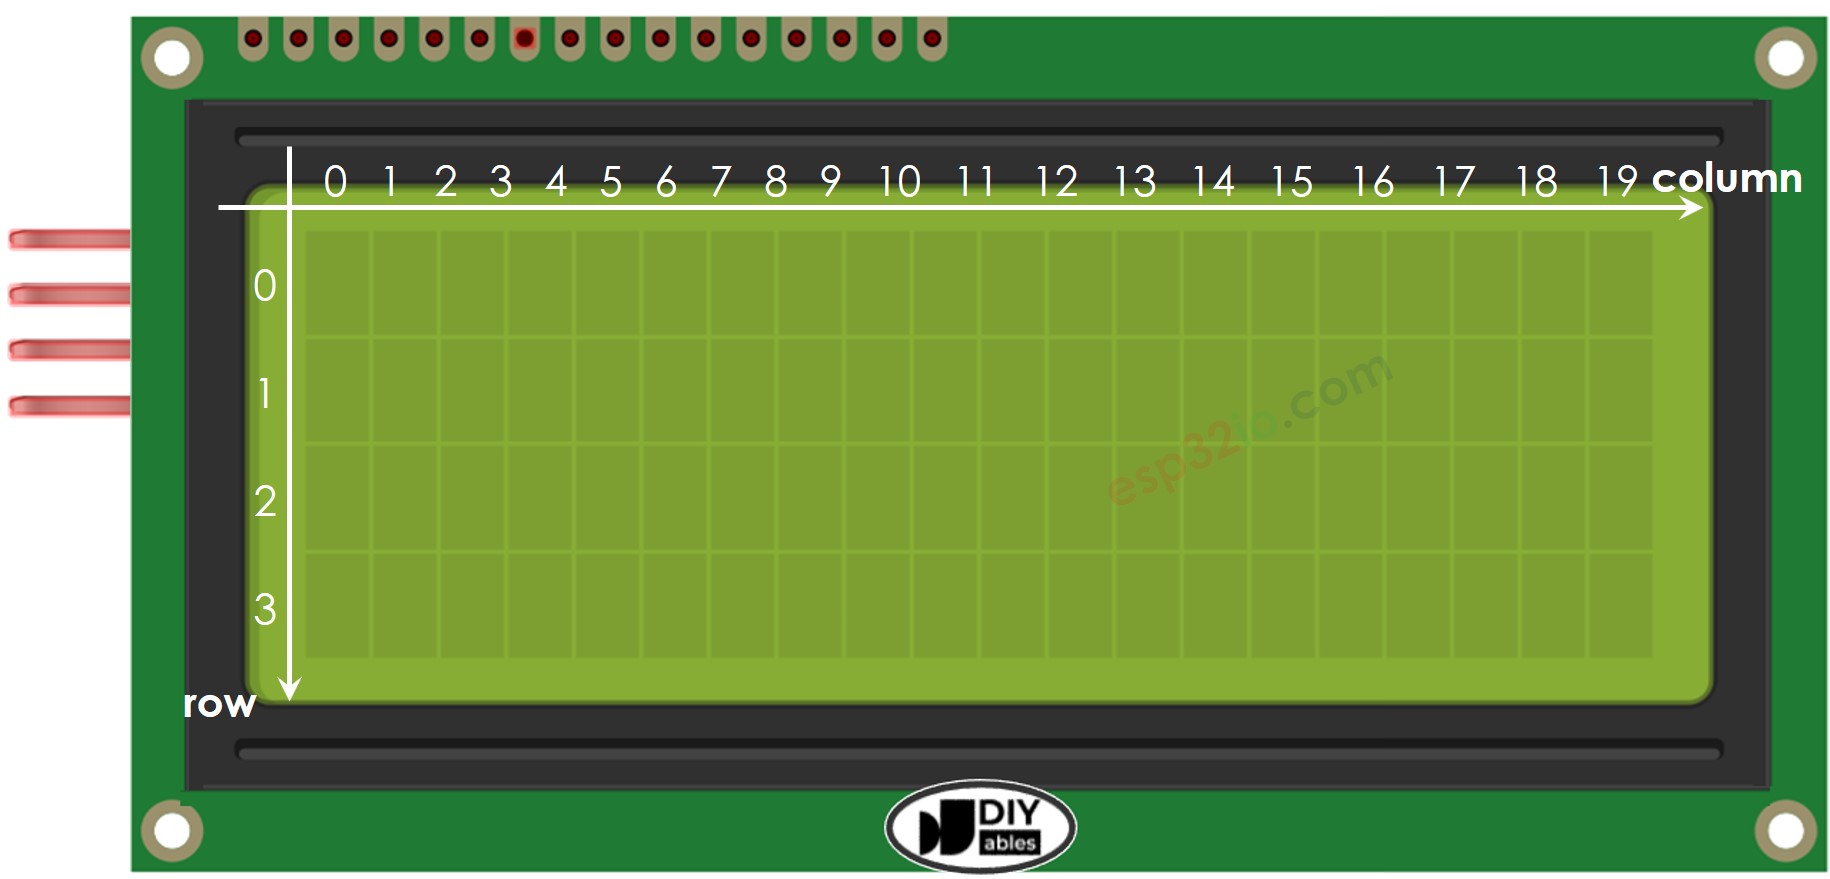
LCD I2C 20x4 includes 20 columns and 4 rows. the conlums and rows are indexed from 0.
Wiring Diagram
- How to connect ESP32 and lcd 20x4 using breadboard (powered via USB cable)

This image is created using Fritzing. Click to enlarge image
- How to connect ESP32 and lcd 20x4 using breadboard (powered via Vin pin)
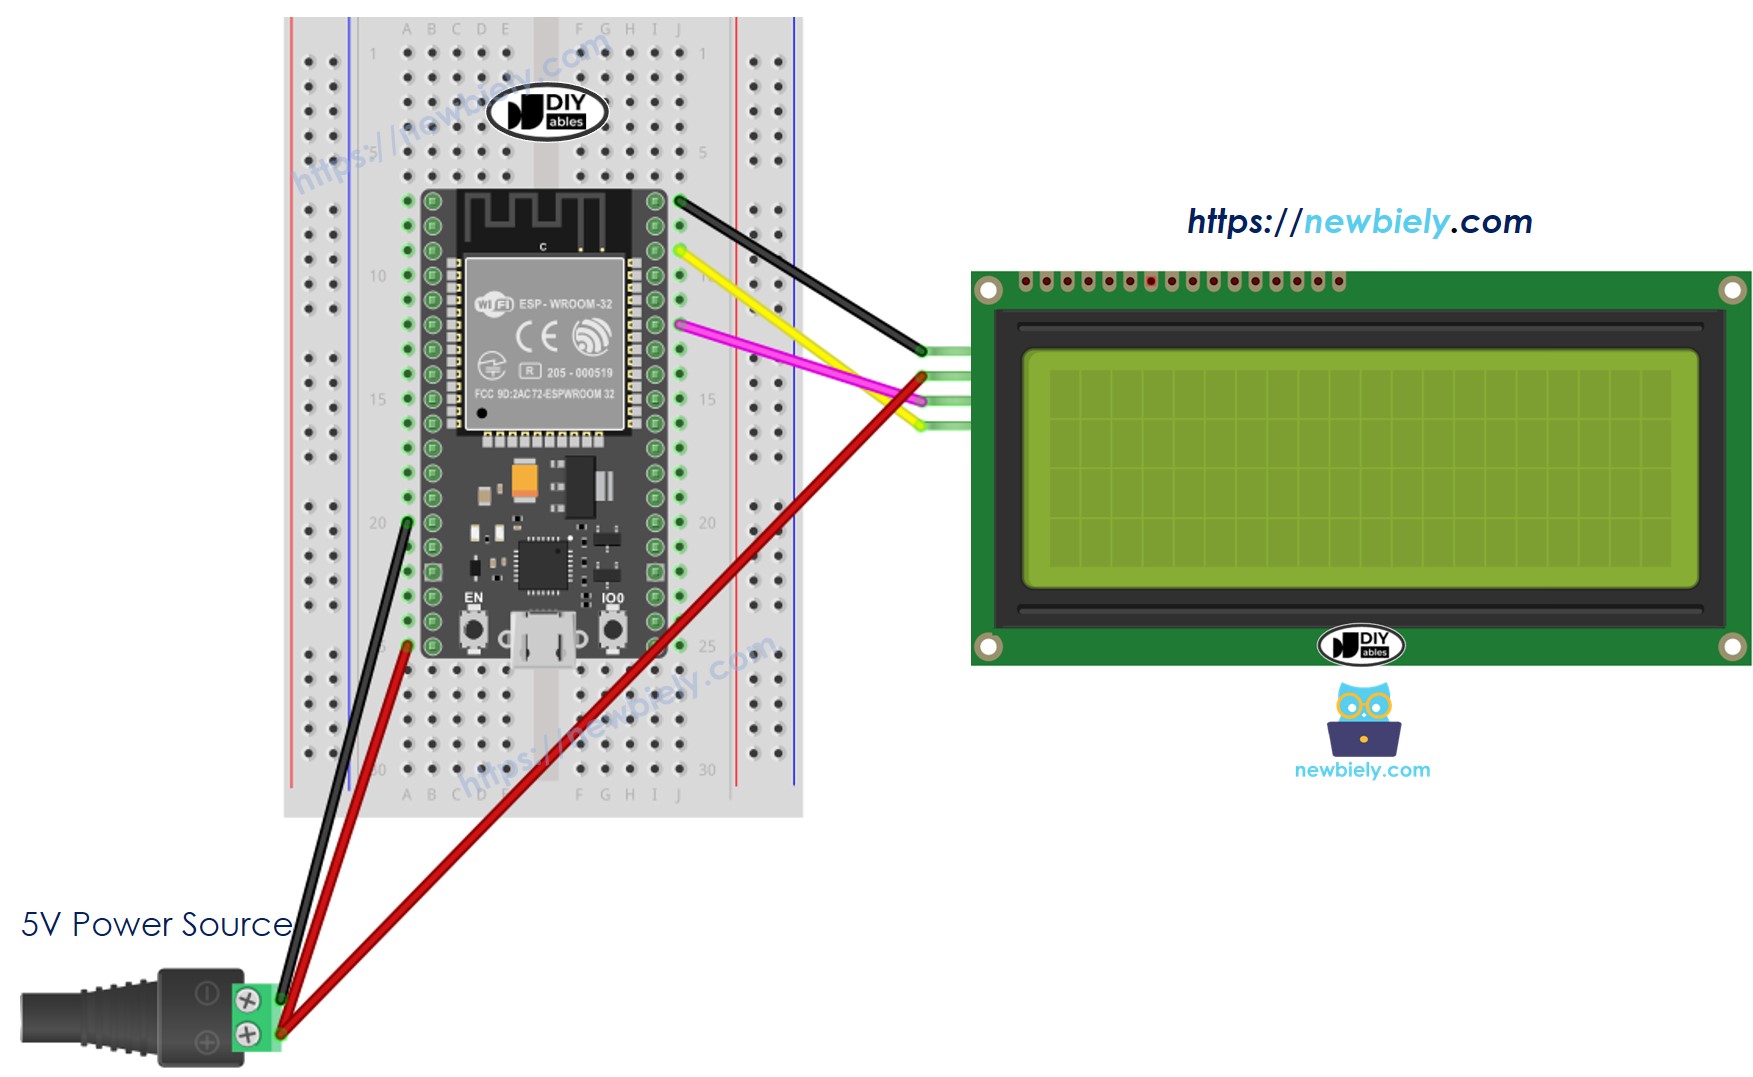
This image is created using Fritzing. Click to enlarge image
- How to connect ESP32 and lcd 20x4 using screw terminal block breakout board (powered via USB cable)
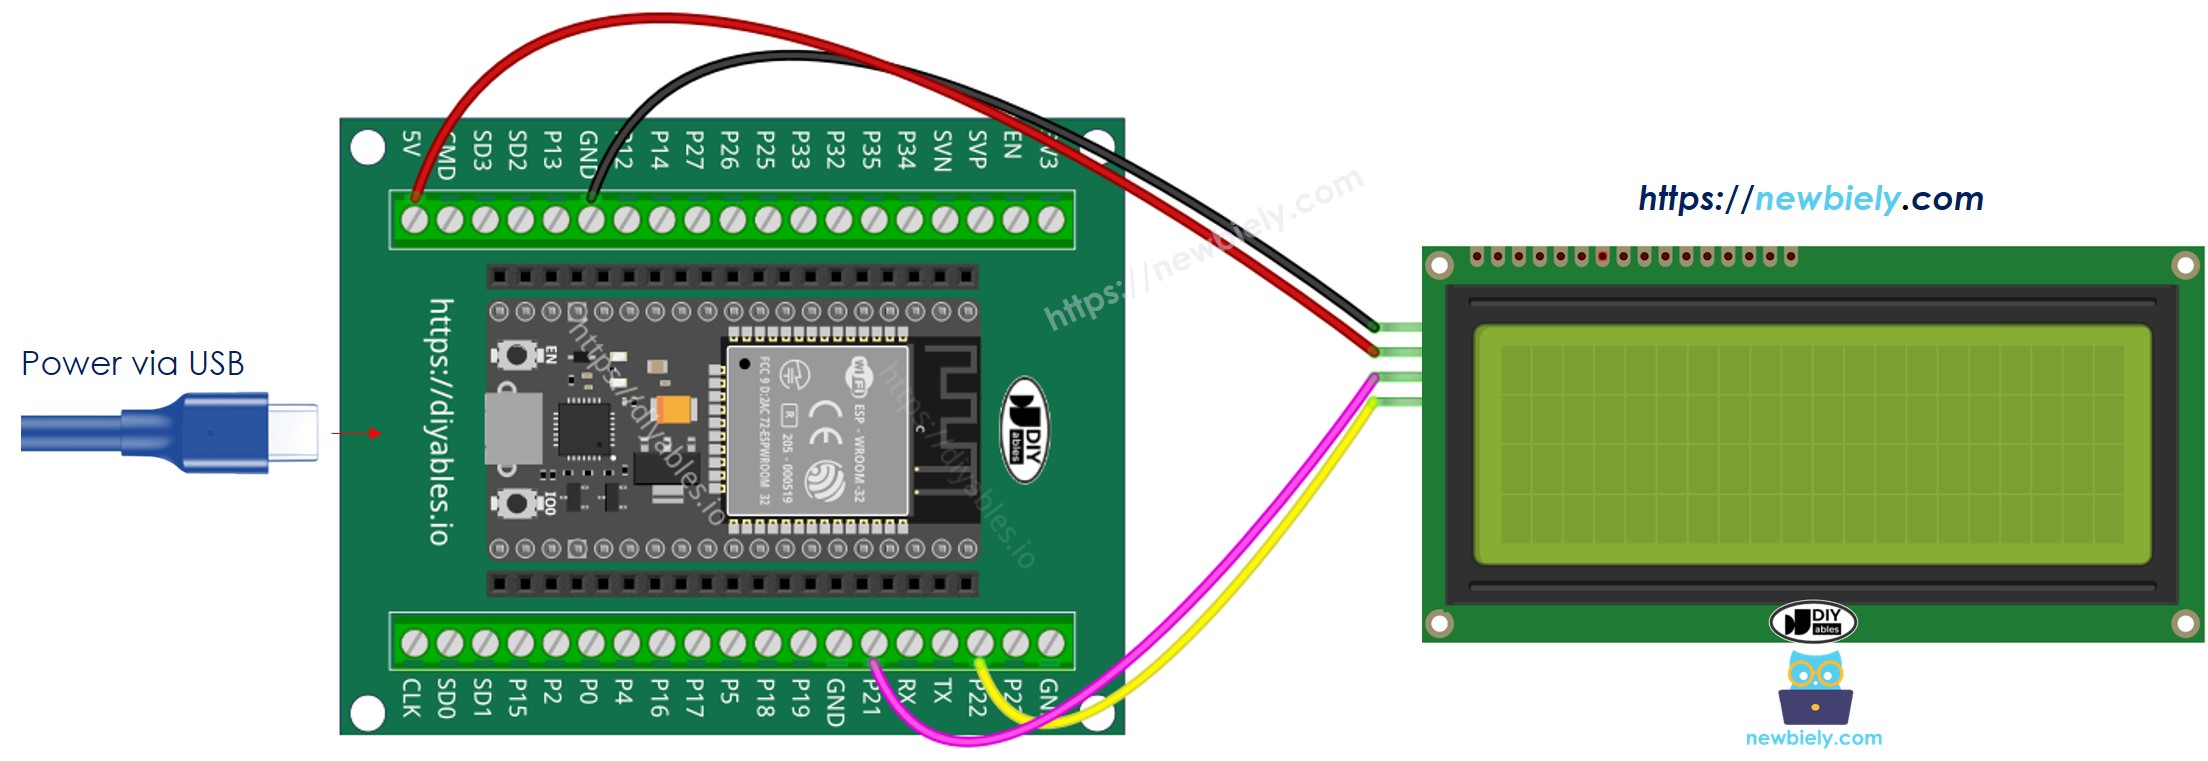
- How to connect ESP32 and lcd 20x4 using screw terminal block breakout board (powered via Vin pin)
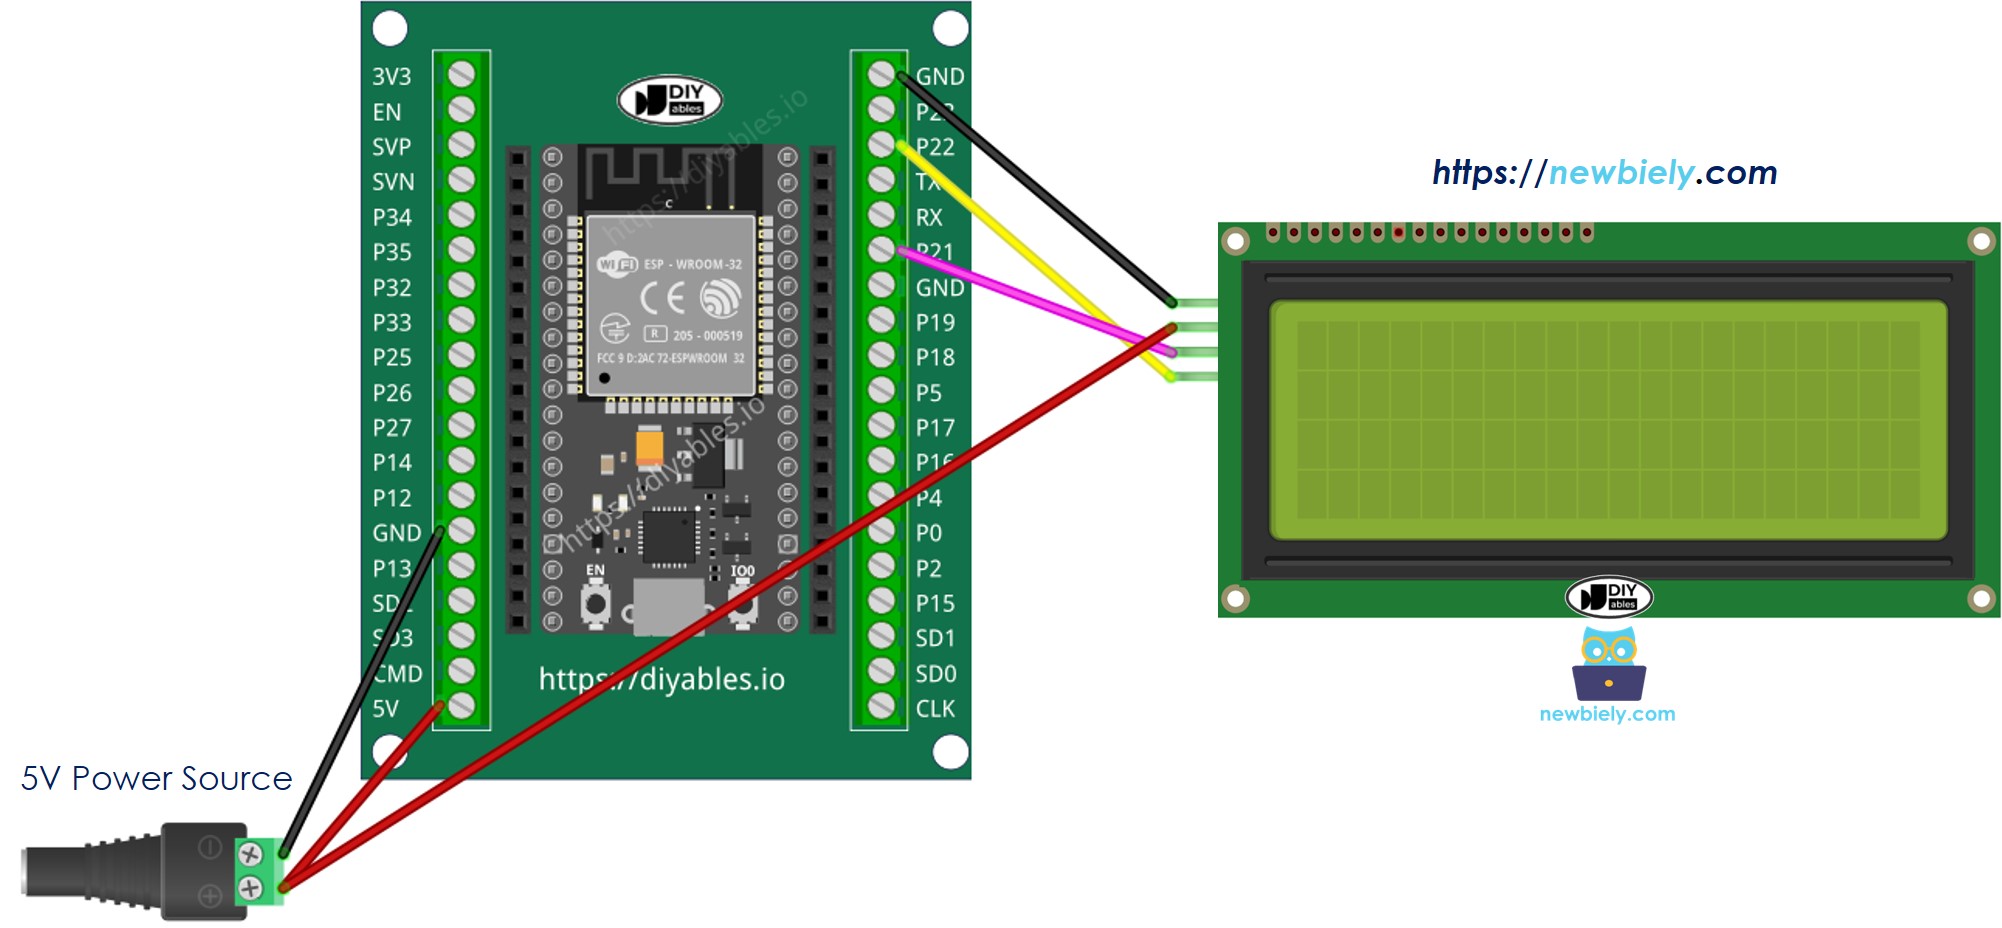
| LCD I2C | ESP32 |
|---|---|
| VCC | Vin 5V |
| GND | GND |
| SDA | GPIO21 (SDA) |
| SCL | GPIO22 (SCL) |
If you're unfamiliar with how to supply power to the ESP32 and other components, you can find guidance in the following tutorial: The best way to Power ESP32 and sensors/displays.
How To Program For LCD I2C
Thanks to the LiquidCrystal_I2C library, the using LCD is a piece of cake.
- Include the library:
- Declare a LiquidCrystal_I2C object with I2C address, the number of columns, the number of rows:
- Initialize the LCD.
- Move cursor to the desired position (column_index, row_index)
- Print a message to the LCD.
※ NOTE THAT:
The I2C address of LCD can vary according to the manufacturers. In the code, we used 0x27 that is specified by DIYables manufacturer
ESP32 Code
Quick Instructions
- If this is the first time you use ESP32, see how to setup environment for ESP32 on Arduino IDE.
- Do the wiring as above image.
- Connect the ESP32 board to your PC via a micro USB cable
- Open Arduino IDE on your PC.
- Select the right ESP32 board (e.g. ESP32 Dev Module) and COM port.
- Click to the Libraries icon on the left bar of the Arduino IDE.
- Search "LiquidCrystal I2C", then find the LiquidCrystal_I2C library by Frank de Brabander
- Click Install button to install LiquidCrystal_I2C library.
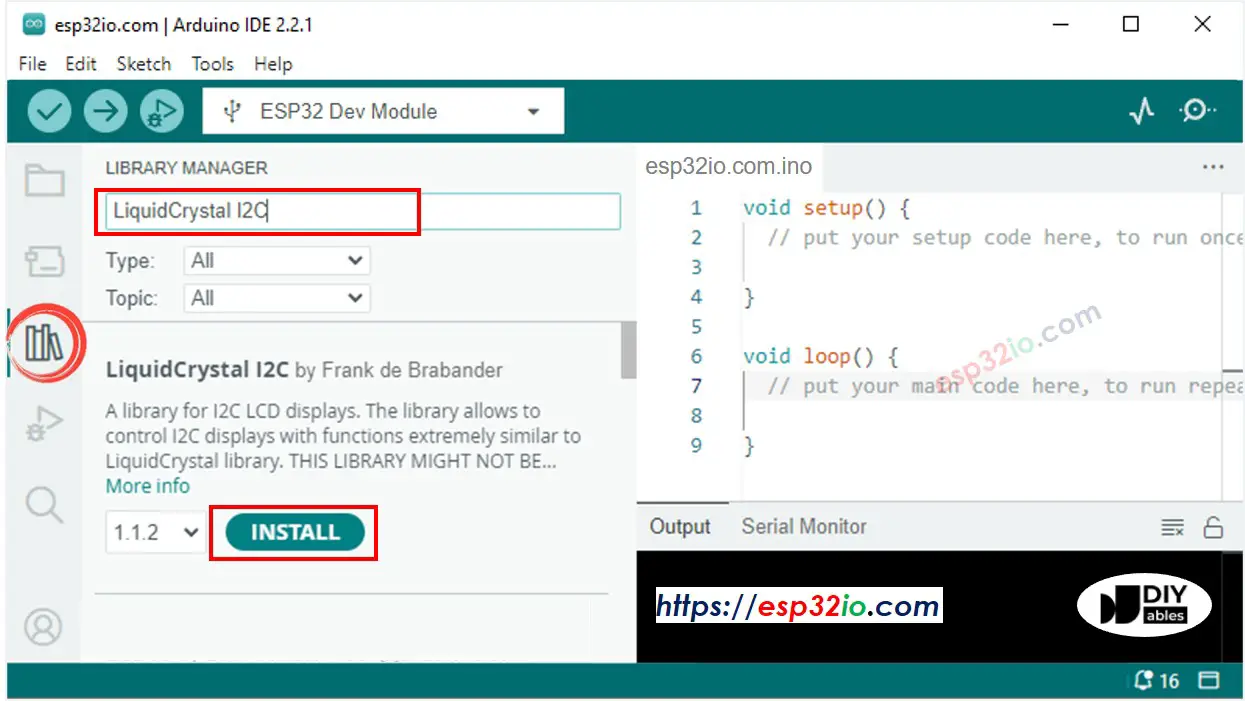
- Copy the above code and open with Arduino IDE
- Click Upload button on Arduino IDE to upload code to ESP32
- See the result on LCD
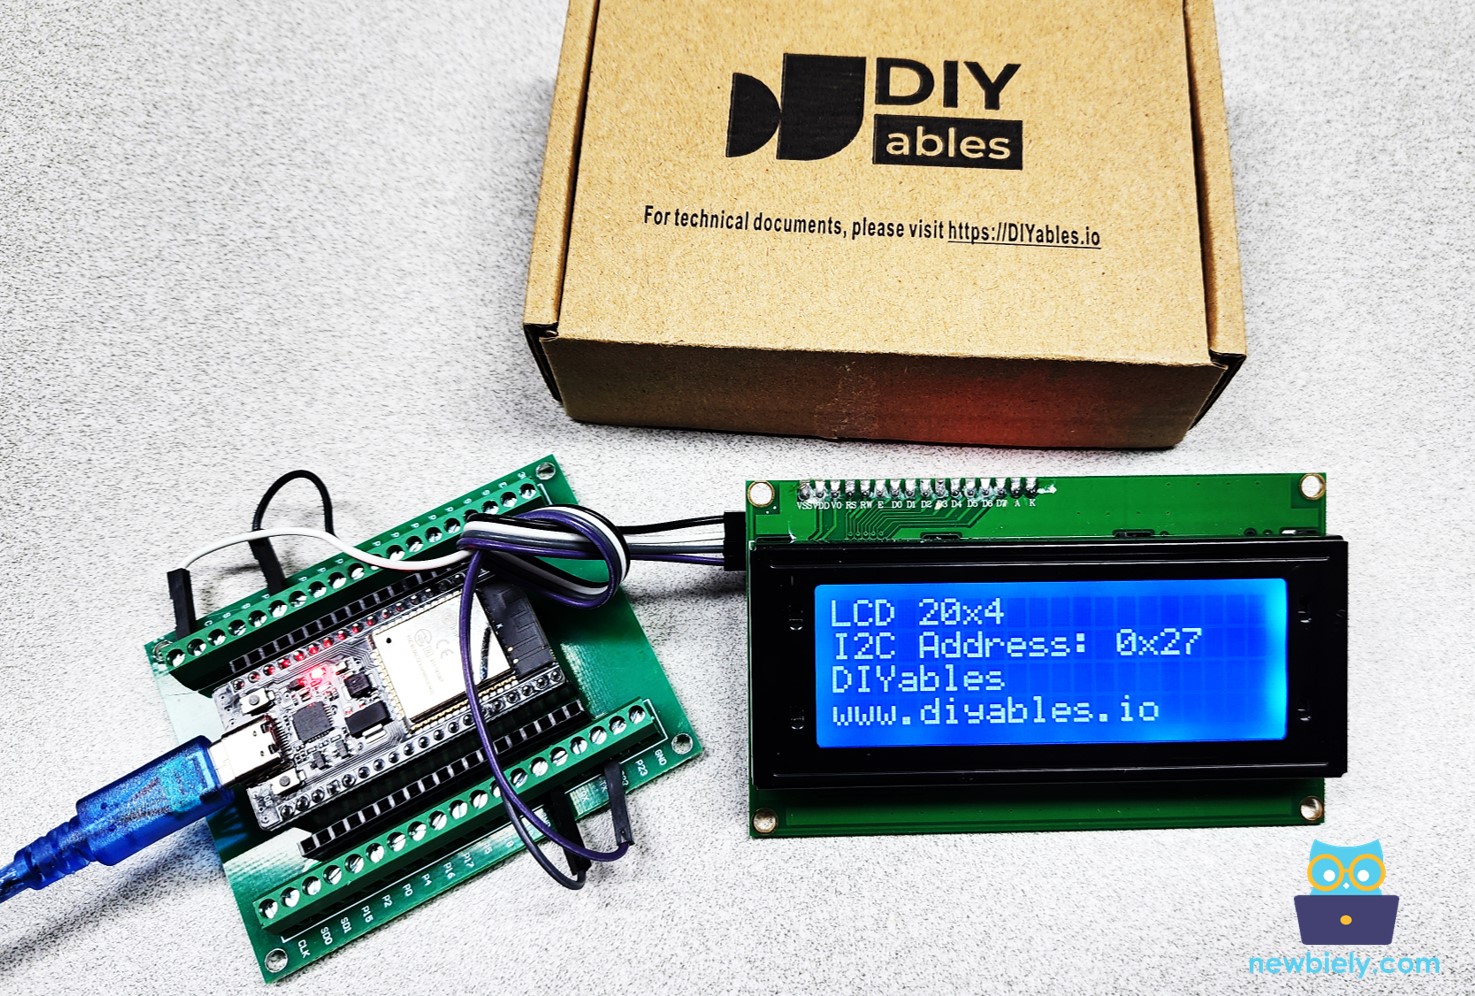
- Try modifying text and position
Guide for Choosing LCD I2C Displays
There are different types of LCD I2C displays you can buy, mainly varying in background color and how you select the I2C address.
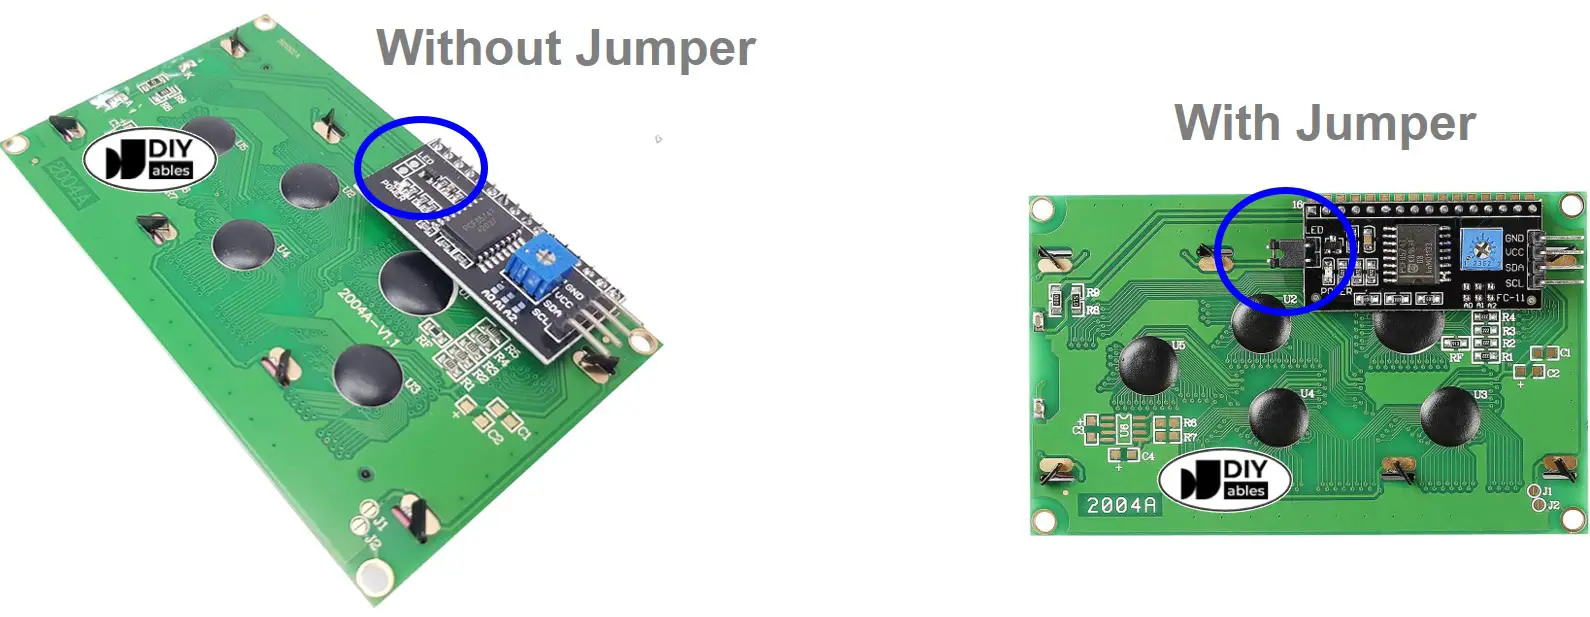
For background colors: Usually, you can choose between green and blue.
For I2C address selection:
- With a jumper: This option lets you switch between two I2C addresses. This is helpful if you want to use two LCDs at the same time in your code. However, if you are using only one LCD, it can give you a little trouble with the I2C addresses, and it takes up more space.
- Without a jumper: This setup has a fixed I2C address. It is very convenient when your project uses only one LCD display. Since most projects use just one LCD, this type is highly recommended.
Do More with LCD
Custom Character
If you want to display special characters or symbols (e.g. emoticon), see how to display the special characters on LCD.
Troubleshooting on LCD I2C
If LCD does not display anything, please see LCD does not work!- Checklist
