ESP32 - LM35 Temperature Sensor
This tutorial instructs you how to use ESP32 to read temperature value from LM35 temperature sensor, and print it to Serial Monitor.
Hardware Used In This Tutorial
Or you can buy the following kits:
| 1 | × | DIYables ESP32 Starter Kit (ESP32 included) | |
| 1 | × | DIYables Sensor Kit (18 sensors/displays) |
Introduction to LM35 Temperature Sensor
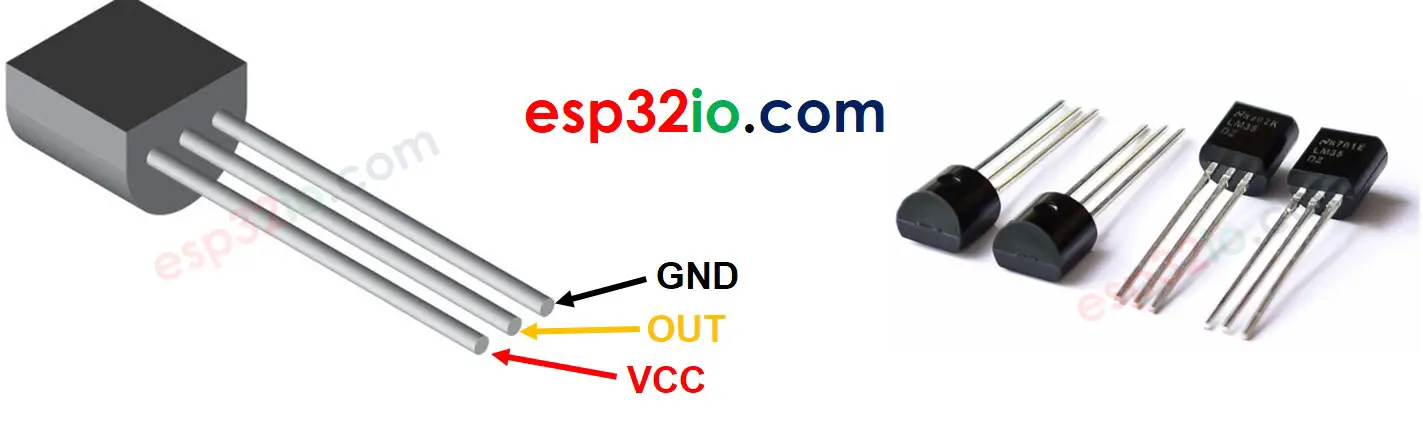
LM35 Temperature Sensor Pinout
LM35 temperature sensor has three pins:
- VCC pin: connect this pin to VCC (5V)
- GND pin: connect this pin to GND (0V)
- OUT pin: This pin outputs voltage in proportion to the temperature value.
How LM35 Temperature Sensor Works
The LM35 sensor outputs the voltage in linearly proportion to the Celsius temperature. The output scale factor of the LM35 is 10 mV/°C. By measuring the voltage on the LM32's OUT pin, we can calculate the temperature value.
Wiring Diagram between LM35 Temperature Sensor and ESP32
The wiring diagram with power supply from USB cable
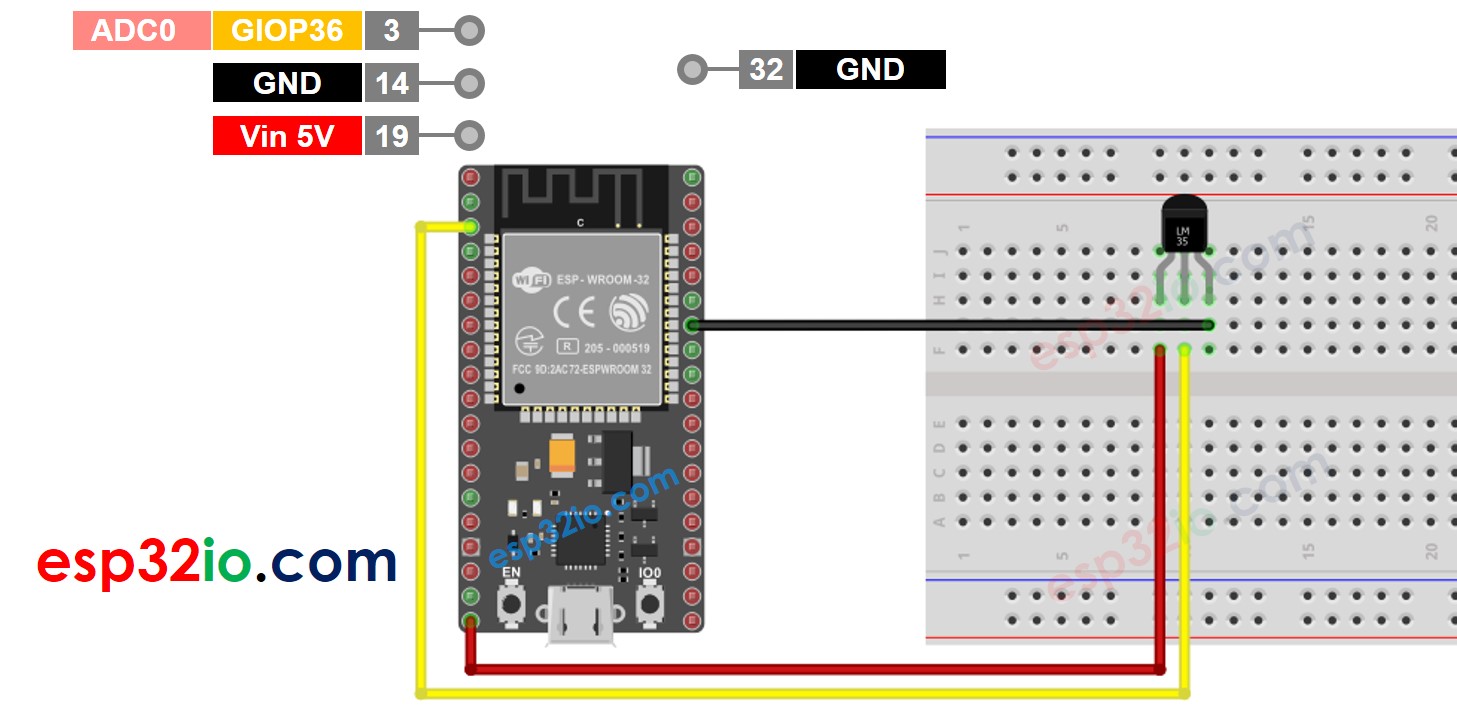
This image is created using Fritzing. Click to enlarge image
The wiring diagram with power supply from 5v adapter
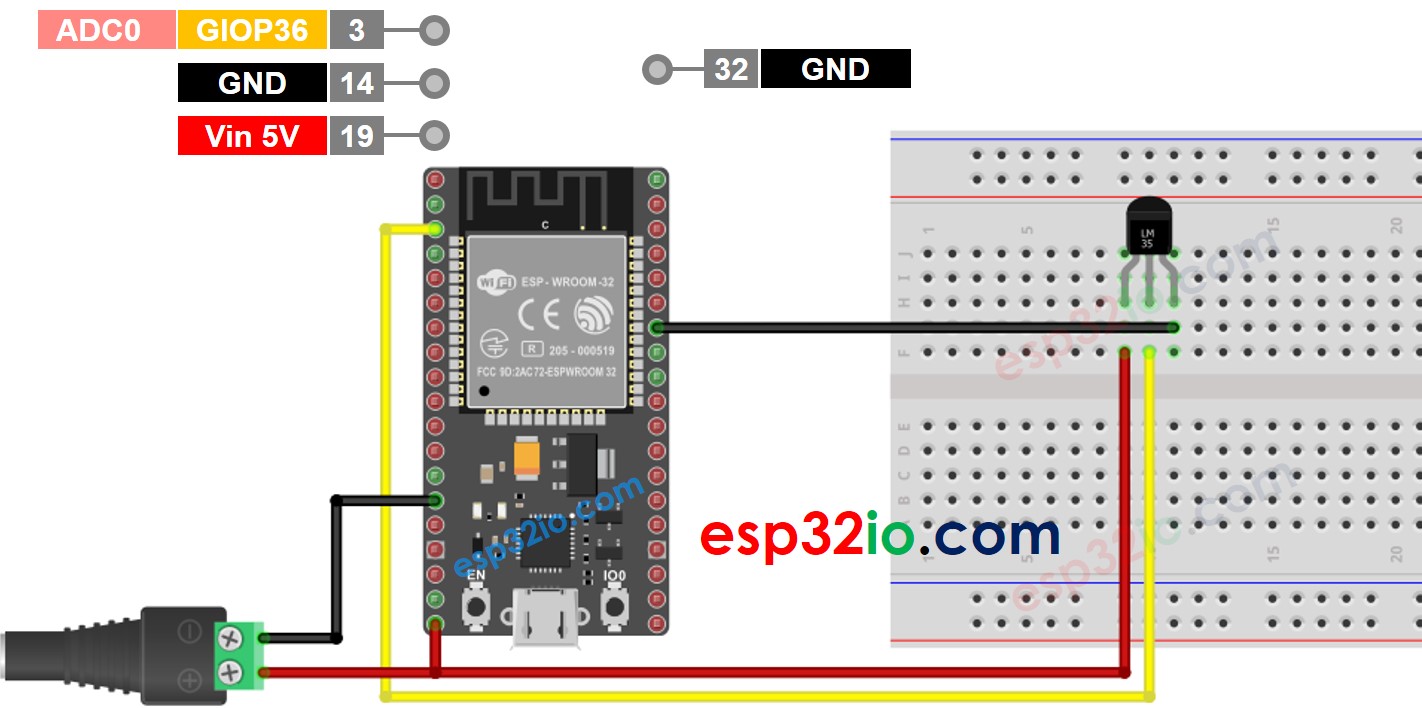
This image is created using Fritzing. Click to enlarge image
If you're unfamiliar with how to supply power to the ESP32 and other components, you can find guidance in the following tutorial: The best way to Power ESP32 and sensors/displays.
ESP32 Code
Quick Instructions
- If this is the first time you use ESP32, see how to setup environment for ESP32 on Arduino IDE.
- Copy the above code and paste it to Arduino IDE.
- Compile and upload code to ESP32 board by clicking Upload button on Arduino IDE
- Make the sensor colder or hotter. For example, putting the sensor near an ice cup
- See the result on Serial Monitor. It looks like the below:
※ NOTE THAT:
This tutorial uses the analogRead() function to read values from an ADC (Analog-to-Digital Converter) connected to a LM35 sensor. The ESP32 ADC is good for projects that do NOT need high accuracy. However, for projects that need precise measurements, please note:
- The ESP32 ADC is not perfectly accurate and might need calibration for correct results. Each ESP32 board can be a bit different, so you need to calibrate the ADC for each individual board.
- Calibration can be difficult, especially for beginners, and might not always give the exact results you want.
For projects that need high precision, consider using an external ADC (e.g ADS1115) with the ESP32 or using an Arduino, which has a more reliable ADC. If you still want to calibrate the ESP32 ADC, refer to ESP32 ADC Calibration Driver
Video Tutorial
Making video is a time-consuming work. If the video tutorial is necessary for your learning, please let us know by subscribing to our YouTube channel , If the demand for video is high, we will make the video tutorial.