ESP32 - MySQL
This tutorial instructs you how to use ESP32 to insert/update data to MySQL database, or read the data from MySQL database
Hardware Used In This Tutorial
Or you can buy the following kits:
| 1 | × | DIYables ESP32 Starter Kit (ESP32 included) | |
| 1 | × | DIYables Sensor Kit (18 sensors/displays) |
ESP32 - MySQL
There are two terms in MySQL that beginners usually get confused: MySQL Database and MySQL server. They are different. Howerver, if you are a beginner, you can assume that they are the same. Later, You will find the differencesin your learning process.
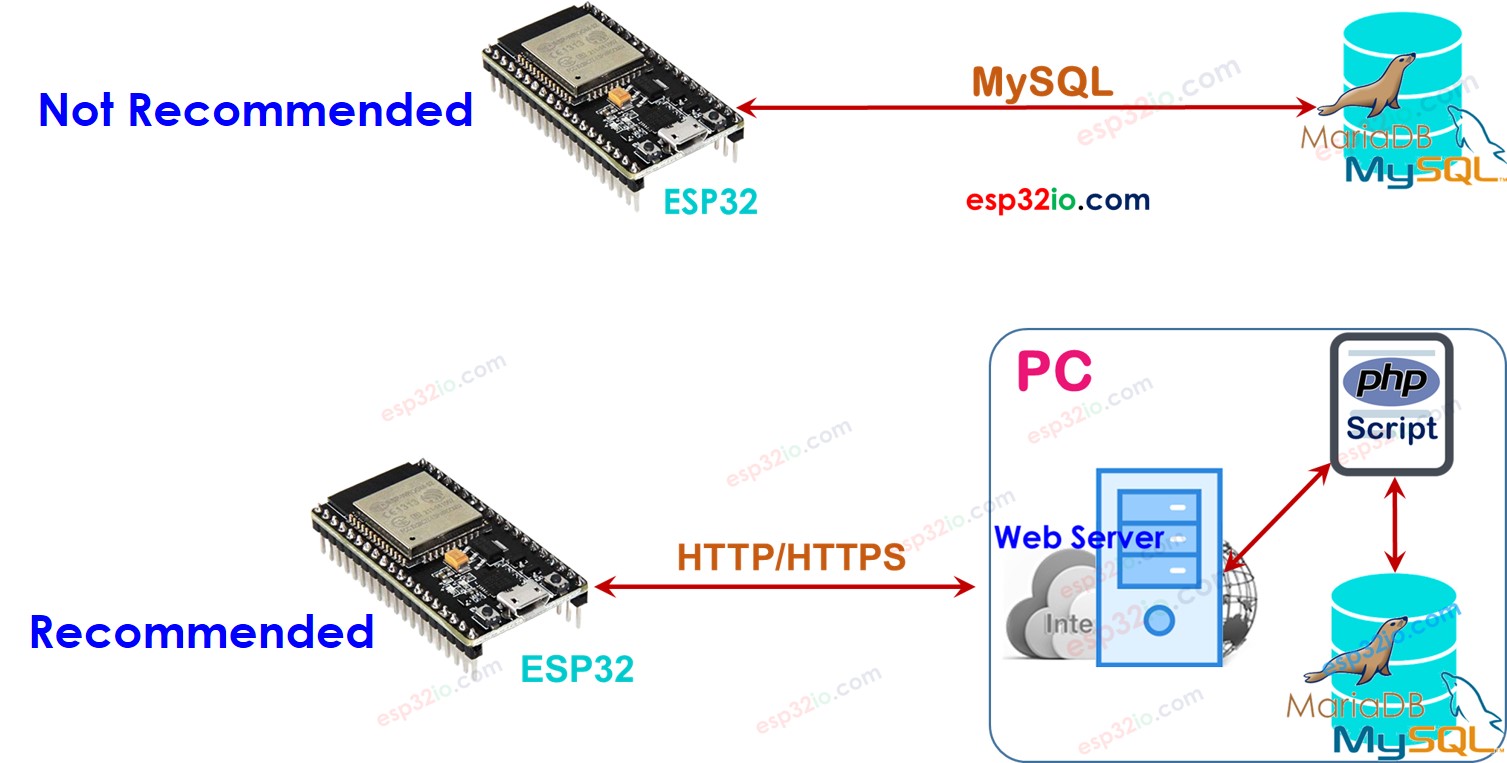
ESP32 can interact with the MySQL database in two ways:
- Directly: ESP32 connects directly to MySQL server and interacts with MySQL server using MySQL protocol
- Indirectly: ESP32 connects indirectly to MySQL server via a web server using HTTP/HTTPS protocol.
Which one is the best for ESP32? Let's find out!
ESP32 interacts directly to MySQL Server
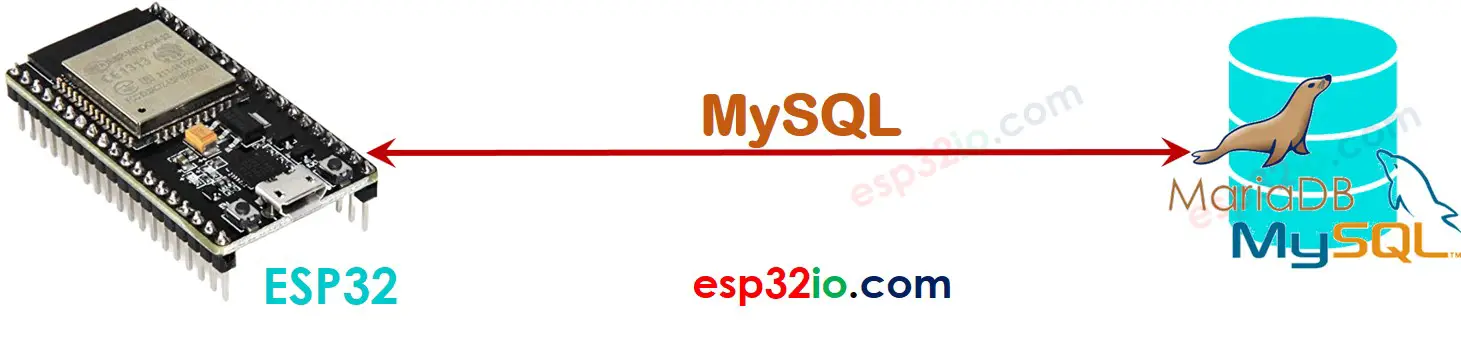
Interacting with MySQL directly seems to be simple but there are a lot of drawbacks:
- We have to grant remote access permissions to a MySQL user account ⇒ This is risky in the security aspect, even if we grant a limited privileges the user account.
- ESP32 MUST store and send MySQL queries to MySQL server ⇒ Need to write much ESP32 code, and also exhaust ESP32 resources (Memory and CPU usage).
- ESP32 MUST process a complex MySQL response (very big size of data in some cases) ⇒ This can make ESP32 run out of memory
- MySQL server must process the raw data ⇒ increases the complexity of MySQL script.
- Most of the MySQL libraries for ESP32 do not support SSL/TLS ⇒ The data and username/password is sent without encryption ⇒ another security issue.
ESP32 interacts indirectly to MySQL Server via HTTP/HTTPS
Interacting with MySQL indirectly via HTTP/HTTPS solves all problems of the direct access.
How it works
- Step 1: ESP32 includes the data to HTTP/HTTPS request and send the request to the Web server
- Step 2: Web server runs a PHP script that handles the request from ESP32
- Step 3: PHP script extracts the data from the HTTP request, processes the data, and then interacts with MySQL database.
- Step 4: PHP script processes the result and returns only the necessary result to ESP32 via HTTP response
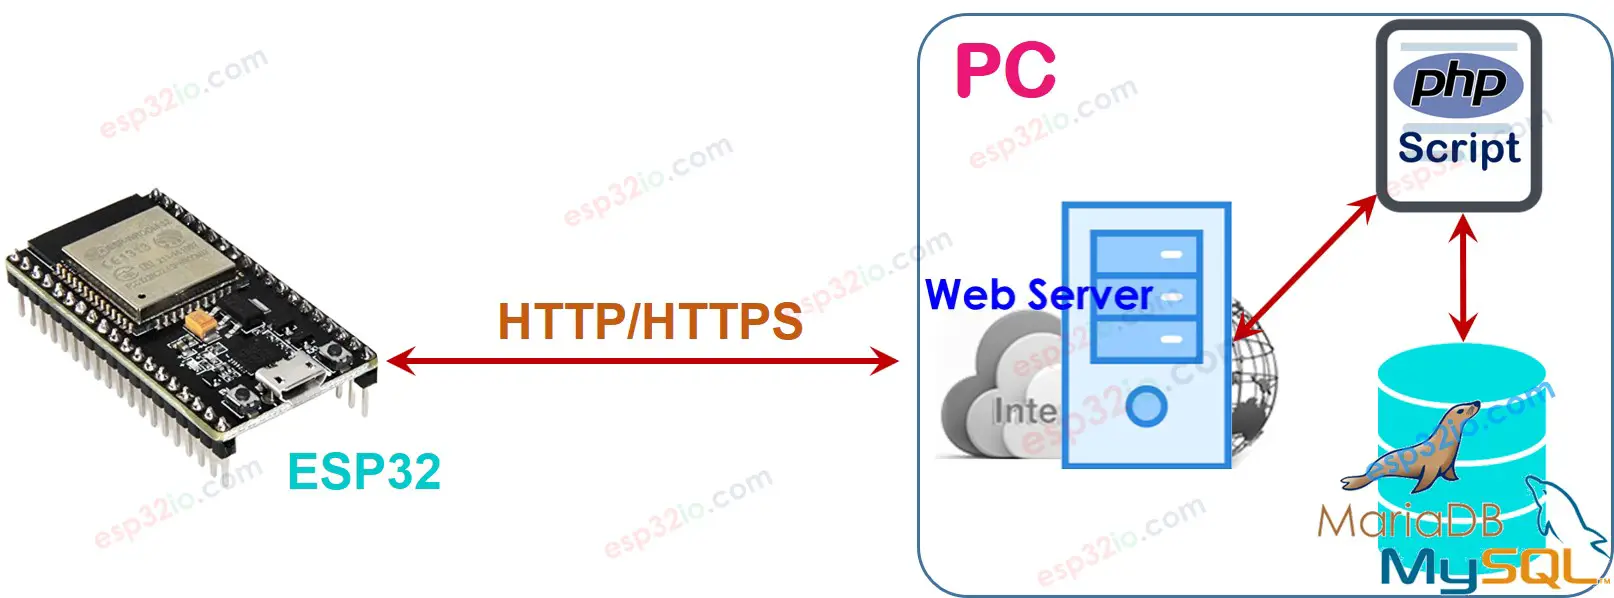
We are going to install MySQL server, Web server, and PHP on the PC. In the fact, we can install it on a dedicated server or cloud service such as AWS EC2.
The below is how the indirect way solve the problems of the direct way.
- We can install HTTP server and the MySQL server in the same physical server, We can give a limit access to a MySQL user account(e.g. localhost access ONLY) ⇒ secure
- The username/password of the MySQL account is stored on the server ⇒ secure.
- Data is processed by a PHP script ⇒ This reduces the load and complexity for ESP32 and MySQL server.
- PHP script can process the data much easier than the ESP32 code and MySQL script ⇒ Simplify ESP32 code and MySQL script
- PHP script can process the data and send only necessary data to ESP32 (Step 4) to prevent ESP32 from running out of memory.
- ESP32 can make HTTPS request easily ⇒ the data is encrypted.
Note that the authentication between ESP32 and Web Server should be independent with MySQL authentication. For example, the HTTP username/password should be different from the MySQL username/password.
Because of those advantages, This tutorial will use the indirect way.
ESP32 To MySQL via HTTP/HTTPS
The below are steps that we need to do:
- Installing XAMPP package that includes MySQL server, Web server, and PHP on your PC
- Creating a MySQL user account
- Creating a MySQL database
- Creating a MySQL table
- Writing one or more PHP script files
- Writing ESP32 code
1. Installing MySQL server, Web server, and PHP on your PC
- Download and install the XAMPP from this link. After installation, check the C:\xampp\htdocs folder on your PC. This is where you put PHP code (see later).
- Open XAMPP Control Panel
- Click Start buttons to enable MySQL and Web server (as the below image)

2. Creating a MySQL User account
We will create a MySQL account with localhost access permissions only.
- Even if attackers know the username/password, they cannot access your MySQL database unless they take control of your PC.
- This username/password will be used by PHP to connect to the MySQL database.
This tutorial creates a MySQL user account with username and password are ESP32 and esp32io.com, respectively:
- Open the Command Prompt on your PC. Do not close it until the end of the tutorial.
- Type the following command on Command Prompt:
- By default, MySQL has THE root account without password. It is highly recommend to set the password for the root account (e.g. YOUR_ROOT_PASSWORD) for the security reason. Type the below command on the Command Prompt:
- Type the below command on Command Prompt to login to MySQL server:
- Type YOUR_ROOT_PASSWORD and press Enter
- Let's create a MySQL user account with username and passowrd are ESP32 and esp32io.com, respectively by coping the below commands and paste on Command Prompt:
You created and MySQL user account successfully. Write down the username/password. It will be used in PHP script.
3. Creating a MySQL database
Create a database db_esp32 by typing the following command on Command Prompt:
4. Creating a MySQL table
Create a table tbl_temp by coping the below commands and paste on Command Prompt:
6. Write PHP script files
Create a insert_temp.php by using any text editor (e.g. Notepad/Notepad++). We will write the script in this file to extract the temperature value from HTTP Request and inserts the temperature value into the database.
- Put this file inside C:\xampp\htdocs folder
- Get your PC's IP address. If you do not know how to, google it.
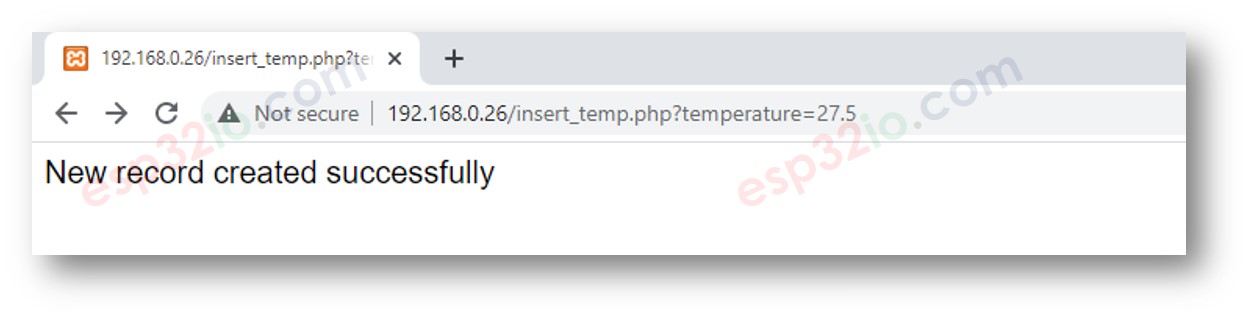
- Test PHP code by open a web browser (e.g. Chrome) and access this link: http://192.168.0.19/insert_temp.php?temperature=26.2. Note that you need to replace the above IP address with your PC address.
- The web browser shows as below:
- Check if data is stored in database by typing the following command on Command Prompt:
As you can see, the temperature of 26.2 is stored in the database. The next step is to write ESP32 code that makes a HTTP Request to the web server on your PC.
7. Write ESP32 code
The below ESP32 code makes HTTP to your PC to insert a temperature of 30.5°C into the database
Quick Instructions
- If this is the first time you use ESP32, see how to setup environment for ESP32 on Arduino IDE.
- Do the wiring as above image.
- Connect the ESP32 board to your PC via a micro USB cable
- Change IP address on the code by your PC's IP address
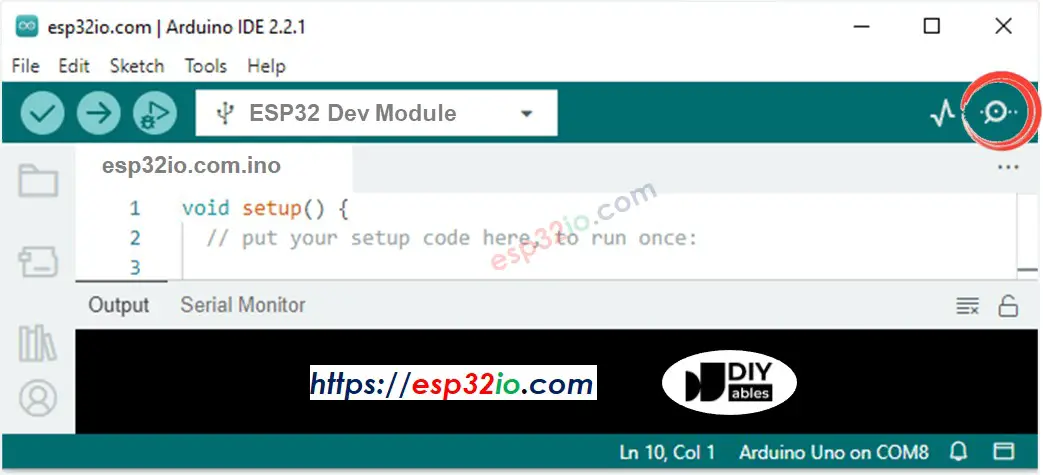
- Compile and upload code to ESP32
- Open Serial Monitor on Arduino IDE
- The result on Serial Monitor
- Check if data is stored in database by using the following command on Command Prompt:
As you can see, the temperature 30.5 is stored in database.
How ESP32 insert, update or get data to/from MySQL database
The above example shows how to insert data into the MySQL database. It is similar for updating and reading data from the database. You just need to modify MySQL query on the PHP code. You can learn more on W3Schools.com
Video Tutorial
Making video is a time-consuming work. If the video tutorial is necessary for your learning, please let us know by subscribing to our YouTube channel , If the demand for video is high, we will make the video tutorial.