ESP32 - Piezo Buzzer

This tutorial instructs you learn how to use the buzzer with ESP32, In detail, we will learn:

Hardware Used In This Tutorial

1×ESP-WROOM-32 Dev Module
1×USB Cable Type-C
1×Piezo Buzzer
1×Breadboard
1×Jumper Wires
1×(Optional) DC Power Jack
1×(Recommended) ESP32 Screw Terminal Adapter

Or you can buy the following sensor kit:

1×DIYables Sensor Kit 30 types, 69 units
Disclosure: some of these links are affiliate links. We may earn a commission on your purchase at no extra cost to you. We appreciate it.

Introduction to Piezo Buzzer

The Piezo Buzzer is an electronic component that can make sound, beep or even play music.

Available in the market is a versatile 3V-24V active buzzer that can function as both a 3-5V active buzzer and a high-voltage buzzer (12V and above).

  • When directly connected to an Arduino pin, this buzzer produces a standard sound, making it ideal for applications such as keypad sound indicators.
  • When connected to a high-voltage source through a relay, it emits a loud sound, making it well-suited for warning signals.

Piezo Buzzer Pinout

Piezo Buzzer usually includes two pins:

  • Positive (+) pin: The ESP32 generate the control signal to this pin (directly, or indirectly via relay)
  • Negative (-) pin: connect this pin to GND (0V)
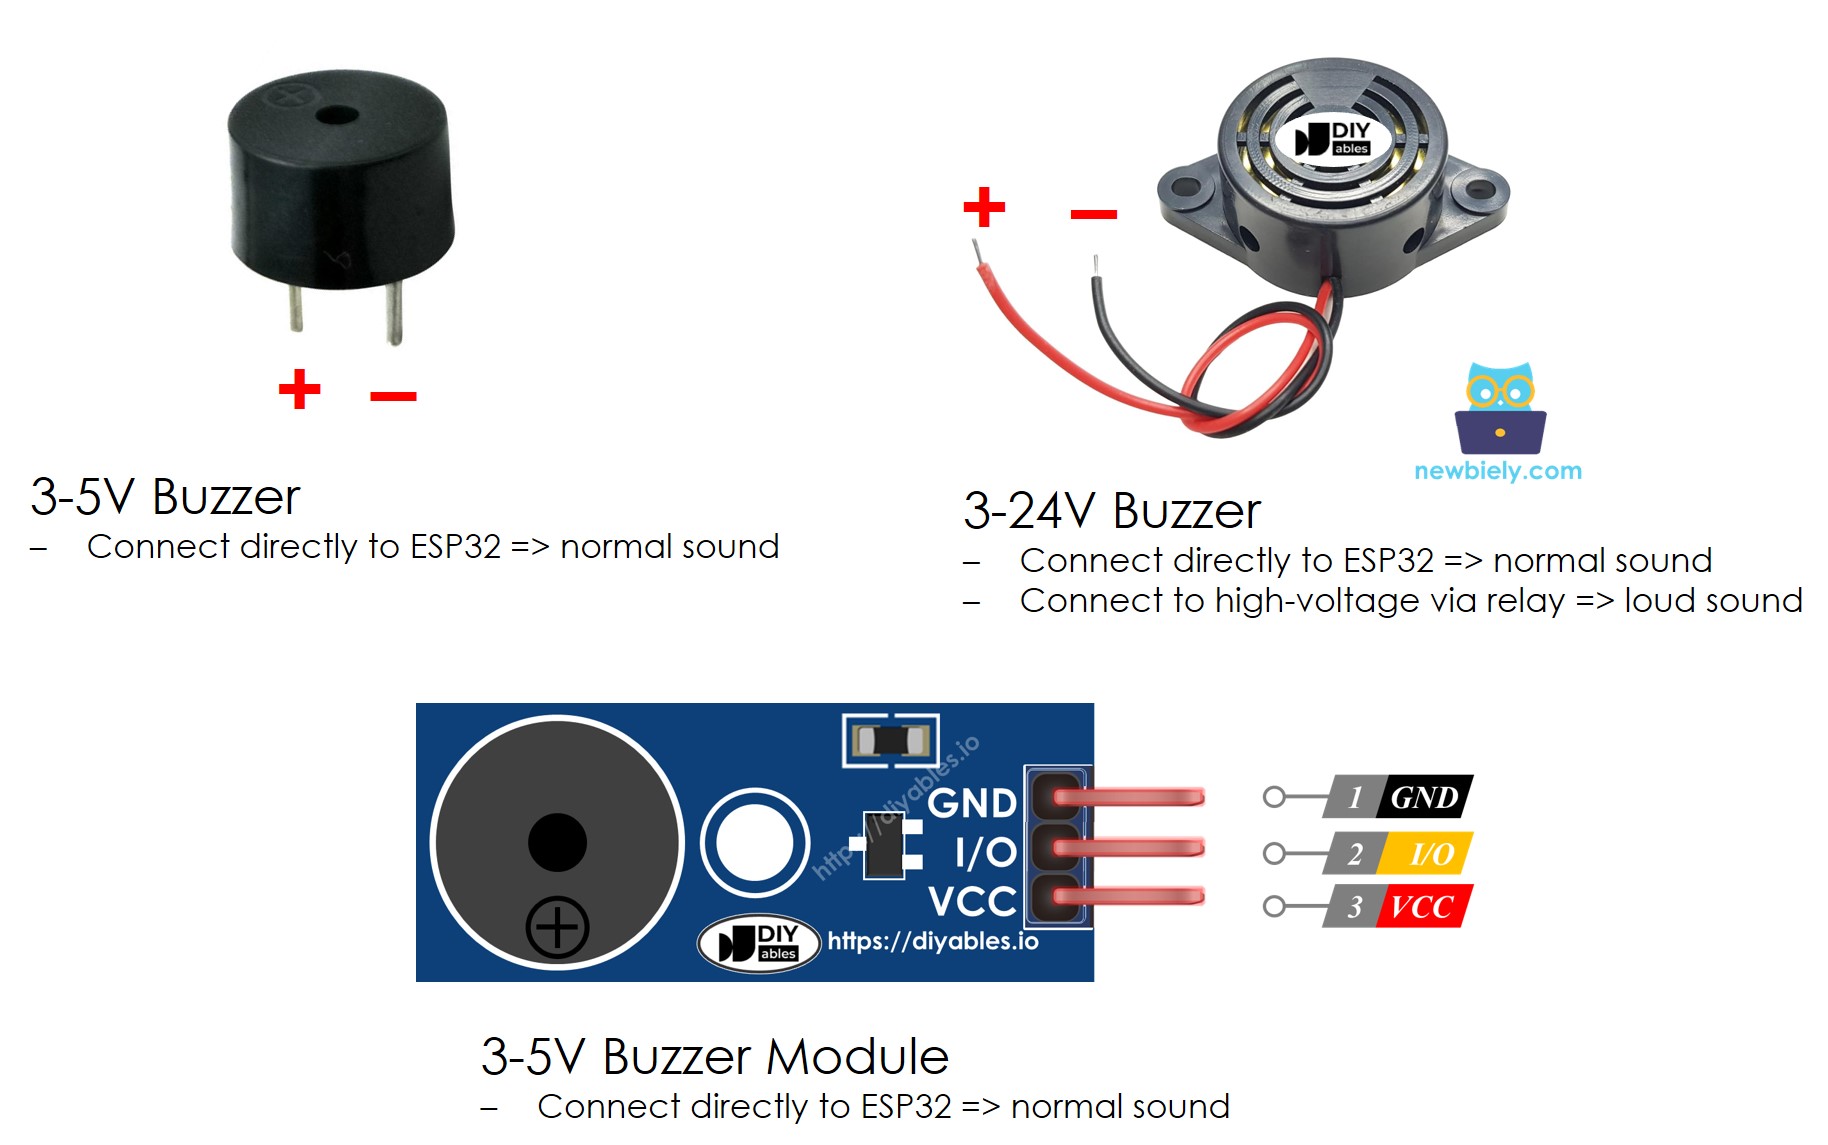
Piezo Buzzer Pinout

How Piezo Buzzer Works

See How Piezo Buzzer works

Wiring Diagram between Piezo Buzzer and ESP32

ESP32 Piezo Buzzer Wiring Diagram

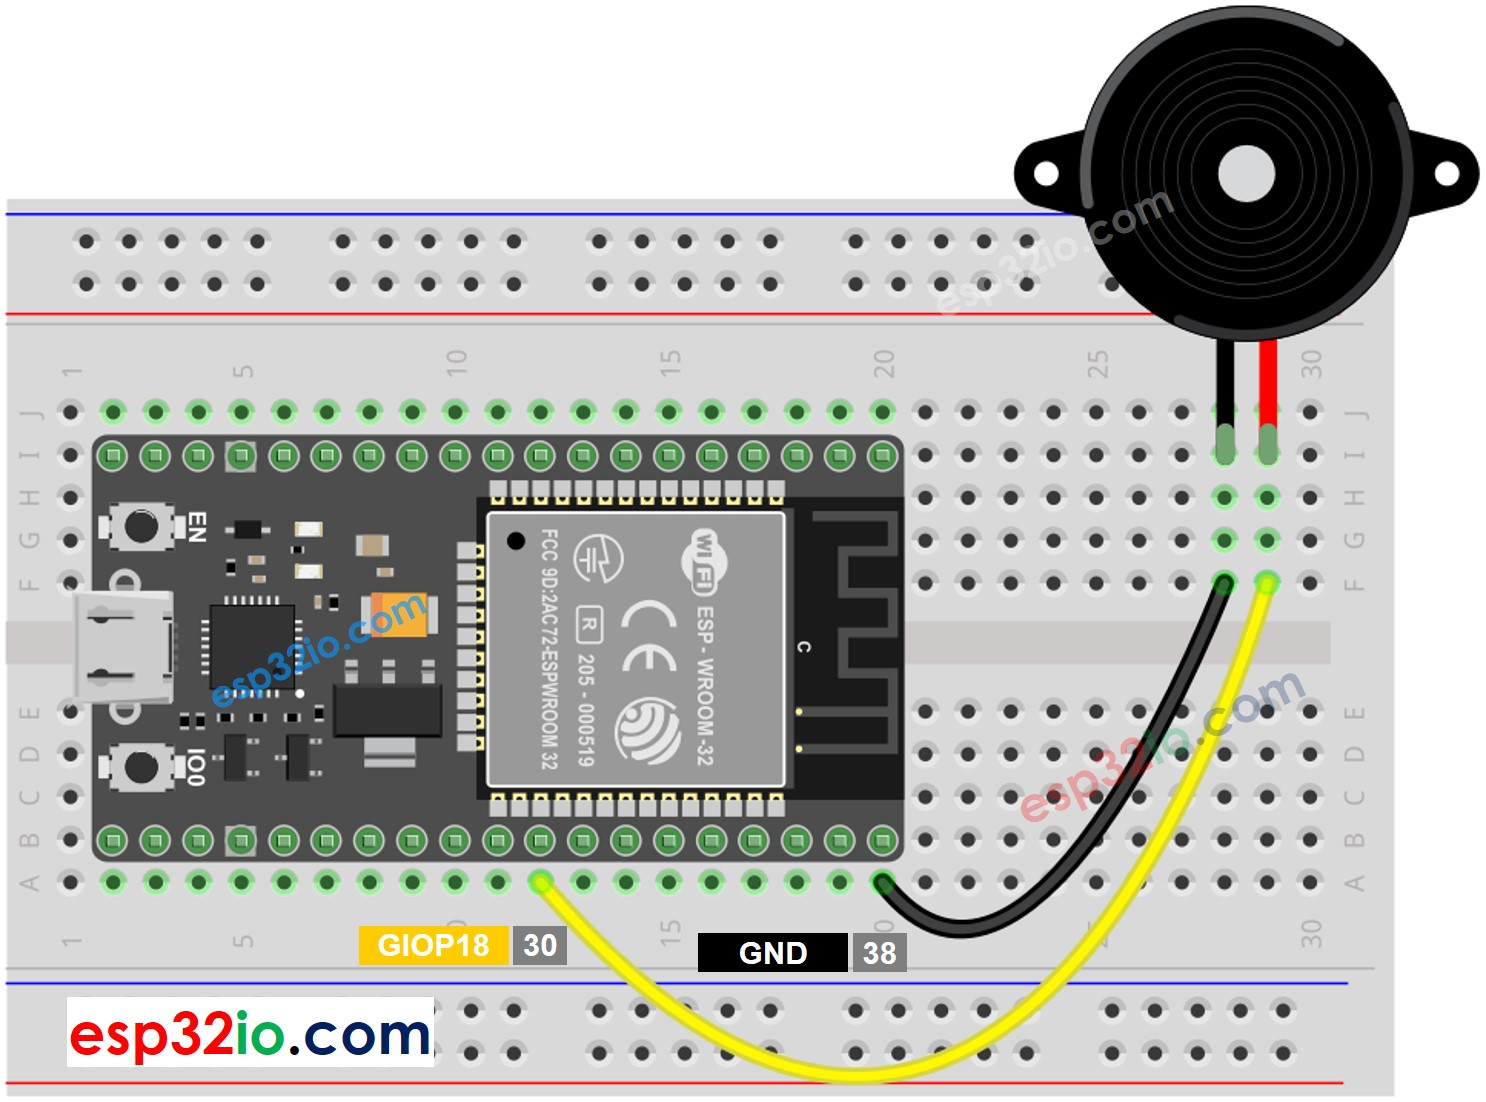
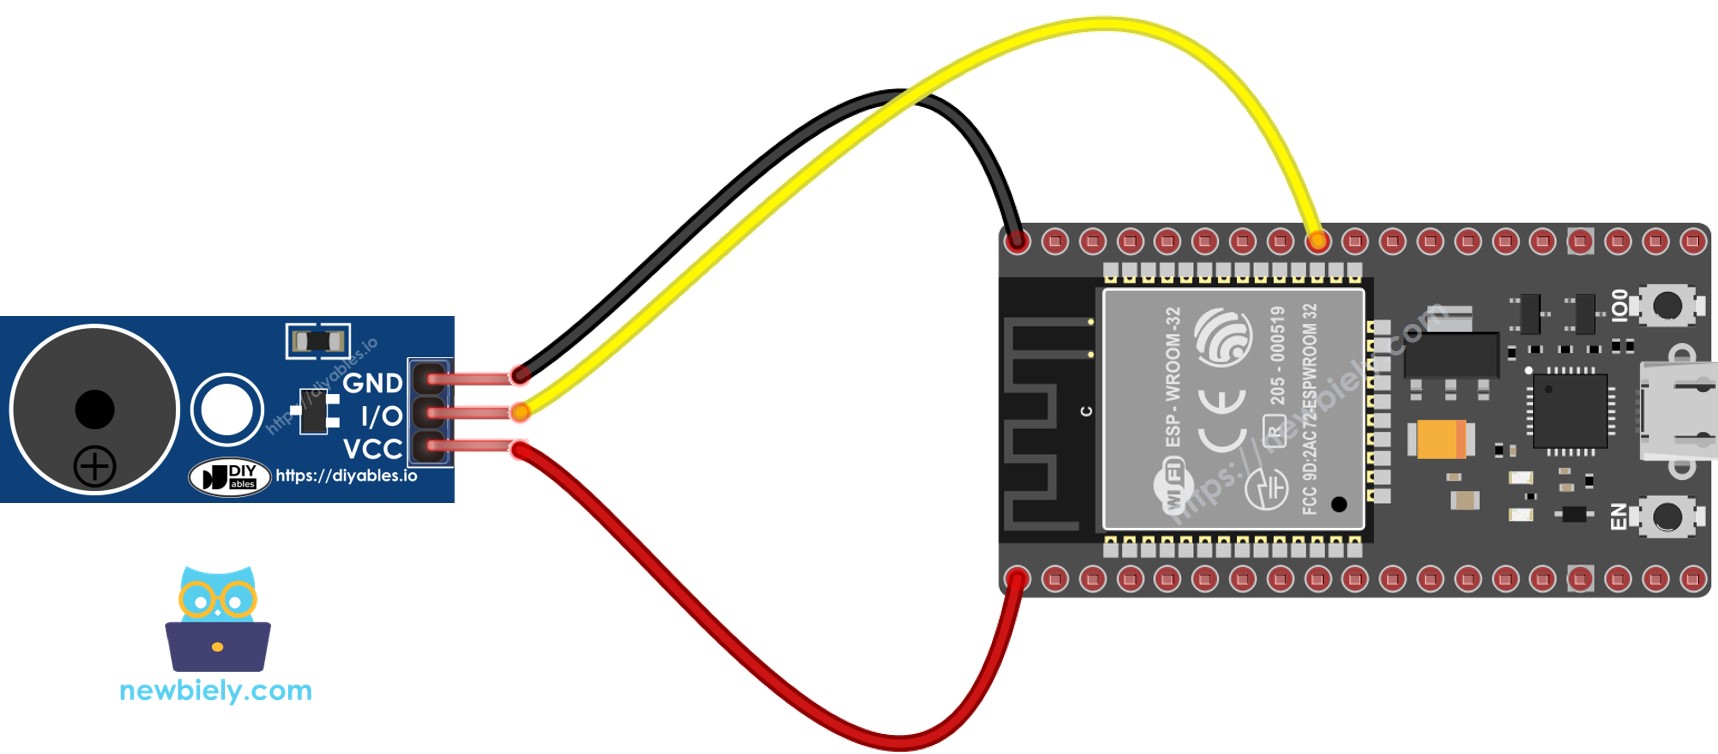
This image is created using Fritzing. Click to enlarge image

If you're unfamiliar with how to supply power to the ESP32 and other components, you can find guidance in the following tutorial: How to Power ESP32.

ESP32 Code

Quick Instructions

  • If this is the first time you use ESP32, see how to setup environment for ESP32 on Arduino IDE.
  • Do the wiring as above image.
  • Connect the ESP32 board to your PC via a micro USB cable
  • Open Arduino IDE on your PC.
  • Select the right ESP32 board (e.g. ESP32 Dev Module) and COM port.
  • Copy the below code and paste to Arduino IDE
/* * This ESP32 code is created by esp32io.com * * This ESP32 code is released in the public domain * * For more detail (instruction and wiring diagram), visit https://esp32io.com/tutorials/esp32-piezo-buzzer */ #include "pitches.h" #define BUZZZER_PIN 18 // ESP32 pin GPIO18 connected to piezo buzzer int melody[] = { NOTE_C4, NOTE_G3, NOTE_G3, NOTE_A3, NOTE_G3, 0, NOTE_B3, NOTE_C4 }; int noteDurations[] = { 4, 8, 8, 4, 4, 4, 4, 4 }; void setup() { for (int thisNote = 0; thisNote < 8; thisNote++) { int noteDuration = 1000 / noteDurations[thisNote]; tone(BUZZZER_PIN, melody[thisNote], noteDuration); int pauseBetweenNotes = noteDuration * 1.30; delay(pauseBetweenNotes); noTone(BUZZZER_PIN); } } void loop() { }
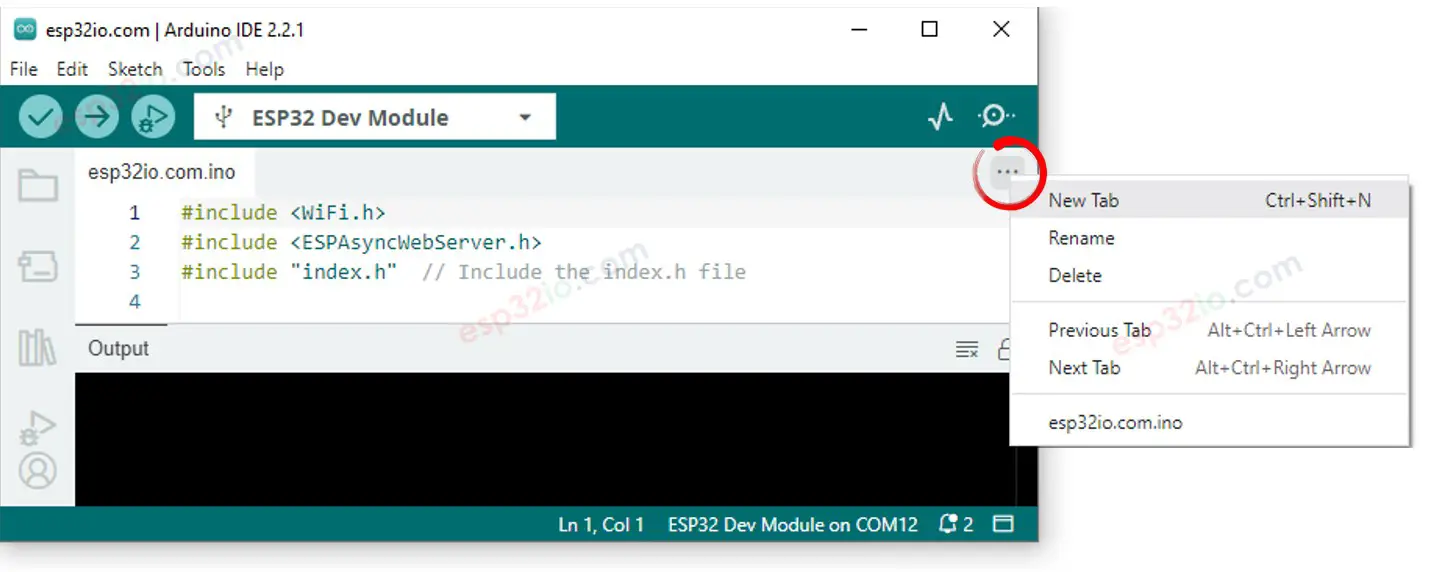
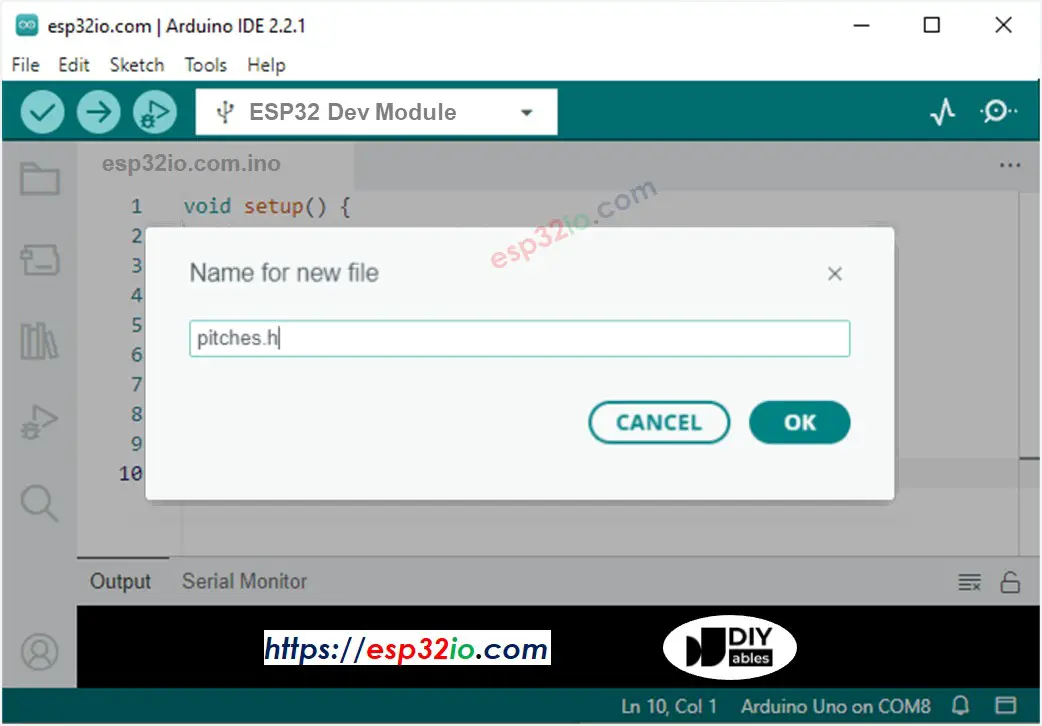
  • Create the pitches.h file On Arduino IDE by:
    • Either click on the button just below the serial monitor icon and choose New Tab, or use Ctrl+Shift+N keys.
    Arduino IDE 2 adds file
    • Give file's name pitches.h and click OK button
    Arduino IDE 2 adds file pitches.h
    • Copy the below code and paste it to the created pitches.h file.
    /************************************************* * Public Constants *************************************************/ #define NOTE_B0 31 #define NOTE_C1 33 #define NOTE_CS1 35 #define NOTE_D1 37 #define NOTE_DS1 39 #define NOTE_E1 41 #define NOTE_F1 44 #define NOTE_FS1 46 #define NOTE_G1 49 #define NOTE_GS1 52 #define NOTE_A1 55 #define NOTE_AS1 58 #define NOTE_B1 62 #define NOTE_C2 65 #define NOTE_CS2 69 #define NOTE_D2 73 #define NOTE_DS2 78 #define NOTE_E2 82 #define NOTE_F2 87 #define NOTE_FS2 93 #define NOTE_G2 98 #define NOTE_GS2 104 #define NOTE_A2 110 #define NOTE_AS2 117 #define NOTE_B2 123 #define NOTE_C3 131 #define NOTE_CS3 139 #define NOTE_D3 147 #define NOTE_DS3 156 #define NOTE_E3 165 #define NOTE_F3 175 #define NOTE_FS3 185 #define NOTE_G3 196 #define NOTE_GS3 208 #define NOTE_A3 220 #define NOTE_AS3 233 #define NOTE_B3 247 #define NOTE_C4 262 #define NOTE_CS4 277 #define NOTE_D4 294 #define NOTE_DS4 311 #define NOTE_E4 330 #define NOTE_F4 349 #define NOTE_FS4 370 #define NOTE_G4 392 #define NOTE_GS4 415 #define NOTE_A4 440 #define NOTE_AS4 466 #define NOTE_B4 494 #define NOTE_C5 523 #define NOTE_CS5 554 #define NOTE_D5 587 #define NOTE_DS5 622 #define NOTE_E5 659 #define NOTE_F5 698 #define NOTE_FS5 740 #define NOTE_G5 784 #define NOTE_GS5 831 #define NOTE_A5 880 #define NOTE_AS5 932 #define NOTE_B5 988 #define NOTE_C6 1047 #define NOTE_CS6 1109 #define NOTE_D6 1175 #define NOTE_DS6 1245 #define NOTE_E6 1319 #define NOTE_F6 1397 #define NOTE_FS6 1480 #define NOTE_G6 1568 #define NOTE_GS6 1661 #define NOTE_A6 1760 #define NOTE_AS6 1865 #define NOTE_B6 1976 #define NOTE_C7 2093 #define NOTE_CS7 2217 #define NOTE_D7 2349 #define NOTE_DS7 2489 #define NOTE_E7 2637 #define NOTE_F7 2794 #define NOTE_FS7 2960 #define NOTE_G7 3136 #define NOTE_GS7 3322 #define NOTE_A7 3520 #define NOTE_AS7 3729 #define NOTE_B7 3951 #define NOTE_C8 4186 #define NOTE_CS8 4435 #define NOTE_D8 4699 #define NOTE_DS8 4978
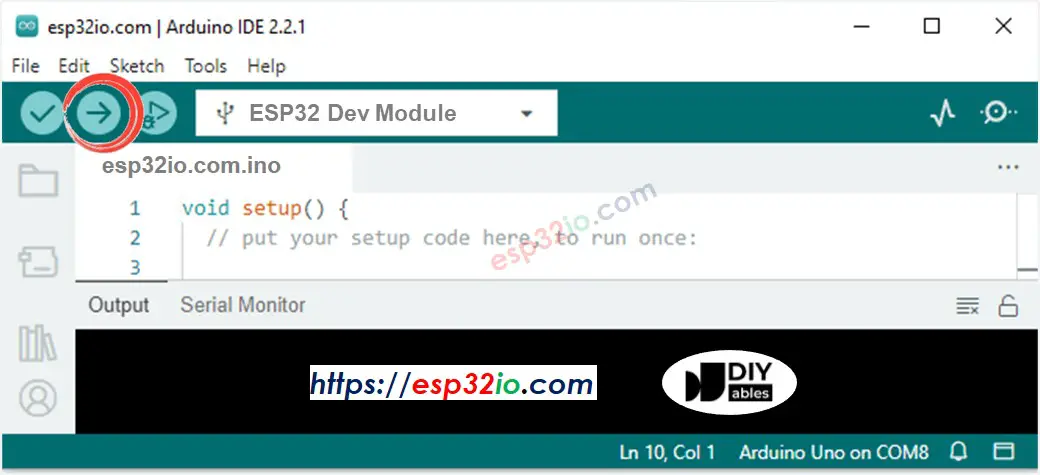
    • Compile and upload code to ESP32 board by clicking Upload button on Arduino IDE
    Arduino IDE Upload Code
    • Listen to the melody

Modifying ESP32 Code

Lt's modidy the ESP32 code to play Jingle Bells song.

We only need to change value of two arrays: int melody[] and int noteDurations[].

/* * This ESP32 code is created by esp32io.com * * This ESP32 code is released in the public domain * * For more detail (instruction and wiring diagram), visit https://esp32io.com/tutorials/esp32-piezo-buzzer */ #include "pitches.h" const int BUZZZER_PIN = 18; // GIOP18 pin connected to piezo buzzer // notes in the melody: int melody[] = { NOTE_E5, NOTE_E5, NOTE_E5, NOTE_E5, NOTE_E5, NOTE_E5, NOTE_E5, NOTE_G5, NOTE_C5, NOTE_D5, NOTE_E5, NOTE_F5, NOTE_F5, NOTE_F5, NOTE_F5, NOTE_F5, NOTE_E5, NOTE_E5, NOTE_E5, NOTE_E5, NOTE_E5, NOTE_D5, NOTE_D5, NOTE_E5, NOTE_D5, NOTE_G5 }; // note durations: 4 = quarter note, 8 = eighth note, etc, also called tempo: int noteDurations[] = { 8, 8, 4, 8, 8, 4, 8, 8, 8, 8, 2, 8, 8, 8, 8, 8, 8, 8, 16, 16, 8, 8, 8, 8, 4, 4 }; void setup() { // iterate over the notes of the melody: int size = sizeof(noteDurations) / sizeof(int); for (int thisNote = 0; thisNote < size; thisNote++) { // to calculate the note duration, take one second divided by the note type. //e.g. quarter note = 1000 / 4, eighth note = 1000/8, etc. int noteDuration = 1000 / noteDurations[thisNote]; tone(BUZZZER_PIN, melody[thisNote], noteDuration); // to distinguish the notes, set a minimum time between them. // the note's duration + 30% seems to work well: int pauseBetweenNotes = noteDuration * 1.30; delay(pauseBetweenNotes); // stop the tone playing: noTone(BUZZZER_PIN); } } void loop() { // no need to repeat the melody. }

Video Tutorial

Making video is a time-consuming work. If the video tutorial is necessary for your learning, please let us know by subscribing to our YouTube channel , If the demand for video is high, we will make the video tutorial.

※ OUR MESSAGES