ESP32 - LCD
This tutorial instructs you how to use ESP32 with LCD I2C. In detail, we will learn:
- How to display text on LCD I2C using ESP32 board.
- How to display special characters on the LCD I2C using ESP32 board.
This tutorial shows how to program the ESP32 using the Arduino language (C/C++) via the Arduino IDE. If you’d like to learn how to program the ESP32 with MicroPython, visit this ESP32 MicroPython - LCD tutorial.
Hardware Used In This Tutorial
Or you can buy the following kits:
| 1 | × | DIYables ESP32 Starter Kit (ESP32 included) | |
| 1 | × | DIYables Sensor Kit (18 sensors/displays) |
Buy Note: You can also build the LCD I2C display by combining LCD 1602 Display and PCF8574 I2C Adapter Module.
Introduction to LCD I2C 16x2
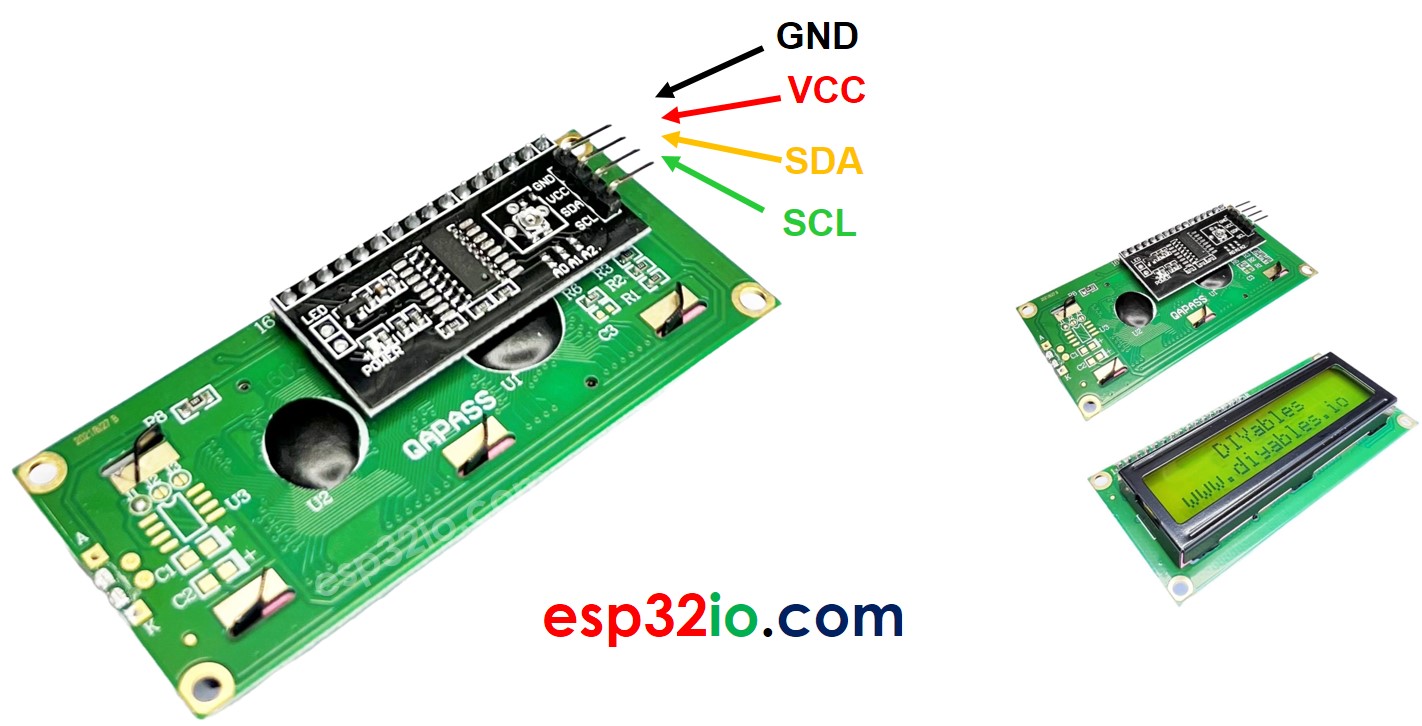
LCD I2C Pinout
LCD I2C has 4 pins:
- VCC pin: the power supply for the LCD, needs to be connected to VCC (5V).
- GND pin: connect this pin to GND (0V).
- SCL pin: I2C clock signal pin
- SDA pin: I2C data signal pin
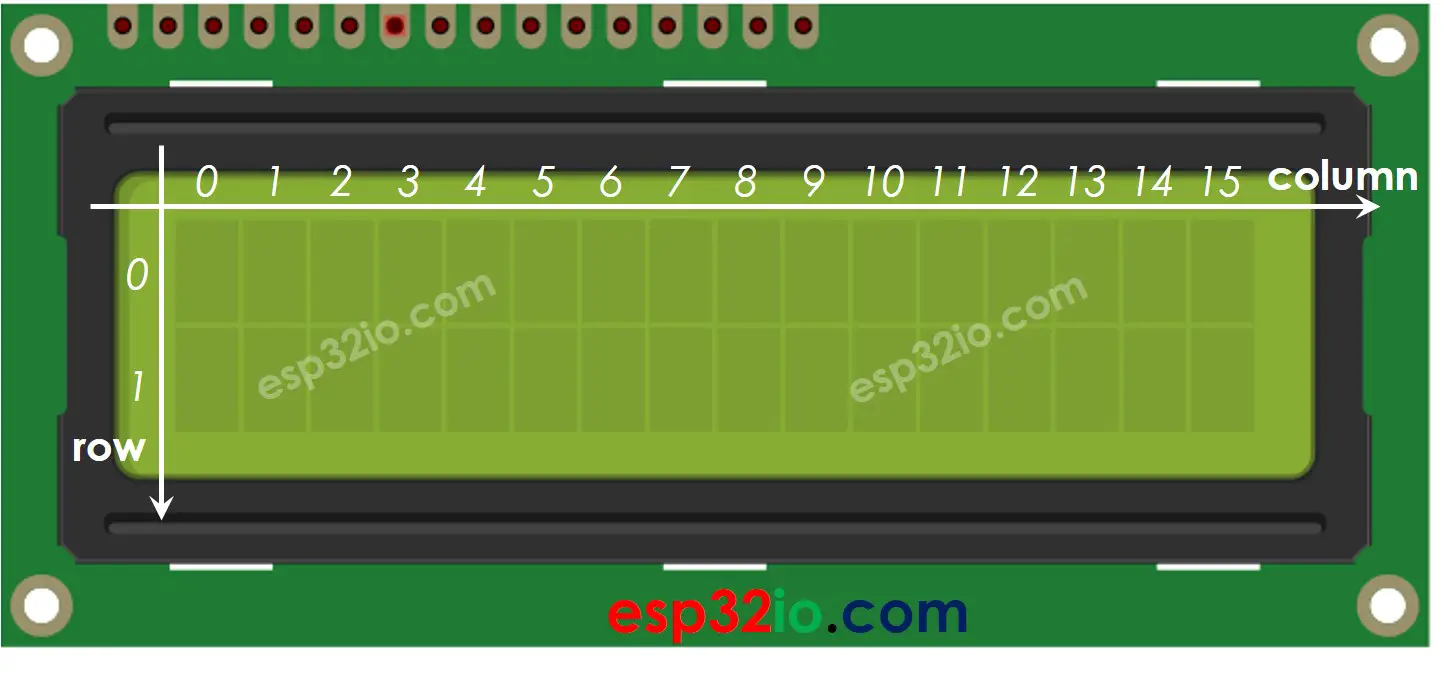
LCD 16x2 Coordinates
LCD I2C 16x2 has 2 rows and 16 columns indexed from 0.
Wiring Diagram between LCD I2C and ESP32
- How to connect ESP32 and LCD i2c using breadboard (powered via USB cable)
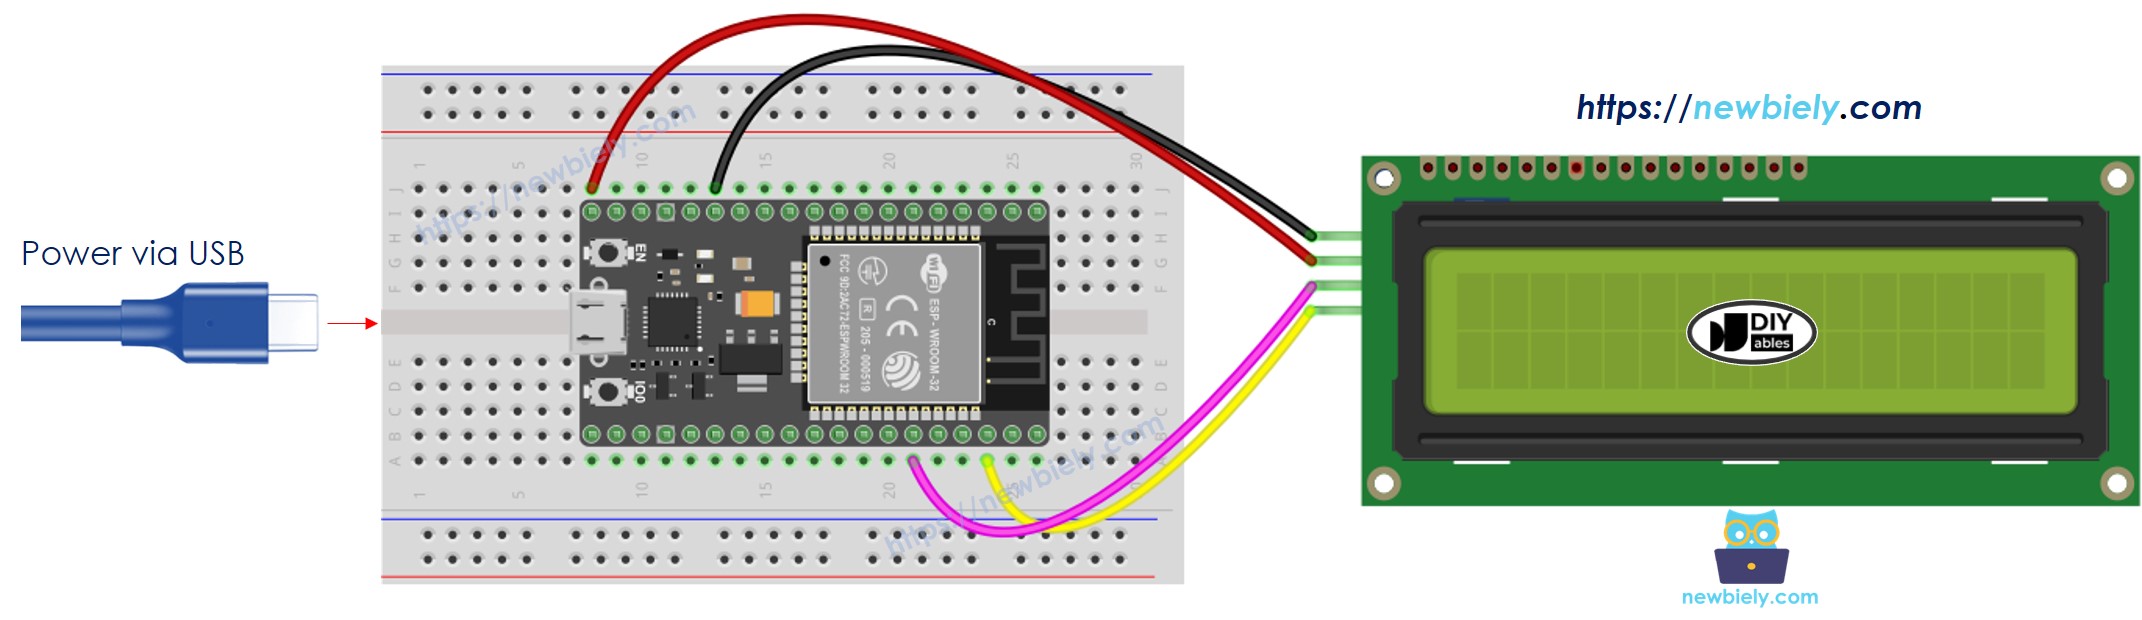
This image is created using Fritzing. Click to enlarge image
- How to connect ESP32 and LCD i2c using breadboard (powered via Vin pin)

This image is created using Fritzing. Click to enlarge image
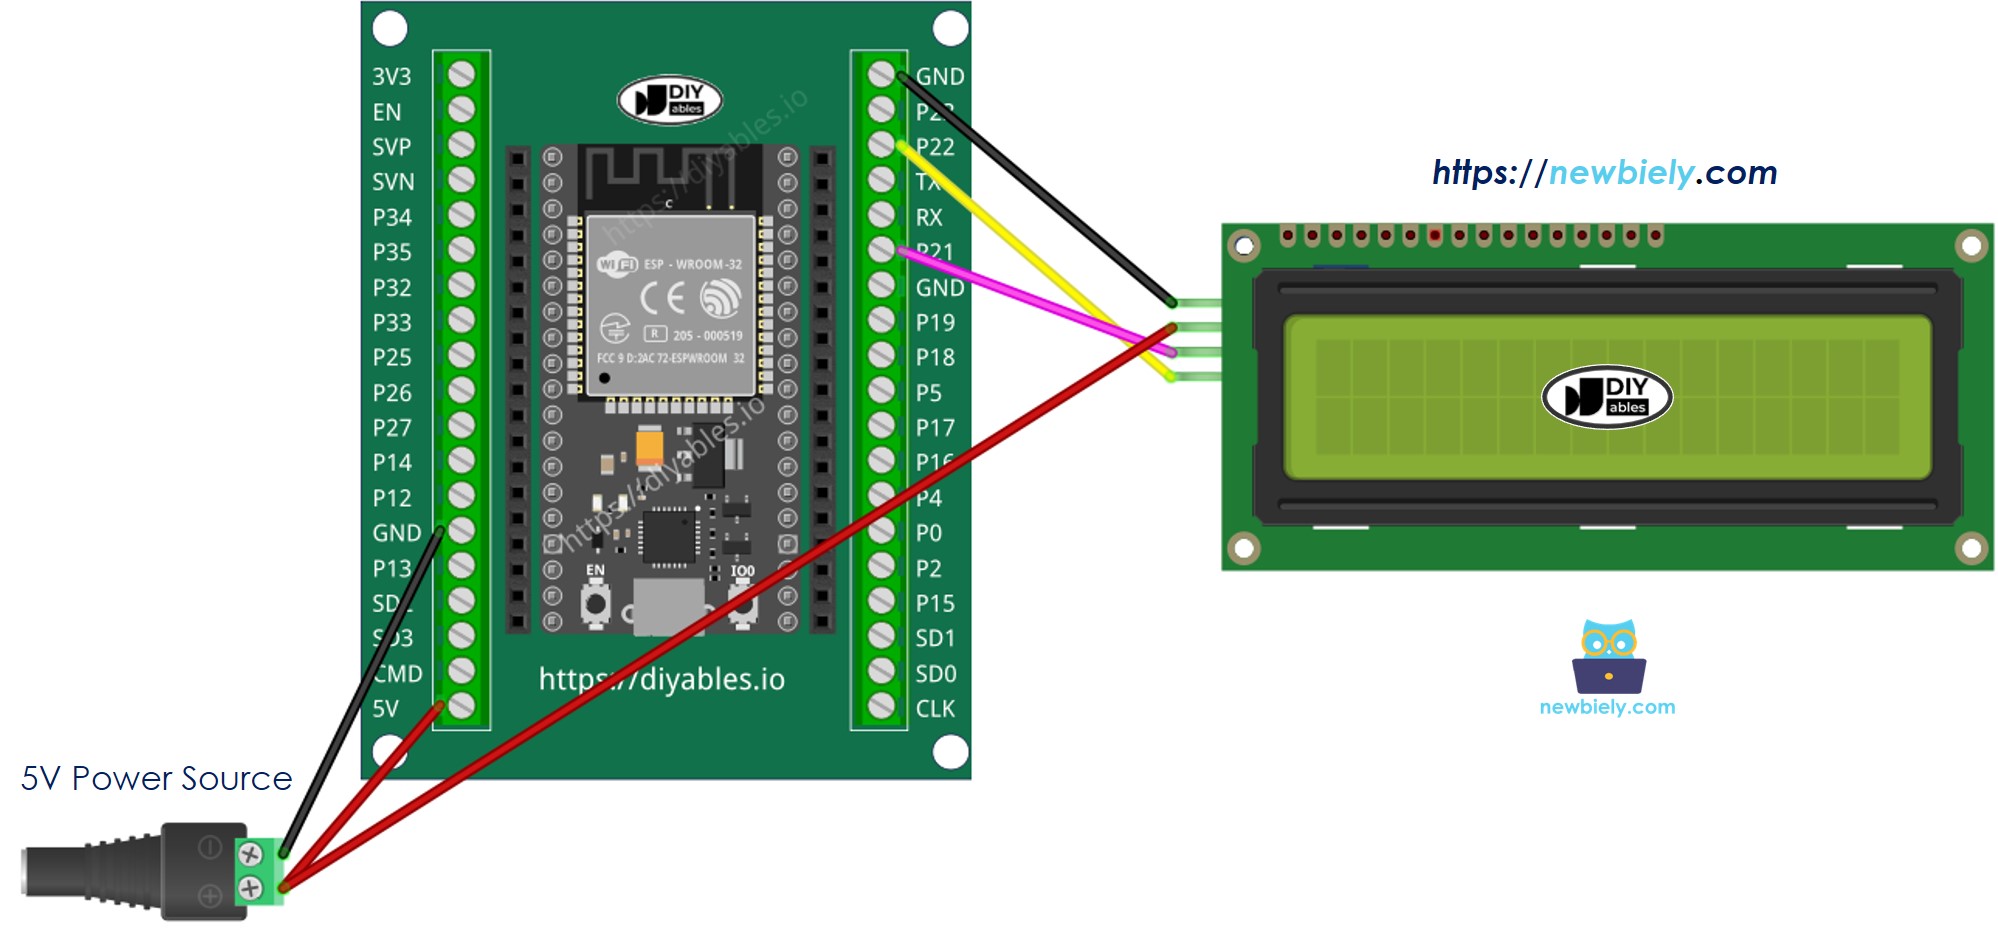
- How to connect ESP32 and LCD i2c using screw terminal block breakout board (powered via USB cable)
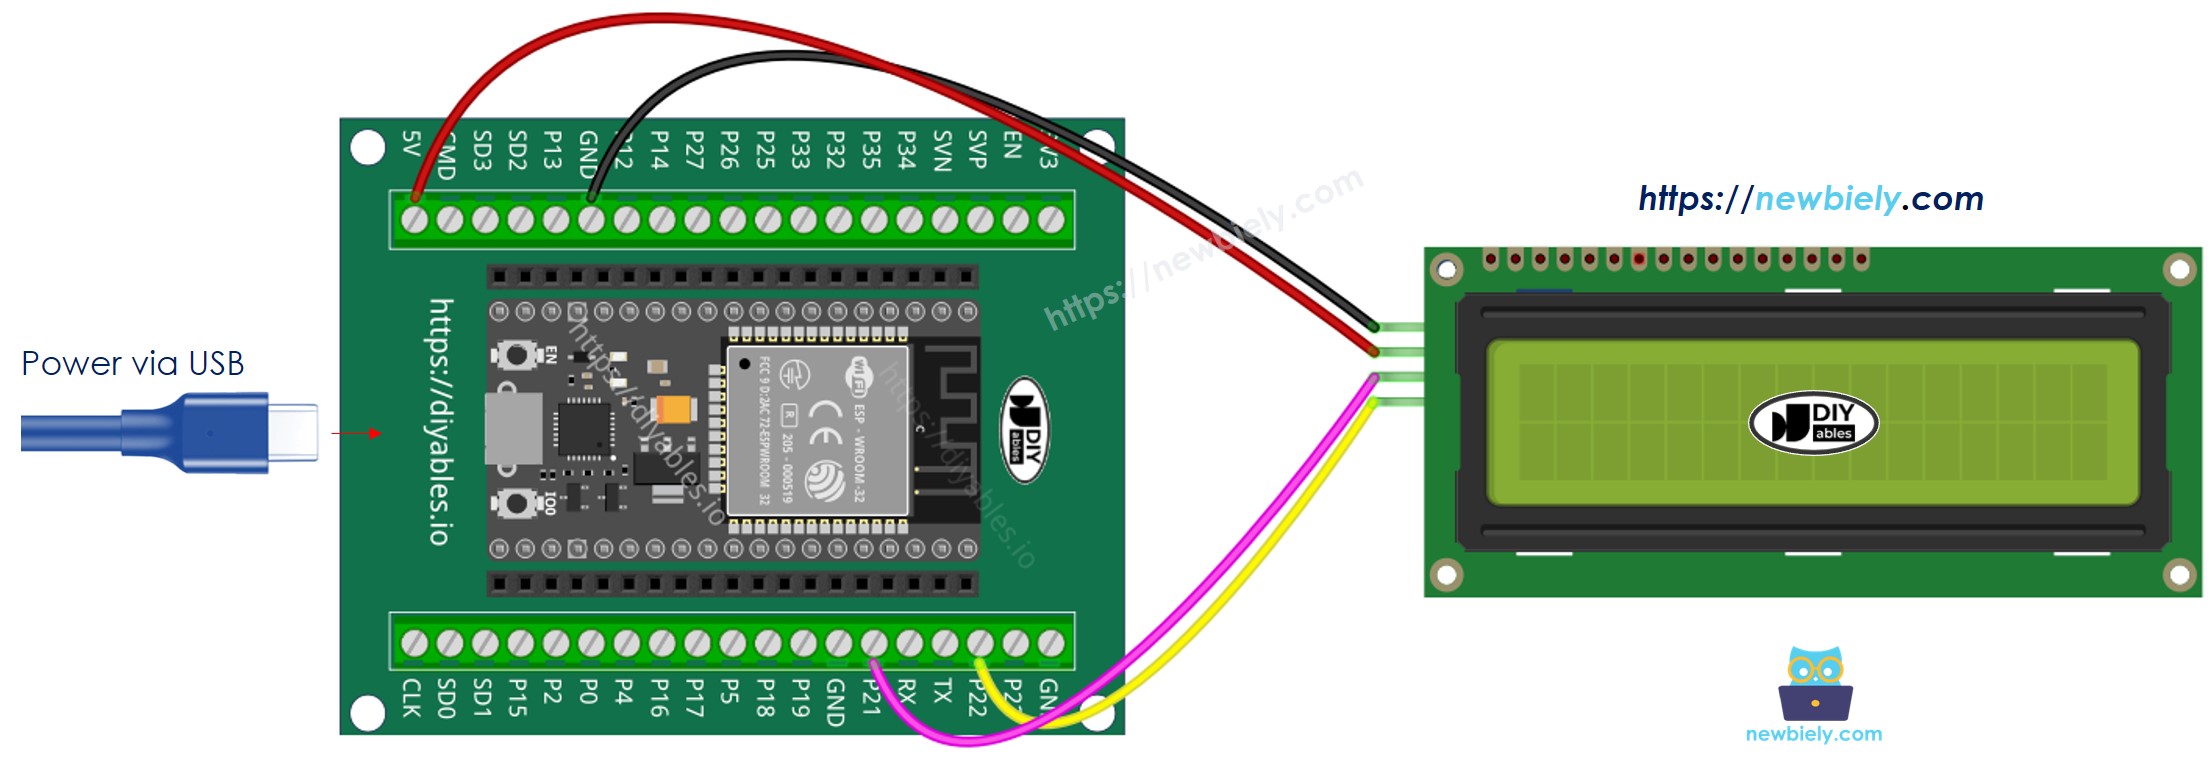
- How to connect ESP32 and LCD i2c using screw terminal block breakout board (powered via Vin pin)
If you're unfamiliar with how to supply power to the ESP32 and other components, you can find guidance in the following tutorial: The best way to Power ESP32 and sensors/displays.
How To Program LCD I2C using ESP32
- Include the DIYables_LCD_I2C library:
- Declare a DIYables_LCD_I2C object:
- Initialize the LCD.
- Move cursor to the desired position (column_index, row_index)
- Print a message to the LCD.
※ NOTE THAT:
The LCD I2C address can be different from each manufacturer. In the code, we used address of 0x27 that is specified by DIYables manufacturer
ESP32 Code
Quick Instructions
- If this is the first time you use ESP32, see how to setup environment for ESP32 on Arduino IDE.
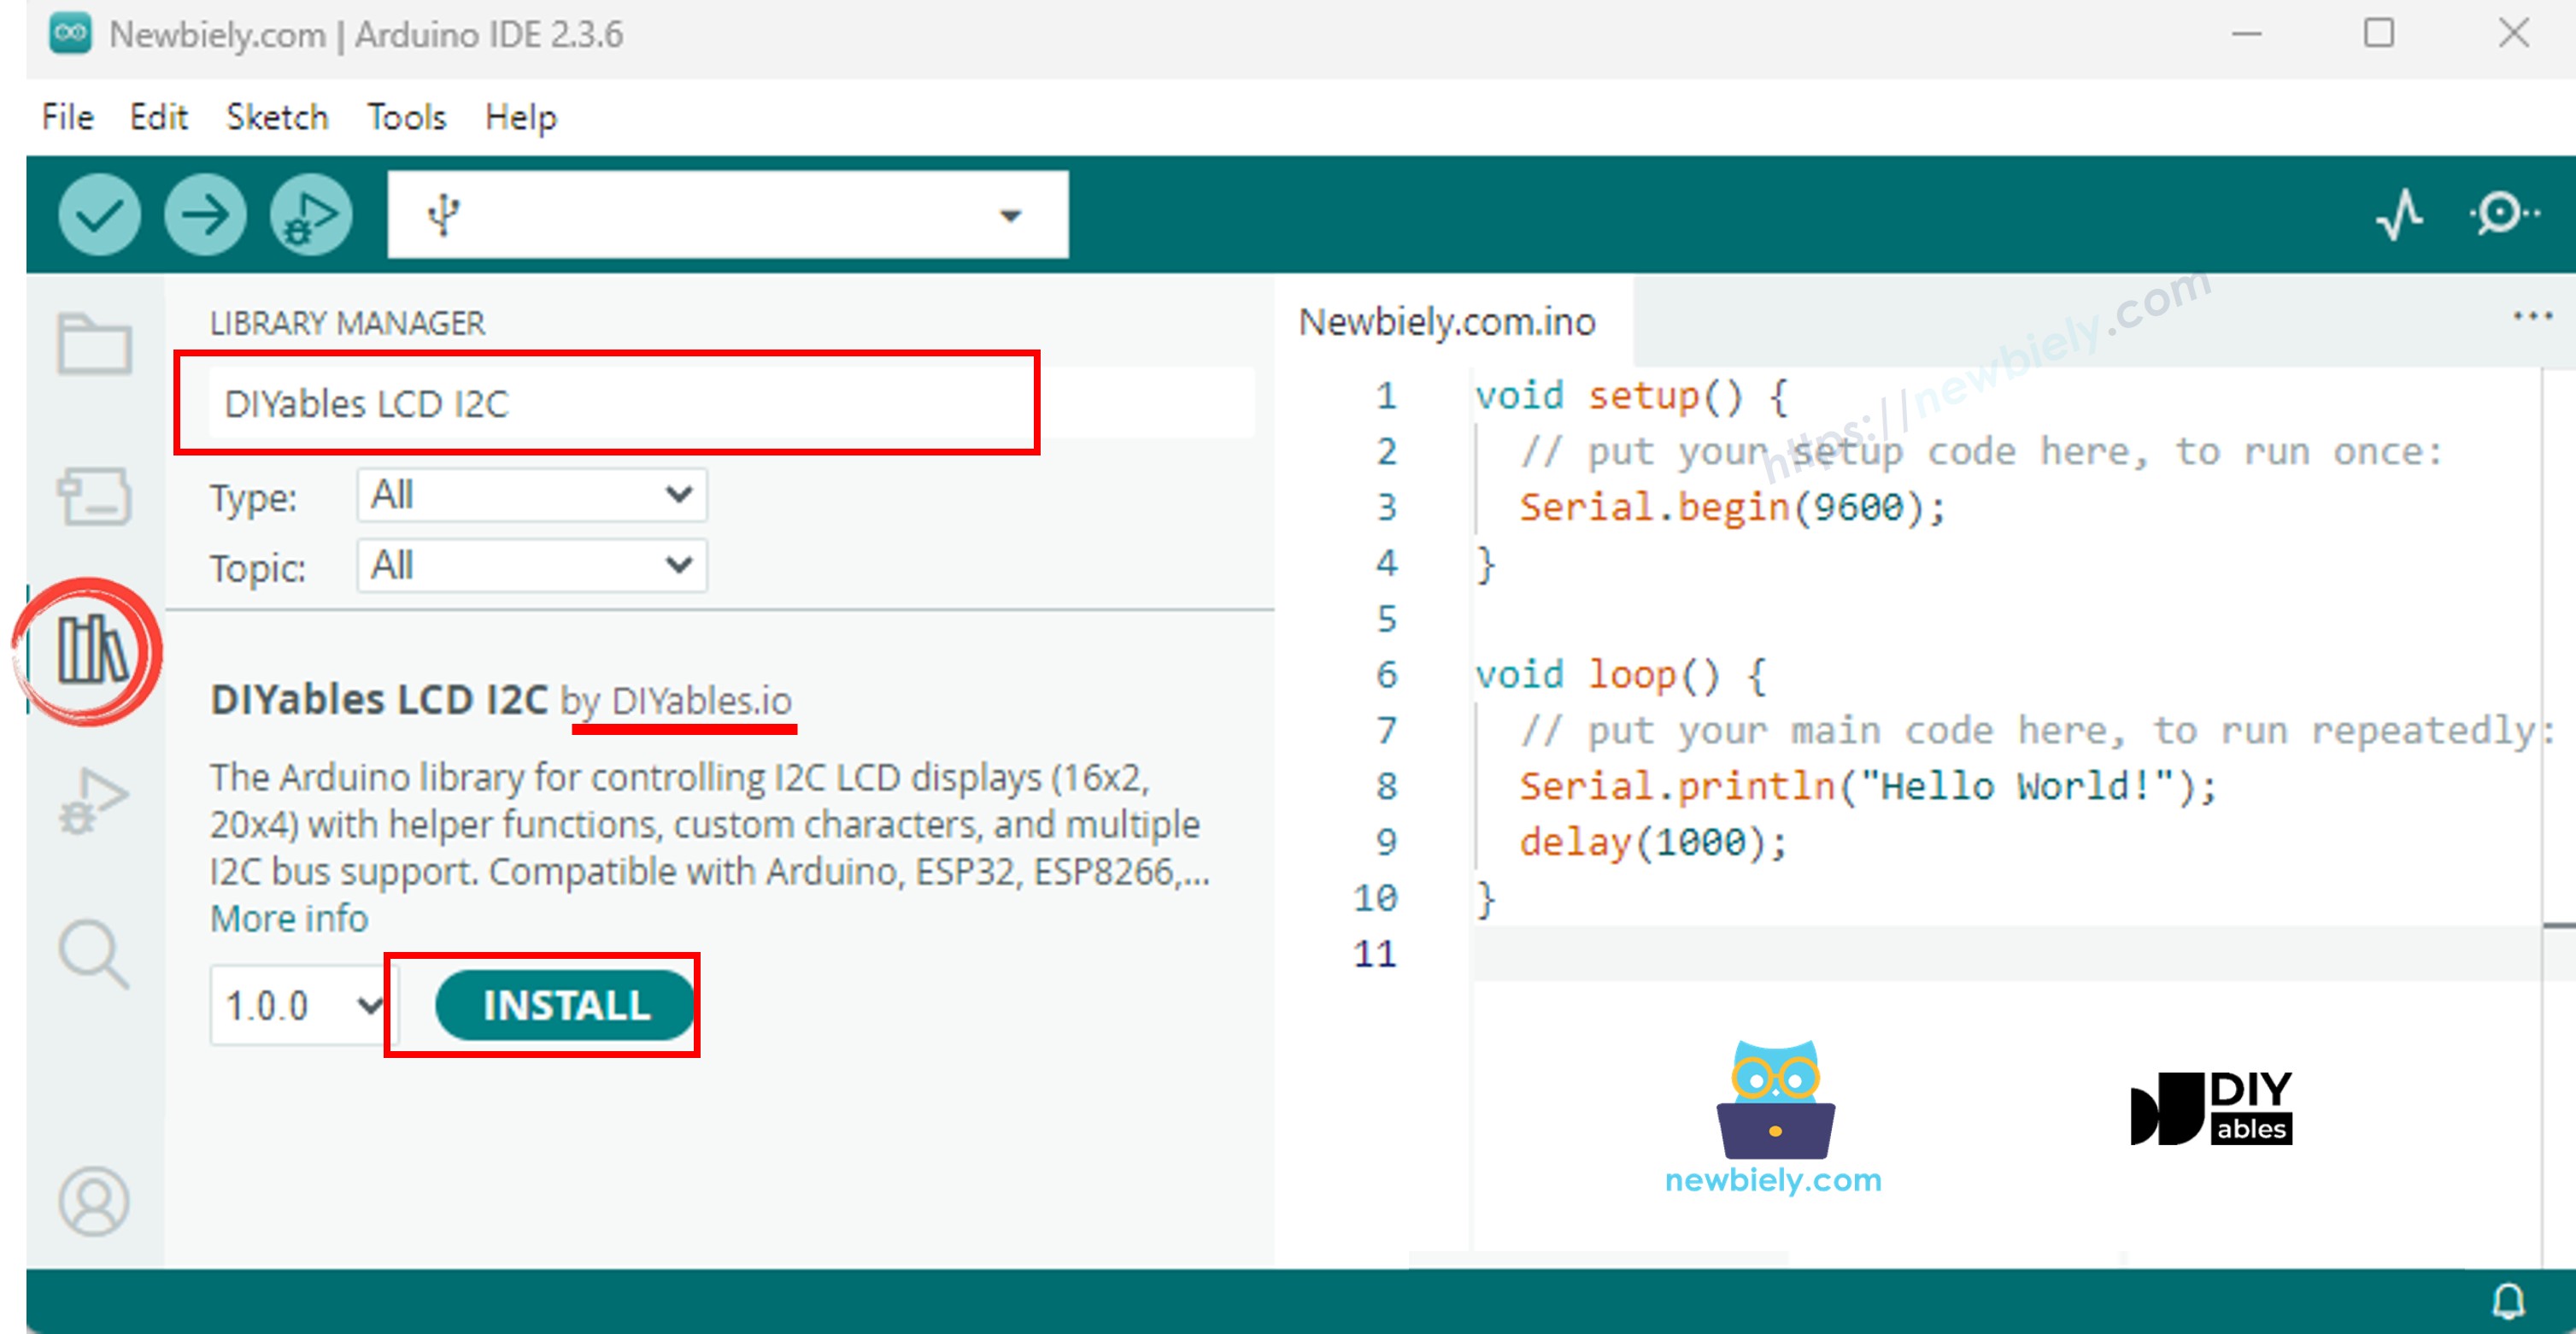
- Click to the Libraries icon on the left bar of the Arduino IDE.
- Type “DIYables LCD I2C” on the search box, then look for the DIYables_LCD_I2C library by DIYables
- Click Install button to install DIYables_LCD_I2C library.
- Copy the above code and paste it to Arduino IDE.
- Compile and upload code to ESP32 board by clicking Upload button on Arduino IDE
- See the result on LCD

- Try modifying text and position
LCD I2C Selection Guide
There are many types of LCD I2C displays available. They mainly differ in background color and the design of the I2C interface module.
Regarding color, these displays usually have either a green or blue background.
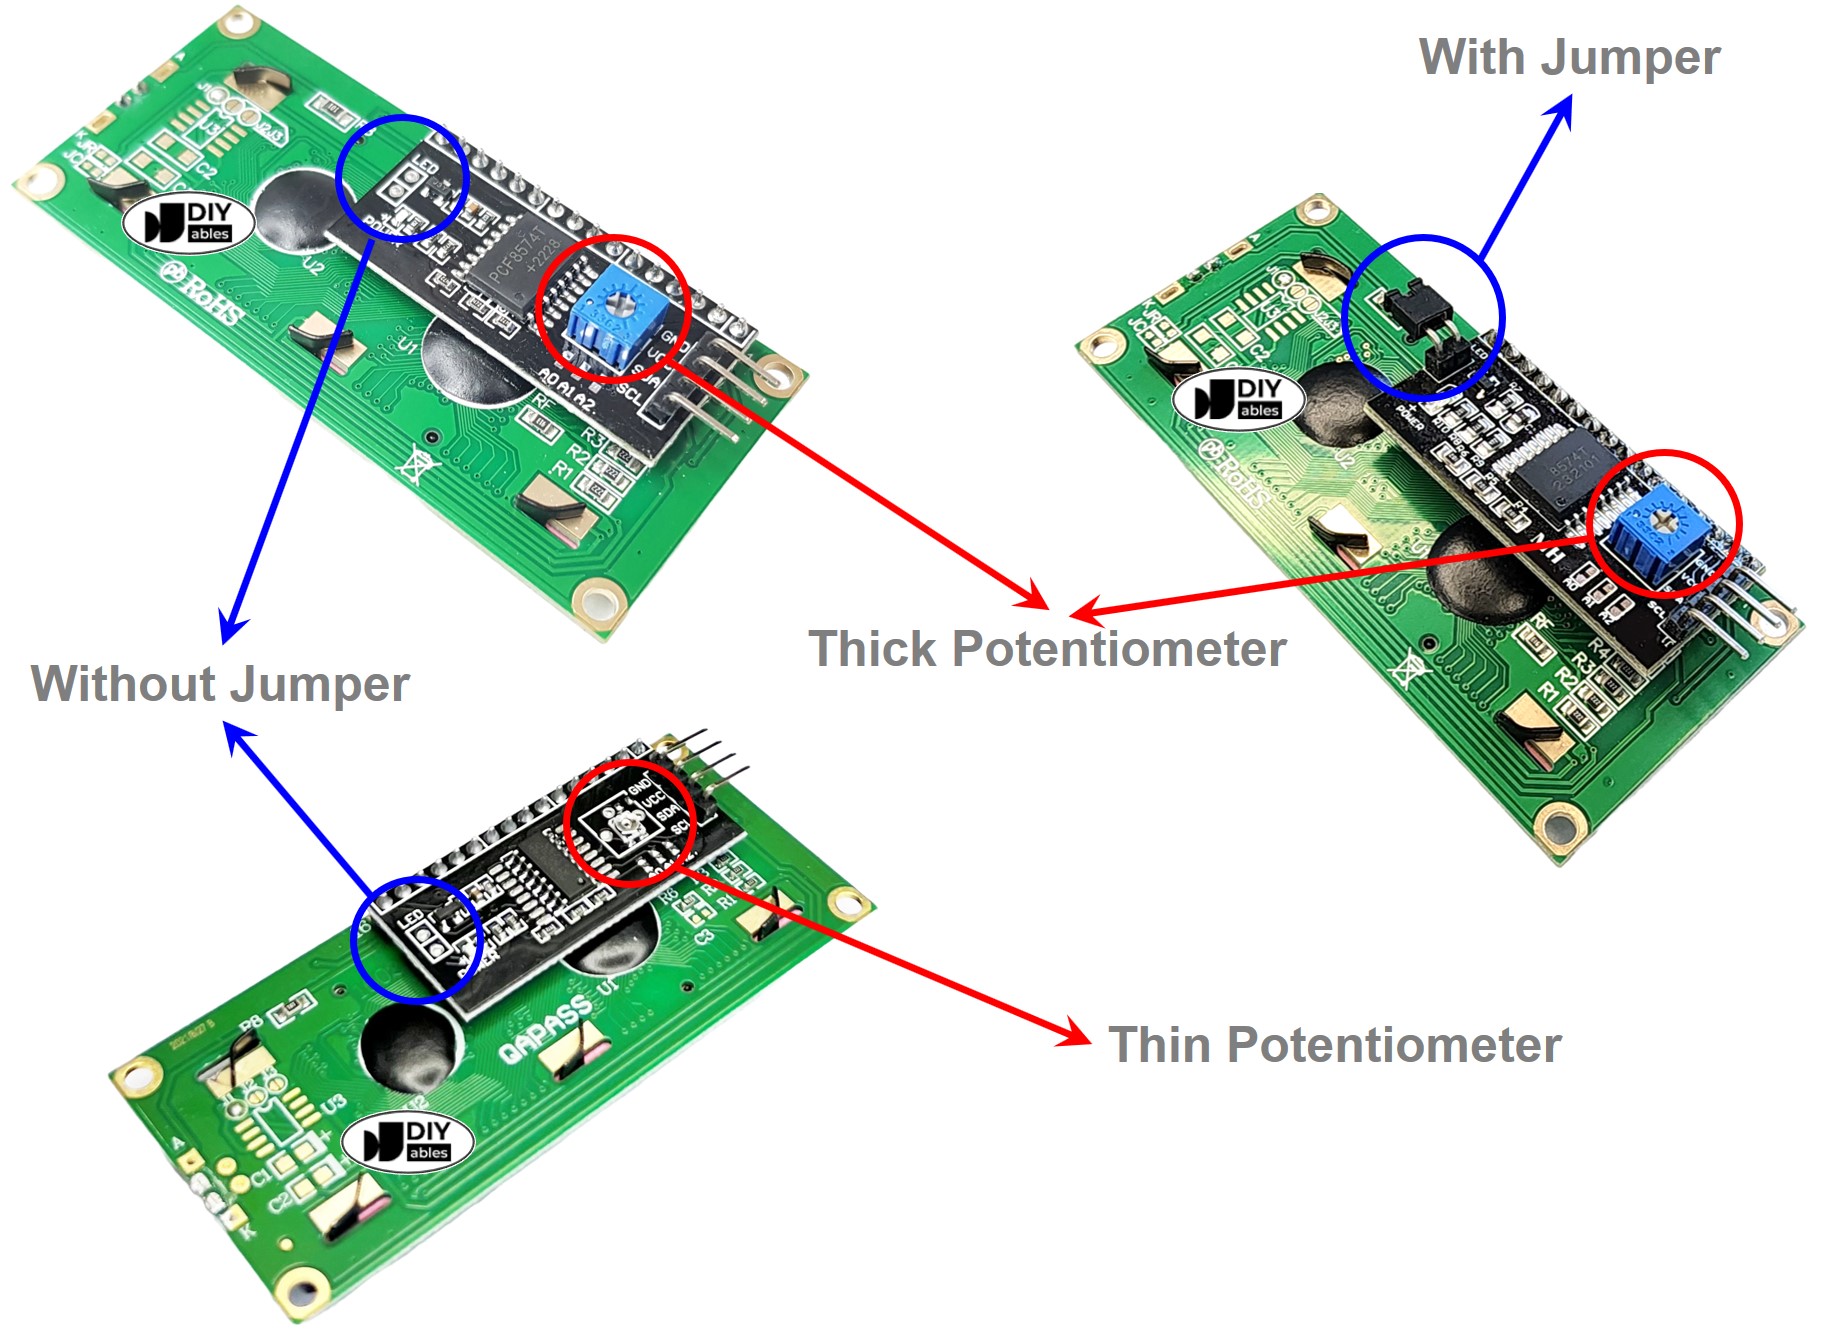
For the I2C interface module design, there are two main factors to consider:
- Potentiometer size: You can choose between thin and thick potentiometers.
- Thick potentiometer: Easier to adjust but takes up more space.
- Thin potentiometer: More compact, saving space due to its smaller height.
- I2C selection jumper:
- With jumper: Allows switching between two I2C addresses, which is useful when using two LCD displays at the same time. However, it can cause confusion with I2C addresses when using only one LCD and also requires more space.
- Without jumper: Has a fixed I2C address and is very convenient for using just one LCD display. Since most applications use only one LCD, this type is highly recommended.
Video Tutorial
Making video is a time-consuming work. If the video tutorial is necessary for your learning, please let us know by subscribing to our YouTube channel , If the demand for video is high, we will make the video tutorial.
Do More with LCD
Custom Character
If you want to display special characters or symbols (e.g. emoticon), see how to display the special characters on LCD.
Troubleshooting on LCD I2C
If LCD does not display anything, please see LCD does not work!- Checklist