ESP32 - Secure Your Belongings: Detect Theft and Send Email Alerts

In this tutorial, we are going to learn how to secure your valuables by using an ESP32 and a force sensor to detect when someone takes your stuff. This detailed guide walks you through setting up a theft detection system that sends instant email notifications via Gmail. Our tutorial covers everything from configuring the ESP32, integrating the force sensor, and coding the email alert system. Discover the benefits, step-by-step instructions, and practical applications of using an ESP32 and force sensor for theft detection and email alerts.

ESP32 Theft detection Email Notification

Hardware Used In This Tutorial

1×ESP-WROOM-32 Dev Module
1×USB Cable Type-C
1×Force Sensor
1×10 kΩ resistor
1×Breadboard
1×Jumper Wires
1×(Optional) DC Power Jack
1×(Recommended) ESP32 Screw Terminal Adapter

Or you can buy the following sensor kits:

1×DIYables Sensor Kit (30 sensors/displays)
1×DIYables Sensor Kit (18 sensors/displays)
Disclosure: some of these links are affiliate links. We may earn a commission on your purchase at no extra cost to you. We appreciate it.

Introduction to Force Sensor and Gmail

We have specific tutorials about Force Sensor and Gmail. Each tutorial contains detailed information and step-by-step instructions about hardware pinout, working principle, wiring connection to ESP32, ESP32 code... Learn more about them at the following links:

How the theft detection system work

The force sensor can measure how much something weighs when you put it on the sensor. When you place your item on the force sensor, the ESP32 reads and records this weight. If someone takes your item, the weight on the sensor will change. The ESP32 detects this change and sends you an email notification to let you know that your item has been moved.

Wiring Diagram between Force Sensor and ESP32

ESP32 Force Sensor Wiring Diagram

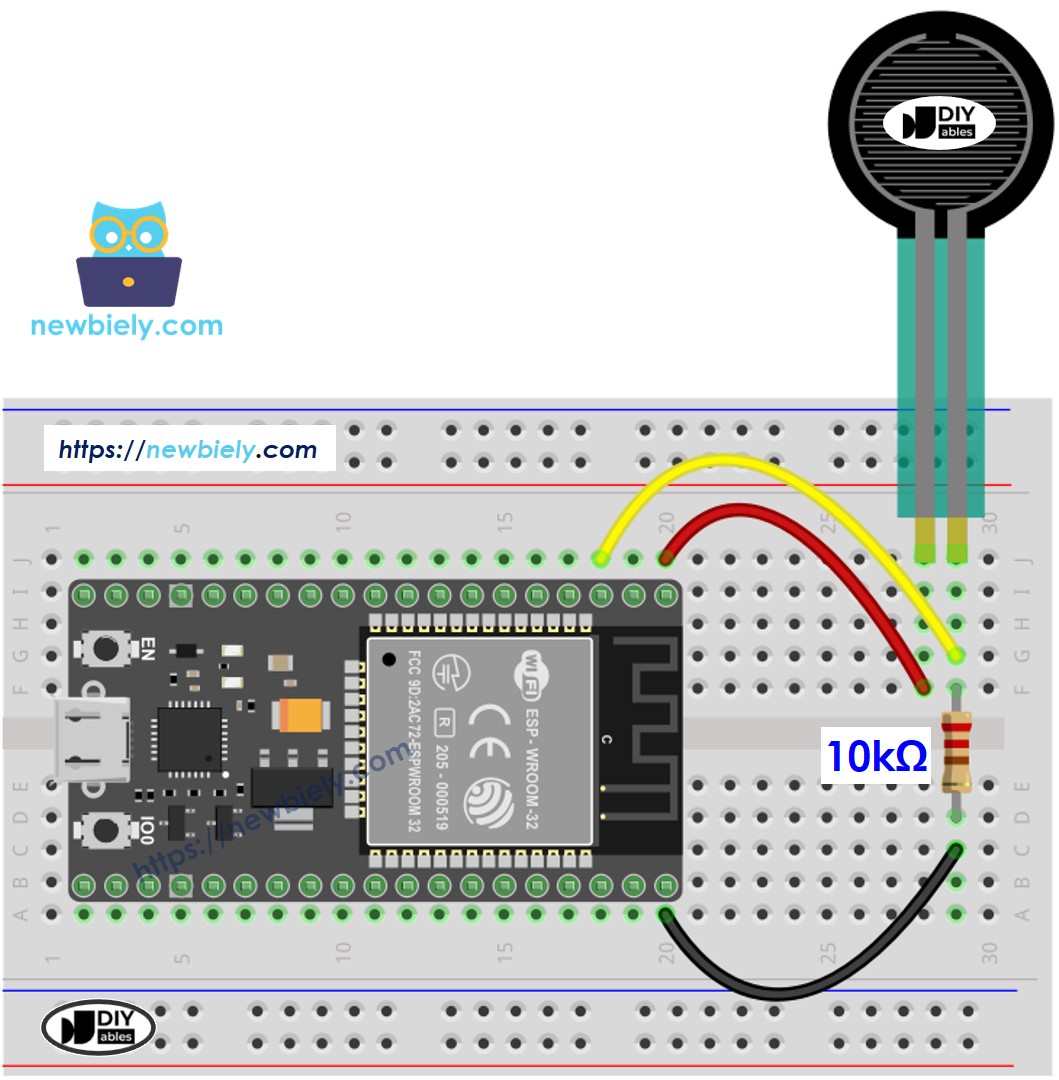
This image is created using Fritzing. Click to enlarge image

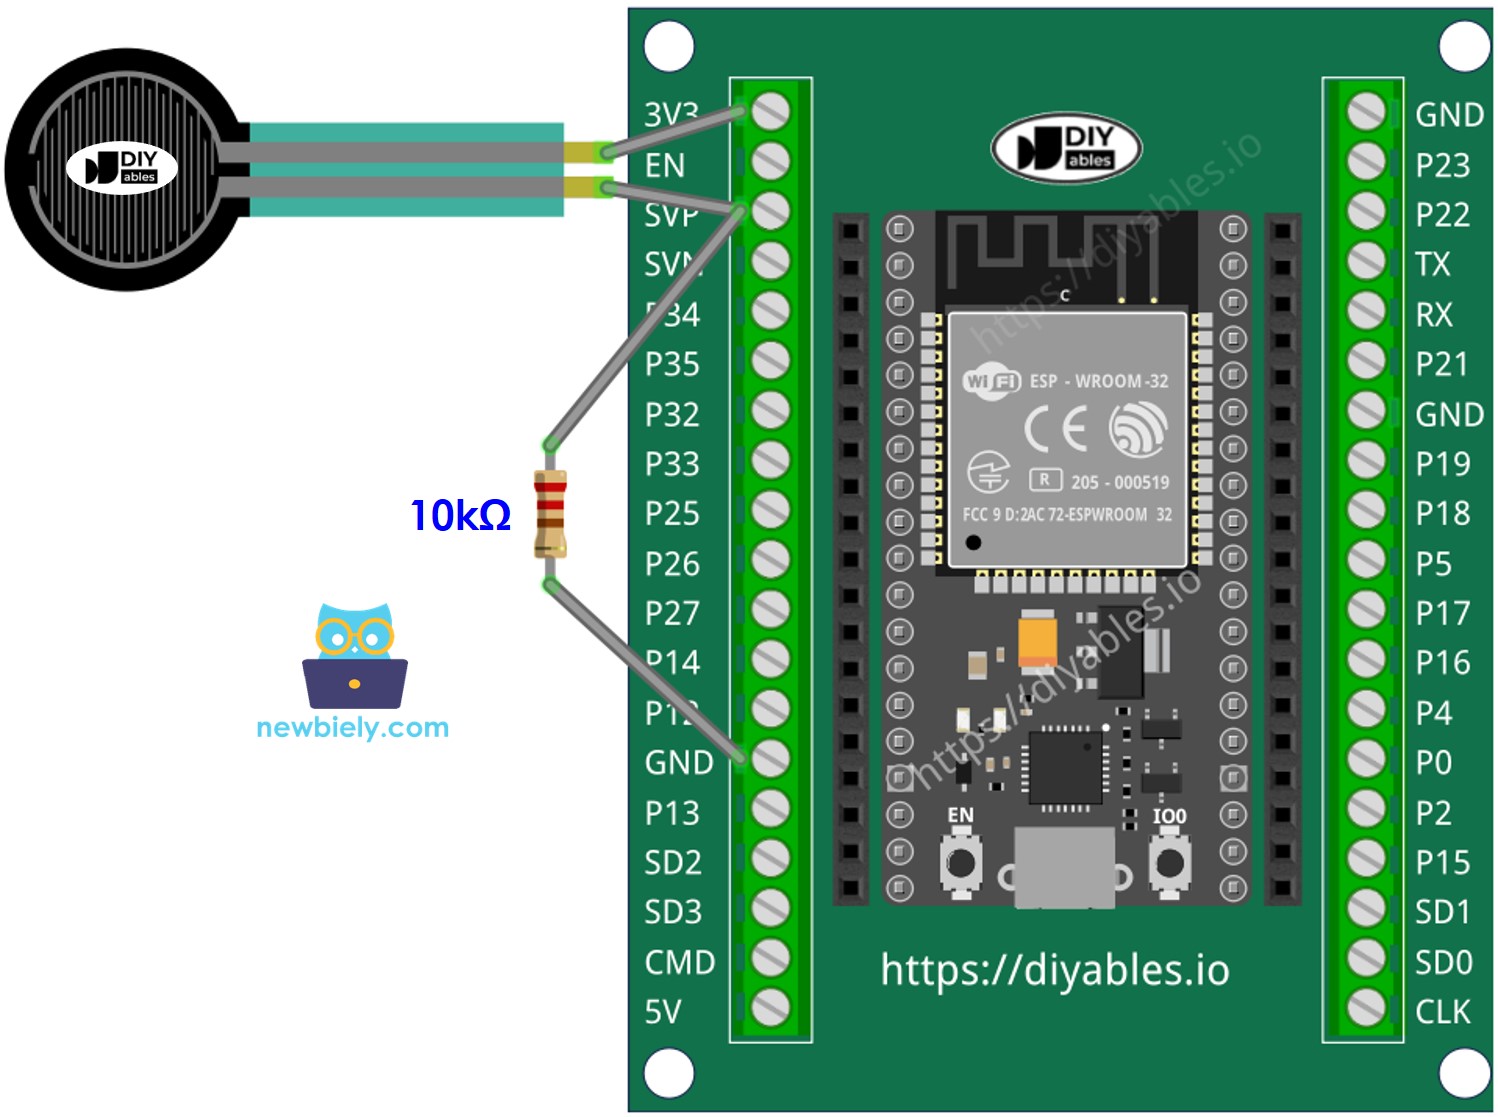
If you're unfamiliar with how to supply power to the ESP32 and other components, you can find guidance in the following tutorial: How to Power ESP32.

ESP32 Code

/* * This ESP32 code is created by esp32io.com * * This ESP32 code is released in the public domain * * For more detail (instruction and wiring diagram), visit https://esp32io.com/tutorials/esp32-secure-your-belongings-detect-theft-and-send-email-alerts */ #include <WiFi.h> #include <ESP_Mail_Client.h> #define WIFI_SSID "YOUR_WIFI_SSID" // CHANGE IT #define WIFI_PASSWORD "YOUR_WIFI_PASSWORD" // CHANGE IT // the sender email credentials #define SENDER_EMAIL "xxxxxx@gmail.com" // CHANGE IT #define SENDER_PASSWORD "xxxx xxxx xxxx xxxx" // CHANGE IT to your Google App password #define RECIPIENT_EMAIL "xxxxxx@gmail.com" // CHANGE IT #define SMTP_HOST "smtp.gmail.com" #define SMTP_PORT 587 #define FORCE_SENSOR_PIN 36 // ESP32 pin GPIO36 (ADC0): the FSR and 10K pulldown are connected to A0 #define THRESHOLD 100 // may need to callibrate this value SMTPSession smtp; void setup() { Serial.begin(9600); WiFi.begin(WIFI_SSID, WIFI_PASSWORD); Serial.print("Connecting to Wi-Fi"); while (WiFi.status() != WL_CONNECTED) { Serial.print("."); delay(300); } Serial.println(); Serial.print("Connected with IP: "); Serial.println(WiFi.localIP()); Serial.println(); pinMode(DOOR_SENSOR_PIN, INPUT_PULLUP); // set ESP32 pin to input pull-up mode door_state = digitalRead(DOOR_SENSOR_PIN); // read state } void loop() { int forceValue = analogRead(FORCE_SENSOR_PIN); if (forceValue < THRESHOLD) { Serial.println("Alert! Someone has stolen your stuff!"); String subject = "Email Notification from ESP32"; String textMsg = "This is an email sent from ESP32.\n"; textMsg += "Alert! Someone has stolen your stuff!"; gmail_send(subject, textMsg); } } void gmail_send(String subject, String textMsg) { // set the network reconnection option MailClient.networkReconnect(true); smtp.debug(1); smtp.callback(smtpCallback); Session_Config config; // set the session config config.server.host_name = SMTP_HOST; config.server.port = SMTP_PORT; config.login.email = SENDER_EMAIL; config.login.password = SENDER_PASSWORD; config.login.user_domain = F("127.0.0.1"); config.time.ntp_server = F("pool.ntp.org,time.nist.gov"); config.time.gmt_offset = 3; config.time.day_light_offset = 0; // declare the message class SMTP_Message message; // set the message headers message.sender.name = F("ESP32"); message.sender.email = SENDER_EMAIL; message.subject = subject; message.addRecipient(F("To Whom It May Concern"), RECIPIENT_EMAIL); message.text.content = textMsg; message.text.transfer_encoding = "base64"; message.text.charSet = F("utf-8"); message.priority = esp_mail_smtp_priority::esp_mail_smtp_priority_low; // set the custom message header message.addHeader(F("Message-ID: <abcde.fghij@gmail.com>")); // connect to the server if (!smtp.connect(&config)) { Serial.printf("Connection error, Status Code: %d, Error Code: %d, Reason: %s\n", smtp.statusCode(), smtp.errorCode(), smtp.errorReason().c_str()); return; } if (!smtp.isLoggedIn()) { Serial.println("Not yet logged in."); } else { if (smtp.isAuthenticated()) Serial.println("Successfully logged in."); else Serial.println("Connected with no Auth."); } // start sending Email and close the session if (!MailClient.sendMail(&smtp, &message)) Serial.printf("Error, Status Code: %d, Error Code: %d, Reason: %s\n", smtp.statusCode(), smtp.errorCode(), smtp.errorReason().c_str()); } // callback function to get the Email sending status void smtpCallback(SMTP_Status status) { // print the current status Serial.println(status.info()); // print the sending result if (status.success()) { Serial.println("----------------"); Serial.printf("Email sent success: %d\n", status.completedCount()); Serial.printf("Email sent failed: %d\n", status.failedCount()); Serial.println("----------------\n"); for (size_t i = 0; i < smtp.sendingResult.size(); i++) { // get the result item SMTP_Result result = smtp.sendingResult.getItem(i); Serial.printf("Message No: %d\n", i + 1); Serial.printf("Status: %s\n", result.completed ? "success" : "failed"); Serial.printf("Date/Time: %s\n", MailClient.Time.getDateTimeString(result.timestamp, "%B %d, %Y %H:%M:%S").c_str()); Serial.printf("Recipient: %s\n", result.recipients.c_str()); Serial.printf("Subject: %s\n", result.subject.c_str()); } Serial.println("----------------\n"); // free the memory smtp.sendingResult.clear(); } }

Quick Instructions

  • If this is the first time you use ESP32, see how to setup environment for ESP32 on Arduino IDE.
  • Connect the ESP32 board to the force sensor
  • Put your stuff cover the force sensor
  • Connect the ESP32 board to your PC via a USB cable
  • Open Arduino IDE on your PC.
  • Select the right ESP32 board (e.g. ESP32 Dev Module) and COM port.
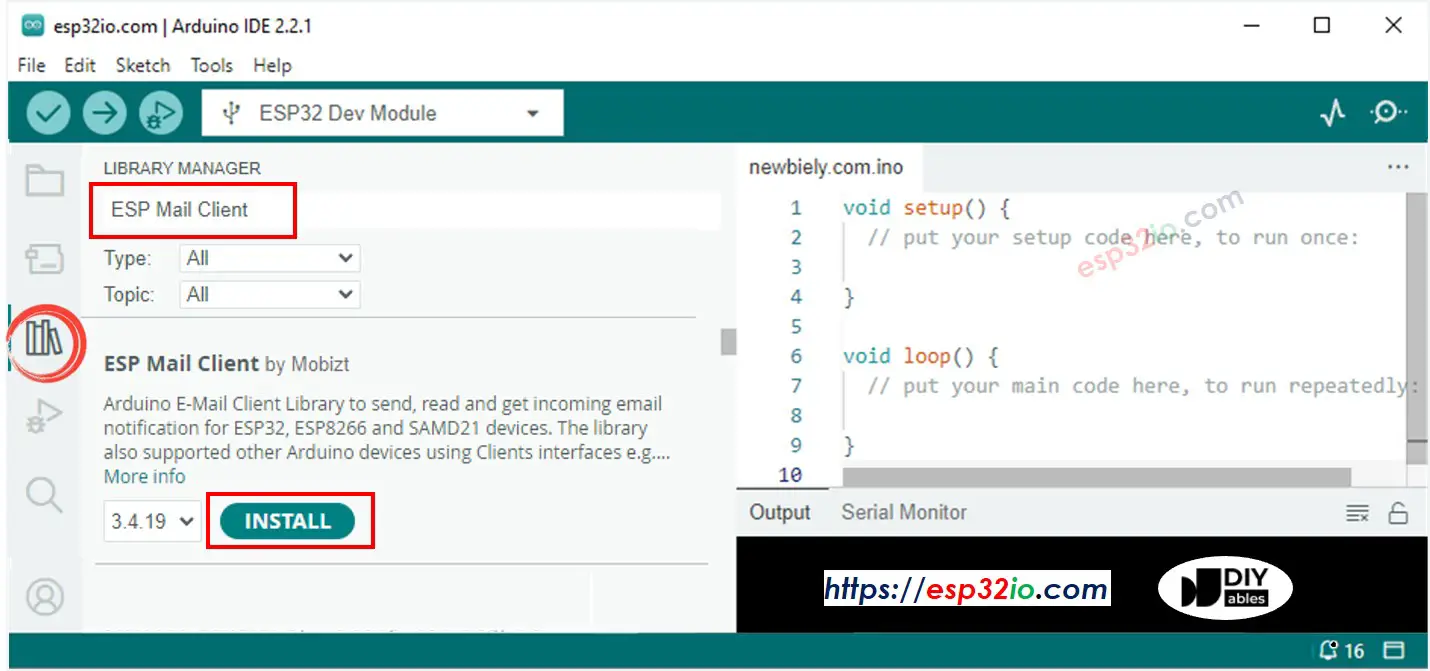
  • Open the Library Manager by clicking on the Library Manager icon on the left navigation bar of Arduino IDE.
  • Search ESP Mail Client, then find the ESP Mail Client created by Mobizt.
  • Click Install button to install ESP Mail Client library.
ESP32 ESP Mail Client library
  • Copy the above code and open with Arduino IDE
  • Change the WiFi information (SSID and password) in the code to yours by changing two contanst WIFI_SSID and WIFI_PASSWORD
  • Change the sender email and password in the code to yours by changing two contanst SENDER_EMAIL and SENDER_PASSWORD
  • Change the recipient email in the code to yours by changing two contanst RECIPIENT_EMAIL. recipient email can be the same as sender

※ NOTE THAT:

  • Sender email MUST be Gmail
  • Sender password is the App passwords you got from previous step
  • Recipient email can be any type of email
  • Click Upload button on Arduino IDE to upload code to ESP32
  • Open the Serial Monitor
  • Take your stuff out of the force sensor
  • Check out the result on Serial Monitor.
COM6
Send
Alert! Someone has stolen your stuff! #### Email sent successfully > C: Email sent successfully ---------------- Message sent success: 1 Message sent failed: 0 ---------------- Message No: 1 Status: success Date/Time: May 27, 2024 04:42:50 Recipient: xxxxxx@gmail.com Subject: Email Notification from ESP32 ----------------
Autoscroll Show timestamp
Clear output
9600 baud  
Newline  
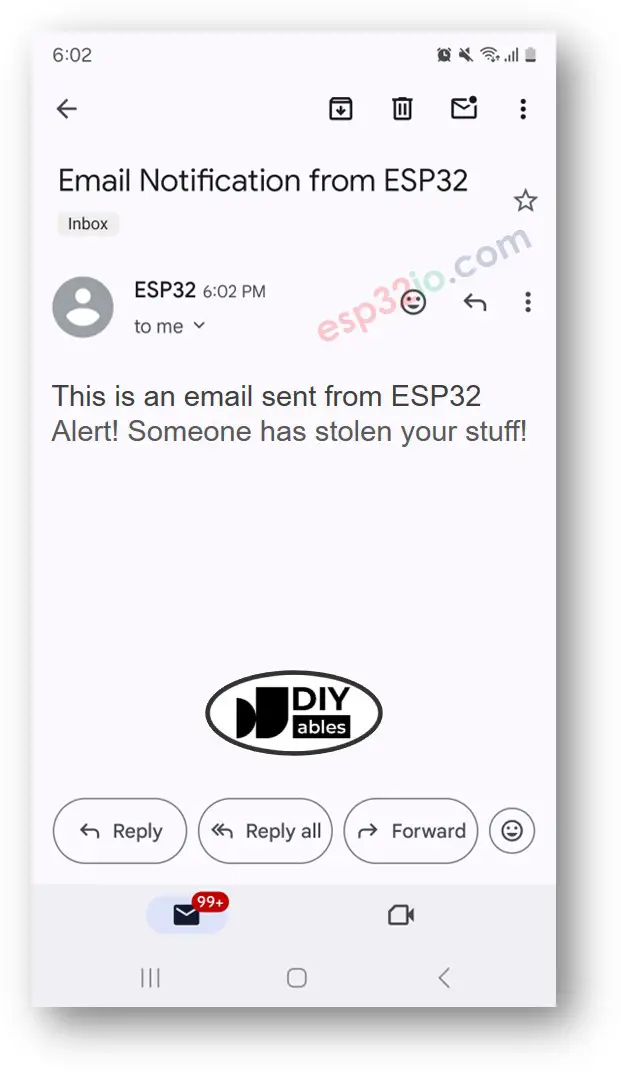
  • Check your recipient email box. You will get an email as below:
ESP32 theft detection email

Video Tutorial

Making video is a time-consuming work. If the video tutorial is necessary for your learning, please let us know by subscribing to our YouTube channel , If the demand for video is high, we will make the video tutorial.

※ OUR MESSAGES