ESP32 - MG996R
In this tutorial, we are going to learn how to use the MG996R high-torque servo motor with ESP32.
Hardware Used In This Tutorial
Or you can buy the following kits:
| 1 | × | DIYables ESP32 Starter Kit (ESP32 included) | |
| 1 | × | DIYables Sensor Kit (30 sensors/displays) | |
| 1 | × | DIYables Sensor Kit (18 sensors/displays) |
Introduction to Servo Motor
The MG996R servo motor is a high-torque servo motor capable of lifting up to 15kg in weight. The motor can rotate its handle from 0° to 180°, providing precise control of angular position. For basic information about servo motors, please refer to the ESP32 - Servo Motor tutorial.
Pinout
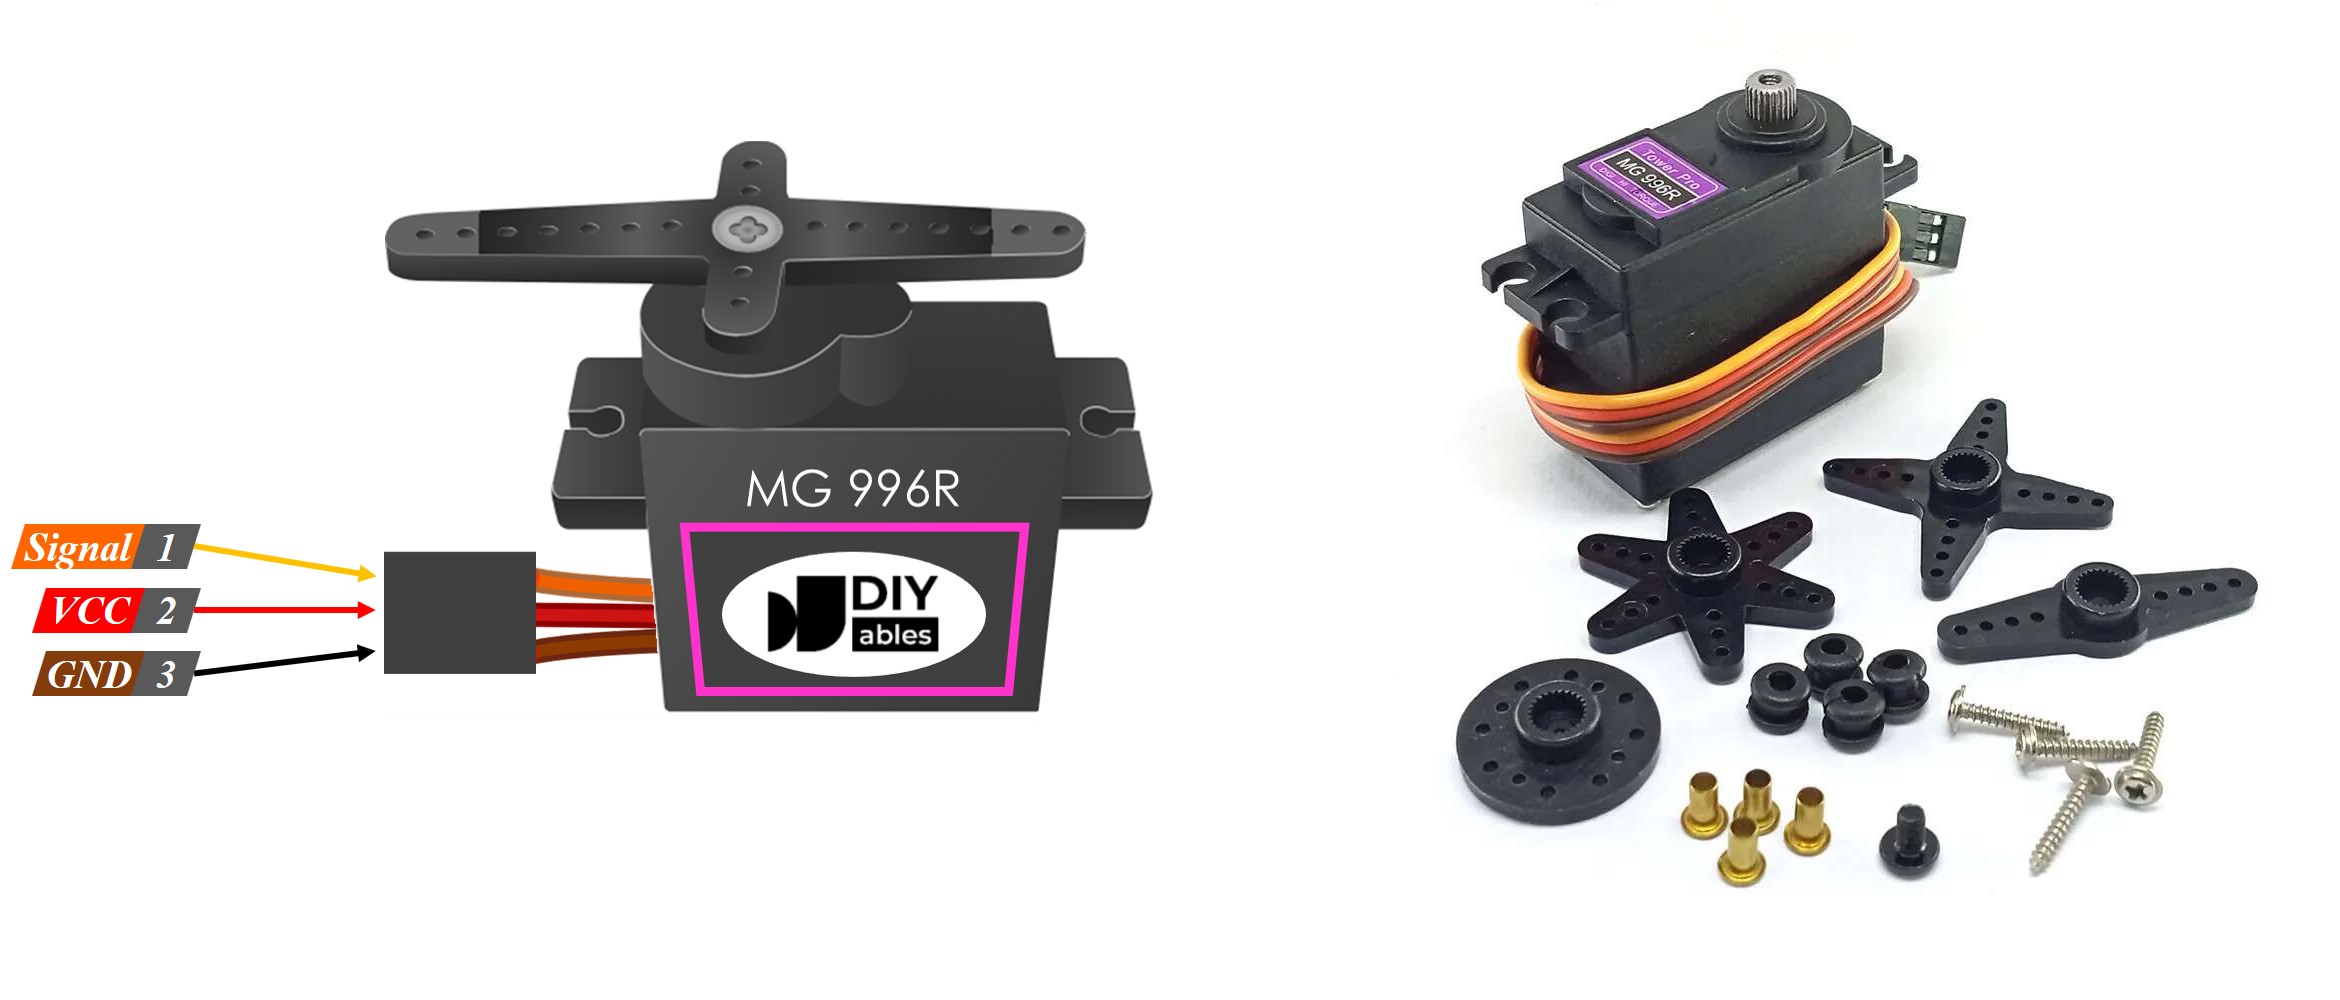
The MG996R servo motor used in this example includes three pins:
- VCC pin: (typically red) needs to be connected to VCC (4.8V – 7.2V)
- GND pin: (typically black or brown) needs to be connected to GND (0V)
- Signal pin: (typically yellow or orange) receives the PWM control signal from an ESP32's pin.

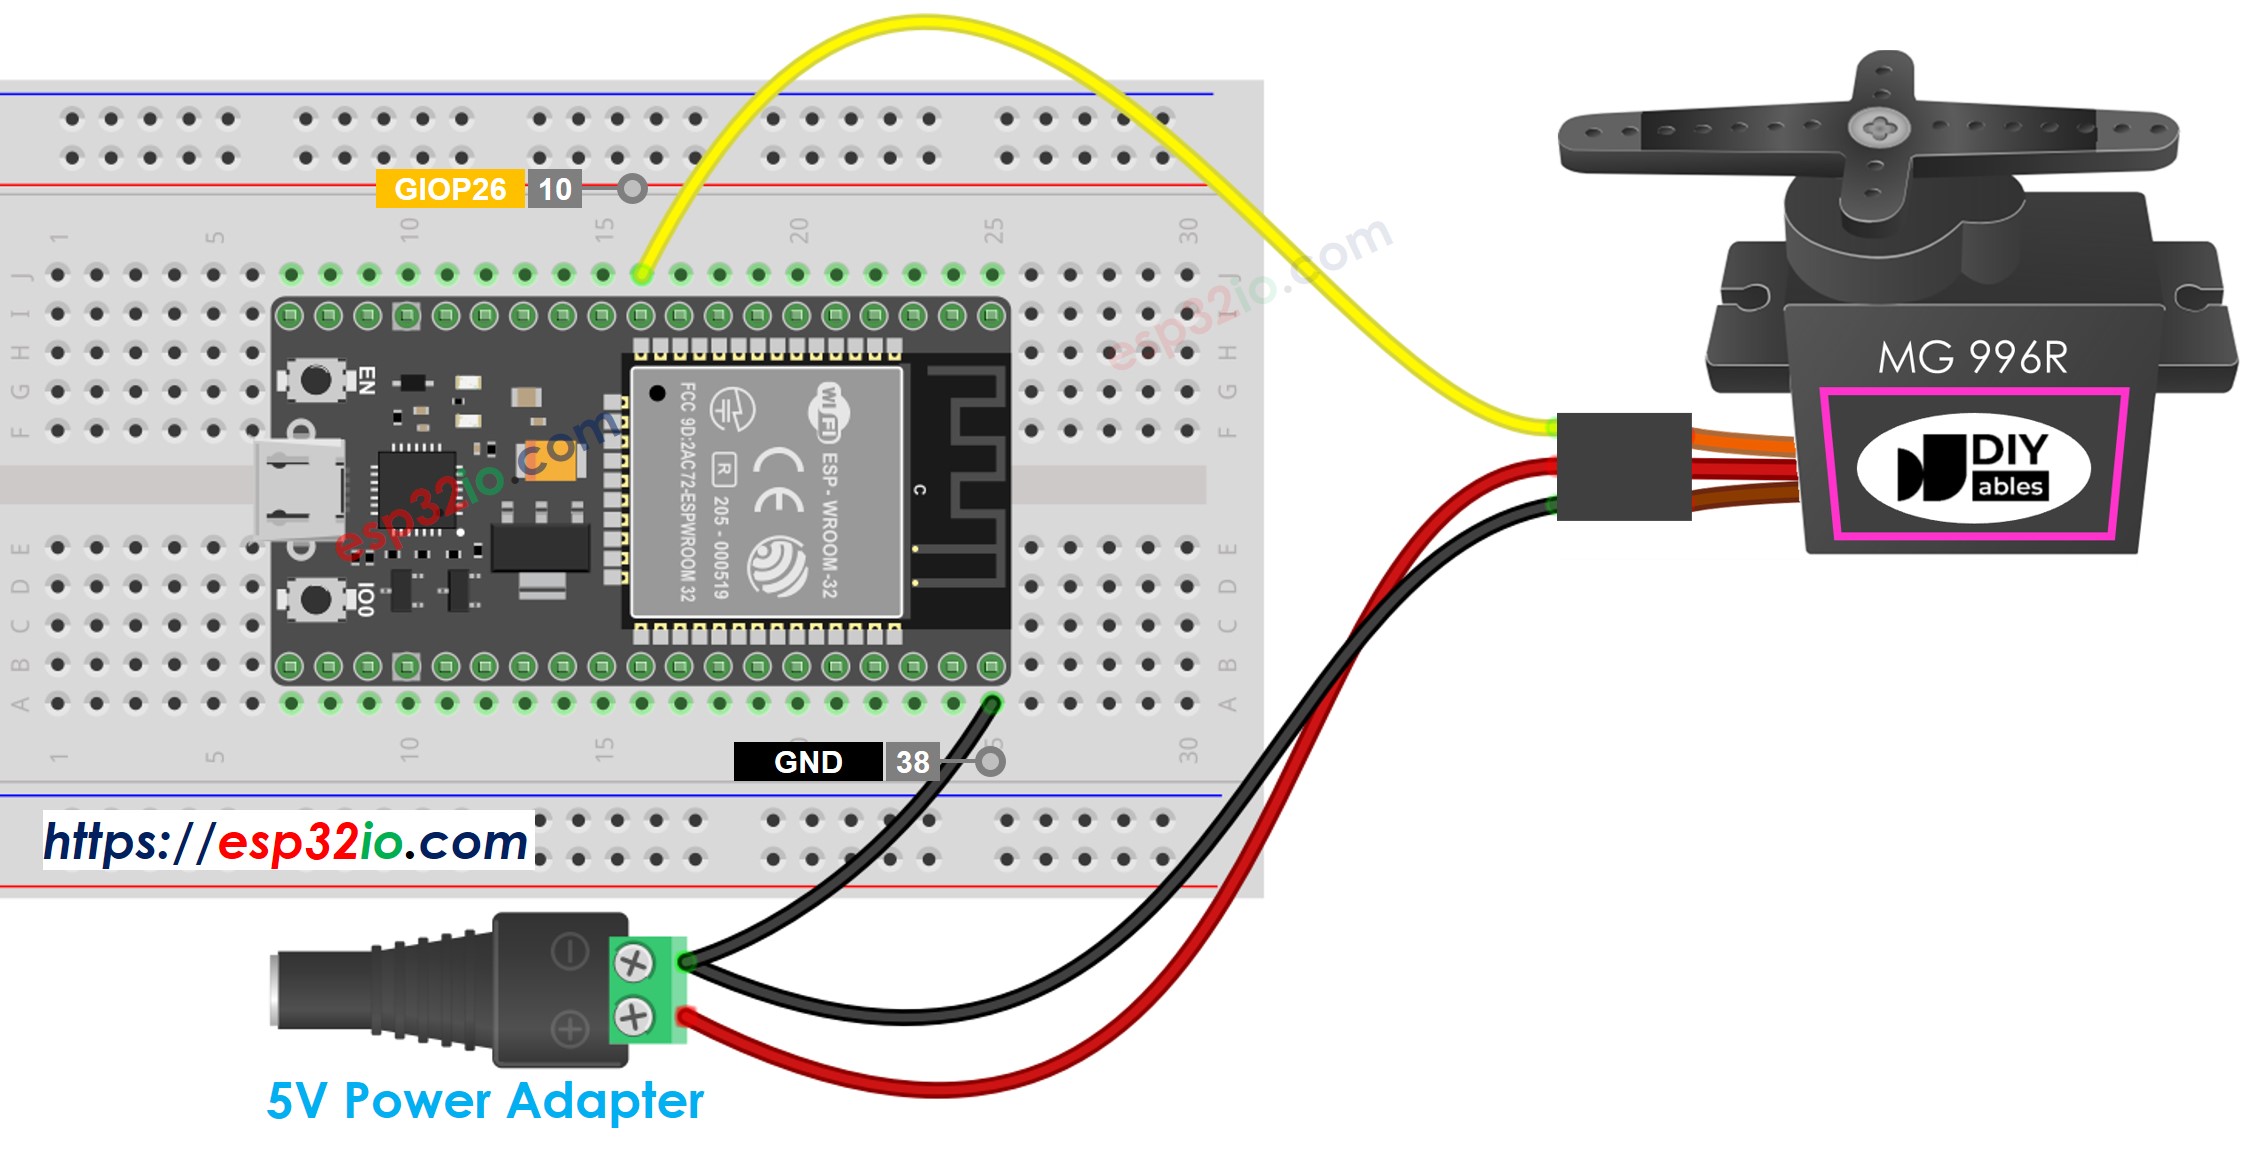
Wiring Diagram
Since the MG996R is a high-torque servo motor, it draws a lot of power. We should not power this motor via the 5v pin of ESP32. Instead, we need to use the external power supply for the MG996R servo motor.

This image is created using Fritzing. Click to enlarge image
If you're unfamiliar with how to supply power to the ESP32 and other components, you can find guidance in the following tutorial: The best way to Power ESP32 and sensors/displays.
ESP32 Code
Quick Instructions
- If this is the first time you use ESP32, see how to setup environment for ESP32 on Arduino IDE.
- Do the wiring as above image.
- Connect the ESP32 board to your PC via a micro USB cable
- Open Arduino IDE on your PC.
- Select the right ESP32 board (e.g. ESP32 Dev Module) and COM port.
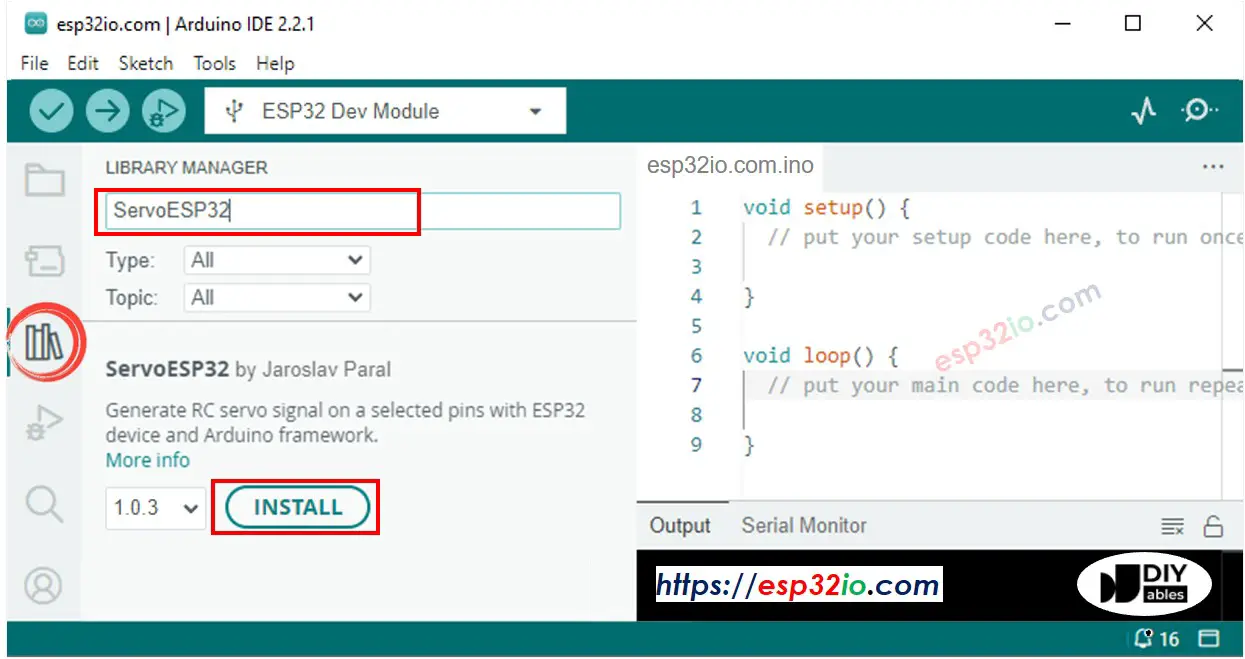
- Click to the Libraries icon on the left bar of the Arduino IDE.
- Type ESP32Servo on the search box, then look for the servo library by Kevin Harrington,John K. Bennett.
- Click Install button to install servo motor library for ESP32.

- Connect ESP32 to PC via USB cable
- Open Arduino IDE, select the right board and port
- Copy the above code and open with Arduino IDE
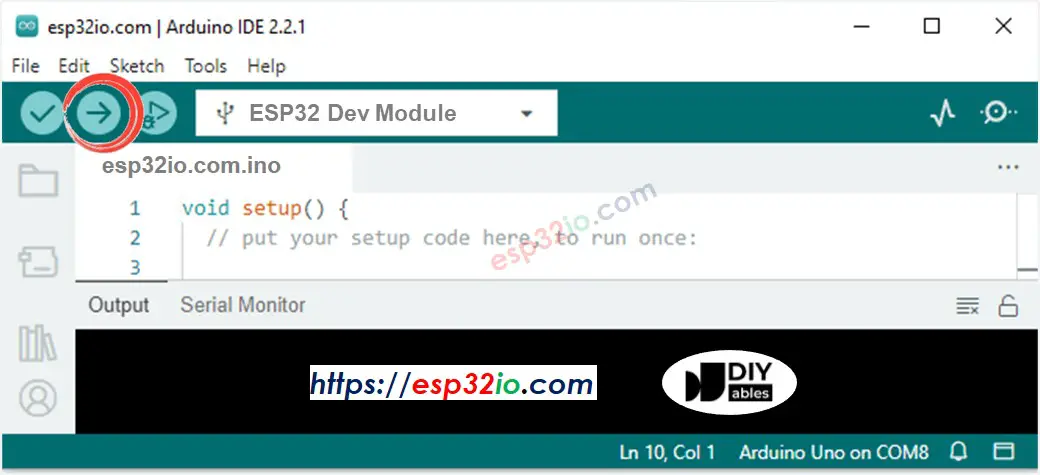
- Click Upload button on Arduino IDE to upload code to ESP32

- See the result: Servo motor rotates slowly from 0 to 180° and then back rotates slowly from 180 back to 0°
Code Explanation
Read the line-by-line explanation in comment lines of code!
How to Control Speed of Servo Motor
By using map() and millis() functions, we can control the speed of servo motor smoothly without blocking other code
Video Tutorial
Making video is a time-consuming work. If the video tutorial is necessary for your learning, please let us know by subscribing to our YouTube channel , If the demand for video is high, we will make the video tutorial.
