ESP32 - Button Count - LCD
In this tutorial, we will explore the capabilities of ESP32 to achieve the following objectives:
- Counting the number of times a button is pressed.
- Displaying the count number on an LCD I2C display.
- Implementing automatic vertical and horizontal center alignment for the count number on the LCD I2C display.
Furthermore, this tutorial addresses the debouncing of the button without relying on the delay() function. For a comprehensive understanding of why debouncing is crucial, you can refer to the explanation provided in Why do we need debouncing?.
This tutorial will guide you through the process of seamlessly integrating button press counting, LCD I2C display functionality, and debouncing techniques with your ESP32 project.
Hardware Used In This Tutorial
Or you can buy the following kits:
| 1 | × | DIYables ESP32 Starter Kit (ESP32 included) | |
| 1 | × | DIYables Sensor Kit (18 sensors/displays) |
Buy Note: You can also build the LCD I2C display by combining LCD 1602 Display and PCF8574 I2C Adapter Module.
Wiring Diagram
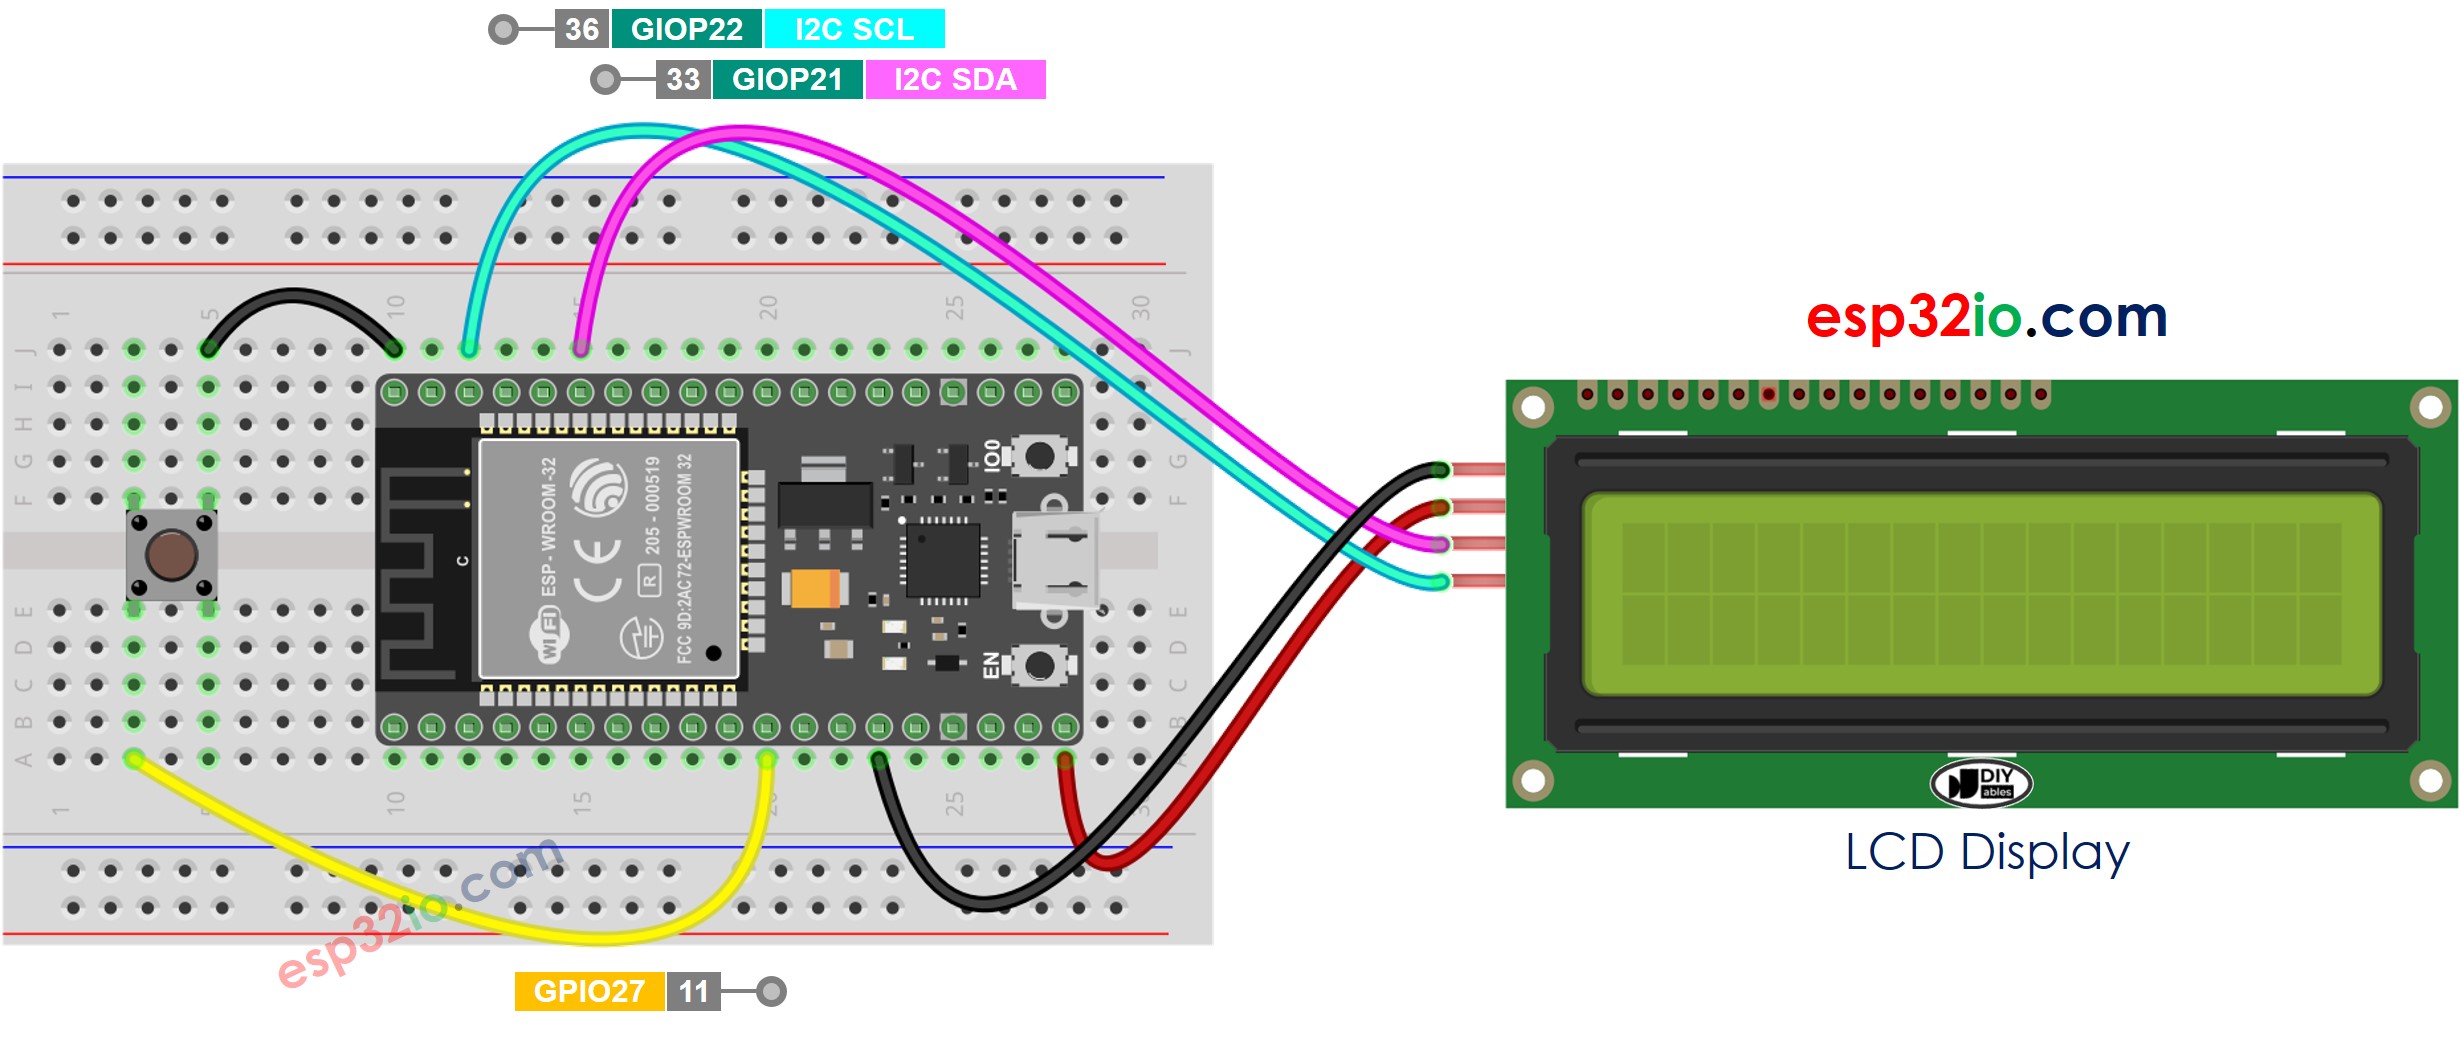
This image is created using Fritzing. Click to enlarge image
If you're unfamiliar with how to supply power to the ESP32 and other components, you can find guidance in the following tutorial: The best way to Power ESP32 and sensors/displays.
ESP32 Code - displaying button count on LCD I2C
Quick Instructions
- If this is the first time you use ESP32, see how to setup environment for ESP32 on Arduino IDE.
- Do the wiring as above image.
- Connect the ESP32 board to your PC via a micro USB cable
- Open Arduino IDE on your PC.
- Select the right ESP32 board (e.g. ESP32 Dev Module) and COM port.
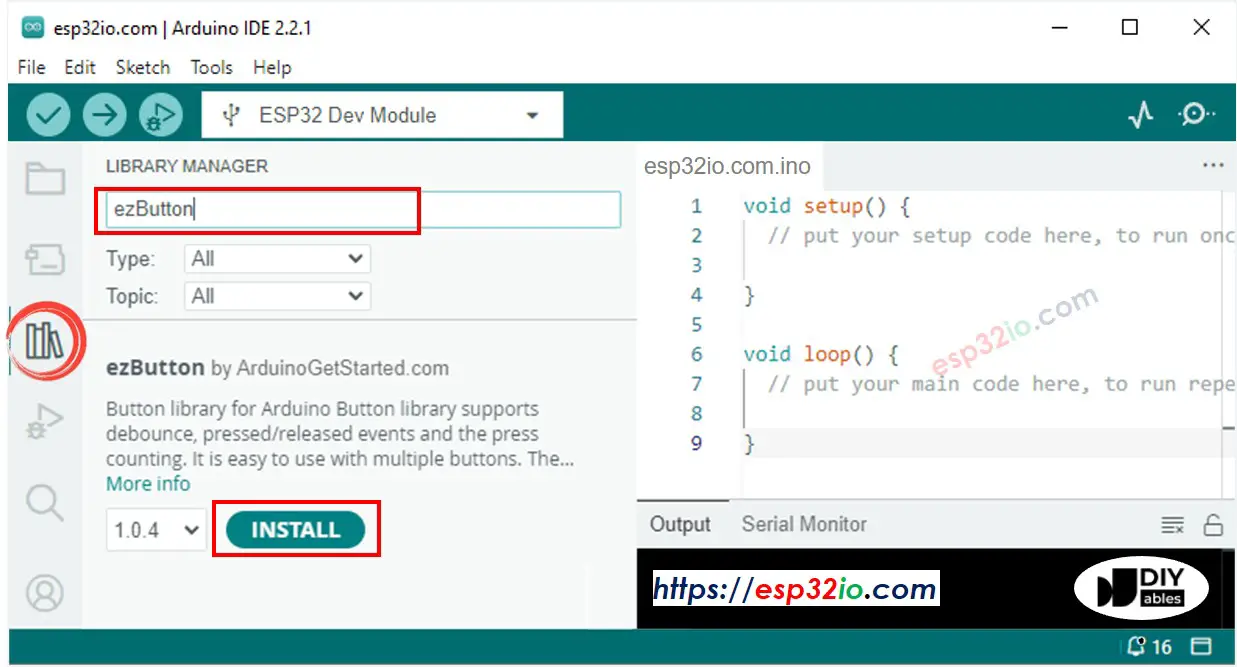
- Click to the Libraries icon on the left bar of the Arduino IDE.
- Search “ezButton”, then find the button library by ArduinoGetStarted
- Click Install button to install ezButton library.
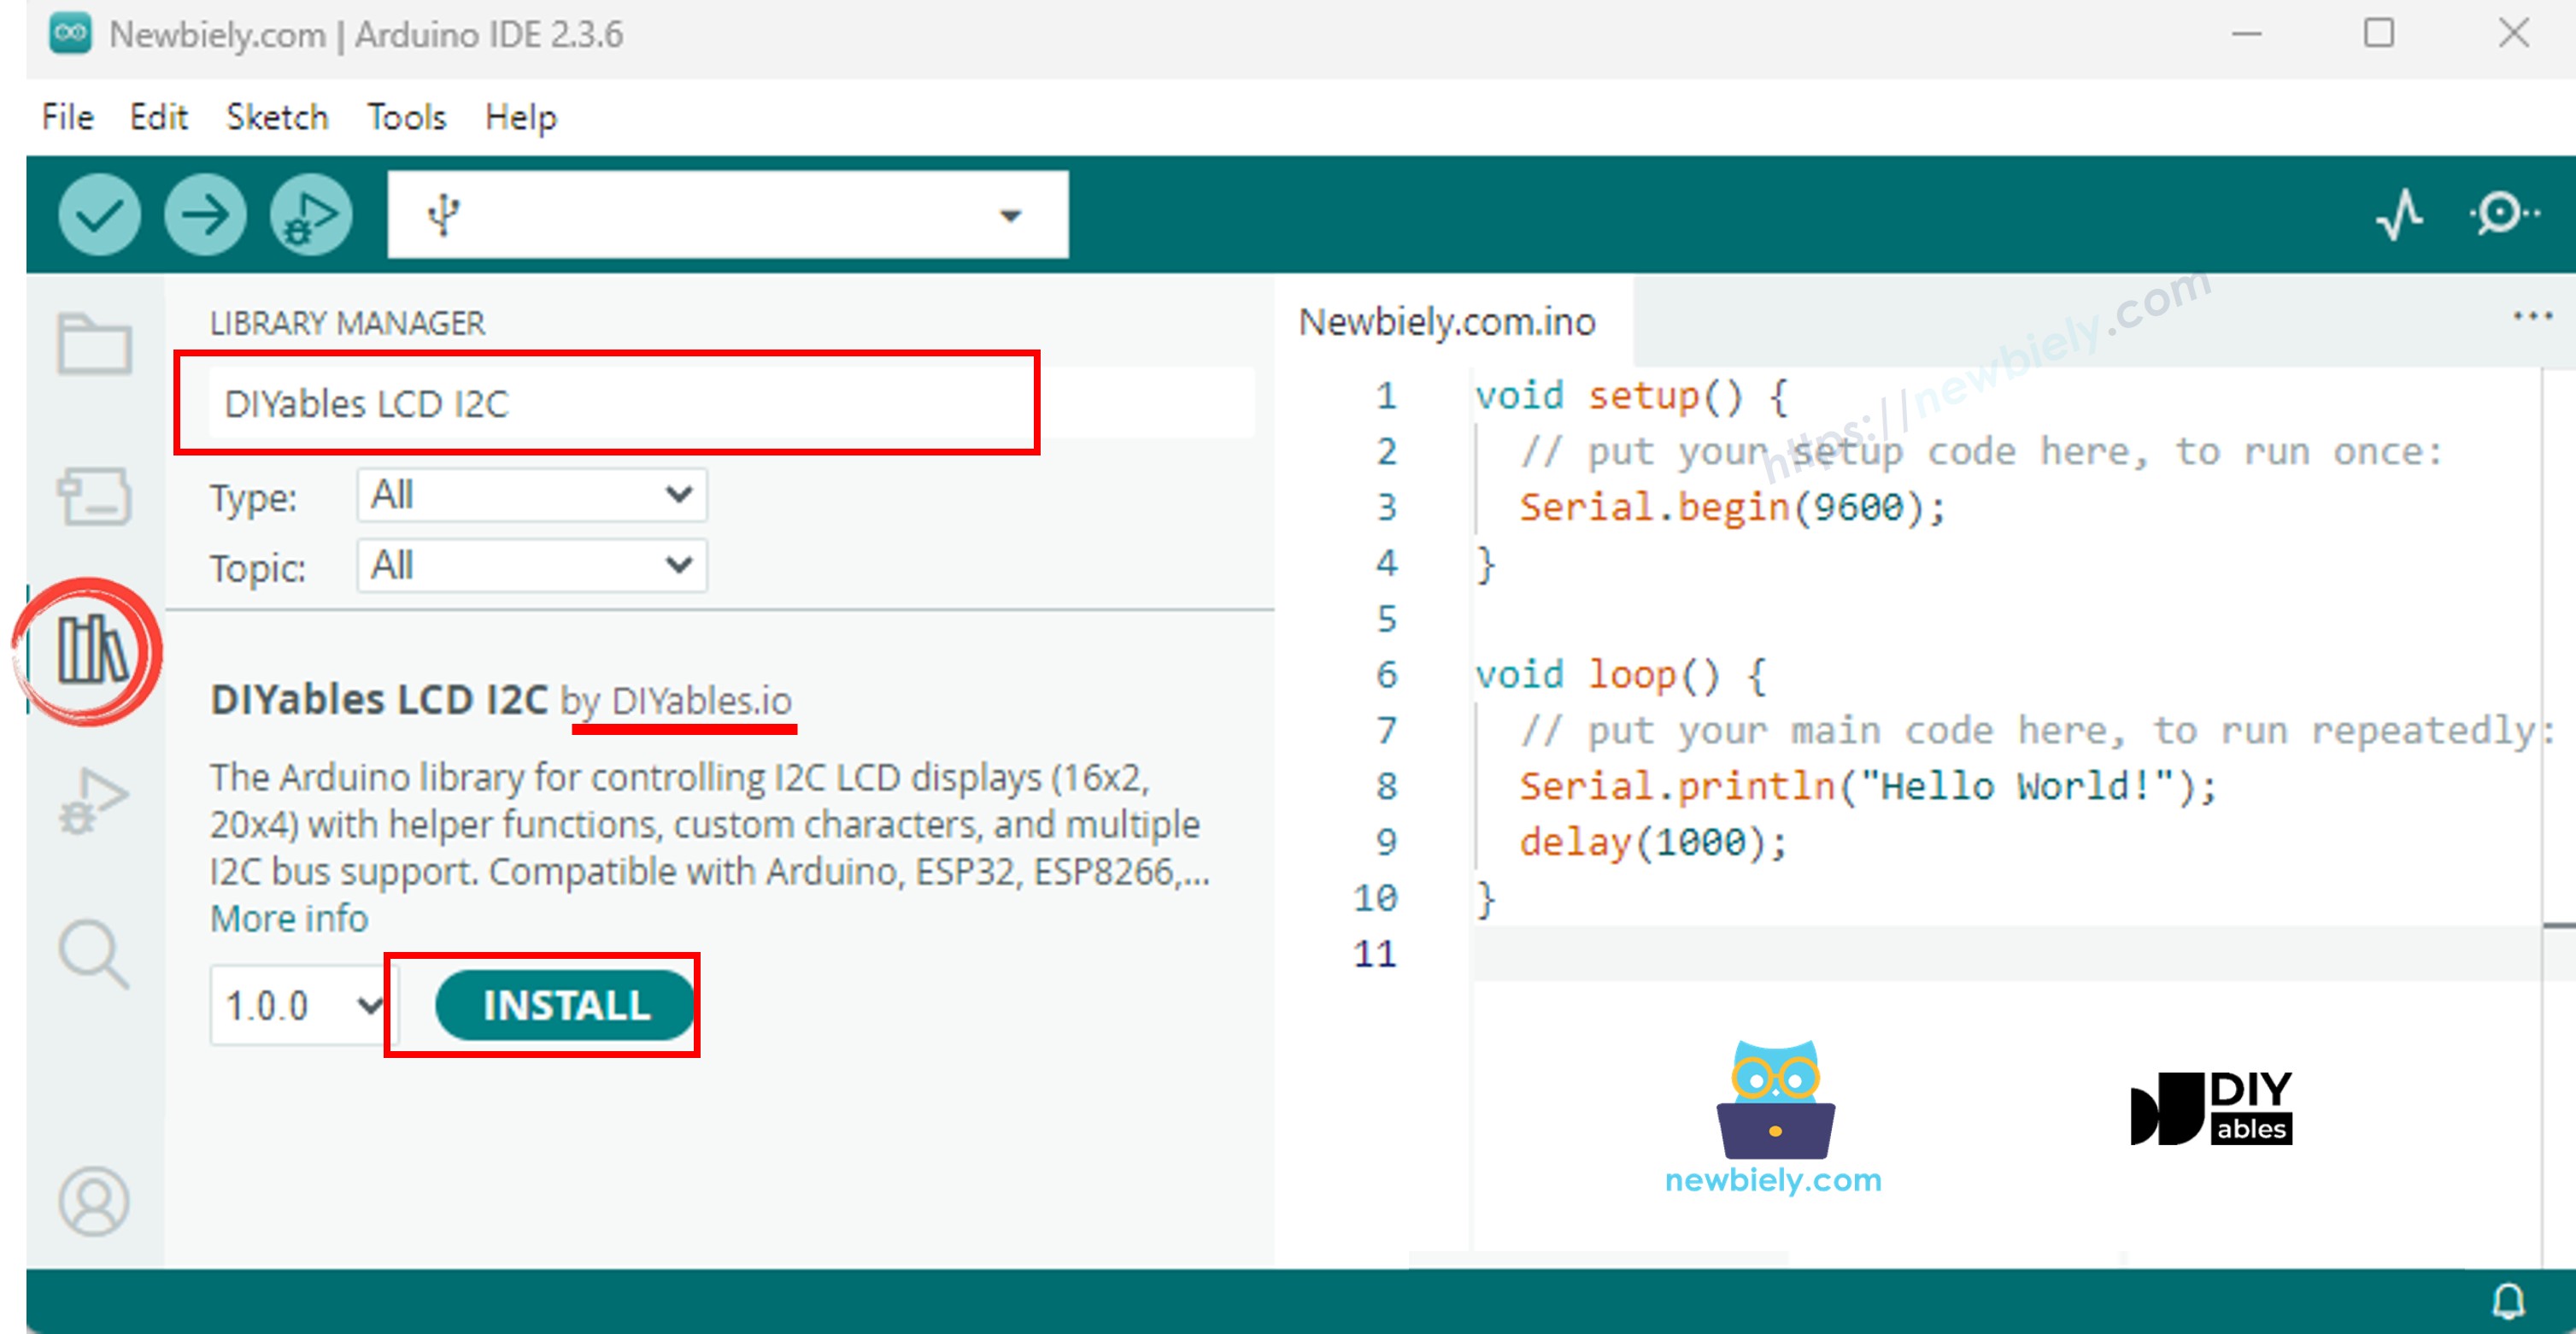
- Search “DIYables LCD I2C”, then find the DIYables_LCD_I2C library by DIYables
- Click Install button to install DIYables_LCD_I2C library.
- Copy the above code and open with Arduino IDE
- Click Upload button on Arduino IDE to upload code to ESP32
- Press button several times
- See the counting number changed on LCD
※ NOTE THAT:
The I2C address of LCD can vary according to the manufacturers. In the code, we used 0x27 that is specified by DIYables manufacturer
Video Tutorial
Making video is a time-consuming work. If the video tutorial is necessary for your learning, please let us know by subscribing to our YouTube channel , If the demand for video is high, we will make the video tutorial.