ESP32 - Button - Servo Motor
This tutorial instructs you how to use ESP32 with button and servo motor. In detail, we will learn how to do:
- ESP32 automatically rotates servo motor to 90° if the button is pressed.
- ESP32 automatically rotates servo motor to 0° if the button is pressed again
That process is repeated.
Hardware Used In This Tutorial
Or you can buy the following kits:
| 1 | × | DIYables ESP32 Starter Kit (ESP32 included) | |
| 1 | × | DIYables Sensor Kit (18 sensors/displays) |
Buy Note: In case of using multiple servo motors, it is recommended to use the PCA9685 16 Channel PWM Servo Driver Module to save MCU pins and simplify the wiring process.
Wiring Diagram
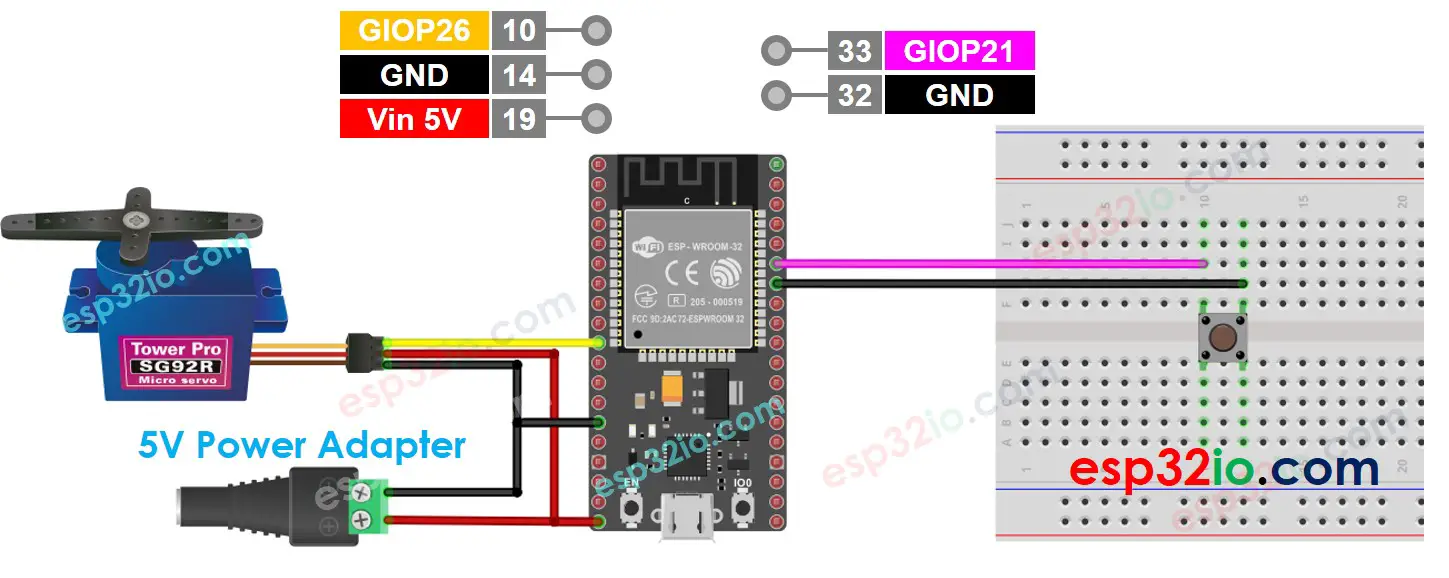
This image is created using Fritzing. Click to enlarge image
If you're unfamiliar with how to supply power to the ESP32 and other components, you can find guidance in the following tutorial: The best way to Power ESP32 and sensors/displays.
ESP32 Code - Button Controls Servo Motor
Why need to debounce for the button? ⇒ see ESP32 - Button Debounce tutorial
Quick Instructions
- If this is the first time you use ESP32, see how to setup environment for ESP32 on Arduino IDE.
- Install ezButton library. See How To
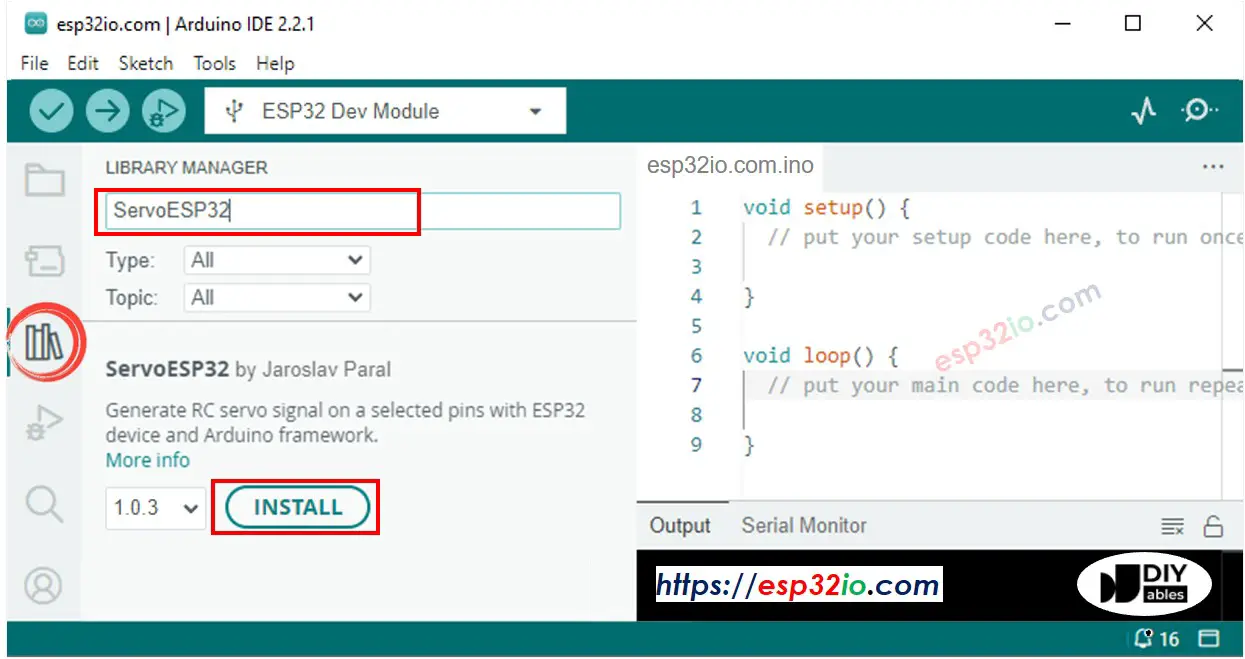
- Click to the Libraries icon on the left bar of the Arduino IDE.
- Type ESP32Servo on the search box, then look for the servo library by Kevin Harrington,John K. Bennett.
- Click Install button to install servo motor library for ESP32.
- Copy the above code and paste it to Arduino IDE.
- Compile and upload code to ESP32 board by clicking Upload button on Arduino IDE
- Press the button several times
- See the servo motor's rotation
Video Tutorial
Making video is a time-consuming work. If the video tutorial is necessary for your learning, please let us know by subscribing to our YouTube channel , If the demand for video is high, we will make the video tutorial.