ESP32 - Button - Debounce
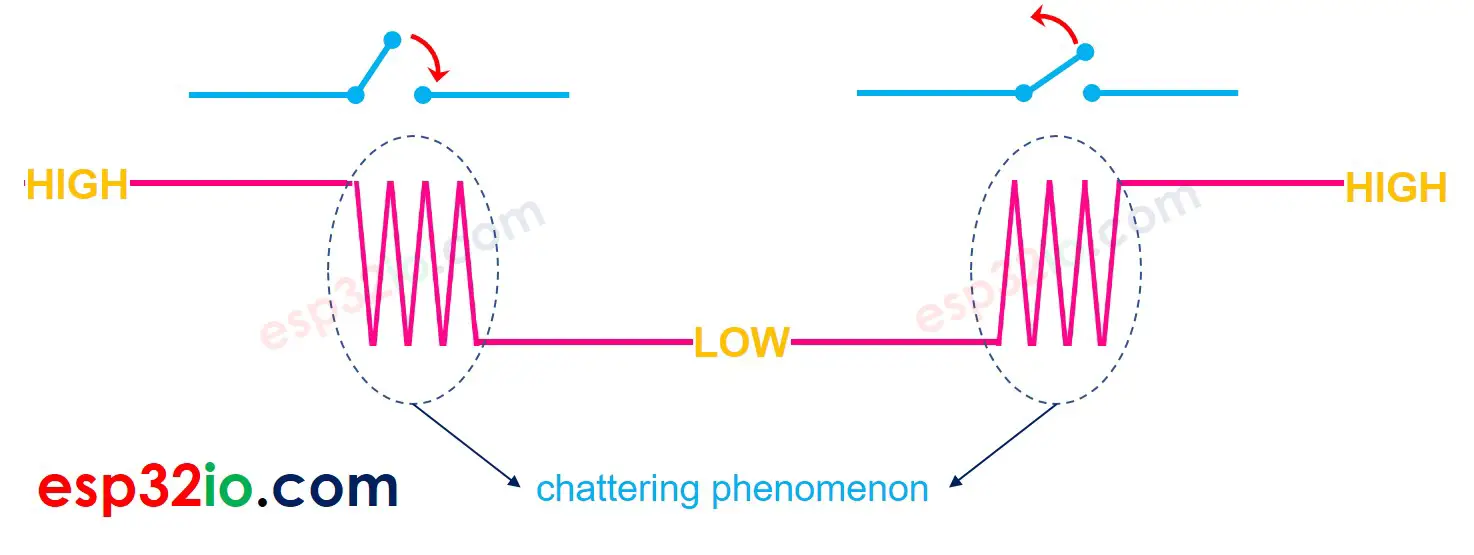
⇒ No, it is not. That is because in the physical world. when you do a single press on a button, the state of the button is quickly toggled between LOW and HIGH several times rather than once. This is the mechanical and physical characteristic. This phenomenon is known with a name: chattering. The chattering phenomenon makes MCU (e.g. ESP32) read multiple button presses in response to a single actual press. This results in a malfunction. The process to eliminate this phenomenon is called debounce. This tutorial shows how to do it.
This tutorial provides:
- How to debounce for a button on ESP32 code
- How to debounce for a button on ESP32 code using library
- How to debounce for multiple buttons on ESP32 code using library
This tutorial shows how to program the ESP32 using the Arduino language (C/C++) via the Arduino IDE. If you’d like to learn how to program the ESP32 with MicroPython, visit this ESP32 MicroPython - Button - Debounce tutorial.
Hardware Used In This Tutorial
Or you can buy the following kits:
| 1 | × | DIYables ESP32 Starter Kit (ESP32 included) | |
| 1 | × | DIYables Sensor Kit (18 sensors/displays) |
Wiring Diagram
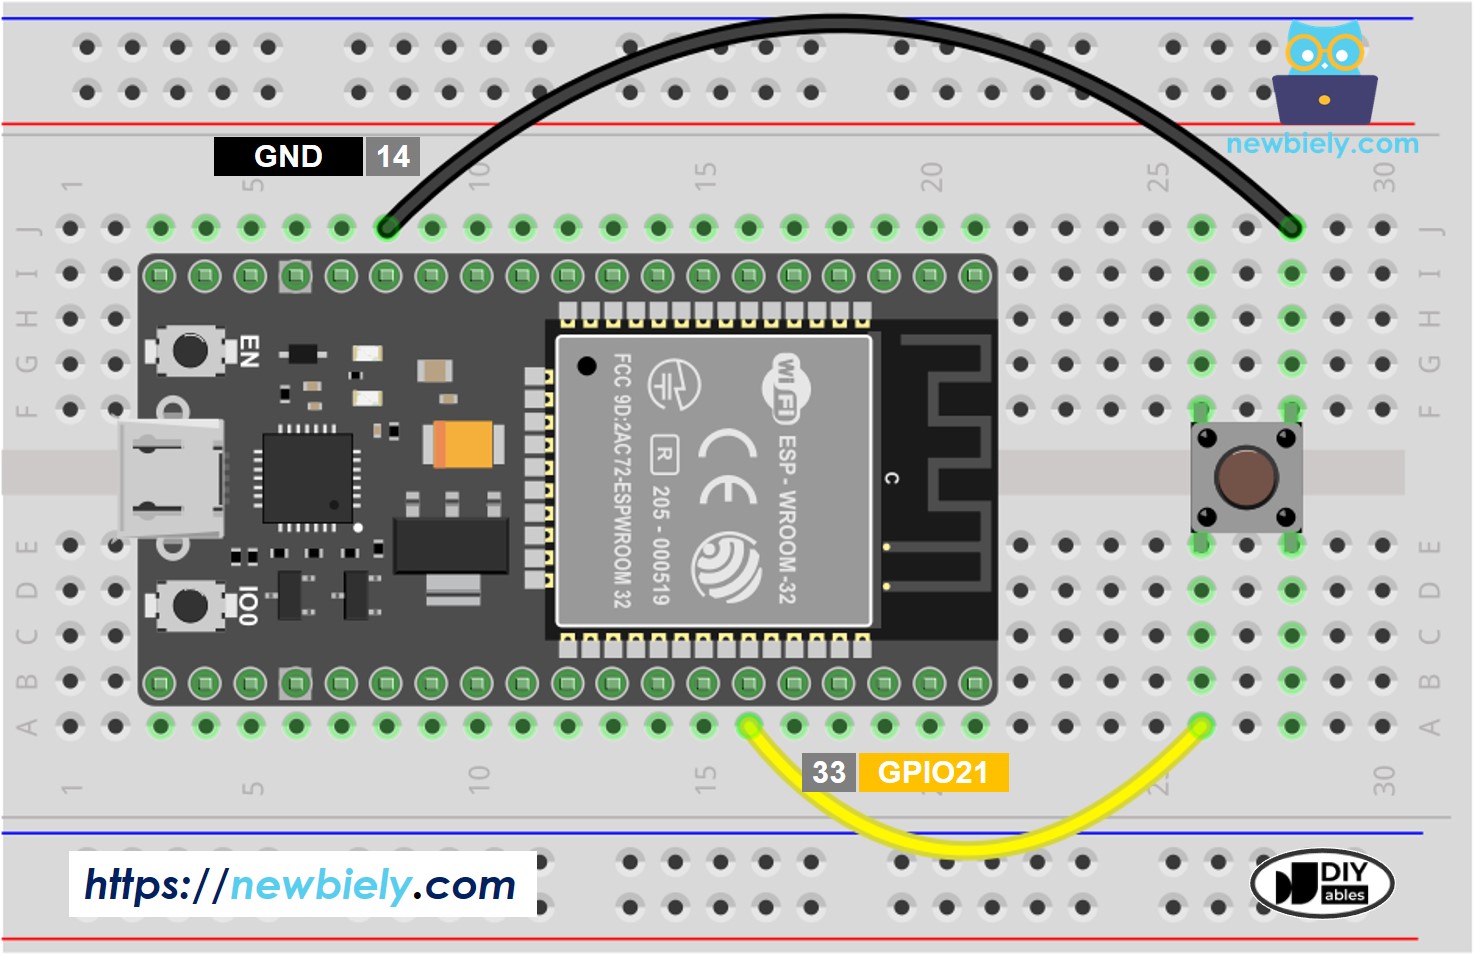
This image is created using Fritzing. Click to enlarge image
To make it clear, let's run ESP32 code WITHOUT and WITH debounce, and compare their results
If you're unfamiliar with how to supply power to the ESP32 and other components, you can find guidance in the following tutorial: The best way to Power ESP32 and sensors/displays.
Reading Button without Debounce
Quick Instructions
- If this is the first time you use ESP32, see how to setup environment for ESP32 on Arduino IDE.
- Do the wiring as above image.
- Connect the ESP32 board to your PC via a micro USB cable
- Open Arduino IDE on your PC.
- Select the right ESP32 board (e.g. ESP32 Dev Module) and COM port.
- Copy the below code and paste it to Arduino IDE.
- Compile and upload code to ESP32 board by clicking Upload button on Arduino IDE

- Open Serial Monitor on Arduino IDE
- Press the button once but keep it several seconds, and then release it.
- See the result on Serial Monitor. It looks like the below:
⇒ As you can see, you did only a single press and release, but ESP32 read multiple presses and releases.
※ NOTE THAT:
The chattering phenomenon does not happen all times. If it does not happen, please try the above test several time.
Reading Button with Debounce
Quick Instructions
- If this is the first time you use ESP32, see how to setup environment for ESP32 on Arduino IDE.
- Copy the below code and paste it to Arduino IDE.
- Compile and upload code to ESP32 board by clicking Upload button on Arduino IDE
- Open Serial Monitor on Arduino IDE
- Keep pressing the button several seconds and then release it.
- See the result on Serial Monitor. It looks like the below:
⇒ As you can see, you did one press and release, and ESP32 read one press and release. The chattering is eliminated.
We Made It Simple - ESP32 Button Debounce Code with Library
To make it easy for newbies, especially when deboucing for multiple buttons, we made a button library, called ezButton. You can learn about ezButton library here.
ESP32 Button Debounce Code for A Single Button
ESP32 Button Debounce Code for A Multiple Buttons
Let's write debounce code for three buttons.
The wiring diagram
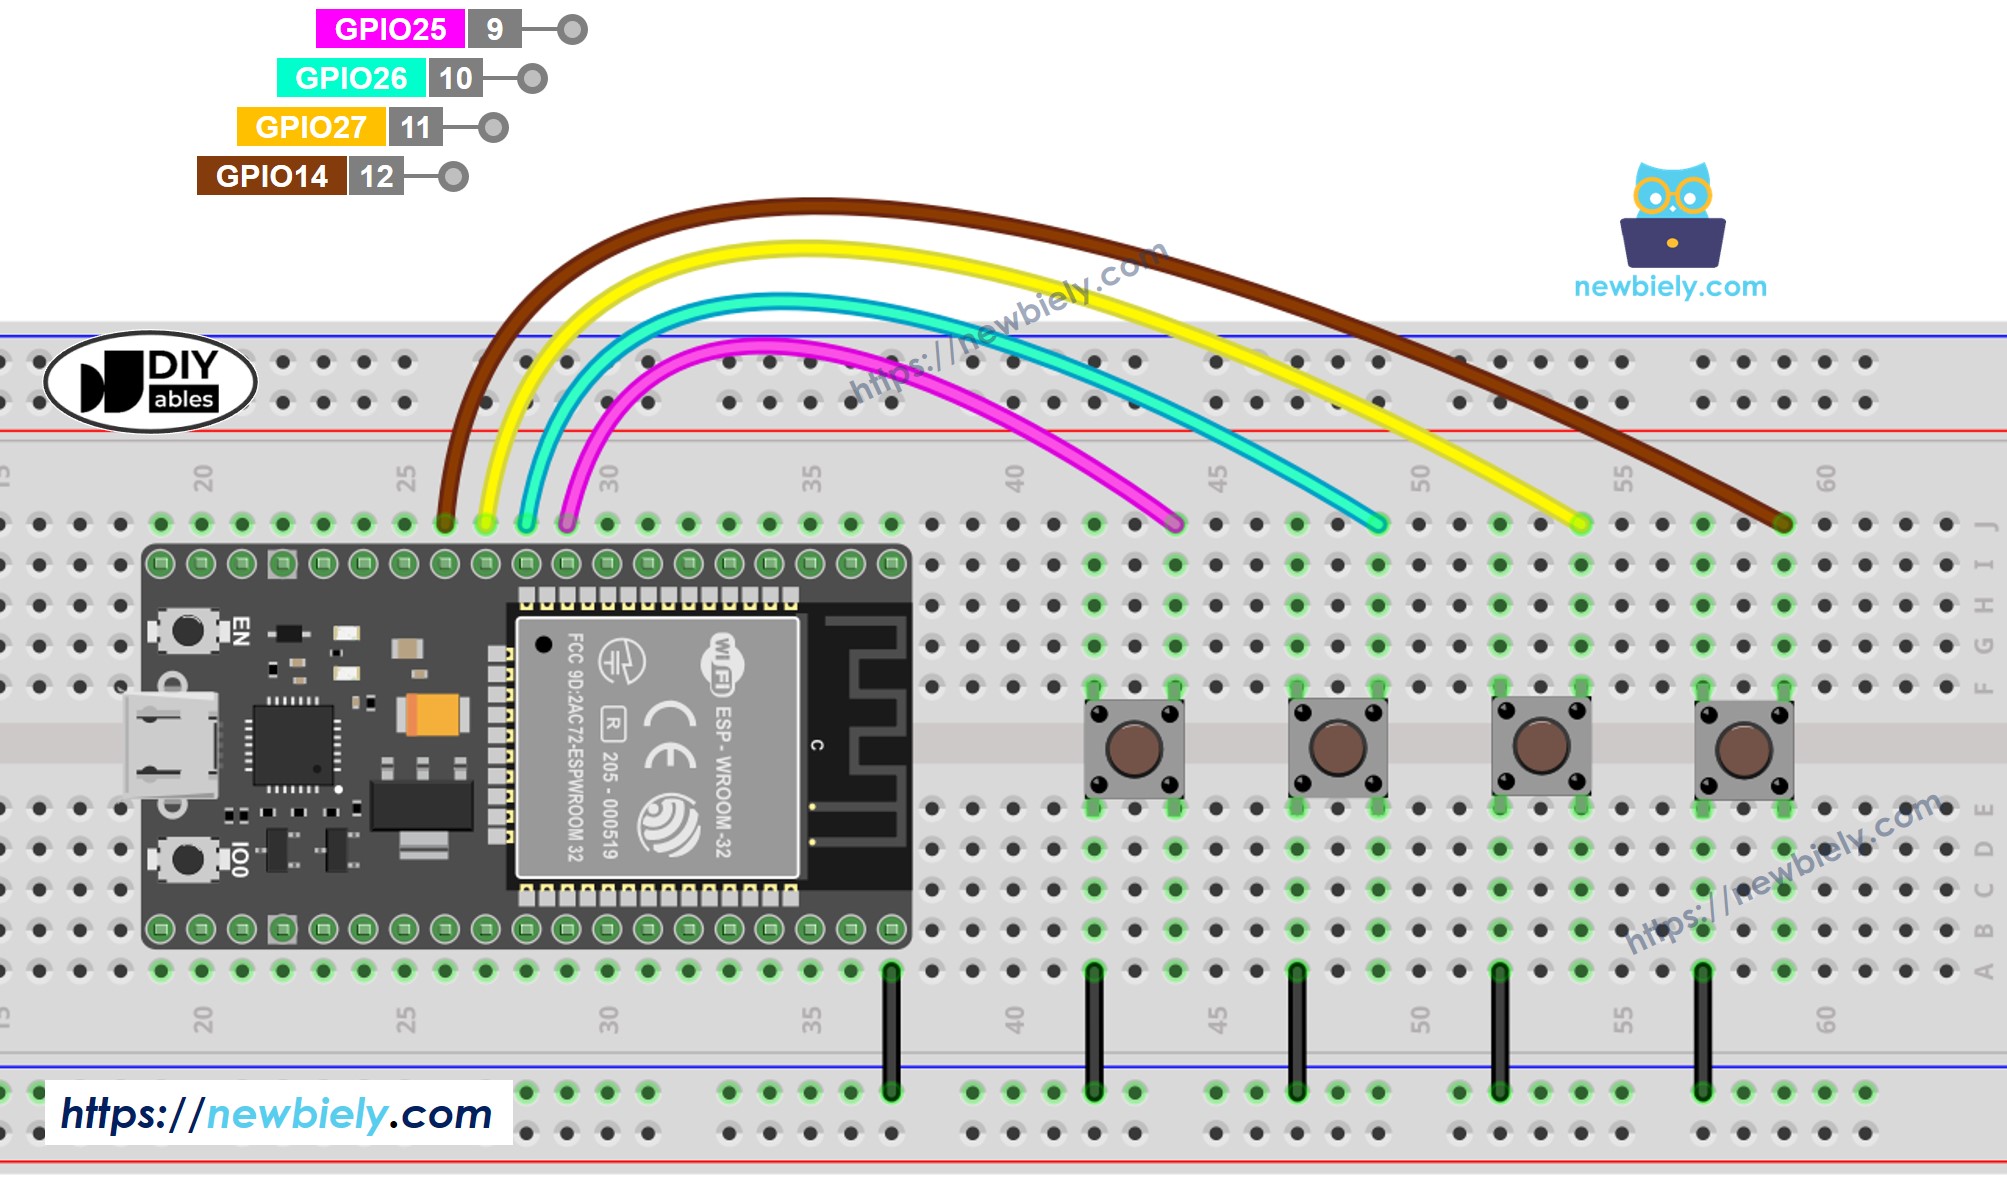
This image is created using Fritzing. Click to enlarge image
Video Tutorial
Making video is a time-consuming work. If the video tutorial is necessary for your learning, please let us know by subscribing to our YouTube channel , If the demand for video is high, we will make the video tutorial.
Additional Knowledge
- DEBOUNCE_TIME value depends on the hardware. Different hardware may use different values.
- The debounce should also apply for on/off switch, limit switch, reed switch, touch sensor ...