DIYables ESP32 Web Apps Web Digital Pins
Overview
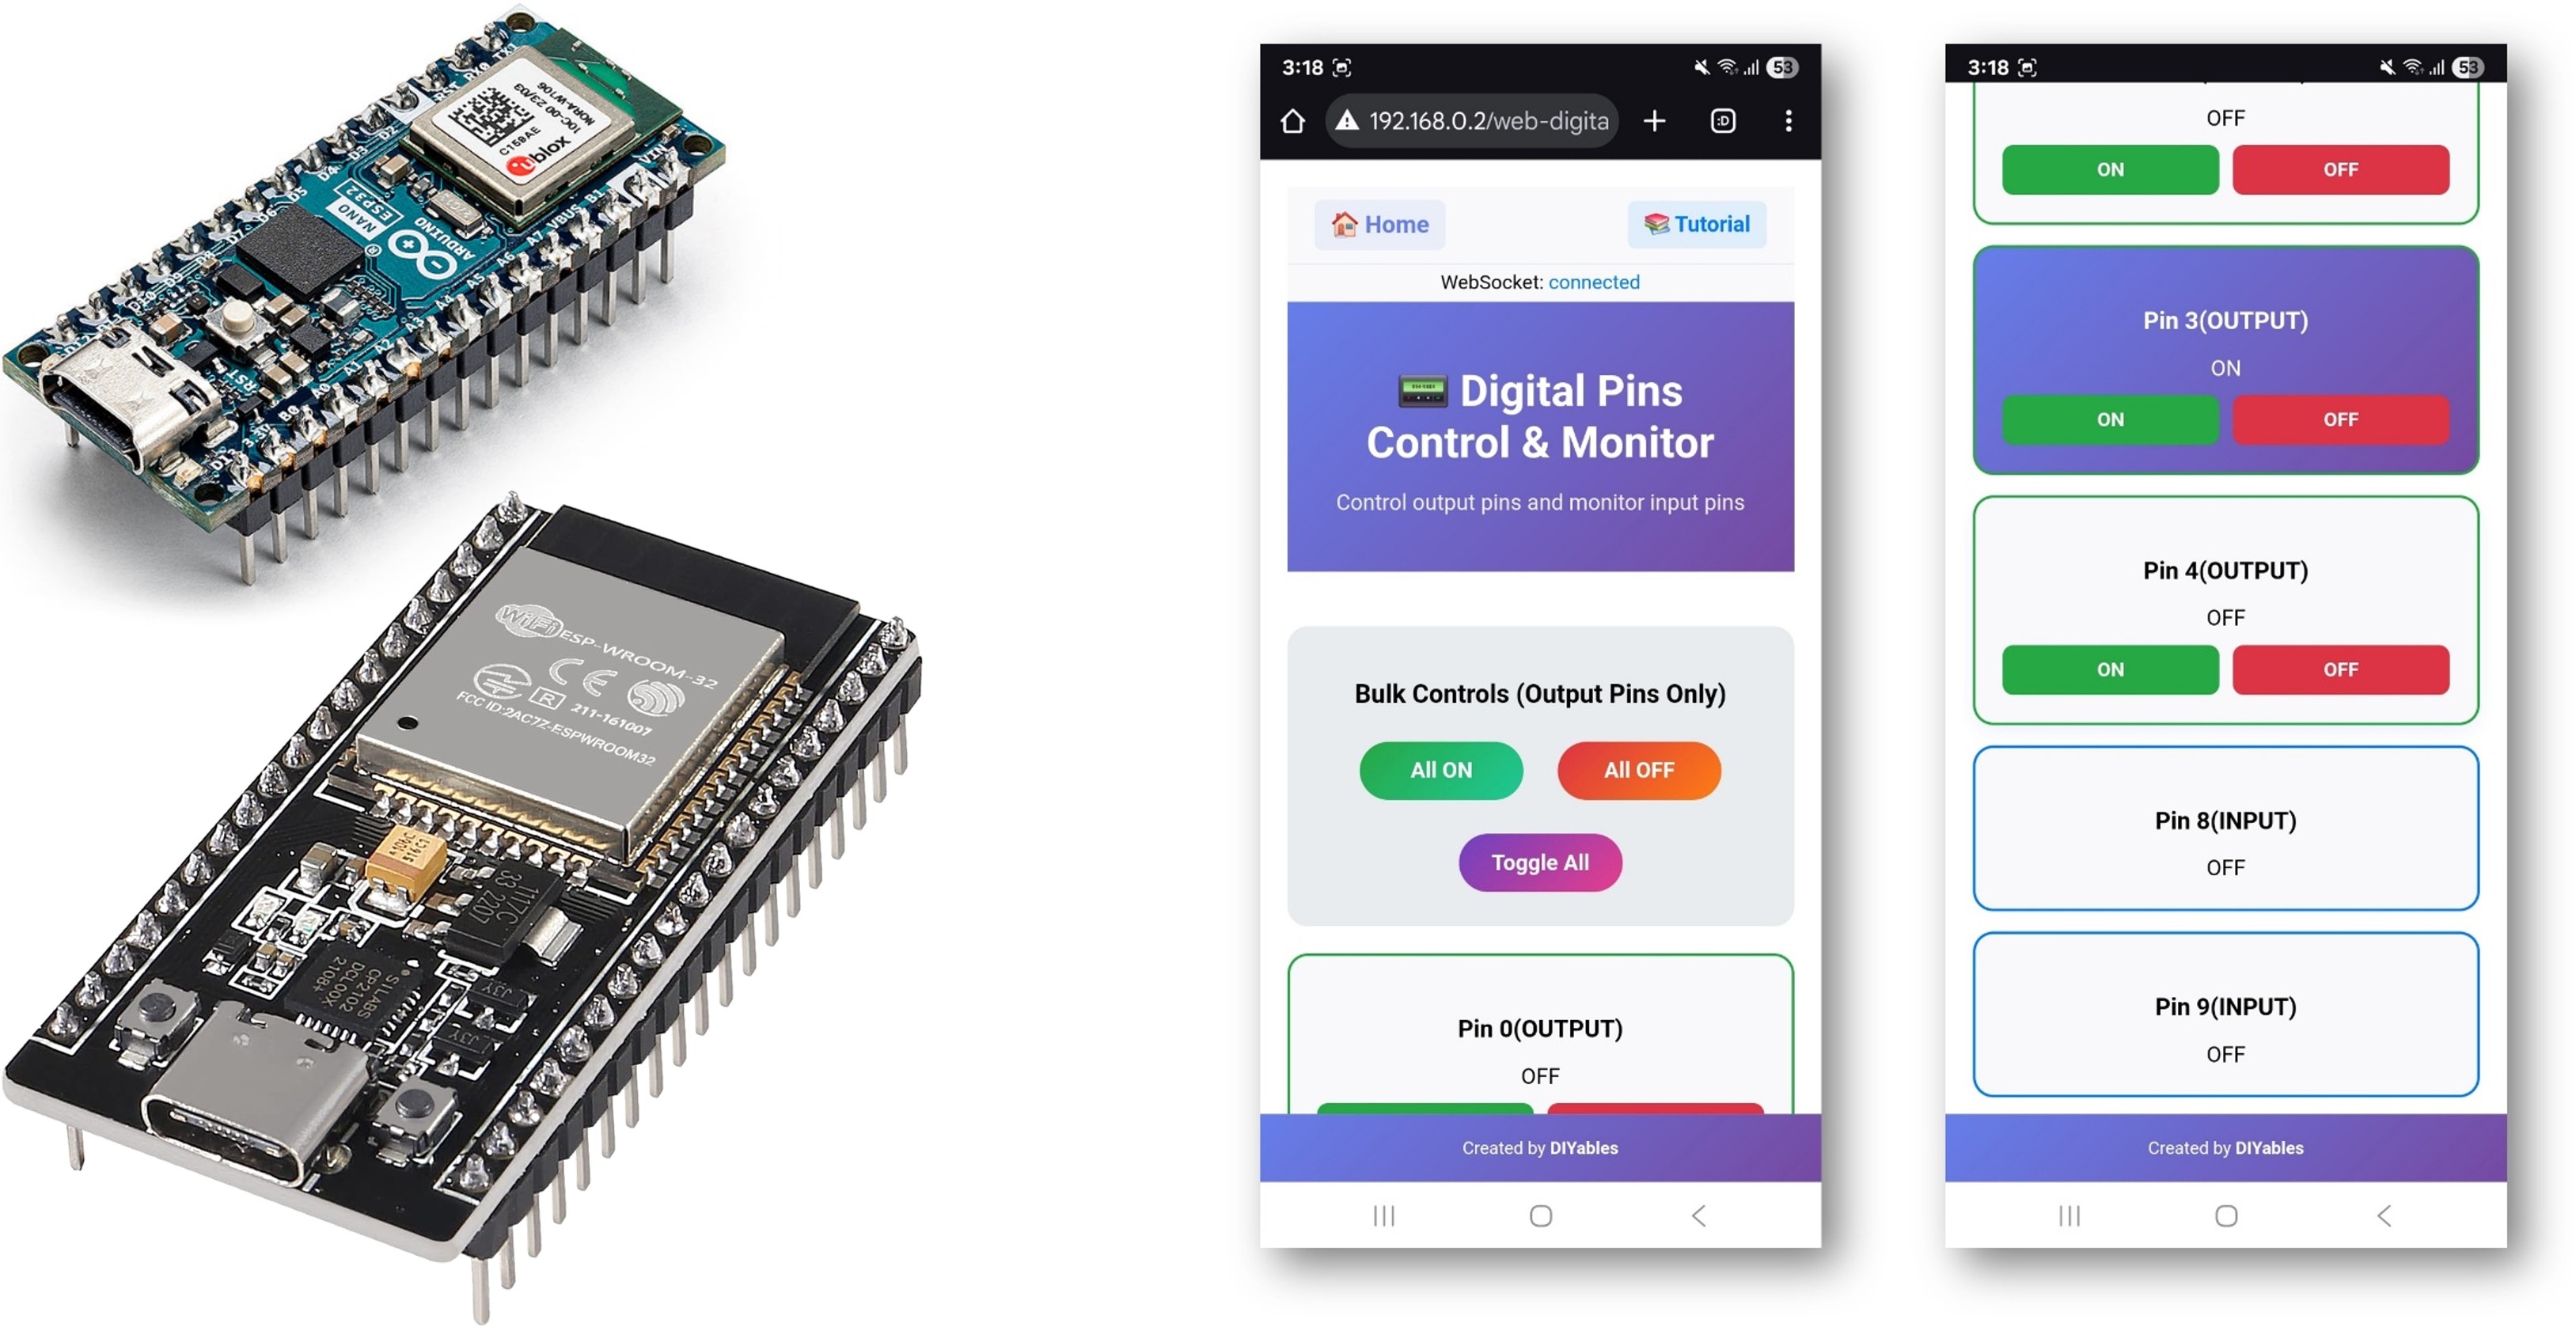
The WebDigitalPins example provides a web-based interface to control and monitor all digital pins on your Arduino. Designed for ESP32 educational platform with enhanced GPIO capabilities, extended pin configurations, and built-in educational features for learning digital electronics. You can turn pins on/off, monitor their states in real-time, and perform bulk operations through an intuitive web interface.
Features
- Individual Pin Control: Control each digital pin (0-13) separately
- Real-time Status: Monitor pin states with visual indicators
- Bulk Operations: Control all pins at once (All ON, All OFF, Toggle All)
- Pin Configuration: Set pins as Input or Output via web interface
- Visual Feedback: Color-coded buttons show pin states (green=ON, red=OFF)
- Responsive Design: Works on desktop, tablet, and mobile devices
- WebSocket Communication: Instant updates without page refresh
Hardware Used In This Tutorial
Or you can buy the following kits:
| 1 | × | DIYables ESP32 Starter Kit (ESP32 included) | |
| 1 | × | DIYables Sensor Kit (18 sensors/displays) |
Setup Instructions
Quick Instructions
Follow these instructions step by step:
- If this is your first time using the ESP32, refer to the tutorial on setting up the environment for ESP32 in the Arduino IDE.
- Connect the ESP32 board to your computer using a USB cable.
- Launch the Arduino IDE on your computer.
- Select the appropriate ESP32 board (e.g. ESP32 Dev Module) and COM port.
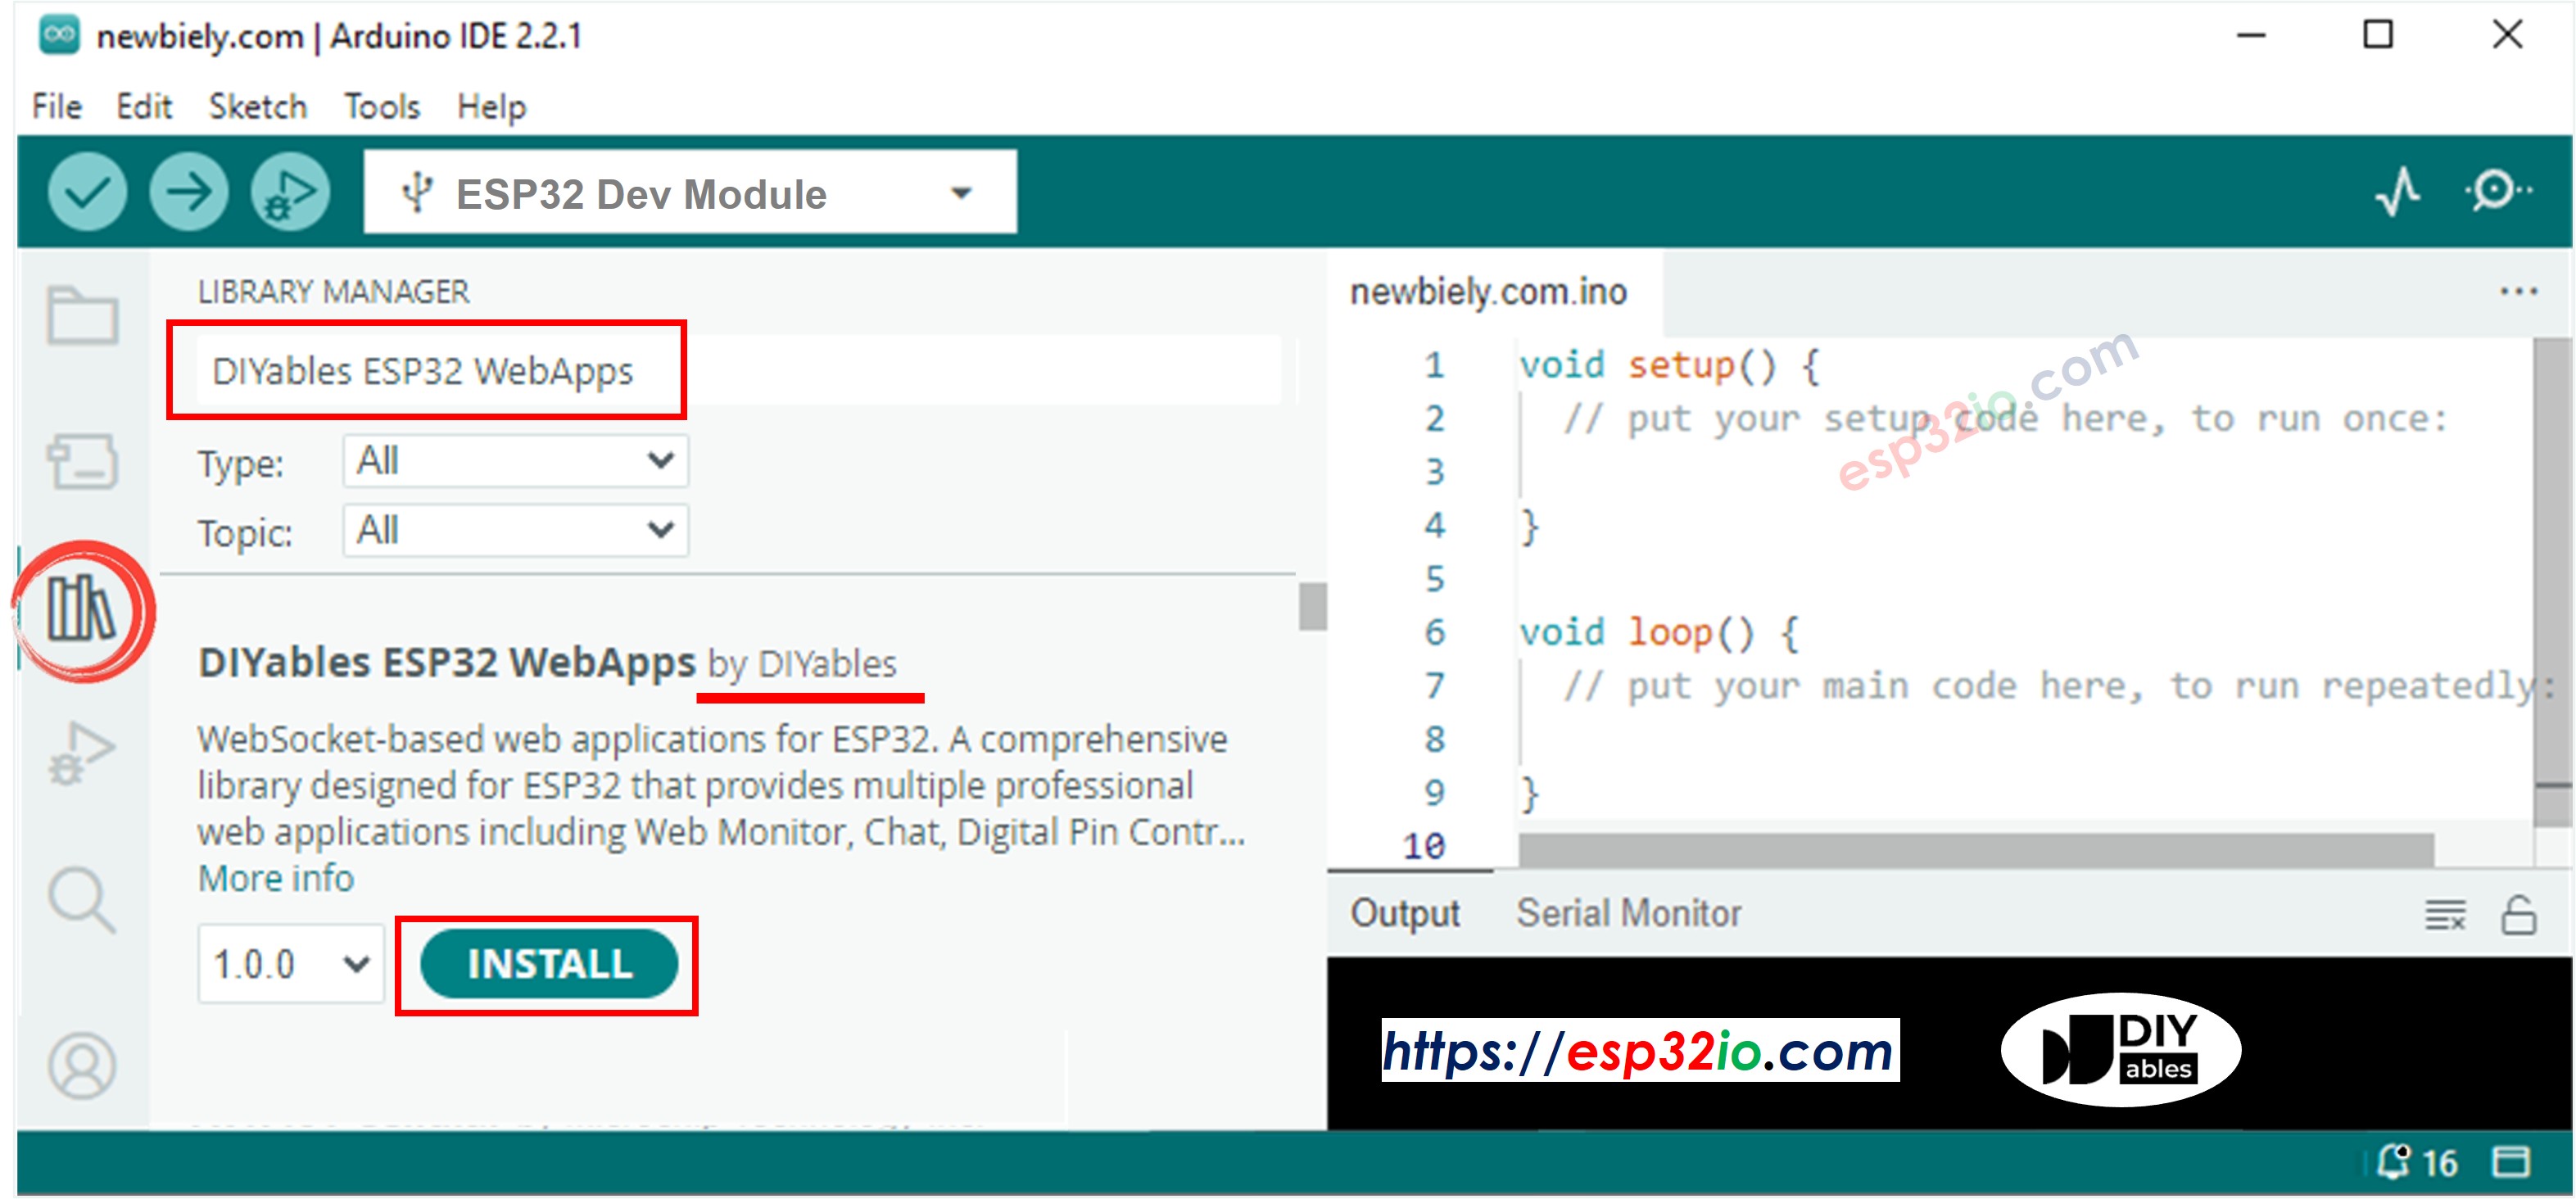
- Navigate to the Libraries icon on the left bar of the Arduino IDE.
- Search "DIYables ESP32 WebApps", then find the DIYables ESP32 WebApps Library by DIYables
- Click Install button to install the library.
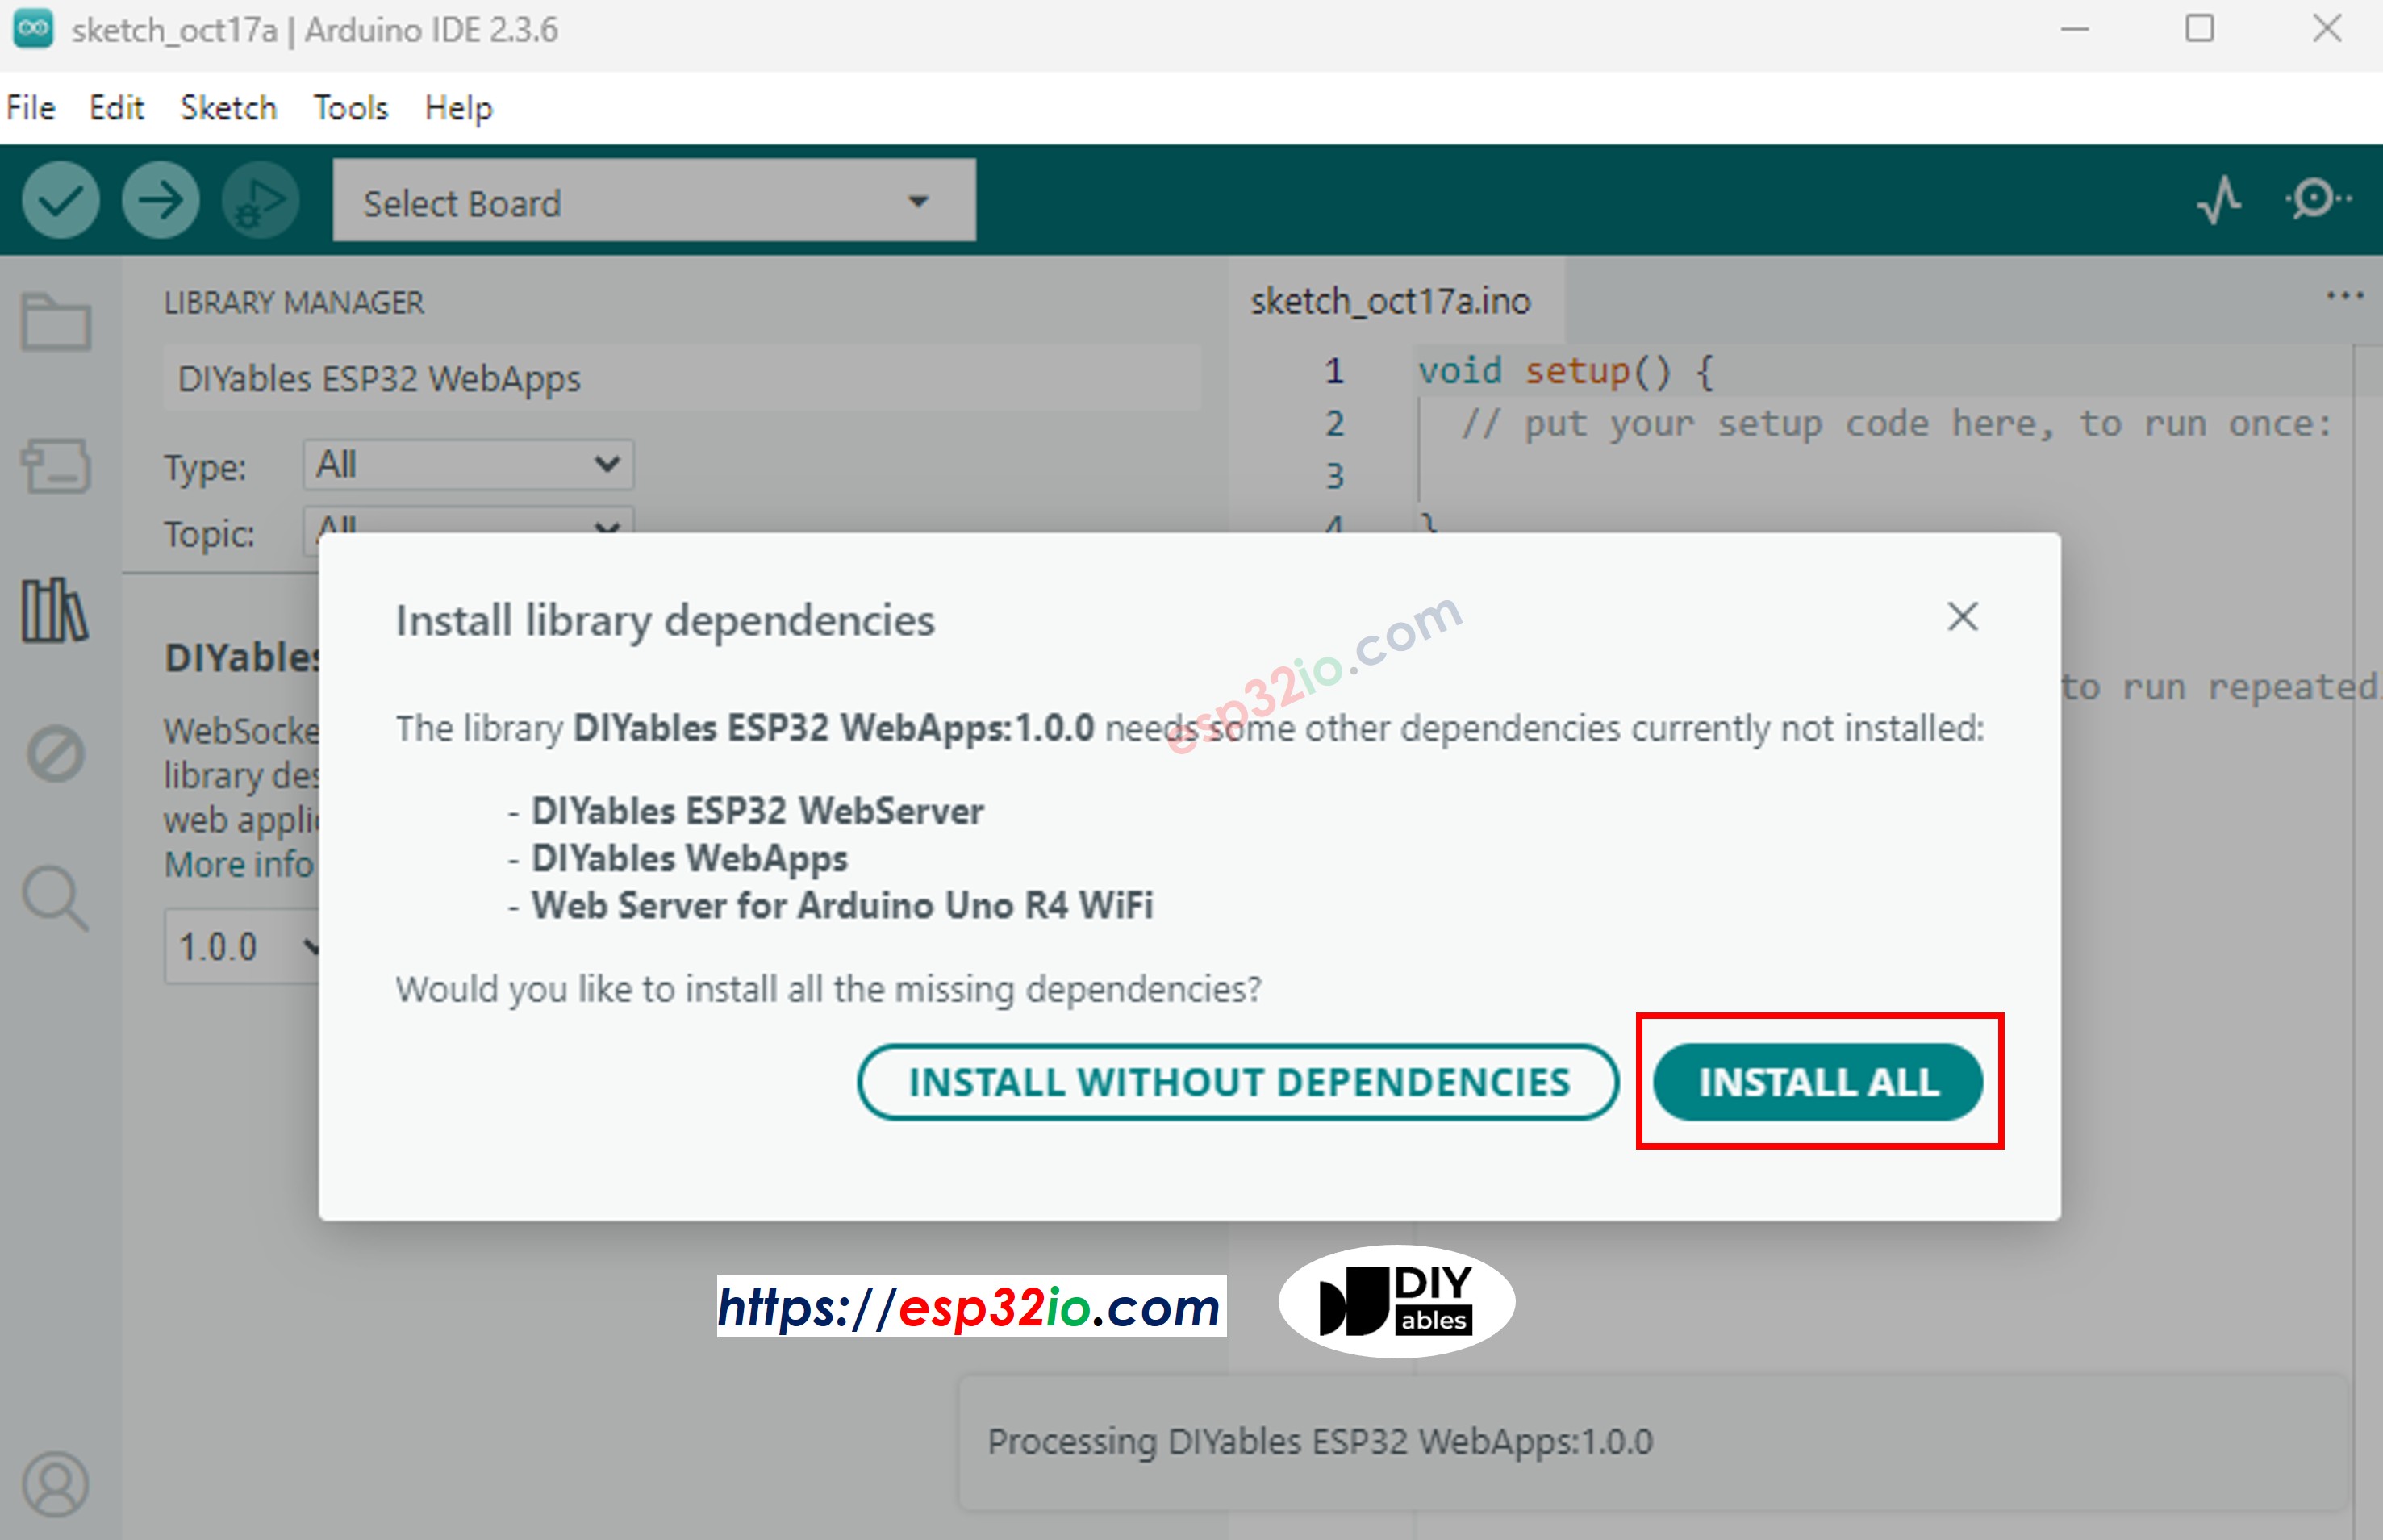
- You will be asked for installing some other library dependencies
- Click Install All button to install all library dependencies.
- On Arduino IDE, Go to File Examples DIYables ESP32 WebApps WebDigitalPins example, or copy the above code and paste it to the editor of Arduino IDE
- Configure WiFi credentials in the code by updating these lines:
- Click Upload button on Arduino IDE to upload code to ESP32
- Open the Serial Monitor
- Check out the result on Serial Monitor. It looks like the below
- If you do not see anything, reboot ESP32 board.
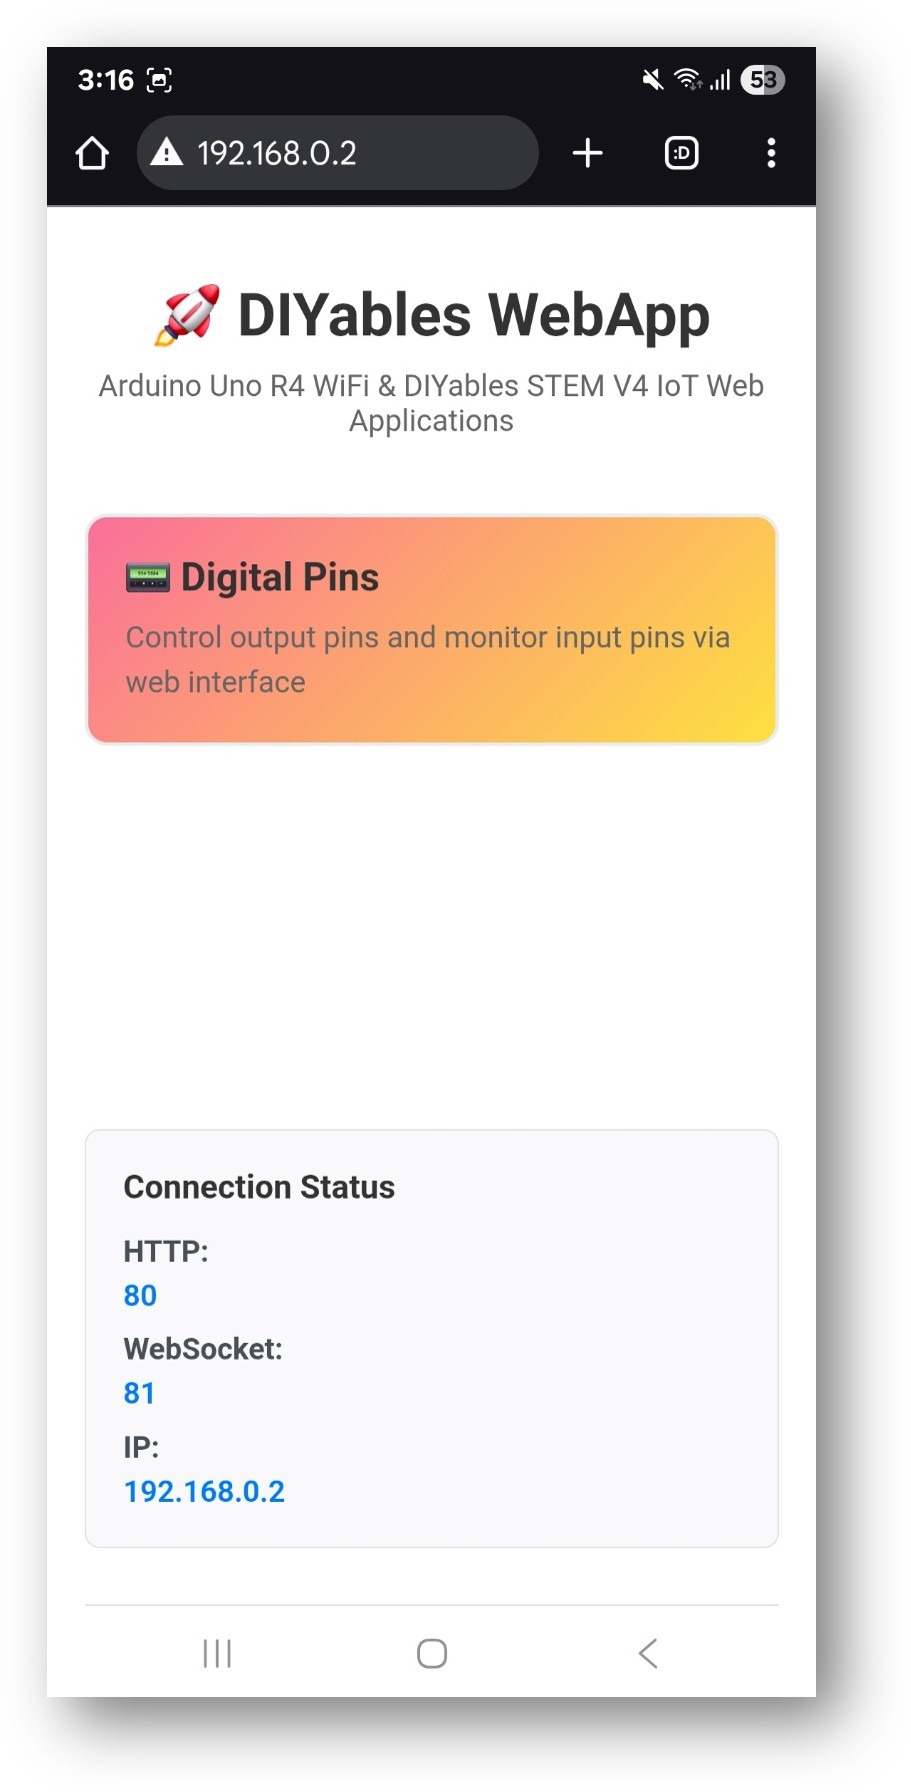
- Take note of the IP address displayed, and enter this address into the address bar of a web browser on your smartphone or PC.
- Example: http://192.168.0.2
- You will see the home page like below image:
- Click to the Web Digital Pins link, you will see the Web Digital Pins app's UI like the below:
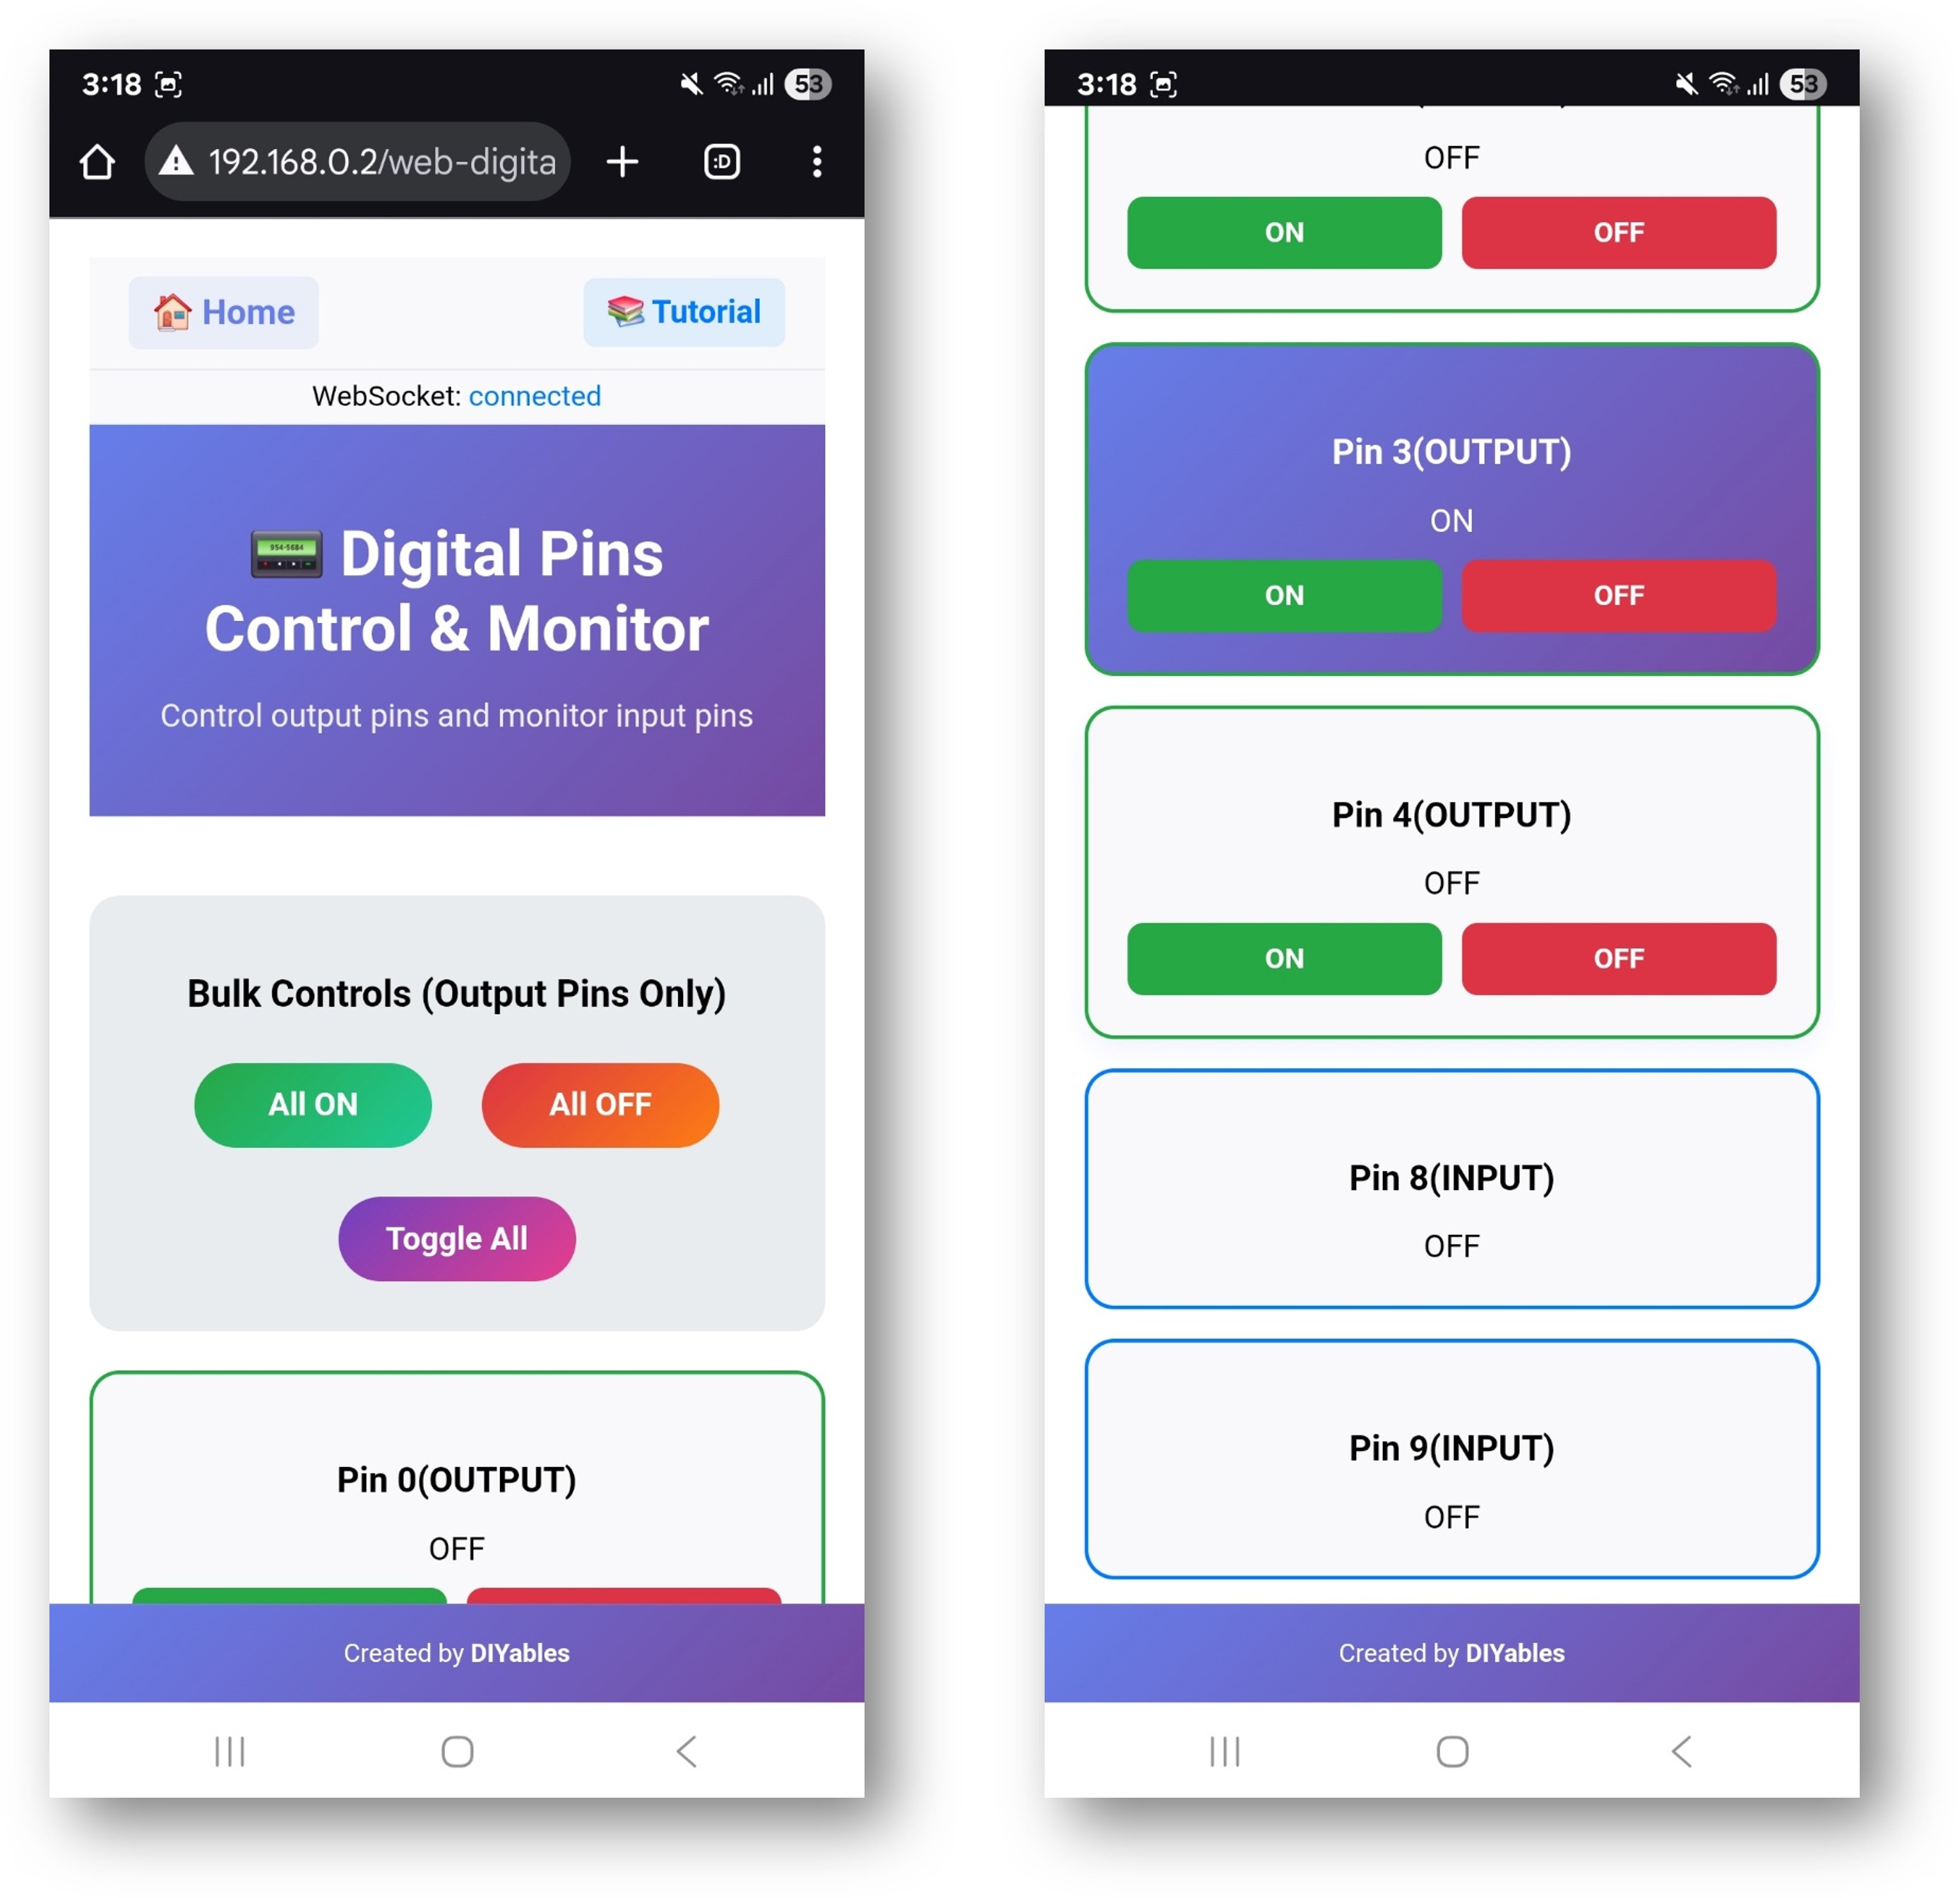
- Or you can also access the page directly by IP address followed by /web-digital-pins. For example: http://192.168.0.2/web-digital-pins
- Try controlling the digital pins by clicking the pin buttons to turn them ON/OFF and observe the built-in LED (pin 13) responding to your commands.
Creative Customization - Adapt the Code to Your Project
The example shows different ways to configure pins to match your creative project needs:
2. Configure Pin Settings
The example shows different ways to configure pins:
Method 1: Enable Specific Pins
Method 2: Enable Pin Ranges
Method 3: Enable All Pins
4. Upload the Sketch
- Select your ESP32 board: Tools → Board → ESP32
- Select the correct port: Tools → Port → [Your ESP32 Port]
- Click Upload button
5. Get the IP Address
- Open Tools → Serial Monitor
- Set baud rate to 9600
- Wait for ESP32 to connect to WiFi
- Note the IP address displayed (e.g., 192.168.1.100)
6. Access the Digital Pins Interface
Open your web browser and navigate to:
Example: http://192.168.1.100/digital-pins
How to Use
Pin Control Interface
The web interface displays all configured pins with:
- Pin Number: Shows which ESP32 pin (0-13)
- Current State: ON (green) or OFF (red) indicator
- Control Button: Click to toggle pin state
- Pin Type: Shows if configured as Input or Output
Individual Pin Control
- Turn Pin ON: Click the pin button when it shows "OFF"
- Turn Pin OFF: Click the pin button when it shows "ON"
- Monitor State: Pin buttons update automatically to show current state
Bulk Operations
Use the bulk control buttons to control multiple pins at once:
All ON
- Turns all configured output pins to HIGH state
- Input pins are not affected
- Useful for testing all connected devices
All OFF
- Turns all configured output pins to LOW state
- Input pins are not affected
- Safe way to disable all outputs
Toggle All
- Inverts the state of all output pins
- ON pins become OFF, OFF pins become ON
- Creates interesting lighting effects
Real-time Monitoring
- Pin states update automatically via WebSocket
- Changes made in code are reflected in web interface
- Multiple users can monitor the same ESP32 simultaneously
Hardware Connections
Output Pin Examples
LED Control
Relay Control
Motor Control (via Motor Driver)
Input Pin Examples
Switch Input
Sensor Input
Code Customization
Adding Pin Change Callbacks
Monitor when pins change state:
Custom Pin Initialization
Set specific pins to desired states on startup:
Reading Input Pins
Monitor input pins in your main loop:
Advanced Features
Pin Groups
Create logical groups of pins for related functions:
Pattern Generation
Create lighting patterns or sequences:
PWM Control Integration
Combine with analog control for advanced features:
Safety Considerations
Pin Usage Guidelines
Pins 0 & 1 (TX/RX)
- Used for Serial communication
- Avoid using unless absolutely necessary
- Can interfere with programming and debugging
Pin 13 (Built-in LED)
- Safe to use for testing
- Built-in LED provides visual feedback
- Good for initial testing
Pins 2-12
- Safe for general digital I/O
- Recommended for most applications
- No special considerations
Current Limitations
Maximum Current per Pin: 40mA
- Use current-limiting resistors with LEDs
- Use transistors or relays for high-current loads
- Consider total current consumption
Voltage Levels: 3.3V logic
- ESP32 uses 3.3V logic
- Ensure connected devices are compatible
- Use level shifters for 5V devices if needed
Troubleshooting
Common Issues
1. Pin not responding
- Check pin is enabled in code
- Verify hardware connections
- Check for short circuits
- Confirm pin mode (INPUT/OUTPUT)
2. Web interface not updating
- Check WebSocket connection status
- Refresh browser page
- Verify network connectivity
- Check Serial Monitor for errors
3. Bulk operations not working
- Ensure pins are configured as outputs
- Check for hardware limitations
- Verify power supply capacity
- Monitor for overcurrent conditions
4. Input pins showing wrong states
- Check for proper pull-up/pull-down resistors
- Verify input signal levels
- Check for electromagnetic interference
- Confirm pin configuration
Debug Tips
Enable debug output:
Project Ideas
Home Automation
- Control room lights
- Operate window blinds
- Control heating/cooling systems
- Security system integration
Garden Automation
- Irrigation system control
- Grow light management
- Temperature regulation
- Humidity control
Workshop Control
- Tool power control
- Lighting management
- Ventilation system
- Safety interlocks
Educational Projects
- Logic gate demonstrations
- Traffic light simulation
- Alarm system projects
- Remote control experiments
Integration Examples
Motion-Activated Lighting
Temperature-Controlled Fan
Next Steps
After mastering the WebDigitalPins example, try:
- WebSlider - For PWM and analog control
- WebJoystick - For directional control
- WebMonitor - For debugging and monitoring
- MultipleWebApps - Combining all features