DIYables ESP32 Web Apps Web Rtc
Overview
The WebRTC example provides a comprehensive real-time clock interface for your ESP32 projects. Designed for ESP32 educational platform with built-in RTC capabilities, enhanced time management features, and seamless integration with the educational ecosystem. You can display real-time clock information, synchronize time from web browser to Arduino, and monitor time differences through an intuitive web interface.
Features
- Real-time Clock Display: Shows current ESP32 RTC time with automatic updates
- Device Time Comparison: Display web browser/device time alongside ESP32 time
- One-click Time Synchronization: Sync ESP32 RTC with web browser time instantly
- Visual Time Difference Indicator: Shows time drift between devices in minutes
- Two-line Time Format: 12-hour AM/PM format with full date display
- Modern Gradient UI: Card-style layout with responsive design
- WebSocket Communication: Real-time bidirectional updates without page refresh
- Timezone-aware Synchronization: Uses local device time for accurate sync
- Connection Status Monitoring: Visual indicators for WebSocket connection state
- Automatic Time Requests: Requests current ESP32 time on page load
Hardware Used In This Tutorial
Or you can buy the following kits:
| 1 | × | DIYables ESP32 Starter Kit (ESP32 included) | |
| 1 | × | DIYables Sensor Kit (18 sensors/displays) |
Wiring Diagram
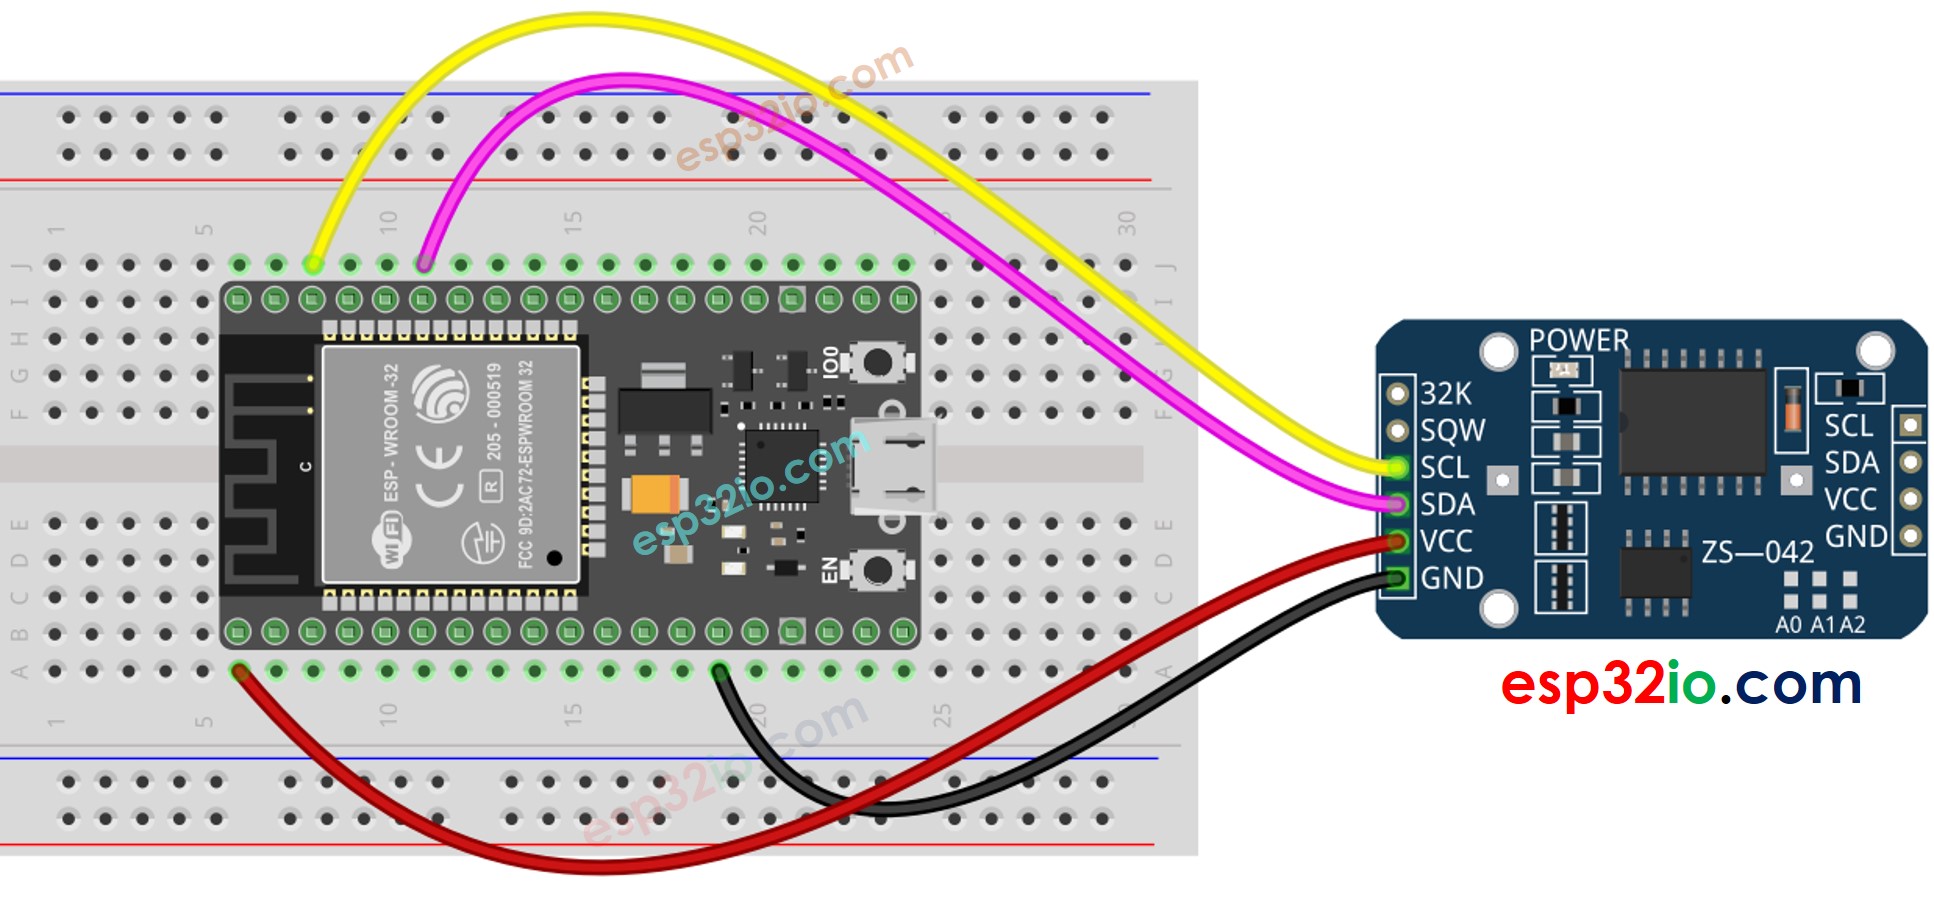
This image is created using Fritzing. Click to enlarge image
ESP32 - DS3231 RTC Module
| DS1307 RTC Module | ESP32 |
|---|---|
| Vin | 3.3V |
| GND | GND |
| SDA | GPIO21 |
| SCL | GPIO22 |
If you're unfamiliar with how to supply power to the ESP32 and other components, you can find guidance in the following tutorial: The best way to Power ESP32 and sensors/displays.
Quick Instructions
Follow these instructions step by step:
- If this is your first time using the ESP32, refer to the tutorial on setting up the environment for ESP32 in the Arduino IDE.
- Connect the ESP32 board to your computer using a USB cable.
- Launch the Arduino IDE on your computer.
- Select the appropriate ESP32 board (e.g. ESP32 Dev Module) and COM port.
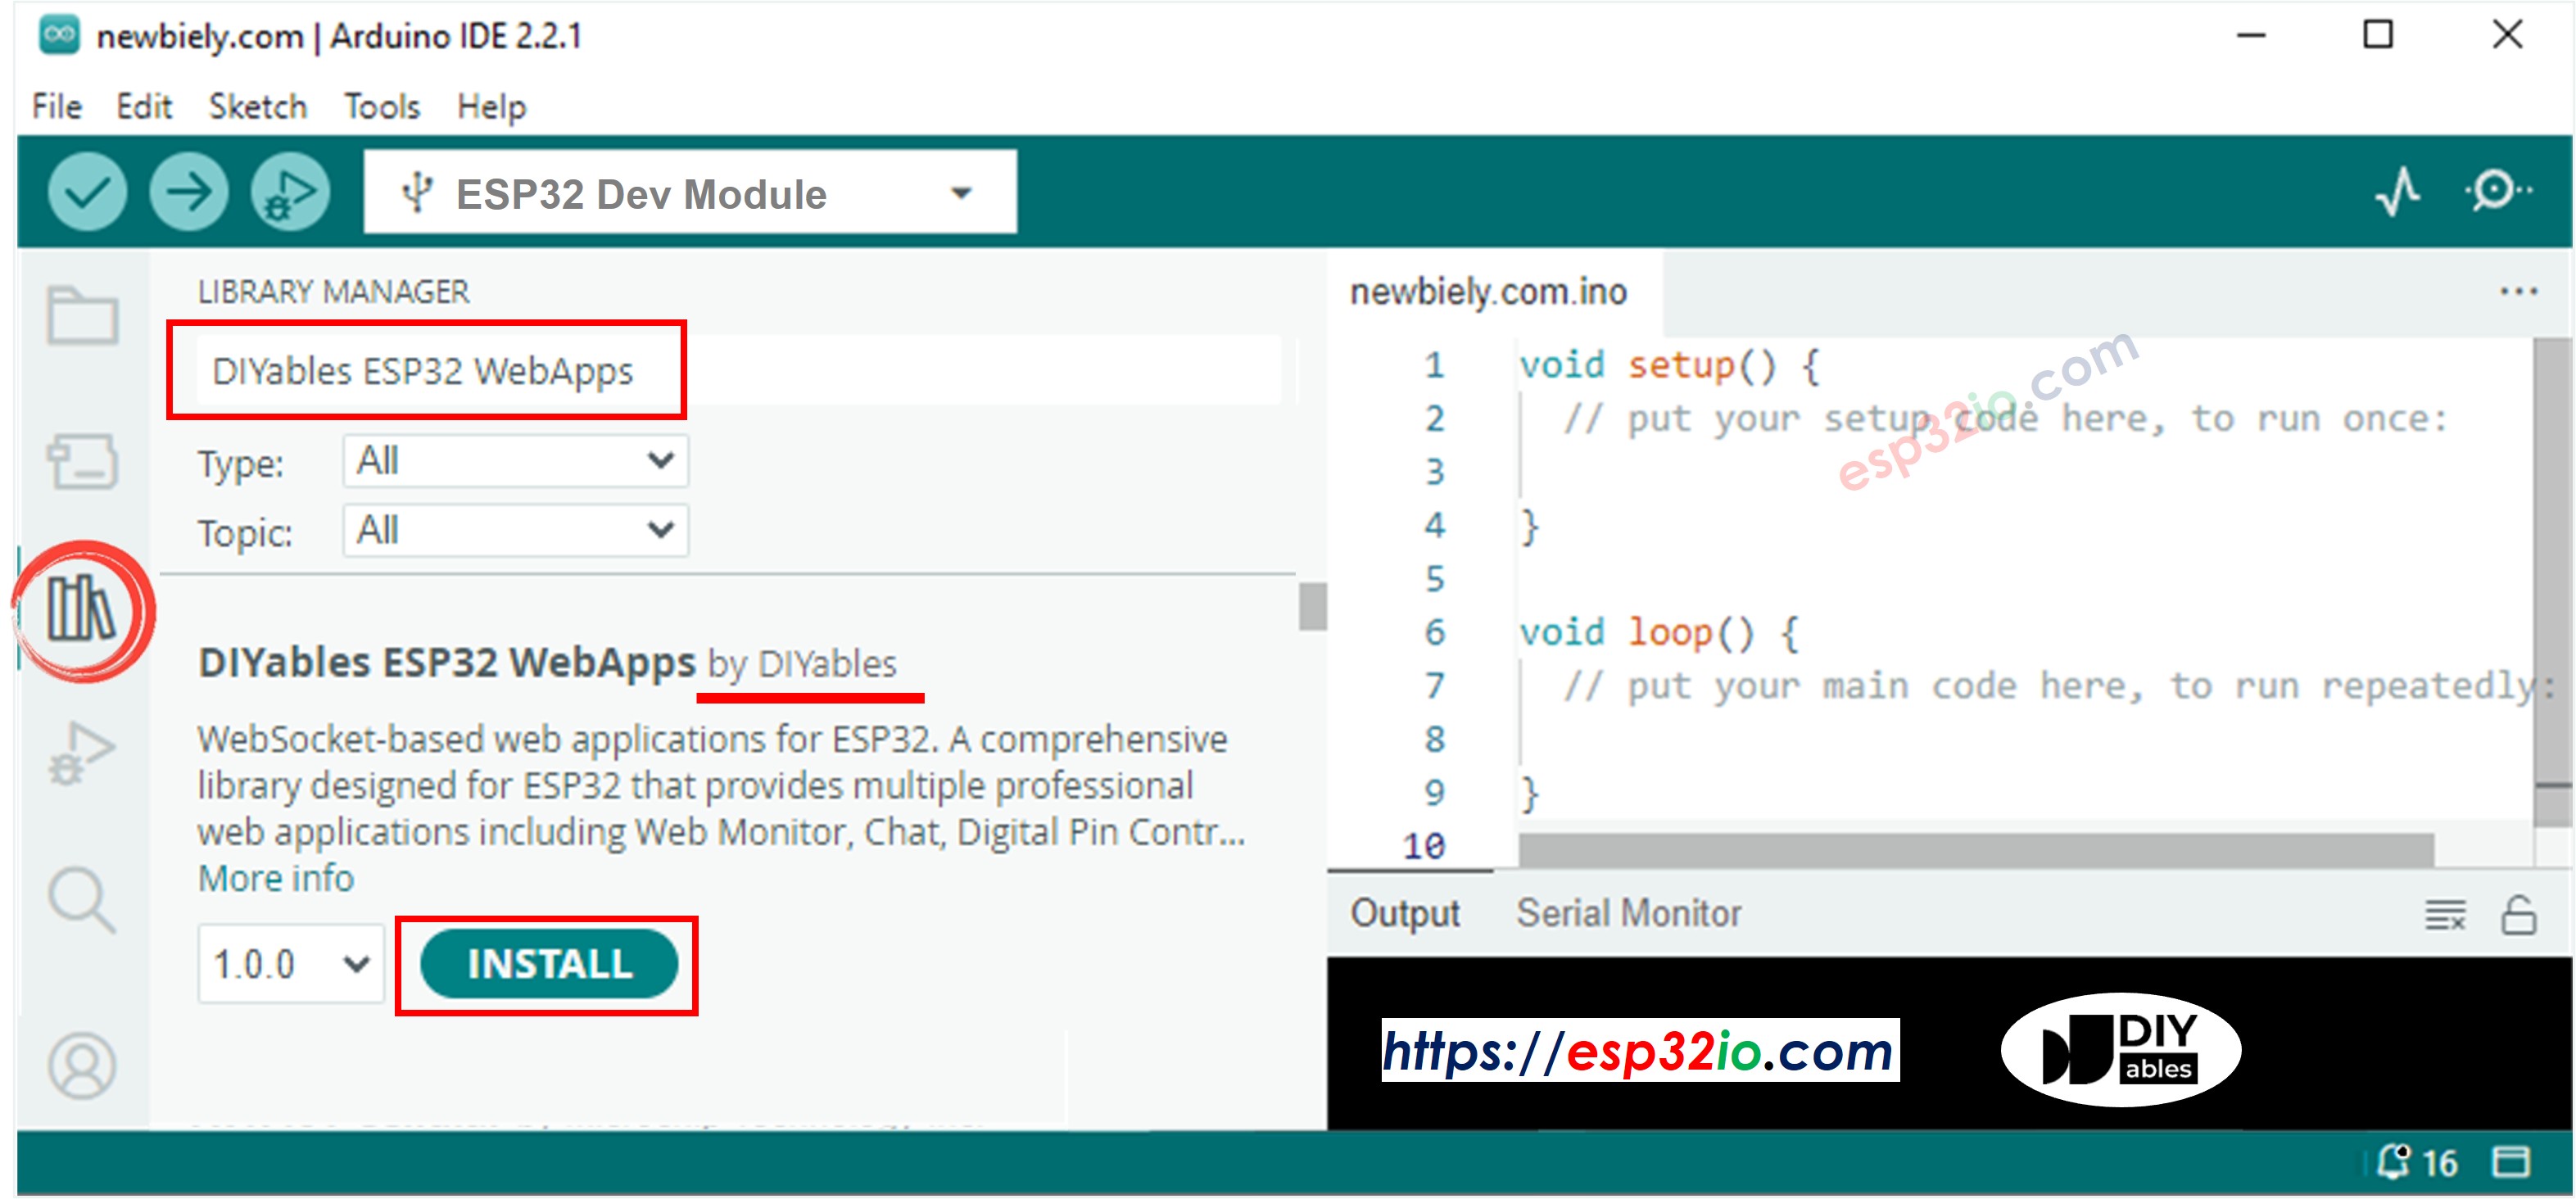
- Navigate to the Libraries icon on the left bar of the Arduino IDE.
- Search "DIYables ESP32 WebApps", then find the DIYables ESP32 WebApps Library by DIYables
- Click Install button to install the library.
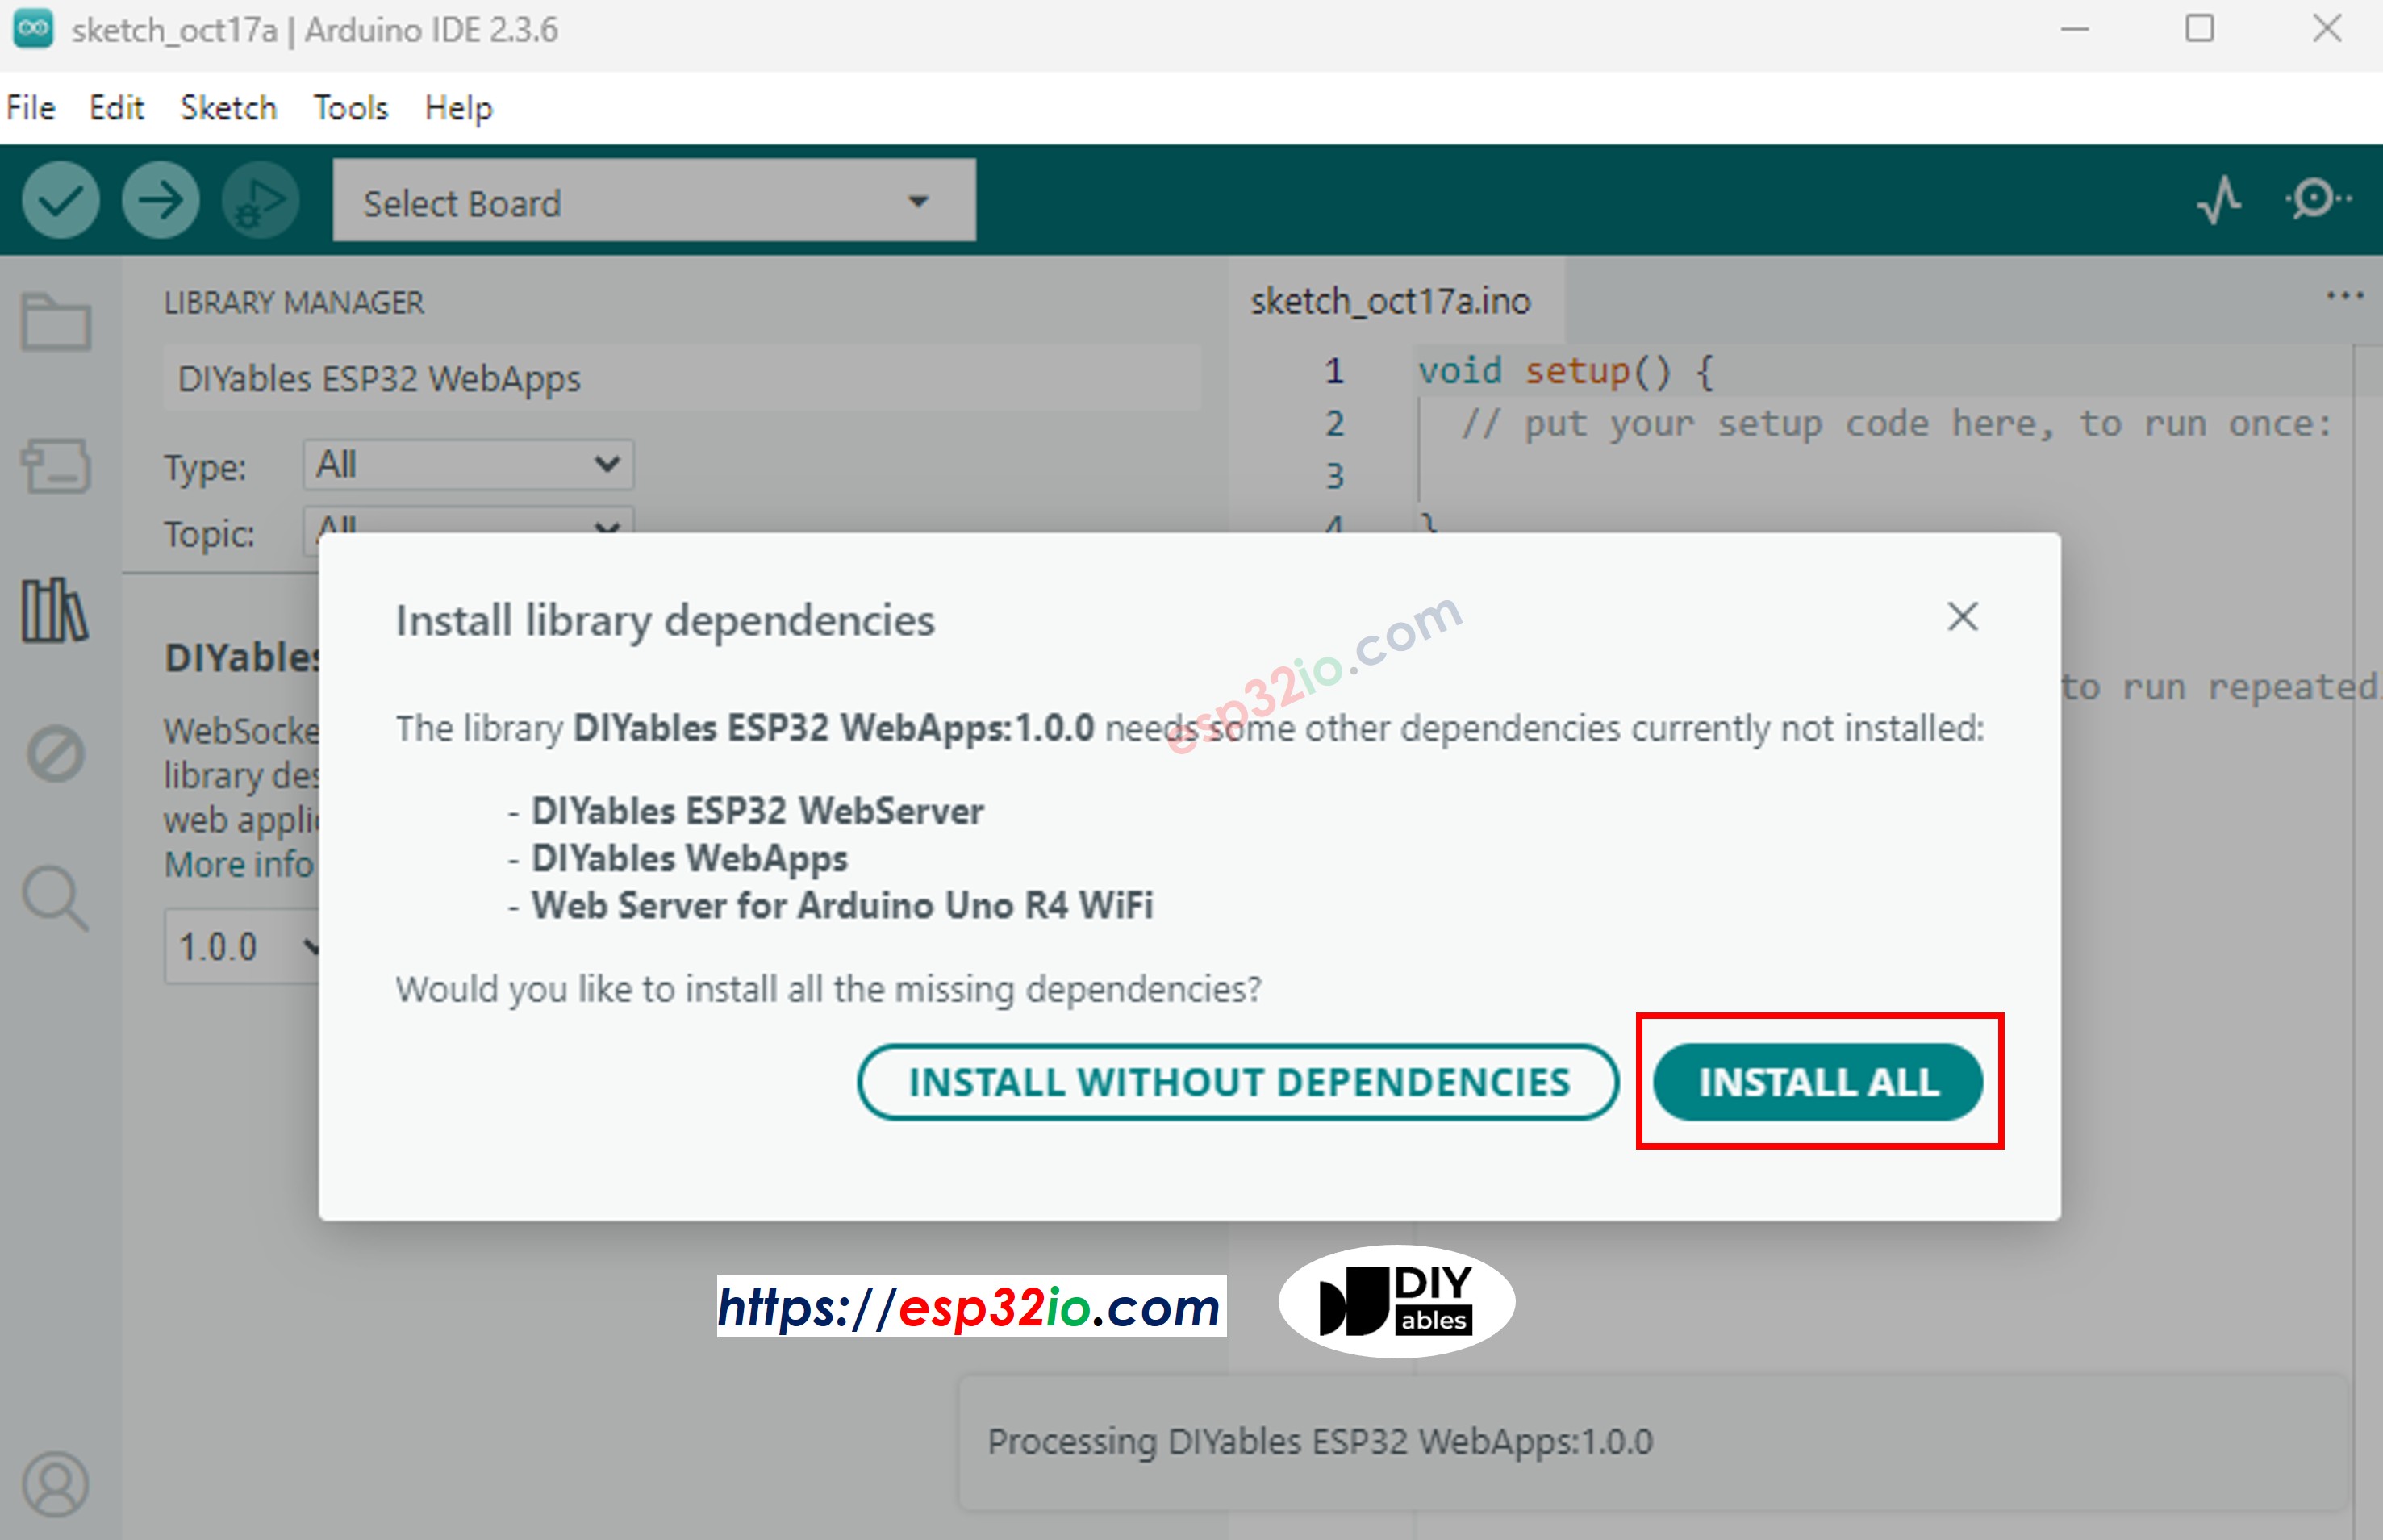
- You will be asked for installing some other library dependencies
- Click Install All button to install all library dependencies.
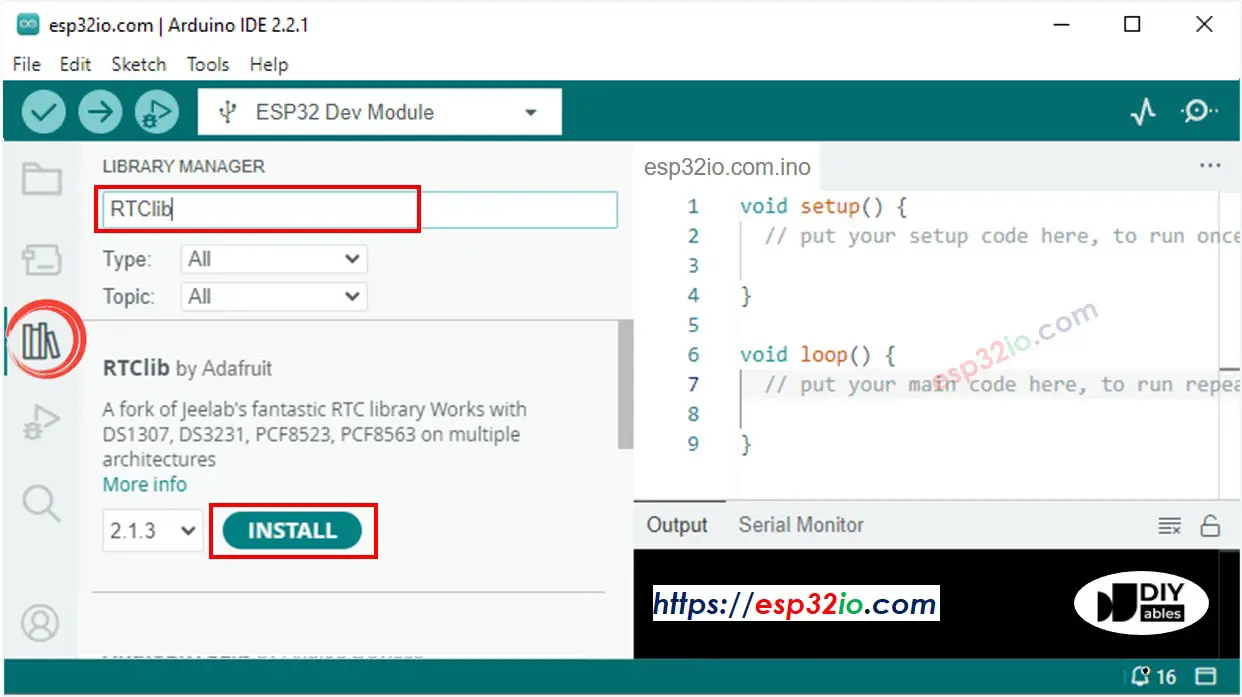
- Search “RTClib”, then find the RTC library by Adafruit
- Click Install button to install RTC library.
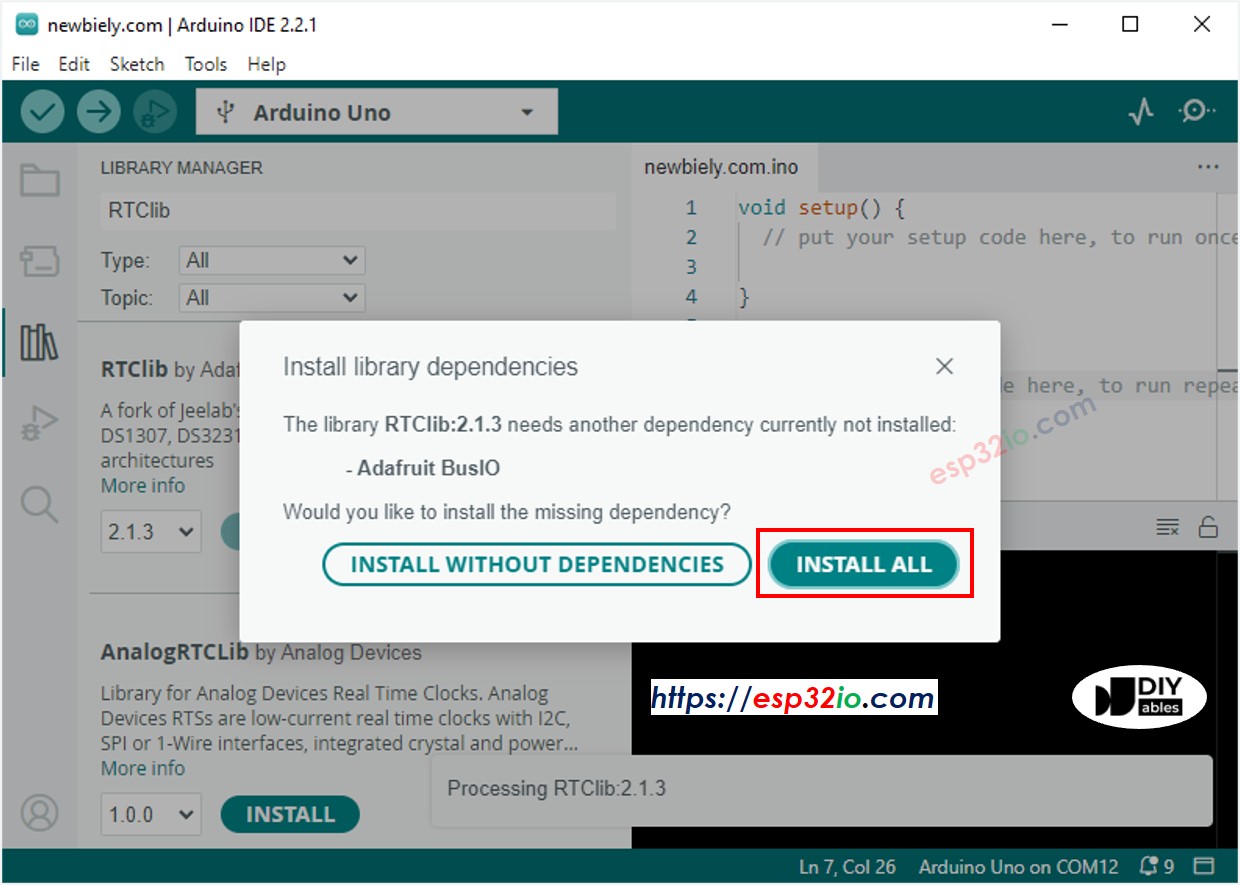
- You may be asked to install dependencies for the library
- Install all dependencies for the library by clicking on Install All button.
- On Arduino IDE, Go to File Examples DIYables ESP32 WebApps WebRTC example, or copy the above code and paste it to the editor of Arduino IDE
- Configure WiFi credentials in the code by updating these lines:
- Click Upload button on Arduino IDE to upload the code to Arduino.
- Open the Serial Monitor on Arduino IDE
- Wait for the connection to WiFi and the prints of WiFi information on Serial Monitor.
- Check out the result on Serial Monitor. It looks like the below
- If you do not see anything, reboot ESP32 board.
Using the Web Interface
- Open a web browser on your computer or mobile device connected to the same WiFi network
- Type the IP address shown in the Serial Monitor to the web browser
- Example: http://192.168.1.100
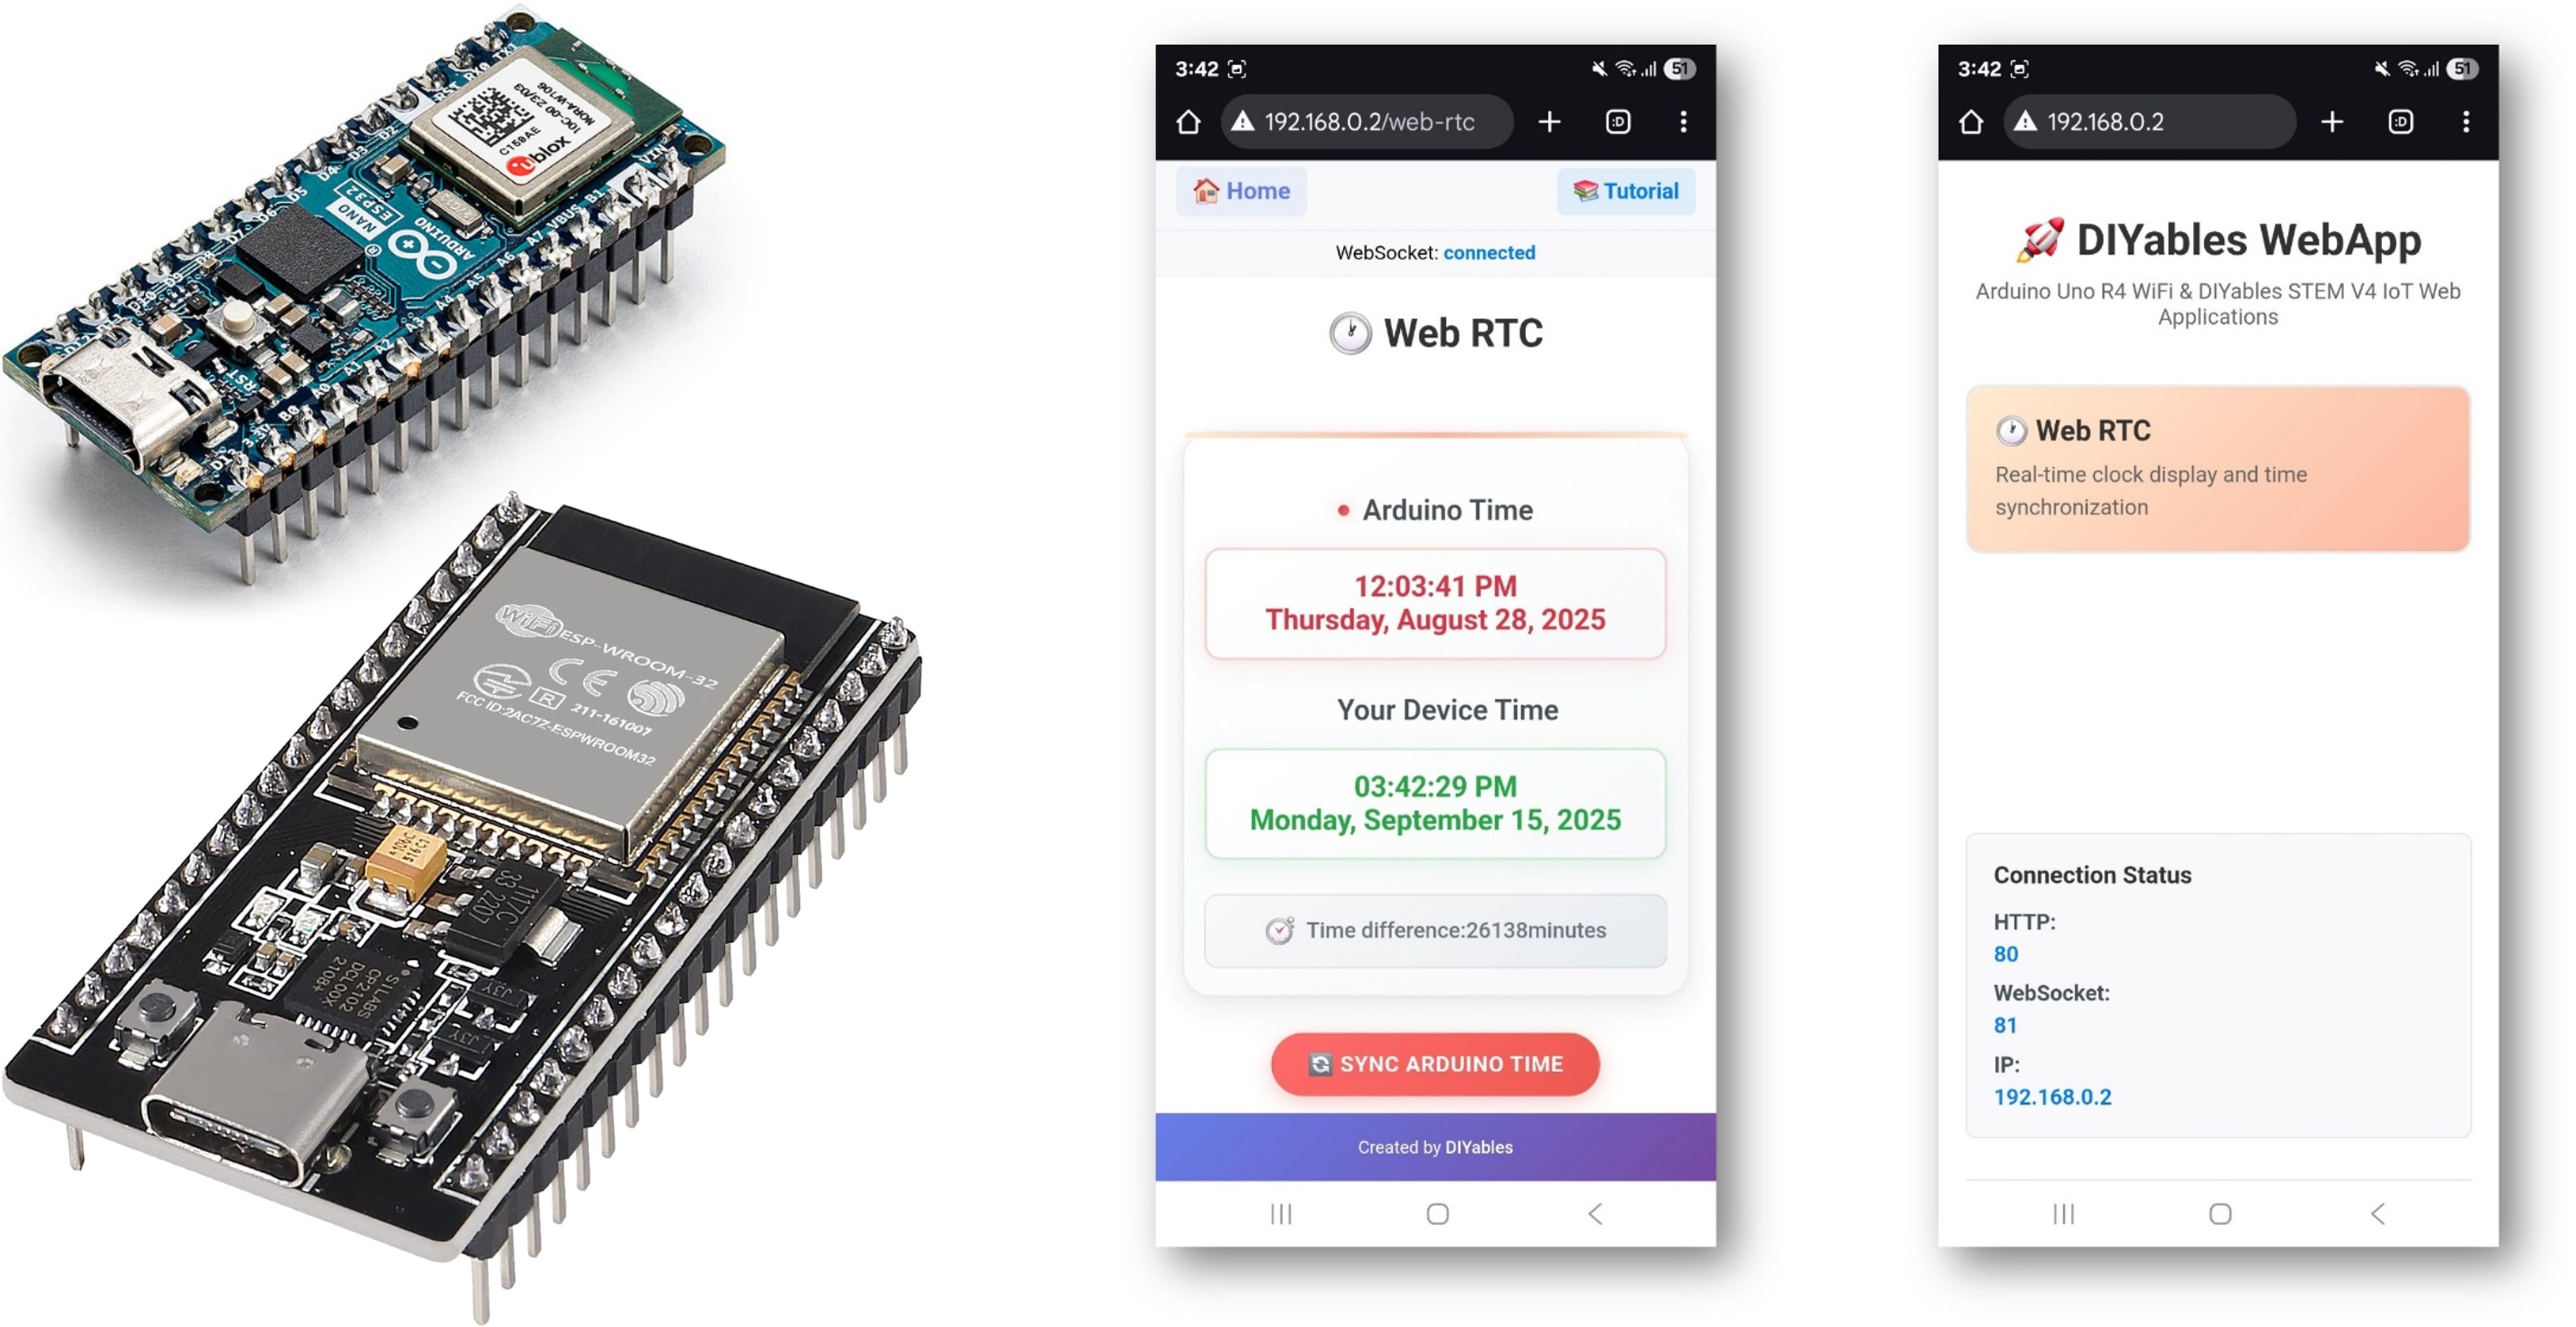
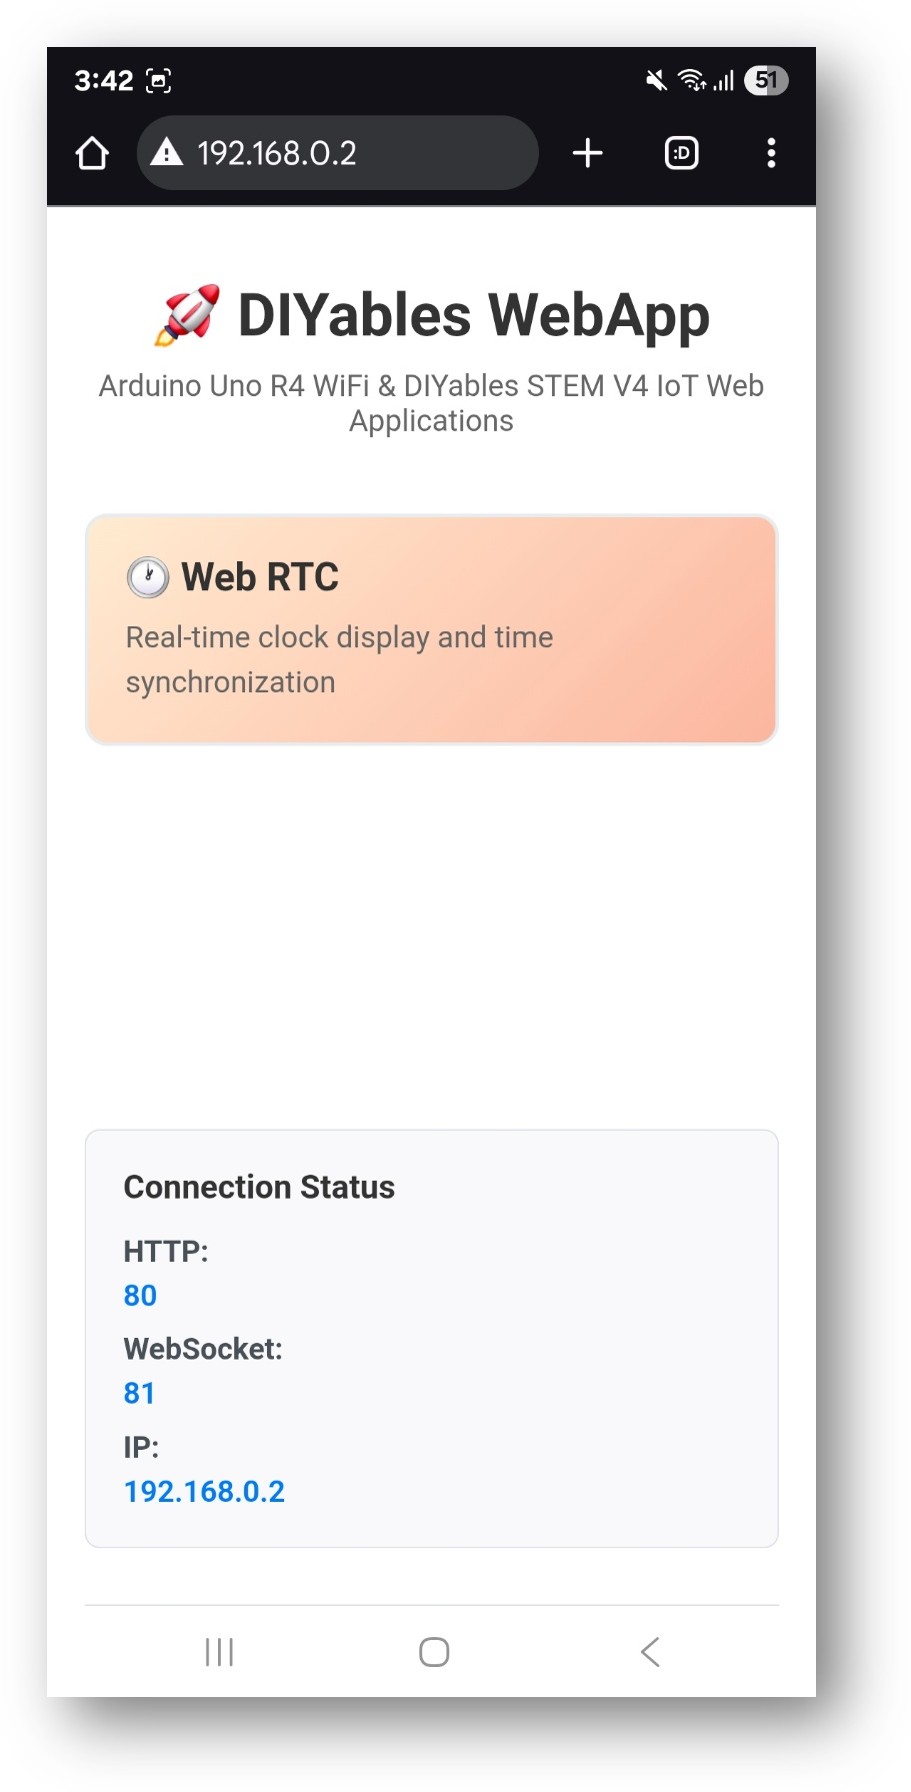
- You will see the home page like below image:
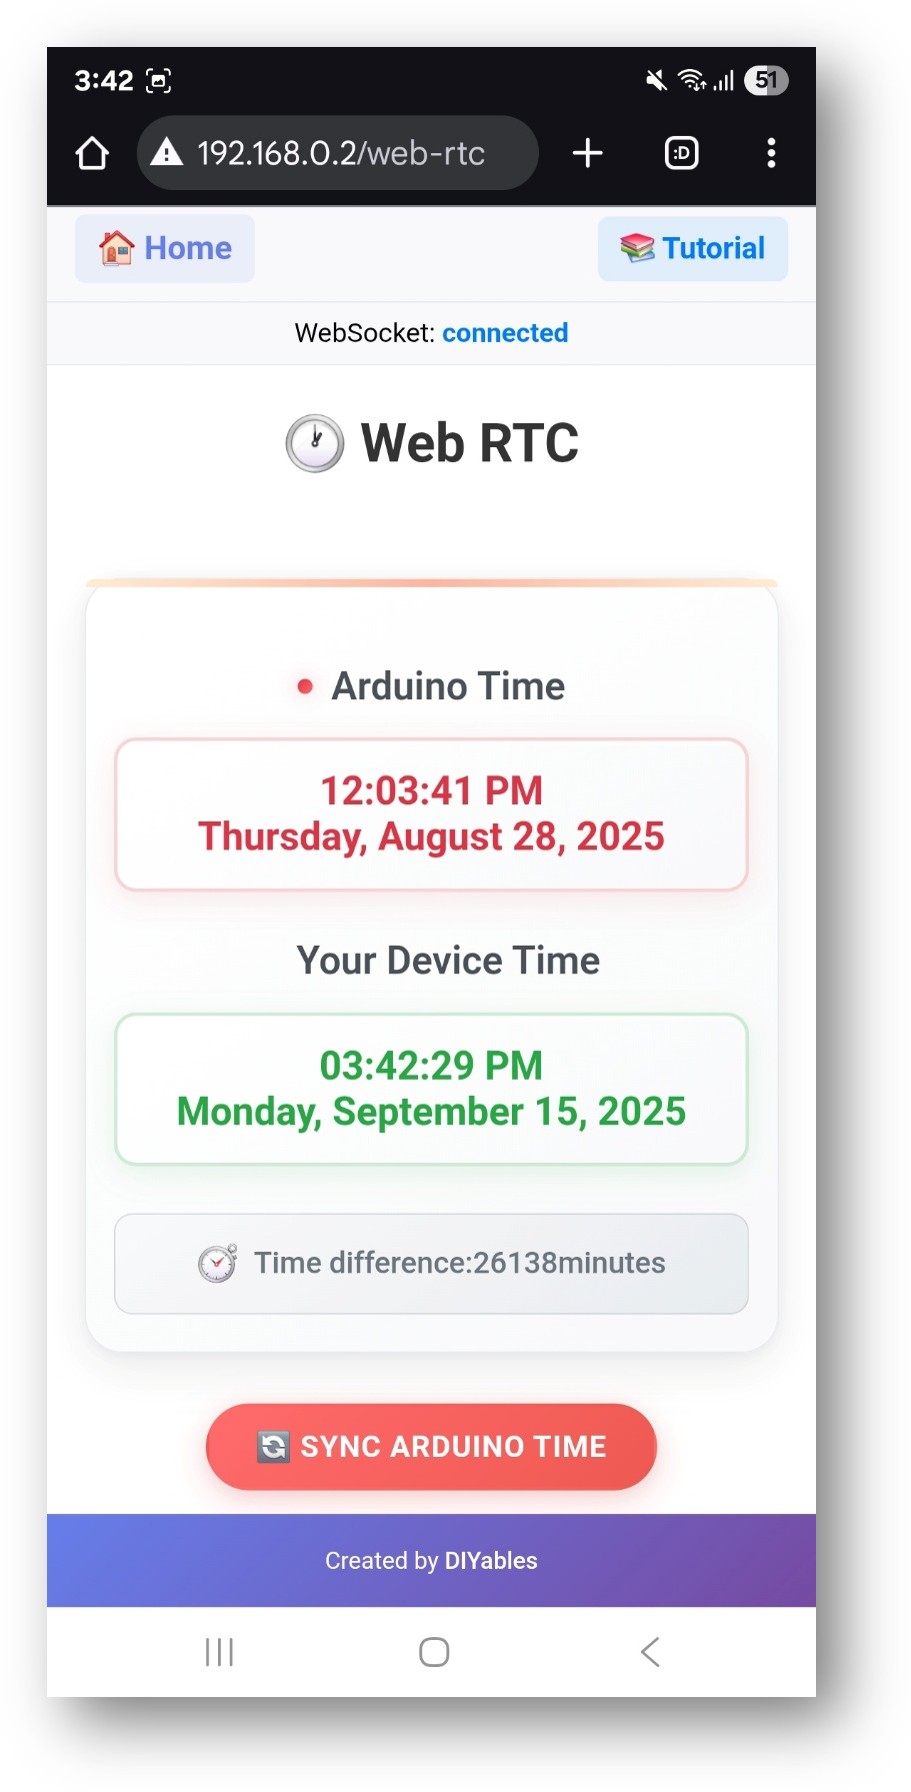
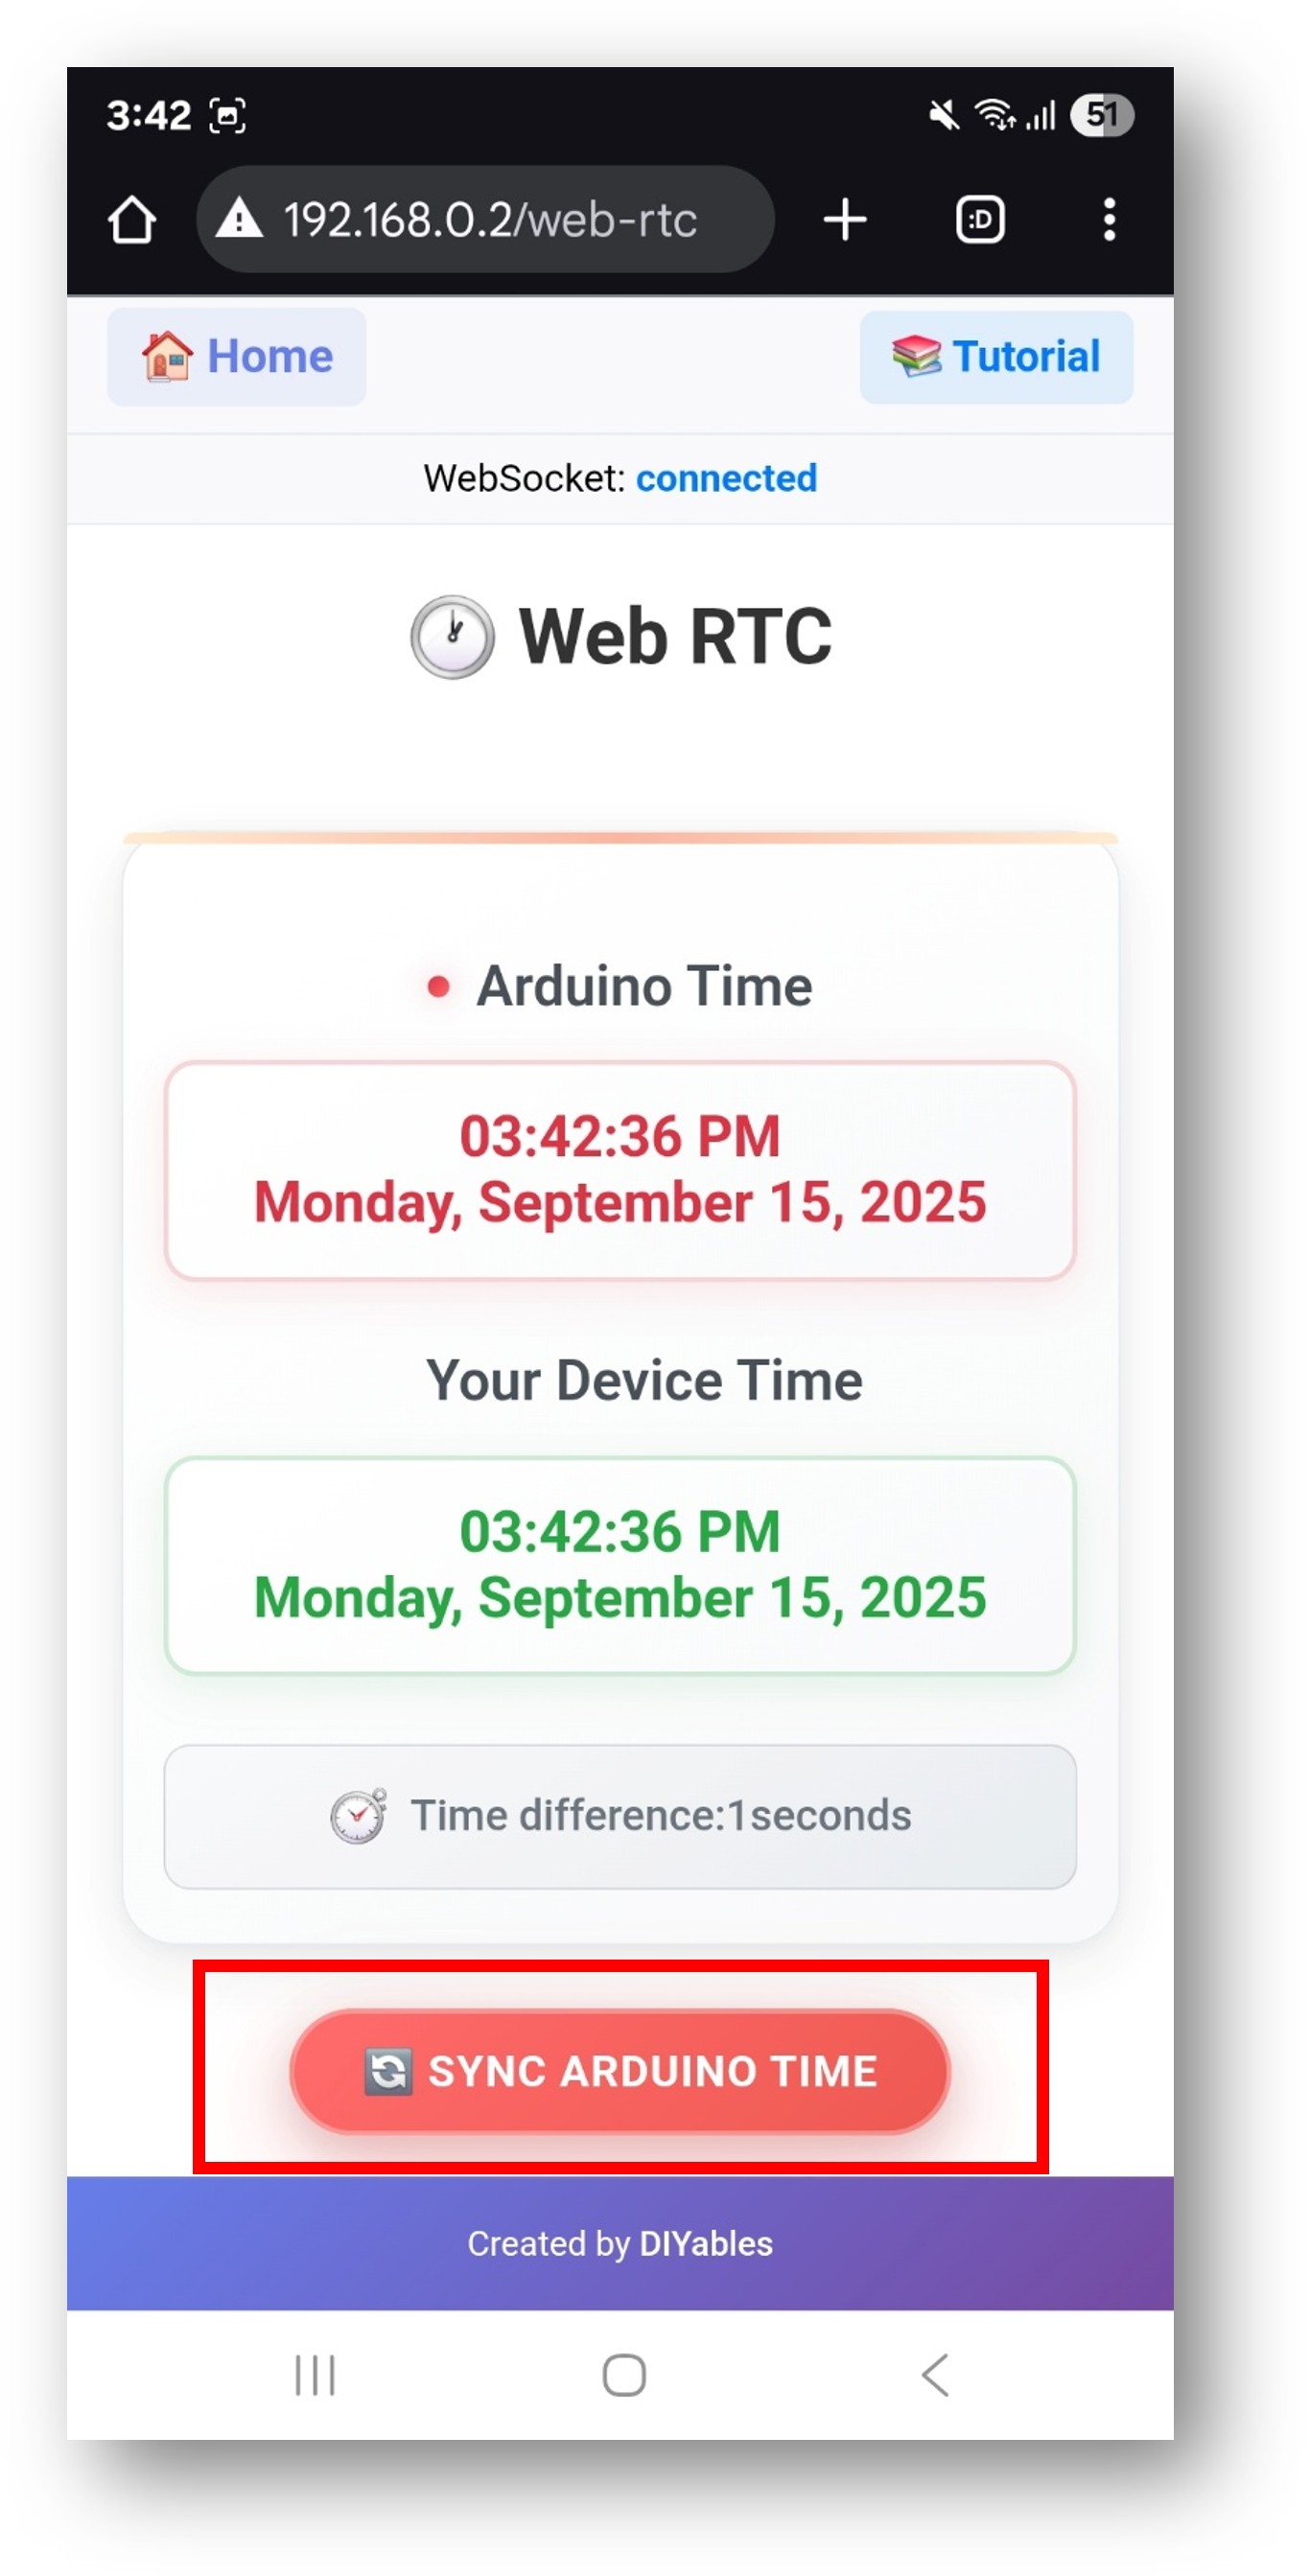
- Click to the Web RTC link, you will see the Web RTC app's UI like the below:
- Or you can also access the page directly by IP address followed by /web-rtc. For example: http://192.168.1.100/web-rtc
- You will see the Web RTC interface showing:
- Arduino Time: Current time from the Arduino's RTC
- Your Device Time: Current time from your web browser/device
- Time Difference: Difference between the two times in minutes
- Sync ESP32 Time Button: Click to synchronize ESP32 time with your device
Time Synchronization
- Click the "Sync ESP32 Time" button to synchronize the Arduino's RTC with your device's local time
- The synchronization process:
- Gets your device's current local time (not UTC)
- Adjusts for timezone offset to ensure accurate local time sync
- Sends timestamp to Arduino via WebSocket
- Arduino updates its RTC with the received time
- Web interface updates to show the synchronized time
Code Explanation
Key Components
Setup Function
Callback Functions
Time Synchronization Callback:
Time Request Callback:
Main Loop
API Methods
DIYablesWebRTCPage Class Methods
onTimeSyncFromWeb(callback)
- Sets the callback function to handle time synchronization from web browser
- Parameter: void (*callback)(unsigned long unixTimestamp)
- Usage: Called when user clicks "Sync ESP32 Time" button
onTimeRequestToWeb(callback)
- Sets the callback function to handle time requests from web browser
- Parameter: void (*callback)()
- Usage: Called when web interface requests current ESP32 time
sendTimeToWeb(year, month, day, hour, minute, second)
- Sends current ESP32 time to web interface
- Parameters:
- year: Current year (e.g., 2025)
- month: Current month (1-12)
- day: Current day of month (1-31)
- hour: Current hour (0-23)
- minute: Current minute (0-59)
- second: Current second (0-59)
WebSocket Communication
Messages from Web to Arduino
- RTC:GET_TIME - Request current ESP32 time
- RTC:SYNC:[timestamp] - Sync ESP32 time with Unix timestamp
Messages from ESP32 to Web
- DATETIME:YYYY,MM,DD,HH,MM,SS - Send current ESP32 time components
Troubleshooting
Common Issues
1. Time Difference of Several Hours
- Issue: ESP32 shows time several hours different from device time
- Cause: Usually a timezone issue or RTC not properly initialized
- Solution:
- Click "Sync ESP32 Time" button to resynchronize
- Check if RTC is properly initialized in setup()
- Verify WiFi connection is stable
- Issue: RTC module not detected during initialization
- Cause: DS3231 module not properly connected or faulty
- Solution:
- Check I2C wiring (SDA to GPIO 21, SCL to GPIO 22)
- Verify power connections (VCC to 3.3V/5V, GND to GND)
- Test with I2C scanner to detect module address
- Try different DS3231 module if available
- Issue: Error when clicking sync button
- Cause: WebSocket connection failed
- Solution:
- Check if ESP32 IP address is correct
- Refresh the web page
- Verify ESP32 is connected to same WiFi network
- Check firewall settings
- Issue: Time display freezes or doesn't update
- Cause: WebSocket connection lost or RTC stopped
- Solution:
- Refresh the web page
- Check WebSocket connection status
- Restart ESP32 if RTC stops responding
- Issue: Time difference shows thousands of minutes
- Cause: RTC wasn't properly set or has drifted significantly
- Solution: Click sync button multiple times and verify callback functions
2. "RTC module is NOT found" Error
3. "Not connected to Arduino" Error
3. Time Stops Updating
4. Large Time Differences (Days/Months)
Debug Tips
Enable Serial Debugging:
Check RTC Initialization:
Advanced Usage
Data Logging with Timestamps
Scheduled Actions
Multiple Web Apps Integration
Applications and Use Cases
Educational Projects
- Time Management Learning: Teach students about RTC, timekeeping, and synchronization
- IoT Time Concepts: Demonstrate network time synchronization in IoT systems
- Data Logging Projects: Add timestamps to sensor readings and experiments
- Scheduling Systems: Create time-based automation and control systems
Real-World Applications
- Home Automation: Schedule lights, irrigation, or other devices
- Data Acquisition: Timestamp sensor readings for analysis
- Event Logging: Record when specific events occur with accurate timing
- Remote Monitoring: Check device status and last update times remotely
STEM Education Benefits
- Time Zone Concepts: Understand local time vs. UTC and timezone handling
- Network Communication: Learn WebSocket communication and real-time updates
- Hardware Integration: Combine web interfaces with hardware RTC functionality
- Problem Solving: Debug timing issues and synchronization problems
Technical Specifications
Memory Usage
- Flash Memory: ~8KB for WebRTC functionality
- SRAM: ~2KB during operation
- WebSocket Buffer: ~1KB for message handling
Performance Characteristics
- Update Frequency: Real-time updates via WebSocket
- Sync Accuracy: Typically within 1-2 seconds
- Network Overhead: ~50 bytes per time update message
- Response Time: <100ms for time sync operations
Compatibility
- ESP32 boards: ESP32, ESP32 Web Apps
- Browsers: All modern browsers with WebSocket support
- Devices: Desktop, tablet, and mobile devices
- Networks: WiFi networks with internet access
Summary
The WebRTC example demonstrates how to:
- Create a web-based real-time clock interface
- Synchronize ESP32 RTC with web browser time
- Display time information in user-friendly format
- Monitor time differences and connection status
- Integrate time functionality with other web applications
- Build educational IoT projects with time management features
This example is perfect for projects requiring accurate timekeeping, data logging with timestamps, scheduled automation, and educational demonstrations of time synchronization concepts in IoT systems.