
ESP32 - SW-420 Vibration Sensor
The SW-420 vibration sensor module can catch shocks, knocks, and shaking that happen around it, turning a simple mechanical disturbance into a digital signal your ESP32 can act on.
In this tutorial, we will learn how to use the ESP32 and a SW-420 vibration sensor to detect vibration. We will delve into the following:
- Connecting the SW-420 vibration sensor to the ESP32
- Programming the ESP32 to detect vibration using the SW-420 vibration sensor.
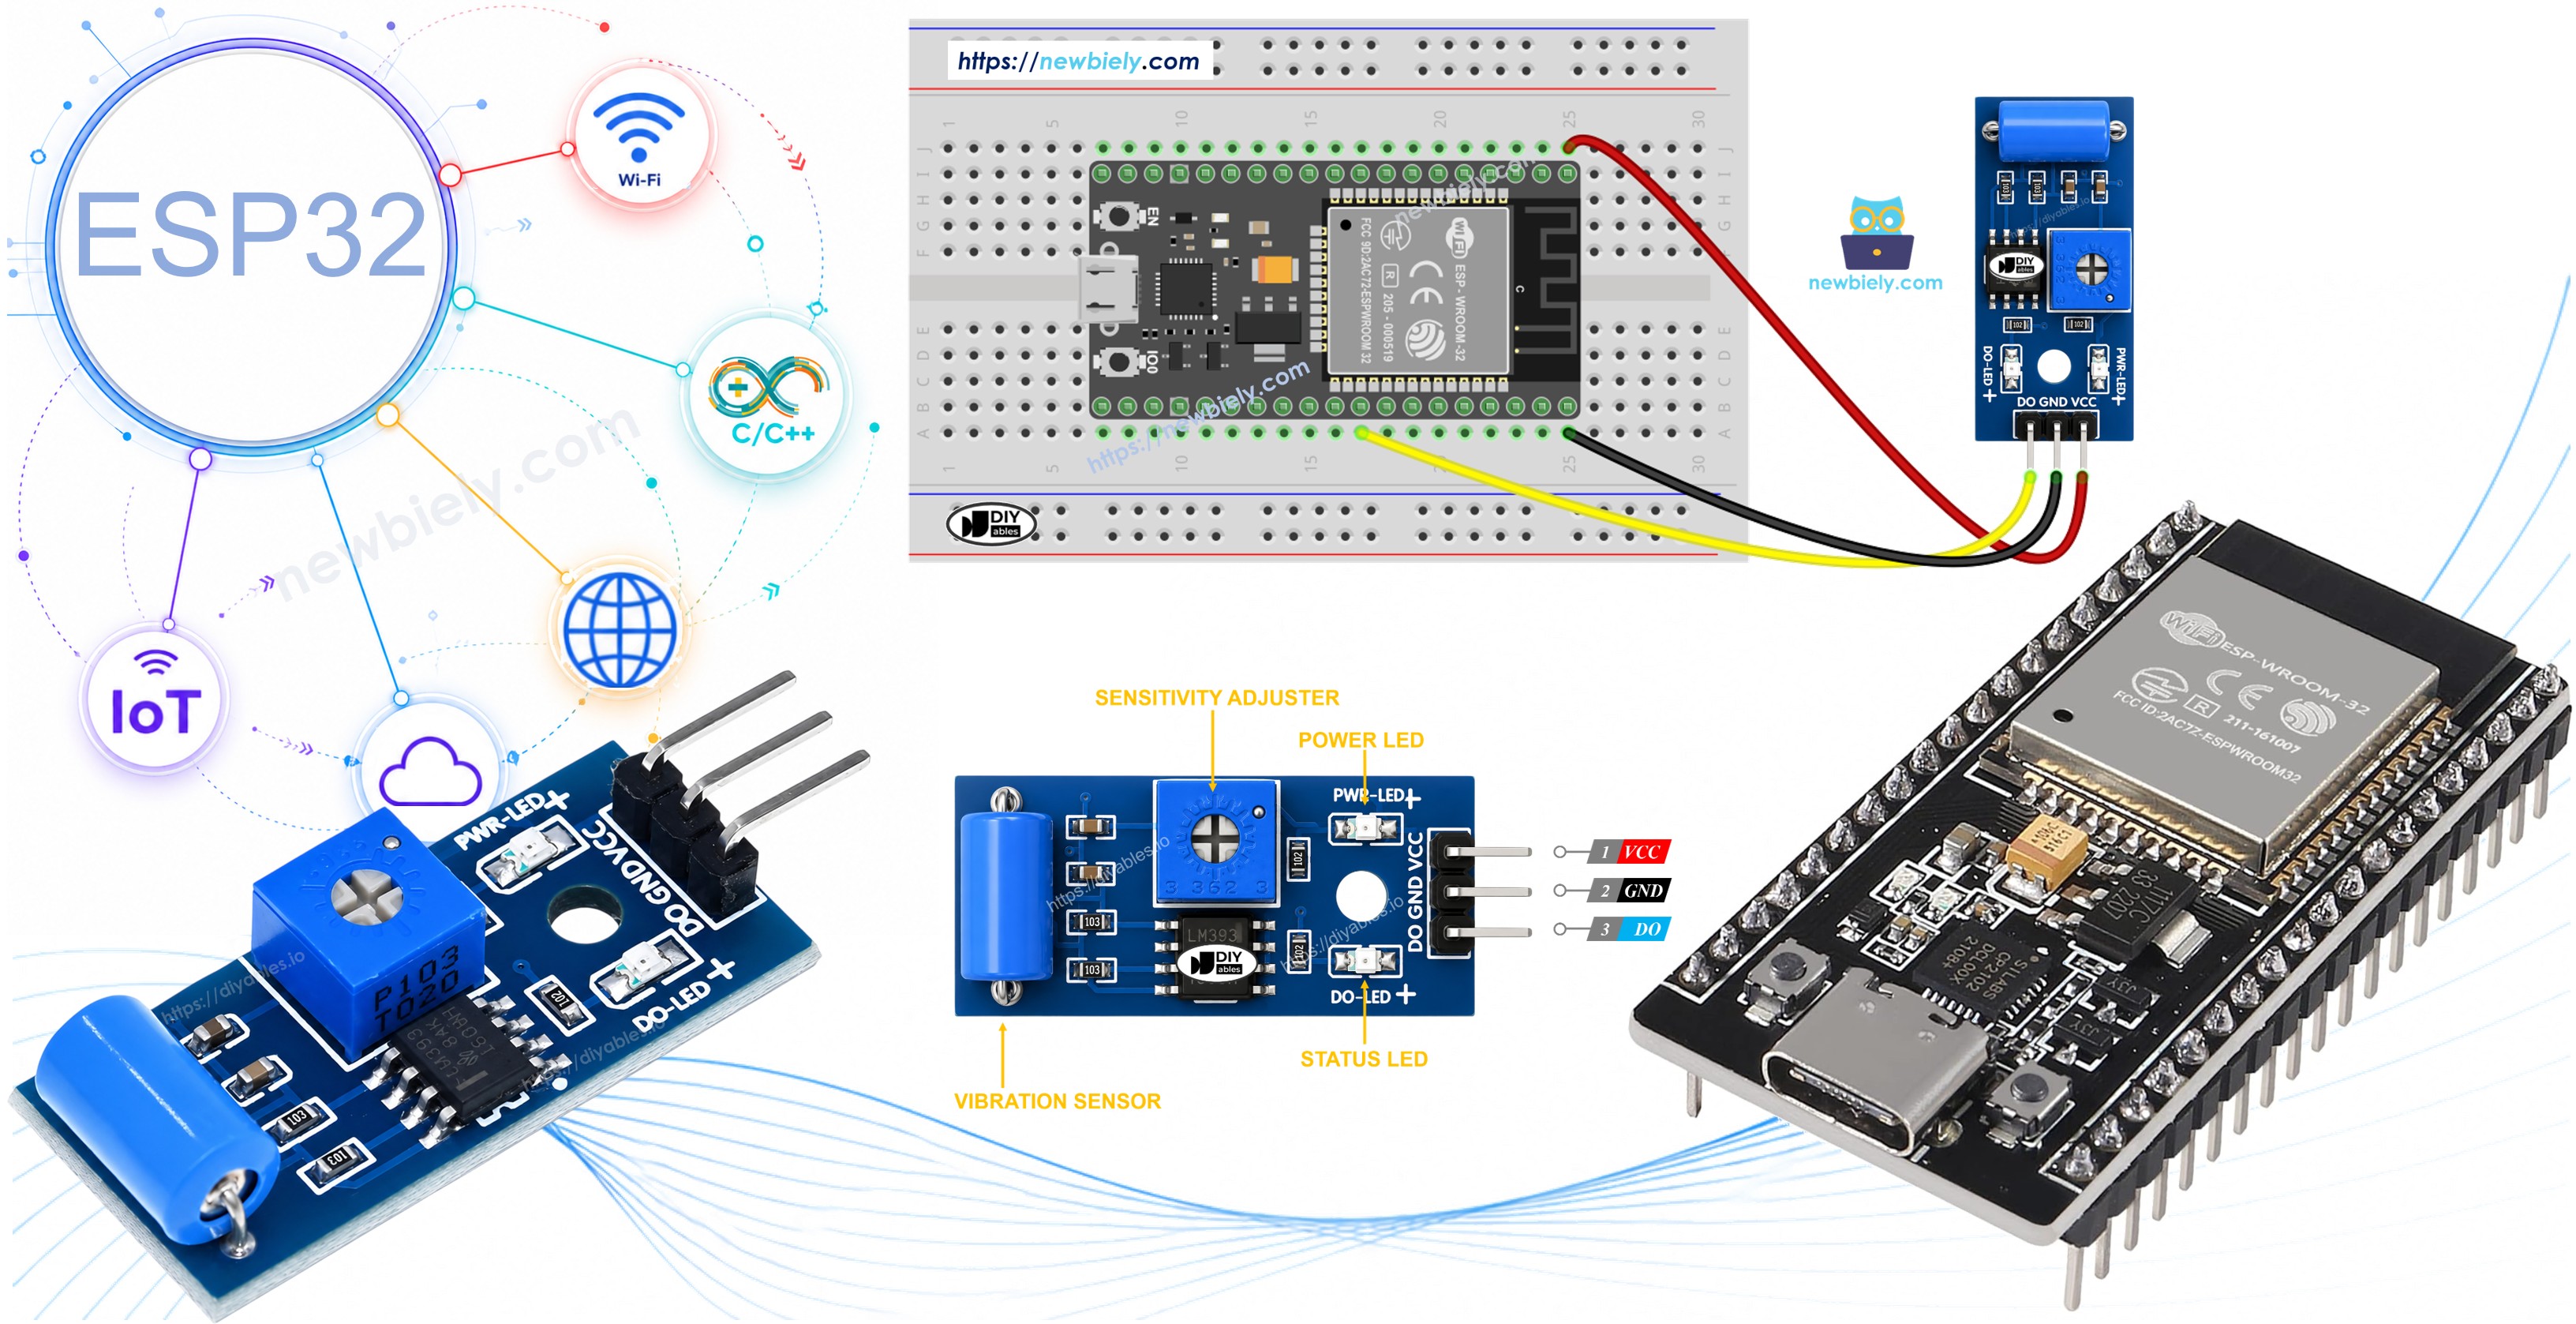
Once the basic detection is working, you can extend the code to sound a buzzer, flash an LED, or send a notification whenever vibration is picked up.
This tutorial shows how to program the ESP32 using the Arduino language (C/C++) via the Arduino IDE. If you’d like to learn how to program the ESP32 with MicroPython, visit this ESP32 MicroPython - SW-420 Vibration Sensor tutorial.
Hardware Used In This Tutorial
Or you can buy the following kits:
| 1 | × | DIYables ESP32 Starter Kit (ESP32 included) | |
| 1 | × | DIYables ESP32 S3 Starter Kit (ESP32 S3 included) | |
| 1 | × | DIYables Sensor Kit (18 sensors/displays) |
Introduction to SW-420 Vibration Sensor
The SW-420 vibration sensor module is built to notice shocks and shaking in whatever it is mounted on. Inside the module, a small spring-based vibration switch sits near a metal contact; an onboard LM393 comparator watches that switch and outputs a clean digital signal whenever vibration or shock disturbs it, while an onboard potentiometer lets you set how much shaking is needed to trigger the output.
The SW-420 Vibration Sensor Pinout
The SW-420 vibration sensor has three pins:
- VCC pin: needs to be connected to VCC (3.3V to 5V)
- GND pin: needs to be connected to GND (0V)
- DO pin: is an output pin: LOW when the sensor is idle and HIGH when vibration or shock is detected. This pin needs to be connected to ESP32's input pin.
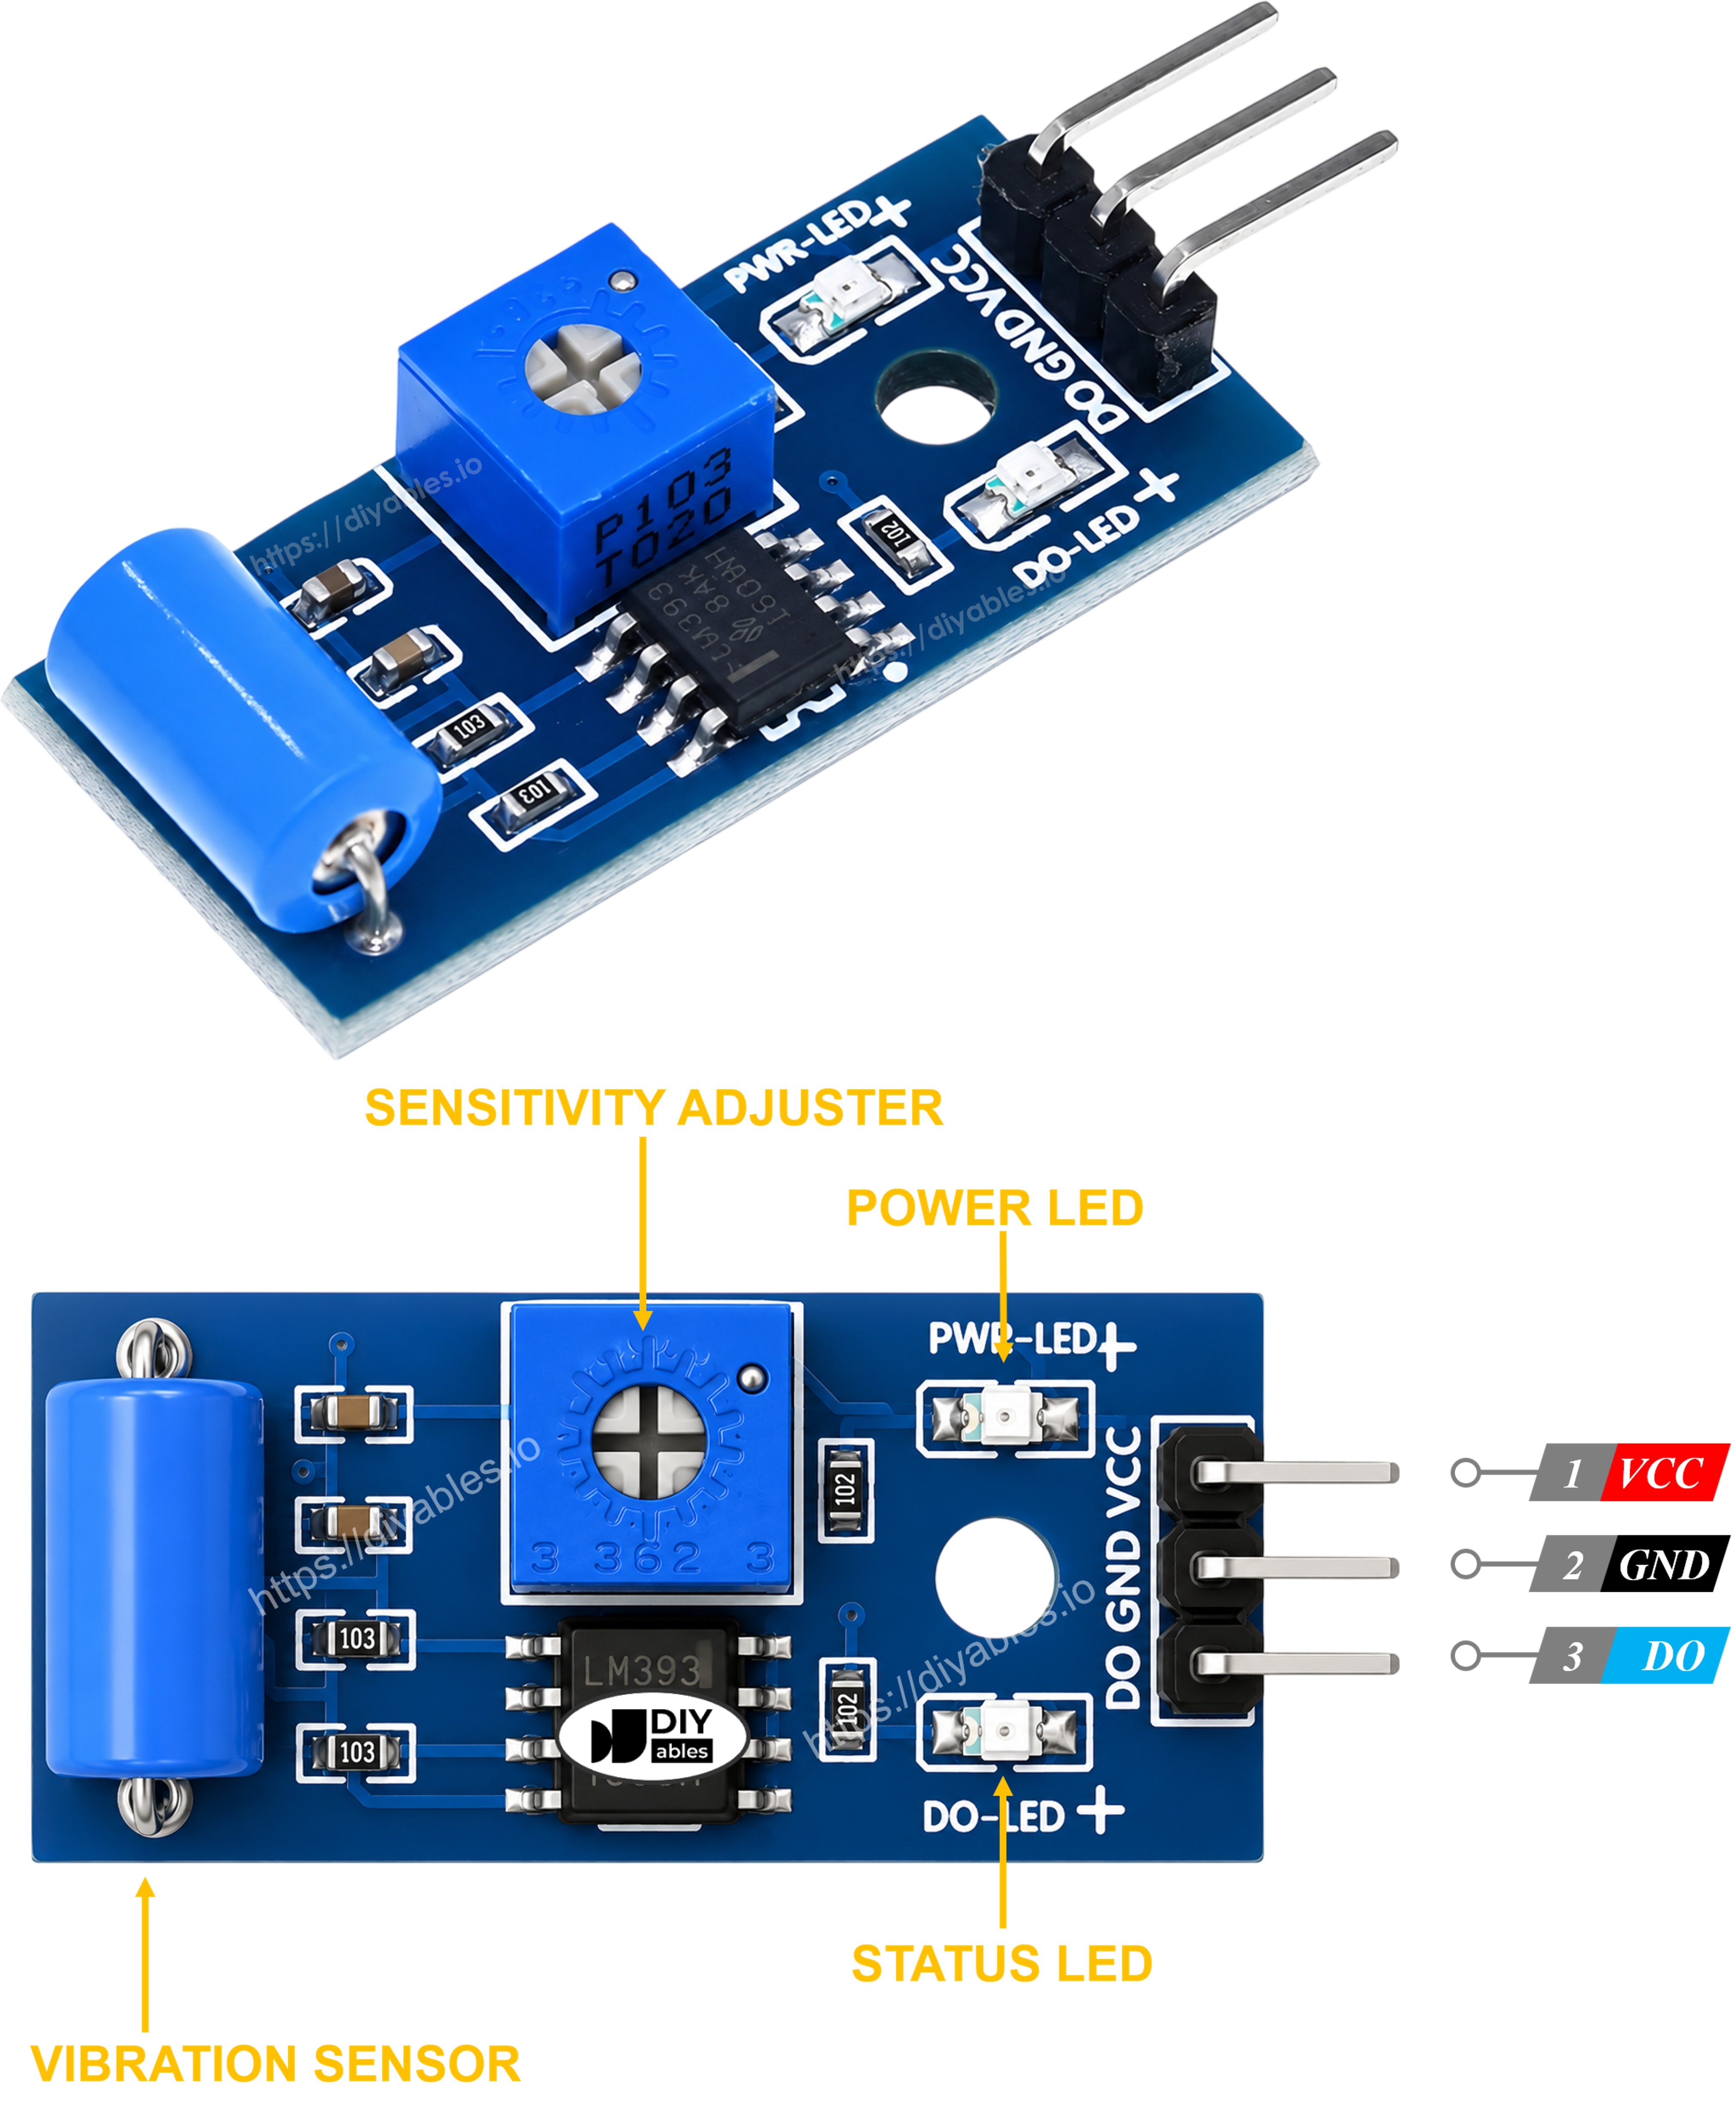
The SW-420 vibration sensor module has two LED indicators:
- One LED indicator shows the power status.
- Another LED indicator lights up whenever the DO pin goes HIGH, signaling that vibration has been detected.
How It Works
Here's how the output pin of the sensor behaves:
- When the module sits still, the internal switch stays open and the output pin is set to LOW.
- When vibration or shock disturbs the module, the internal switch closes momentarily and the output pin is set to HIGH.
Wiring Diagram
- How to connect ESP32 and SW-420 vibration sensor using breadboard
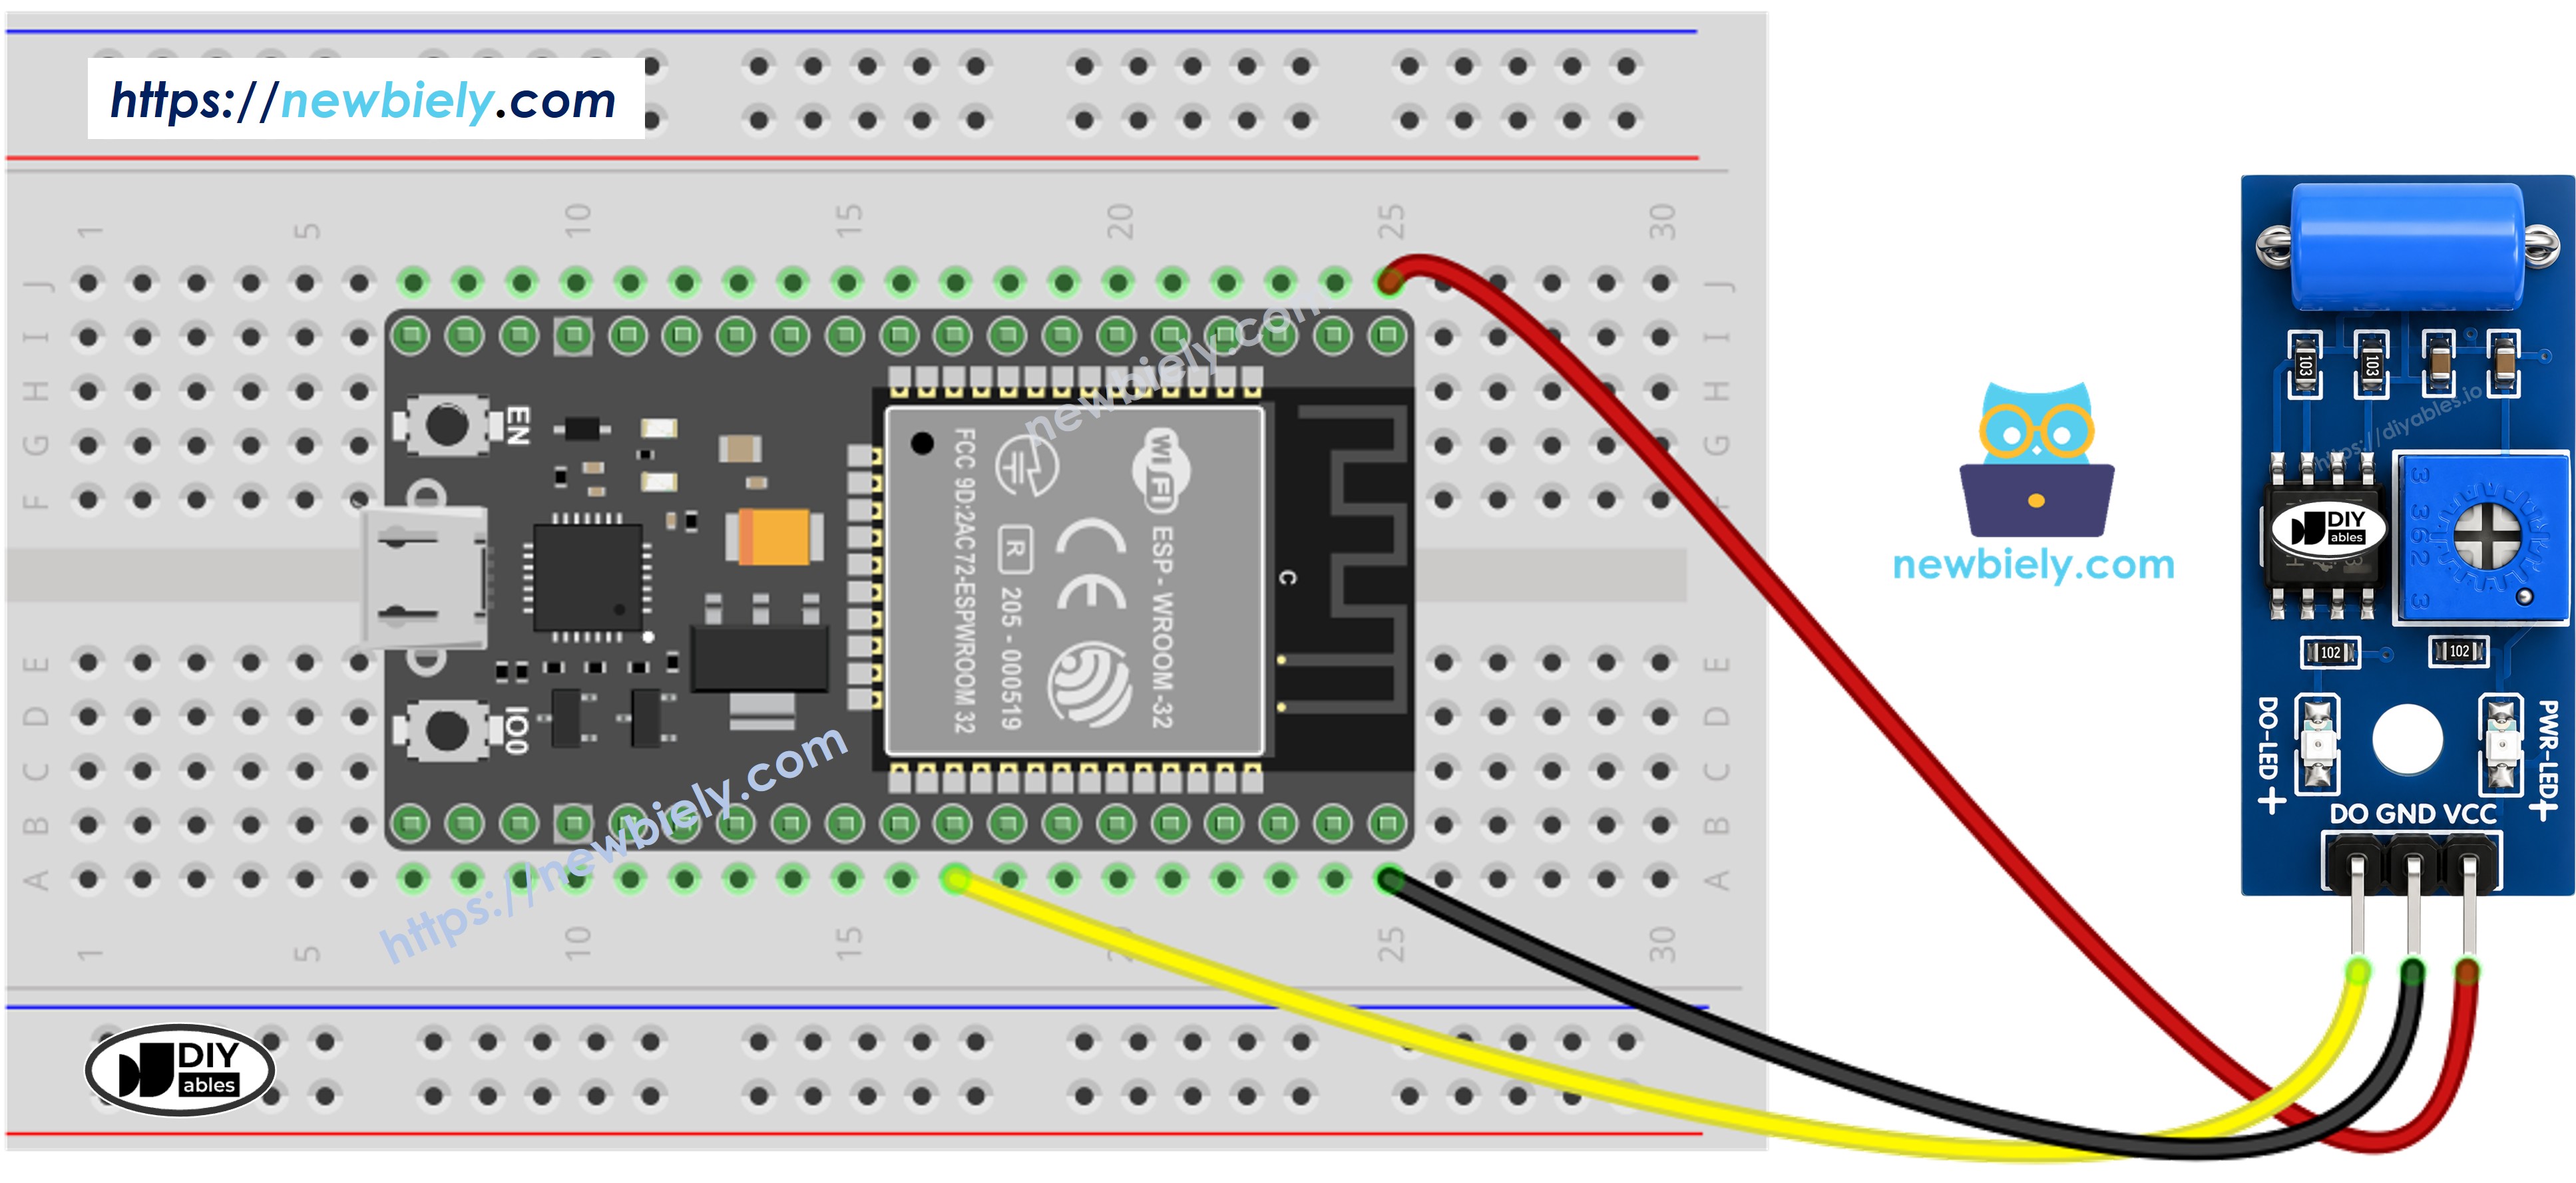
This image is created using Fritzing. Click to enlarge image
- How to connect ESP32 and SW-420 vibration sensor using screw terminal block breakout board
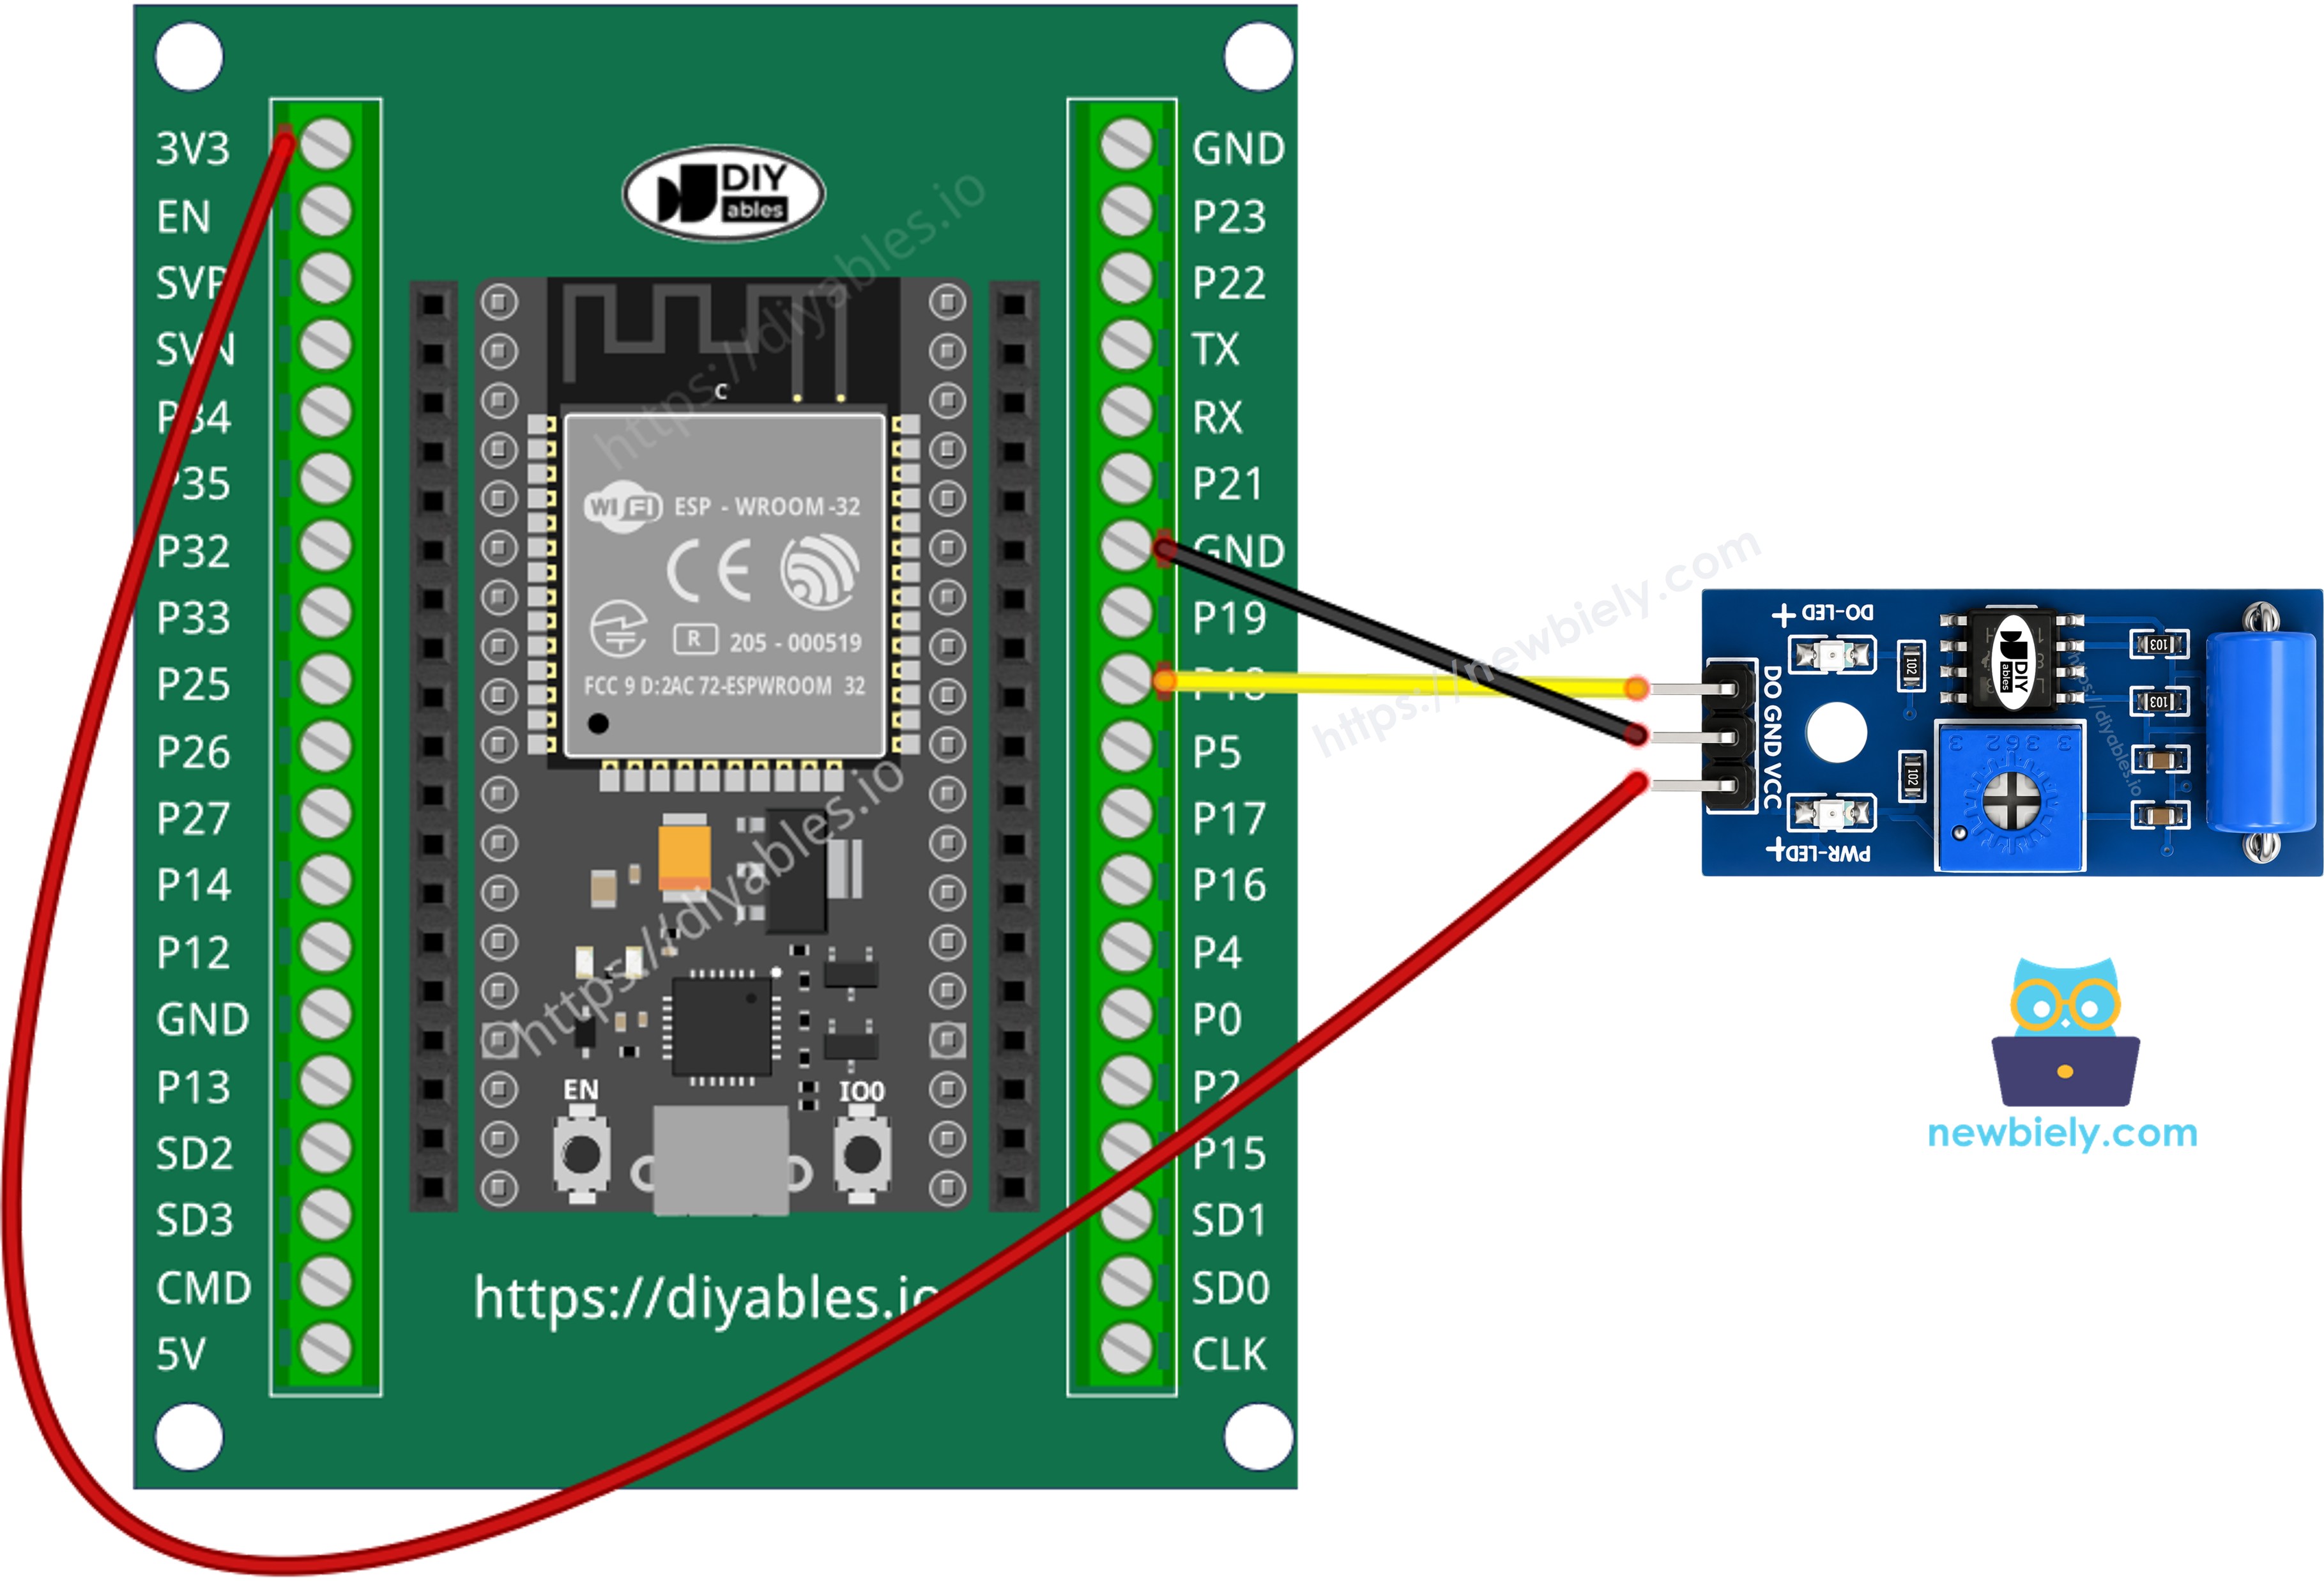
If you're unfamiliar with how to supply power to the ESP32 and other components, you can find guidance in the following tutorial: The best way to Power ESP32 and sensors/displays.
How To Program For SW-420 Vibration Sensor
- Initializes the ESP32 pin to the digital input mode by using pinMode() function. For example, pin GPIO18
- Reads the state of the ESP32 pin by using digitalRead() function.
ESP32 Code - Detecting the vibration
Quick Instructions
- If this is the first time you use ESP32, see how to setup environment for ESP32 on Arduino IDE.
- Copy the above code and open with Arduino IDE
- Click Upload button on Arduino IDE to upload code to ESP32
- Tap or shake the SW-420 sensor
- See the result on Serial Monitor.
From here, you are free to personalize the code so it sounds a buzzer, flashes an LED, or sends an alert whenever vibration is detected. For more detailed guidance and step-by-step instructions, you can refer to the tutorials provided at the end of this tutorial.
Troubleshooting
If you encounter any issues with the SW-420 vibration sensor's functionality, please consider the following troubleshooting steps:
- Adjust the sensitivity: Turn the onboard potentiometer to make the sensor more or less sensitive if it triggers too easily or not at all.
- Isolate from ambient vibration: Mount the sensor away from motors, fans, or surfaces that vibrate constantly, as this can cause continuous false triggers.
- Check the wiring: Make sure the VCC, GND, and DO pins are connected correctly.
- Check the power supply: Ensure that the power supply is clean and stable for consistent readings.
Video Tutorial
Making video is a time-consuming work. If the video tutorial is necessary for your learning, please let us know by subscribing to our YouTube channel , If the demand for video is high, we will make the video tutorial.