ESP32 - SSD1309 OLED Display
An OLED (Organic Light-Emitting Diode) display offers self-emitting pixels that deliver deep blacks, high contrast, and wide viewing angles — making it a great upgrade over traditional LCDs. The SSD1309 is the driver IC commonly found on 2.42-inch (sometimes labeled 2.4-inch) 128×64 I2C OLED modules.
In this step-by-step guide you will learn how to connect and program the SSD1309 OLED 128×64 with an ESP32 board using the DIYables_OLED_SSD1309 library. Specifically, we will cover:
- Wiring the 2.42-inch SSD1309 OLED to ESP32 via I2C
- Printing text and numbers on the screen
- Centering text both vertically and horizontally
- Drawing geometric shapes (lines, rectangles, circles, triangles, rounded rectangles)
- Rendering monochrome bitmap images
- Hardware scrolling in four directions
- Adjusting contrast and dimming the display
- Using custom external fonts from the Adafruit GFX font collection
This tutorial shows how to program the ESP32 using the Arduino language (C/C++) via the Arduino IDE. If you’d like to learn how to program the ESP32 with MicroPython, visit this ESP32 MicroPython - SSD1309 OLED Display tutorial.
Hardware Used In This Tutorial
Or you can buy the following kits:
| 1 | × | DIYables ESP32 Starter Kit (ESP32 included) | |
| 1 | × | DIYables Sensor Kit (18 sensors/displays) |
Introduction to the SSD1309 2.42-Inch OLED Display
The SSD1309 is a single-chip CMOS OLED driver IC designed for 128×64 dot-matrix panels. It is register-compatible with the widely-used SSD1306, so many existing code examples carry over with minimal changes. The key hardware differences are:
- No built-in charge pump — the SSD1309 requires an external VCC rail, though virtually all breakout boards (including 2.42-inch and 2.4-inch modules) ship with an onboard boost converter, so this is transparent to you.
- Higher voltage tolerance — the SSD1309 accepts up to 16 V VCC, whereas the SSD1306 is limited to roughly 4.2 V.
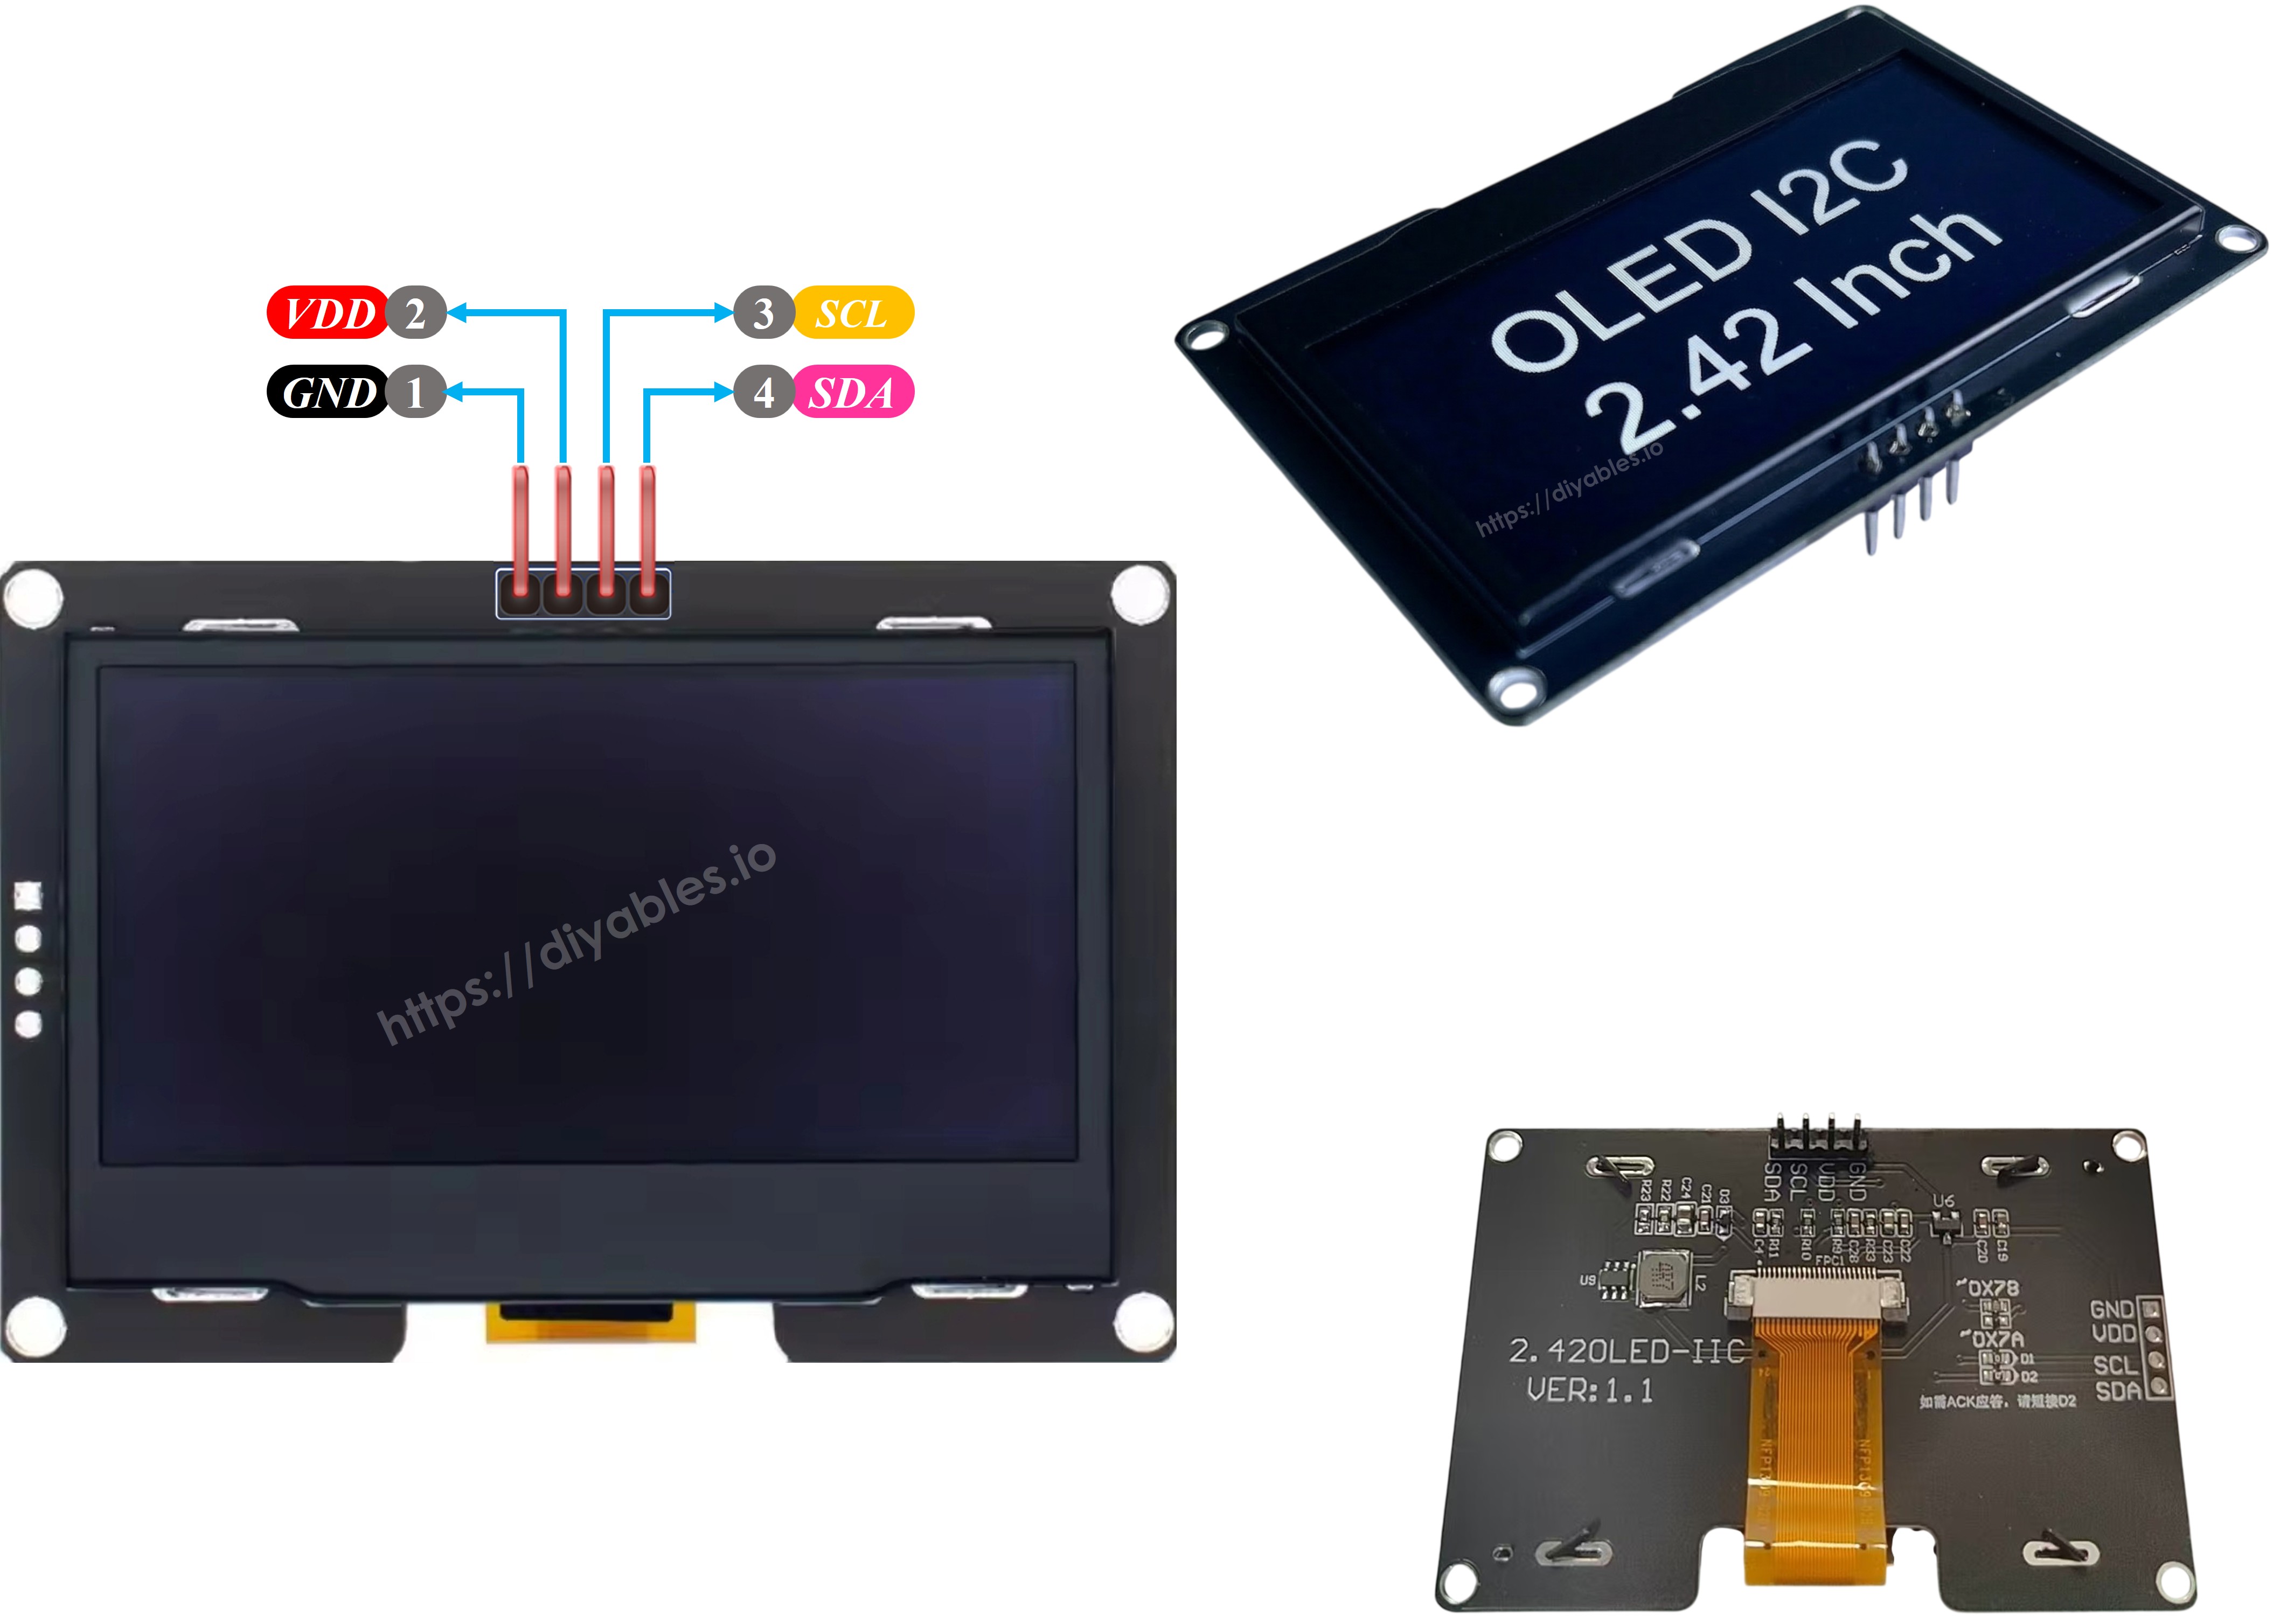
The 2.42 inch (2.4 inch) OLED module commonly uses the SSD1309 driver and features a 128×64 pixel resolution with I2C interface. Panel color (white, blue, yellow, green, or dual-zone) is determined by the physical OLED material and is not software-controllable.
This tutorial communicates with the display over the I2C bus, which only requires two signal wires (SDA and SCL) and can share the bus with other I2C peripherals.
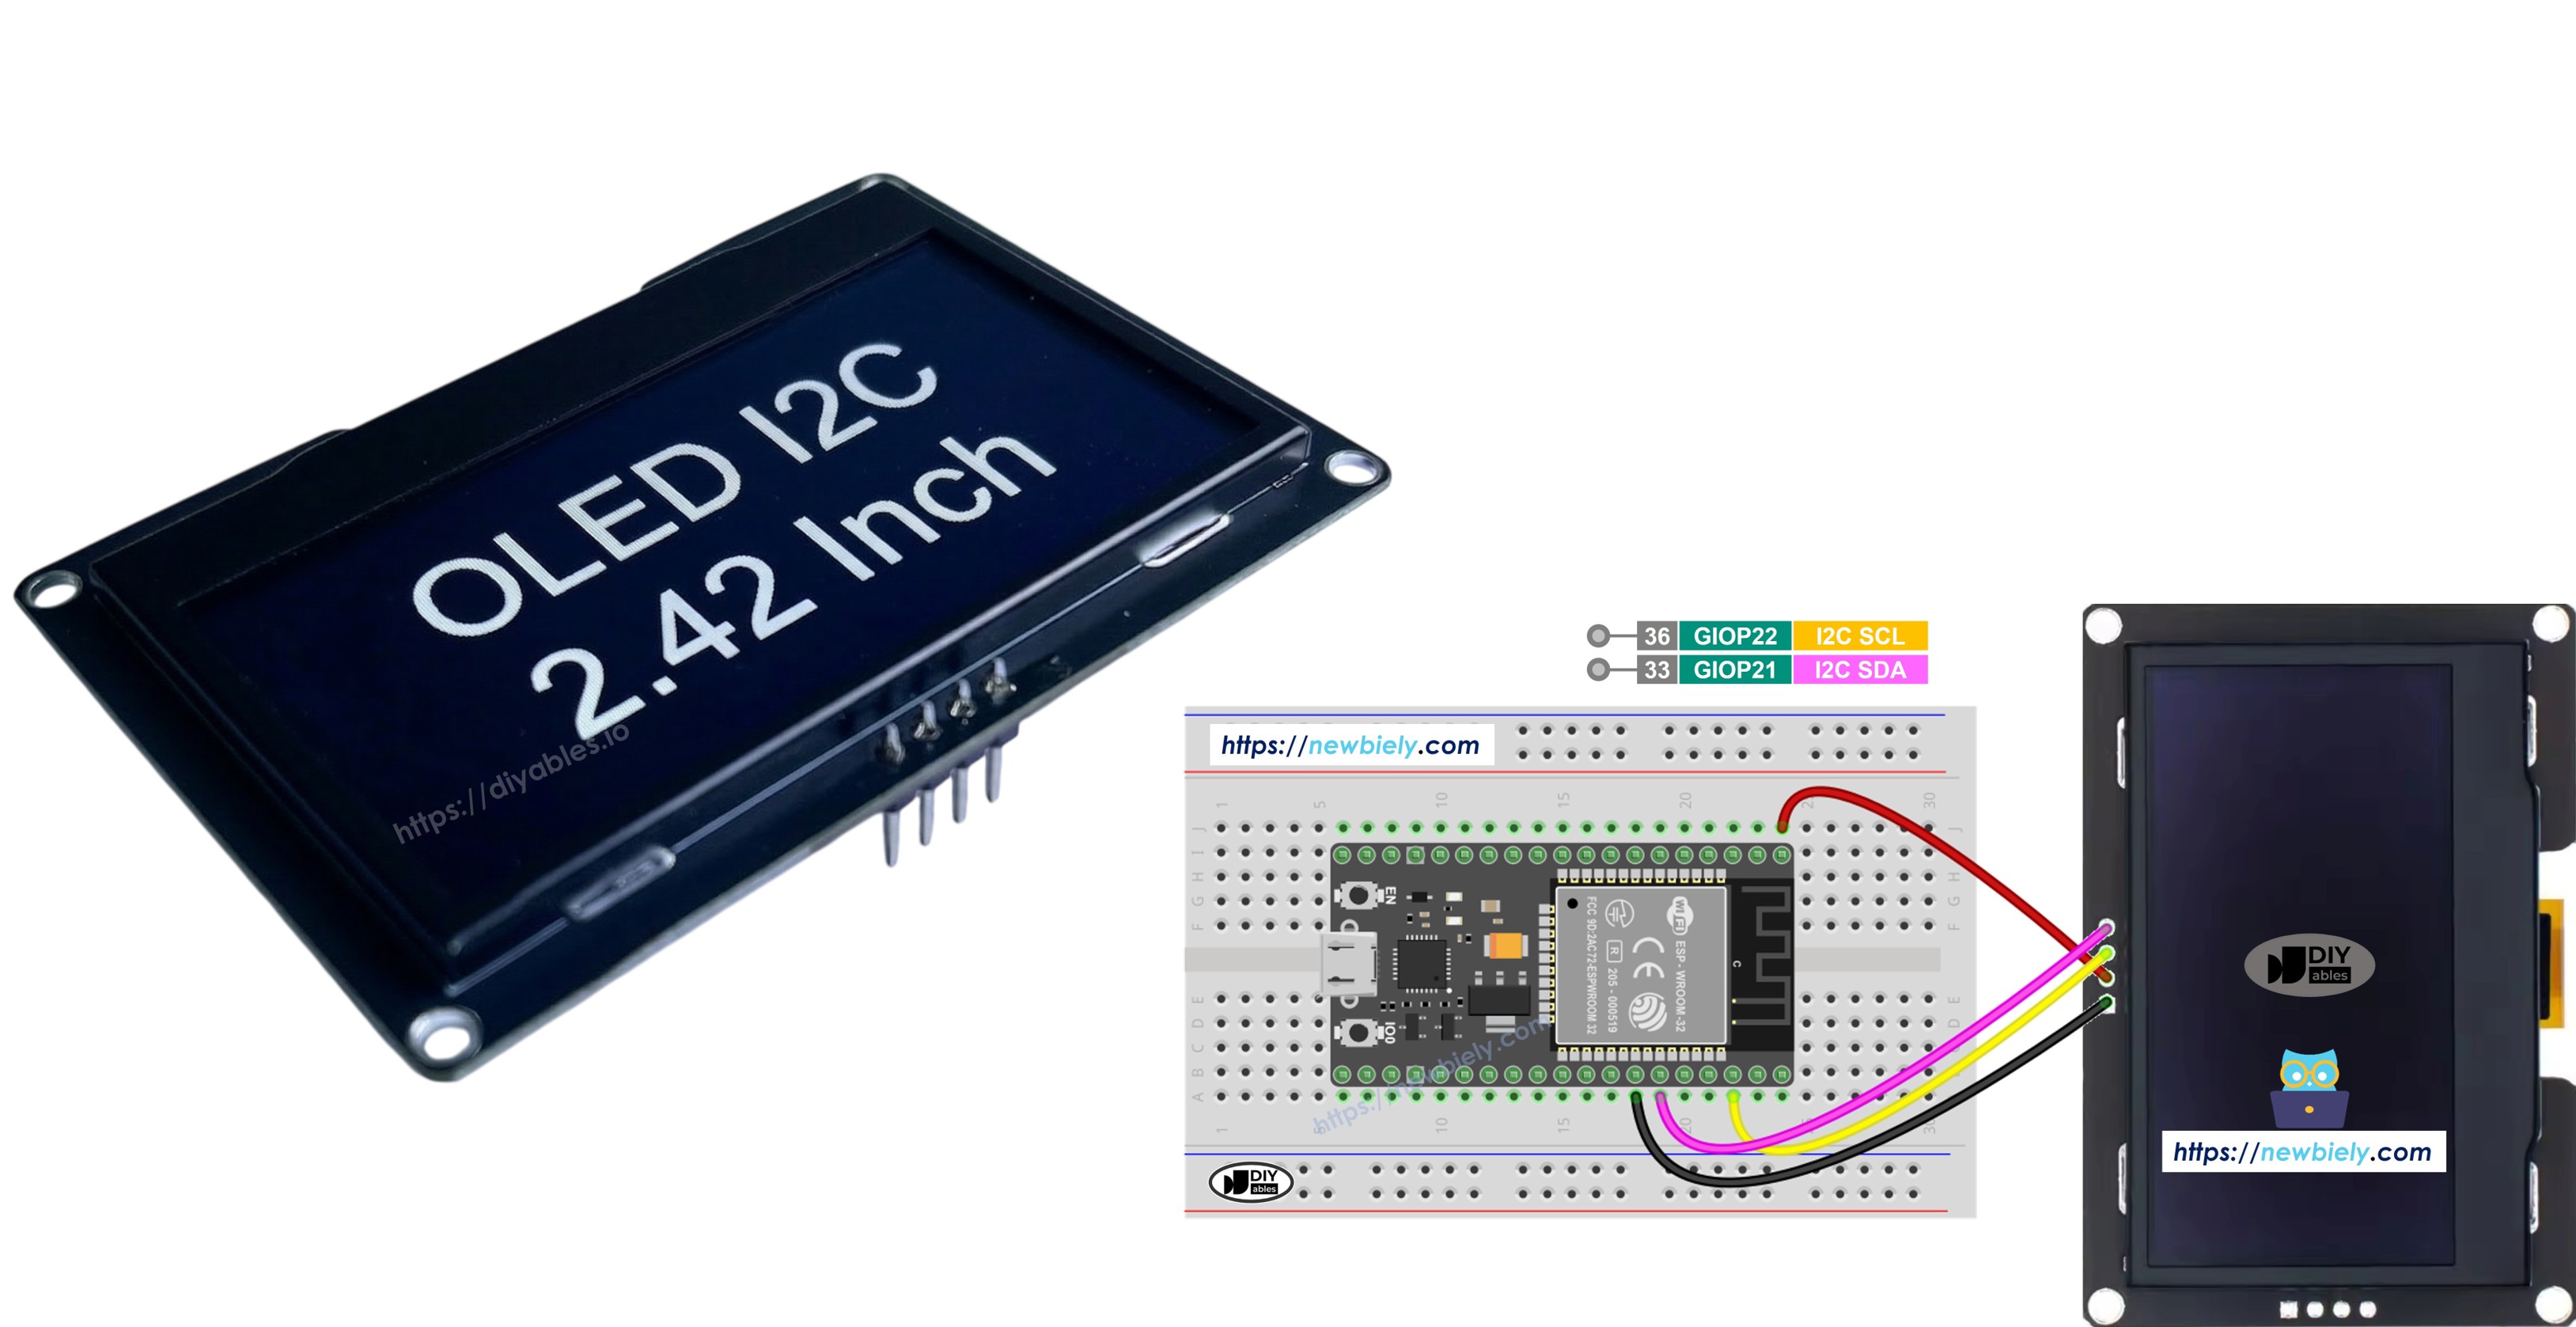
SSD1309 OLED Pinout (I2C Module)
The typical 2.42-inch SSD1309 I2C OLED module exposes four pins:
- GND pin: should be connected to the ground of ESP32
- VCC pin: should be connected to the 3.3V or 5V pin of ESP32 (check your module's specifications)
- SCL pin: is a I2C clock pin. Connect to GPIO 22 (default SCL)
- SDA pin: is a I2C data pin. Connect to GPIO 21 (default SDA)
※ NOTE THAT:
Pin order may vary between manufacturers. Always check the labels printed on your OLED module.
Wiring Diagram
- How to connect ESP32 to SSD1309 OLED 128x64 display using breadboard
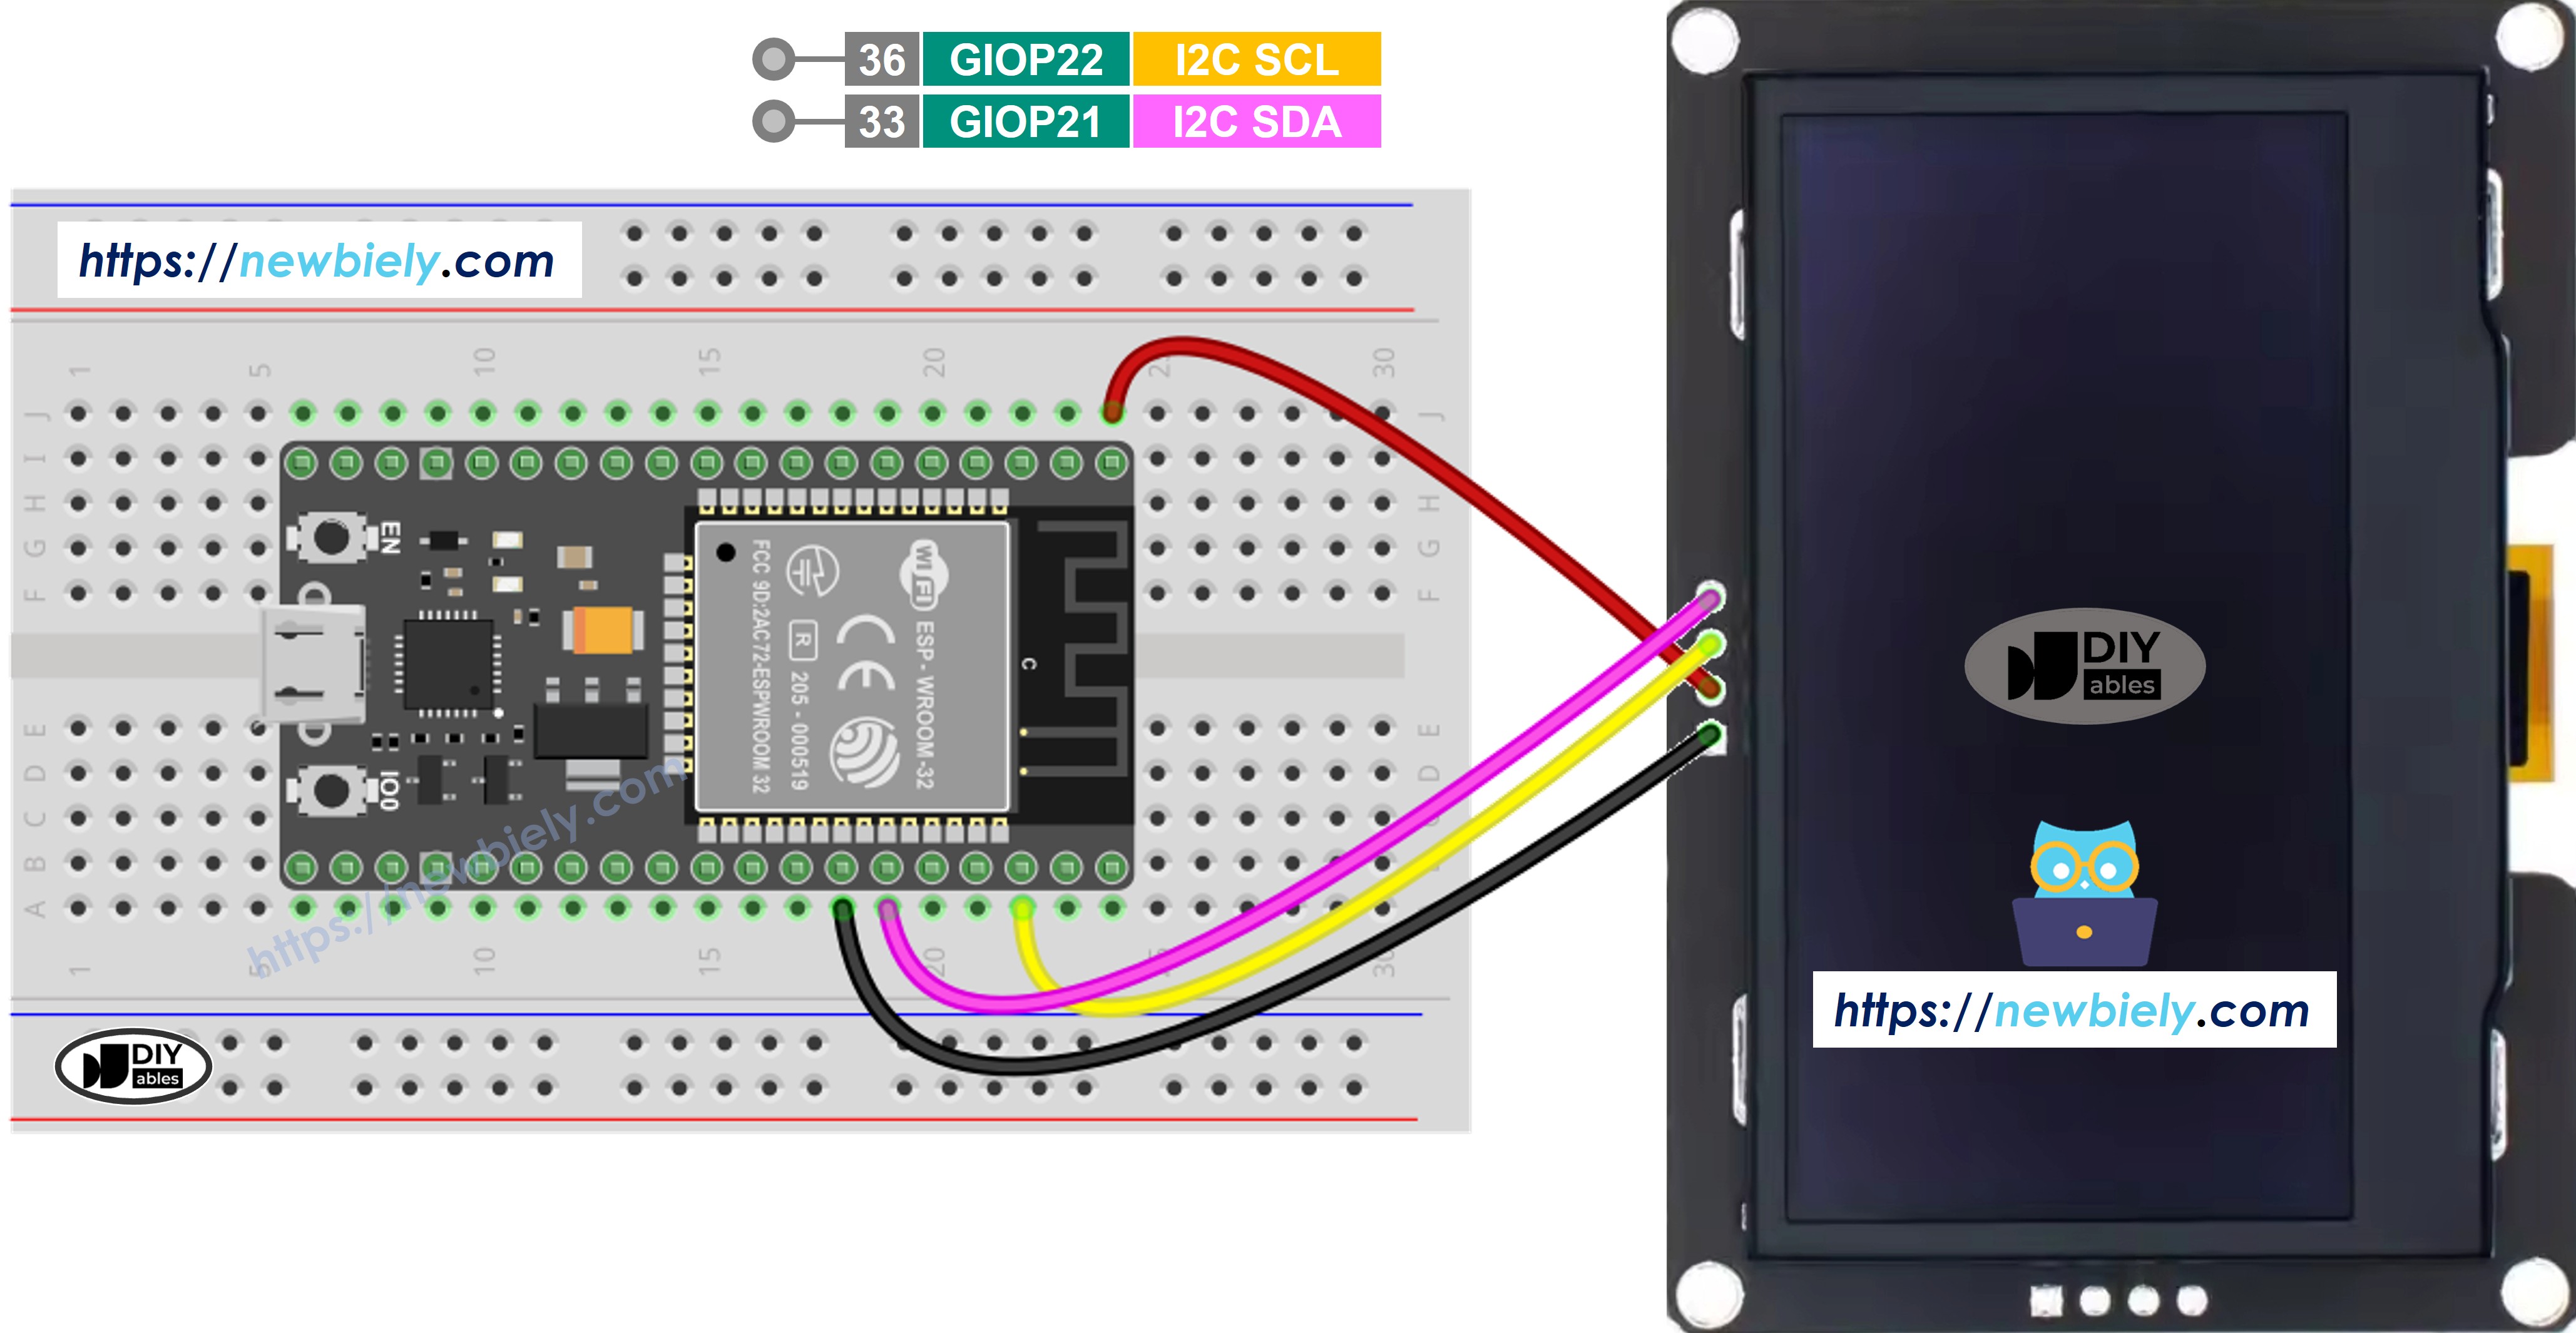
This image is created using Fritzing. Click to enlarge image
- How to connect ESP32 to SSD1309 OLED 128x64 display using screw terminal block breakout board
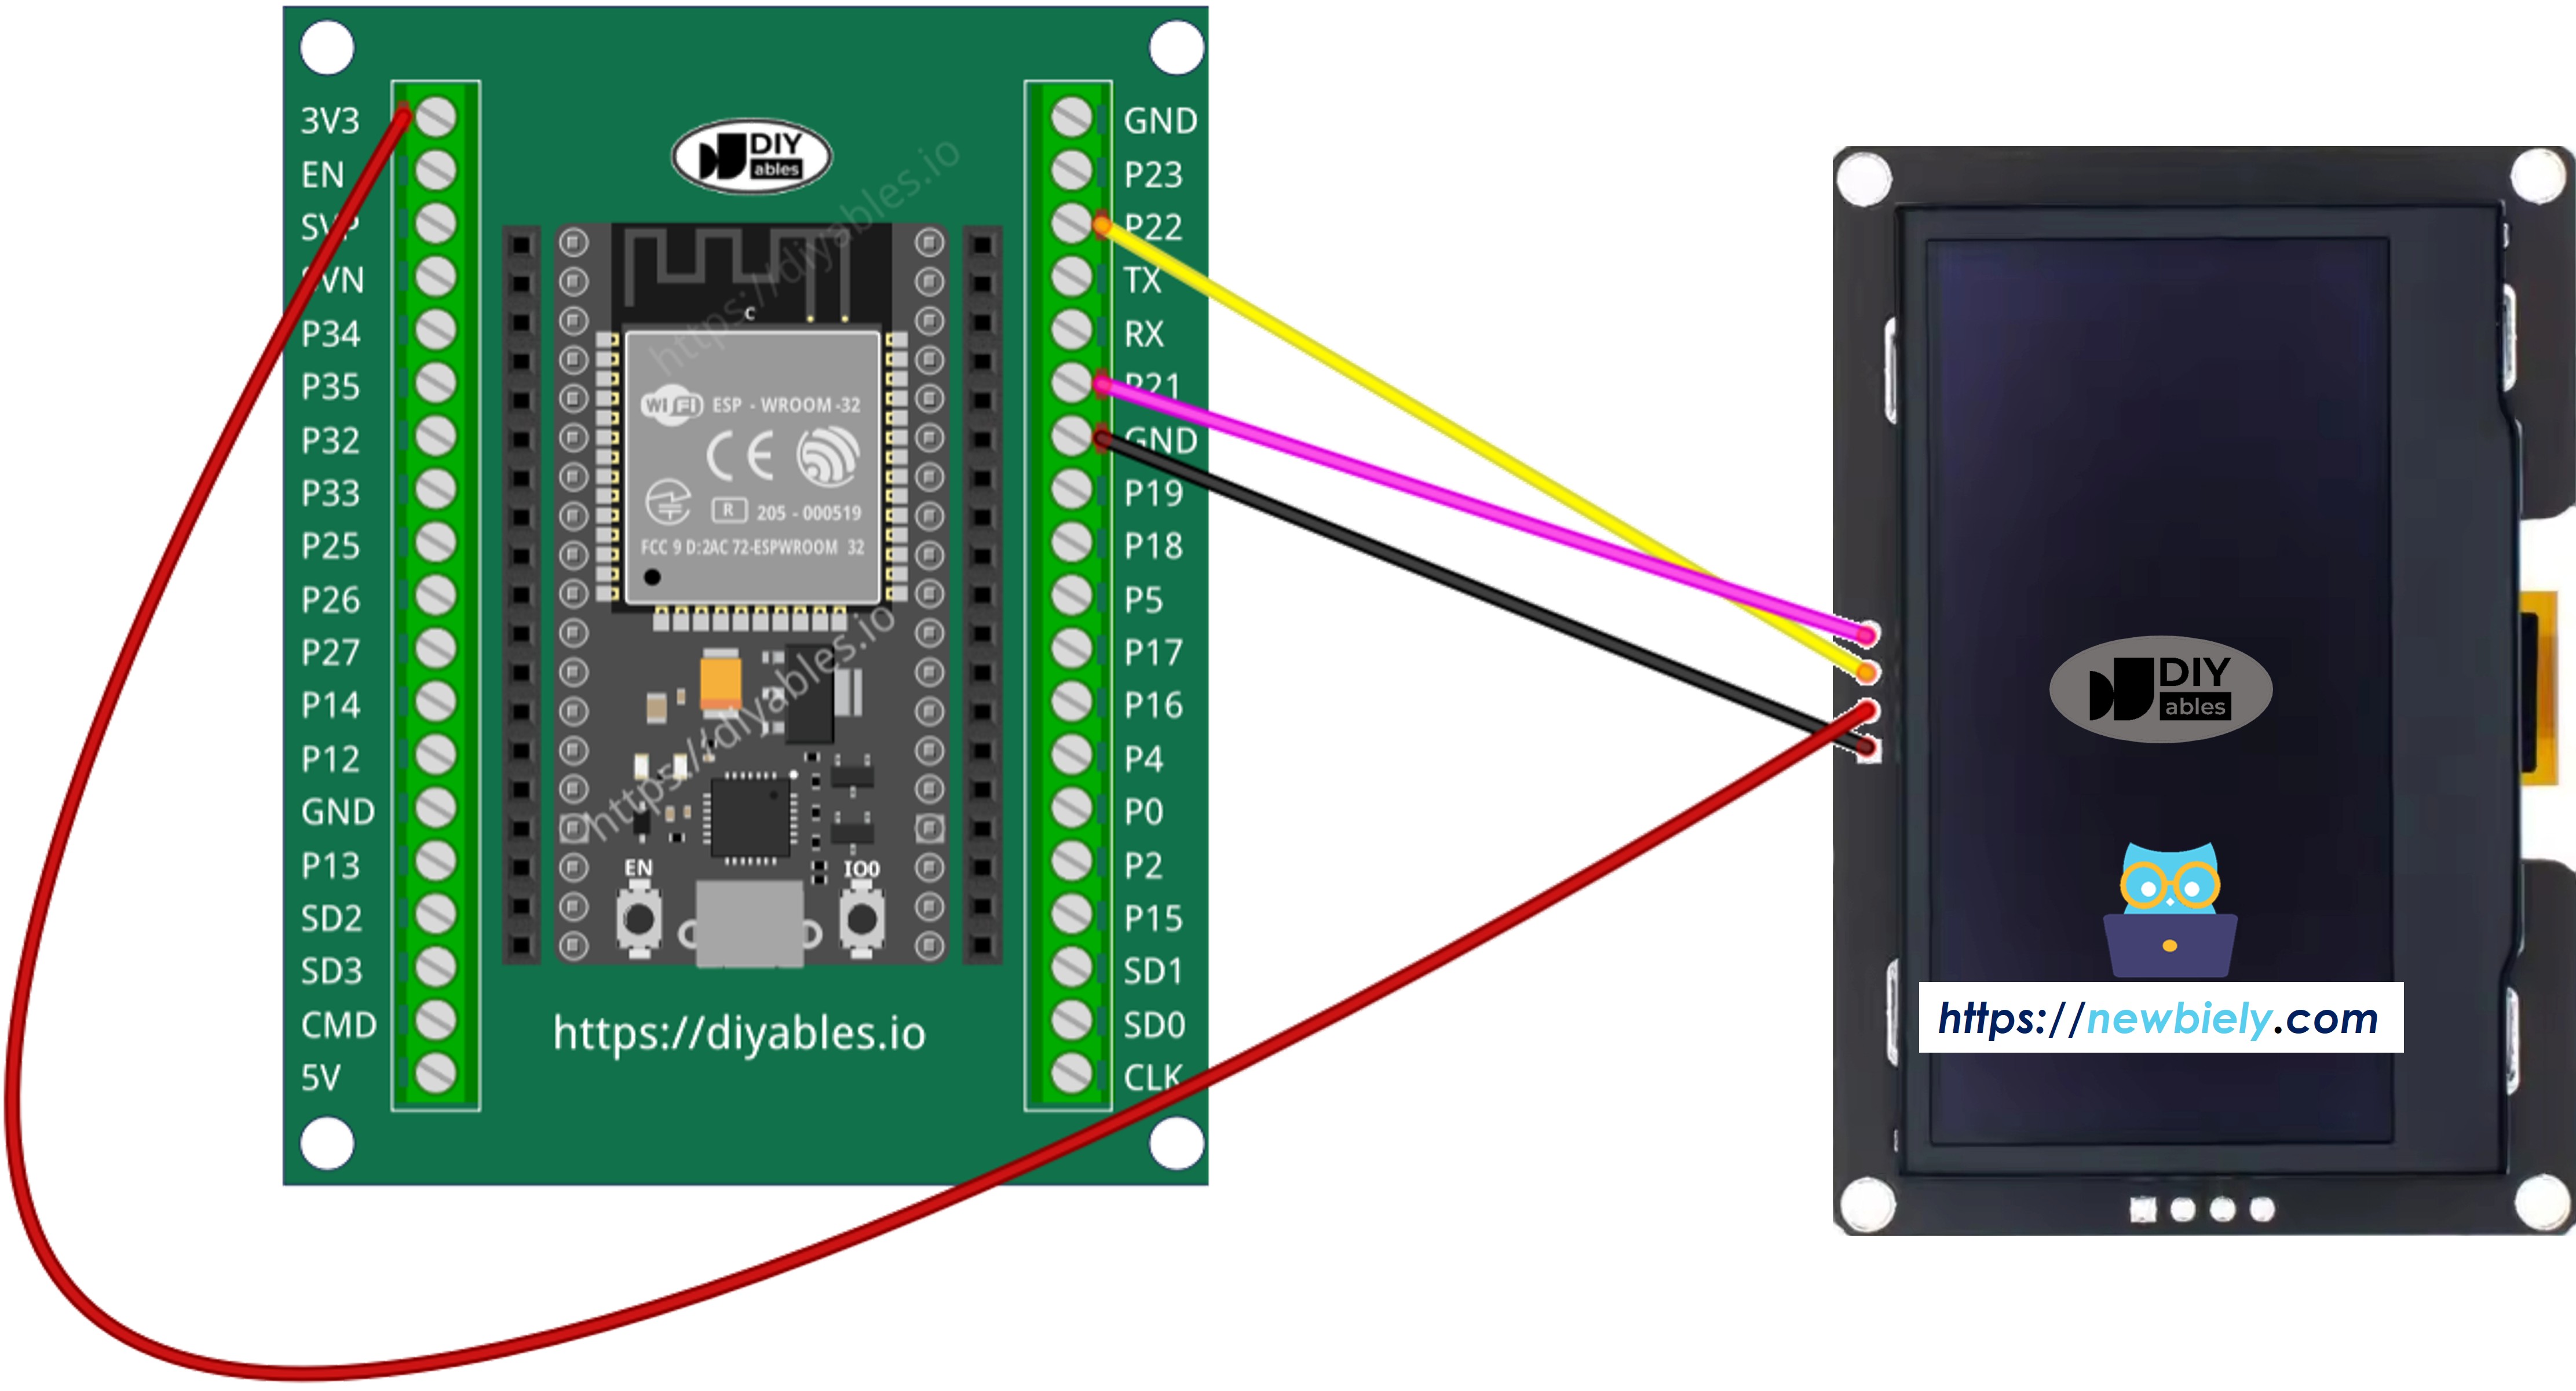
This image is created using Fritzing. Click to enlarge image
If you're unfamiliar with how to supply power to the ESP32 and other components, you can find guidance in the following tutorial: The best way to Power ESP32 and sensors/displays.
How to Program ESP32 for SSD1309 OLED
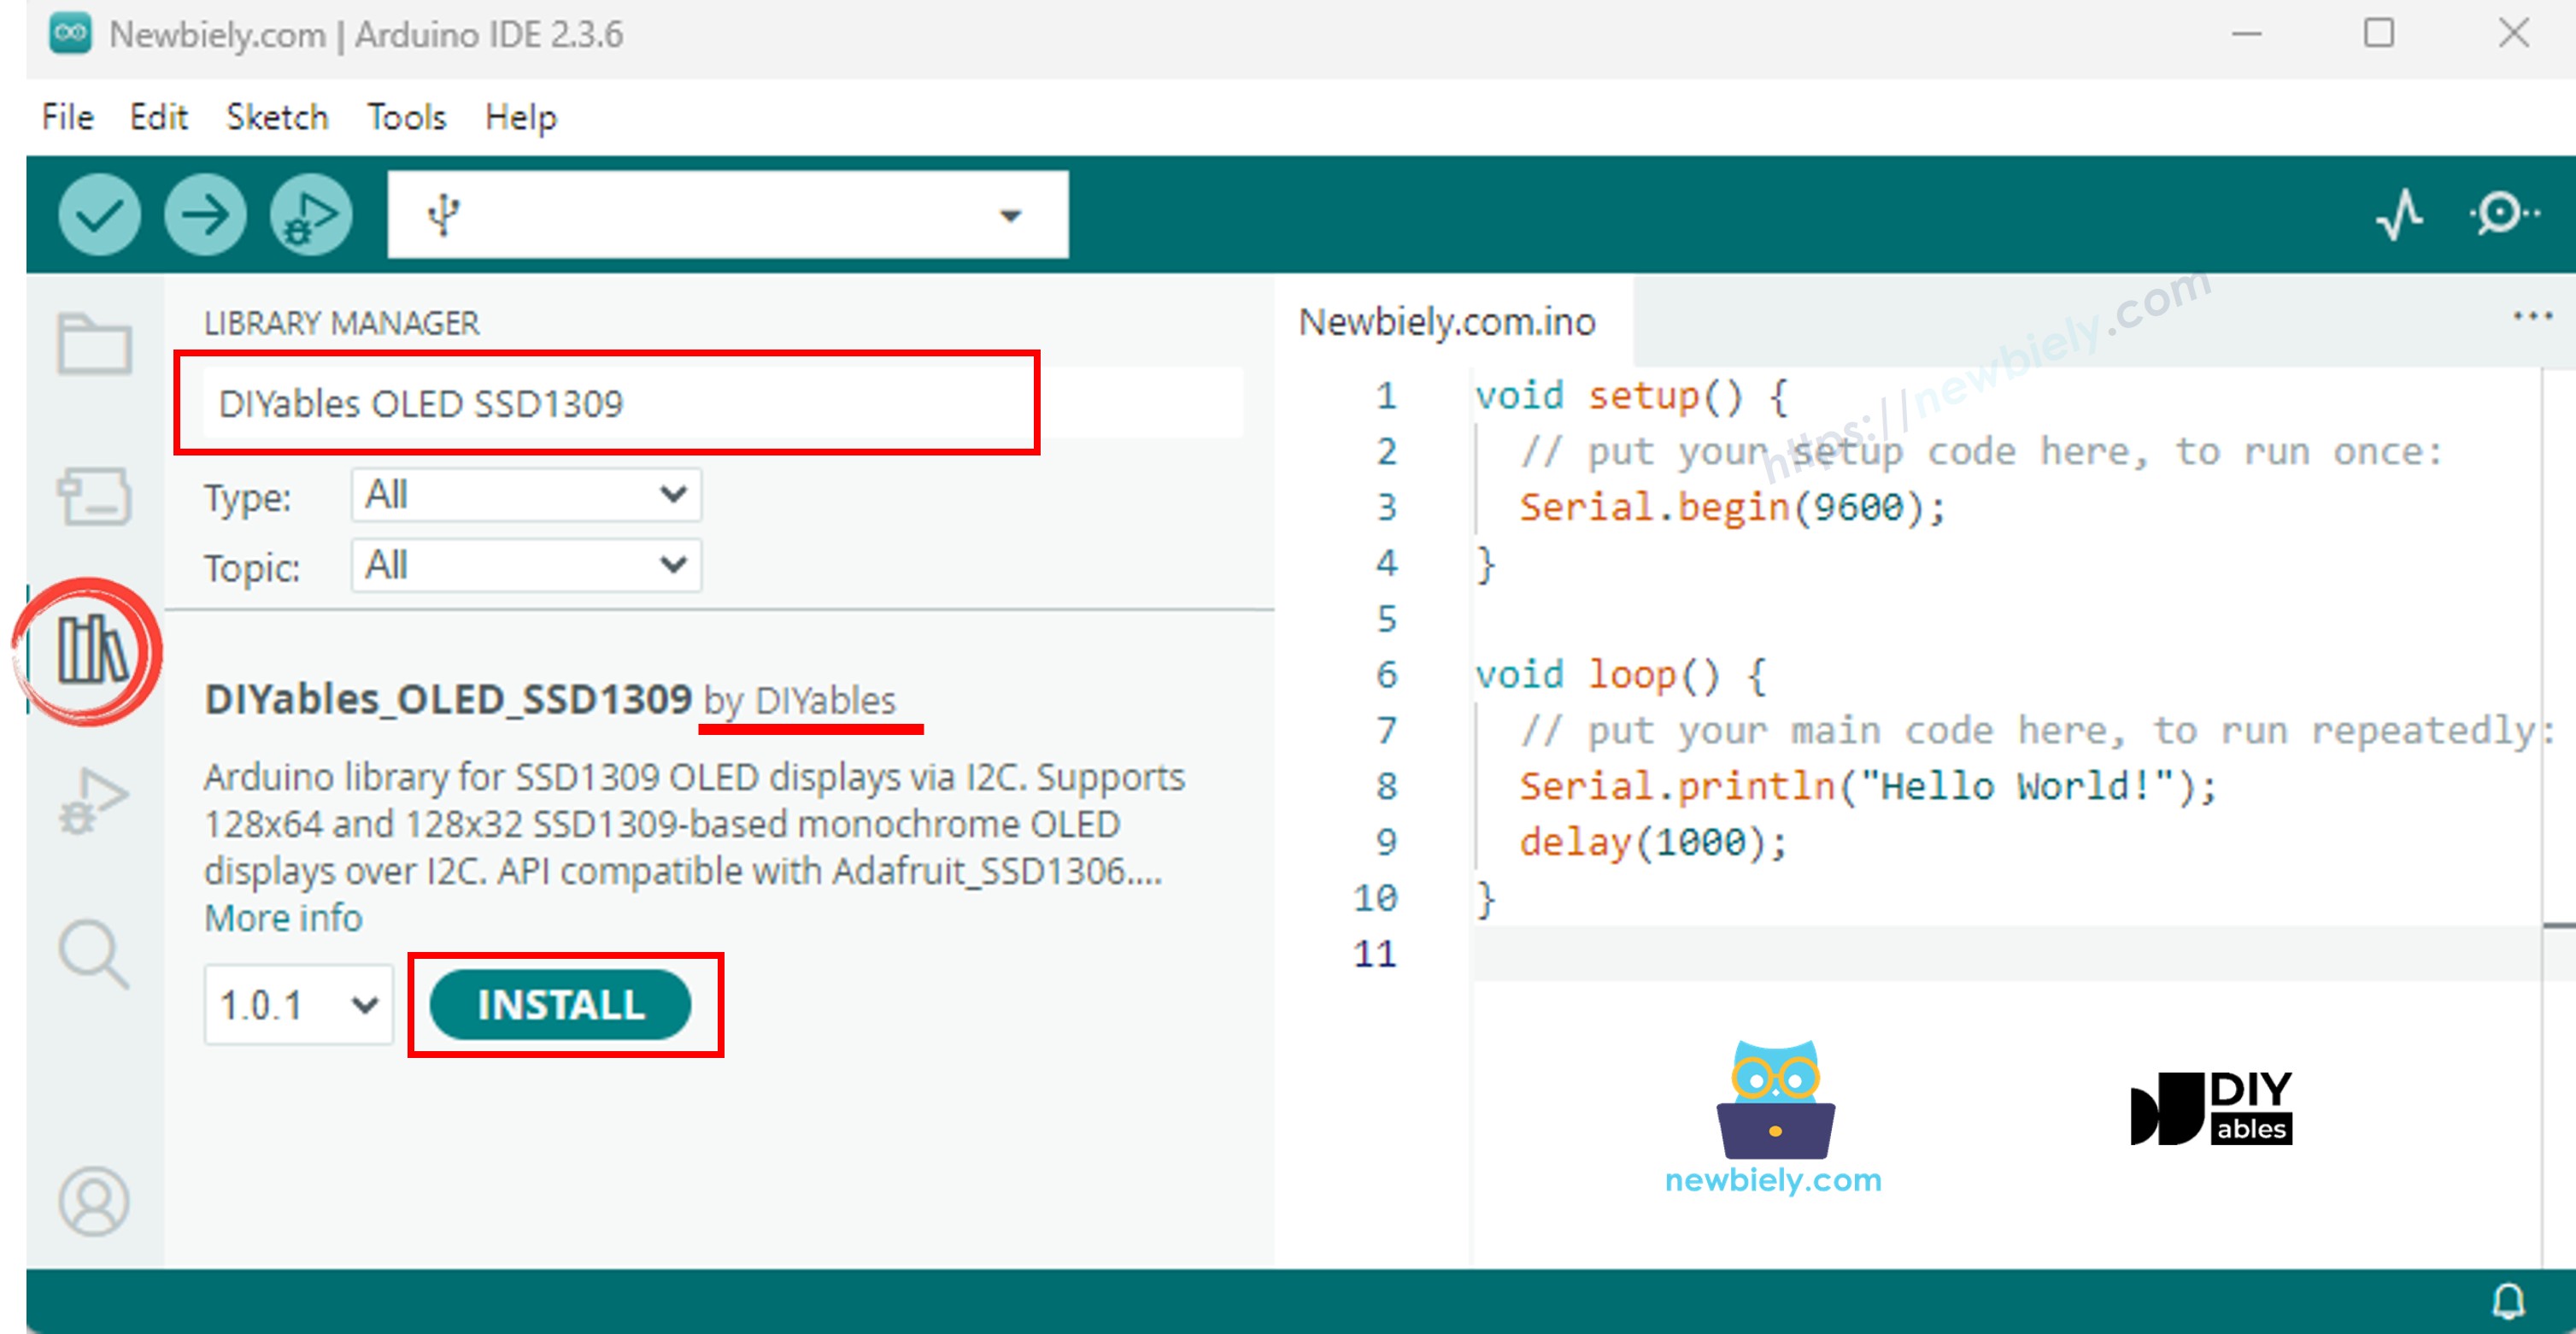
Install the DIYables_OLED_SSD1309 Library
The DIYables_OLED_SSD1309 library is specifically tailored for SSD1309 displays and extends Adafruit_GFX for richer graphics support.
- Open the Arduino IDE
- Navigate to the Libraries icon on the left sidebar
- Search for DIYables_OLED_SSD1309
- Click Install
- A dependency prompt will appear — click Install All to also install Adafruit GFX Library (required for shape drawing and fonts)
Programming Steps
- Include the required libraries
- Define the screen dimensions
- Declare the display object
- Initialize the OLED in setup()
- Display content
ESP32 Code — Hello World on SSD1309 OLED
The simplest starting point: print a few lines of text at different sizes.
ESP32 Code — Display Text on SSD1309 OLED
The following example demonstrates more text features — multiple sizes, number formatting, and the F() macro for saving RAM.
Useful Display Functions Reference
Below is a quick-reference list of the most frequently used functions when working with the SSD1309 OLED through the DIYables library:
- oled.clearDisplay() — wipe the frame buffer (all pixels off).
- oled.display() — transfer the buffer to the OLED so changes become visible.
- oled.drawPixel(x, y, color) — set or clear an individual pixel.
- oled.setTextSize(n) — scale the font by factor *n* (1 = 6×8, 2 = 12×16, …, up to 8).
- oled.setCursor(x, y) — move the text cursor to pixel coordinates *(x, y)*.
- oled.setTextColor(SSD1309_PIXEL_ON) — text foreground only (background is transparent).
- oled.setTextColor(SSD1309_PIXEL_OFF, SSD1309_PIXEL_ON) — text with an explicit background colour.
- oled.println("message") — print a string and advance to the next line.
- oled.println(number) — print an integer in decimal.
- oled.println(number, HEX) — print an integer in hexadecimal.
- oled.startscrollright(start, stop) — hardware-scroll right between page *start* and page *stop*.
- oled.startscrollleft(start, stop) — hardware-scroll left.
- oled.startscrolldiagright(start, stop) — hardware-scroll diagonally right.
- oled.startscrolldiagleft(start, stop) — hardware-scroll diagonally left.
- oled.stopscroll() — halt any active hardware scroll.
- oled.setContrast(value) — adjust display brightness (0–255).
- oled.dim(true/false) — quickly dim the display to minimum or restore the previous contrast.
- oled.invertDisplay(true/false) — hardware-level colour inversion (on pixels ↔ off pixels).
How to Vertically and Horizontally Center Text on the SSD1309 OLED
ESP32 Code — Draw Shapes on SSD1309 OLED
Because the DIYables_OLED_SSD1309 library extends Adafruit_GFX, you get a complete set of shape-drawing primitives: pixels, lines, rectangles, filled rectangles, circles, filled circles, triangles, filled triangles, and rounded rectangles. The sketch below cycles through all of them with animated demos.
ESP32 Code — Hardware Scrolling on SSD1309 OLED
The SSD1309 has a built-in scrolling engine that shifts the display contents without any CPU load. The DIYables library exposes four scroll directions: right, left, diagonal-right, and diagonal-left. Each takes a start page and stop page parameter (pages are 8-pixel-high horizontal strips numbered 0–7 on a 64-pixel-tall display).
※ NOTE THAT:
Always call display() to push your content to the OLED before starting a scroll. Avoid drawing new content while scrolling is active — call stopscroll() first.
ESP32 Code — Display Bitmap Image on SSD1309 OLED
To display a bitmap on the SSD1309 OLED you must first convert your image into a C byte array. Use the free image2cpp online tool for this conversion:
- Upload your image file (PNG, JPG, BMP, etc.).
- Set the canvas size to 128×64 (or smaller).
- Choose Arduino code as the output format.
- Copy the generated array into your sketch.
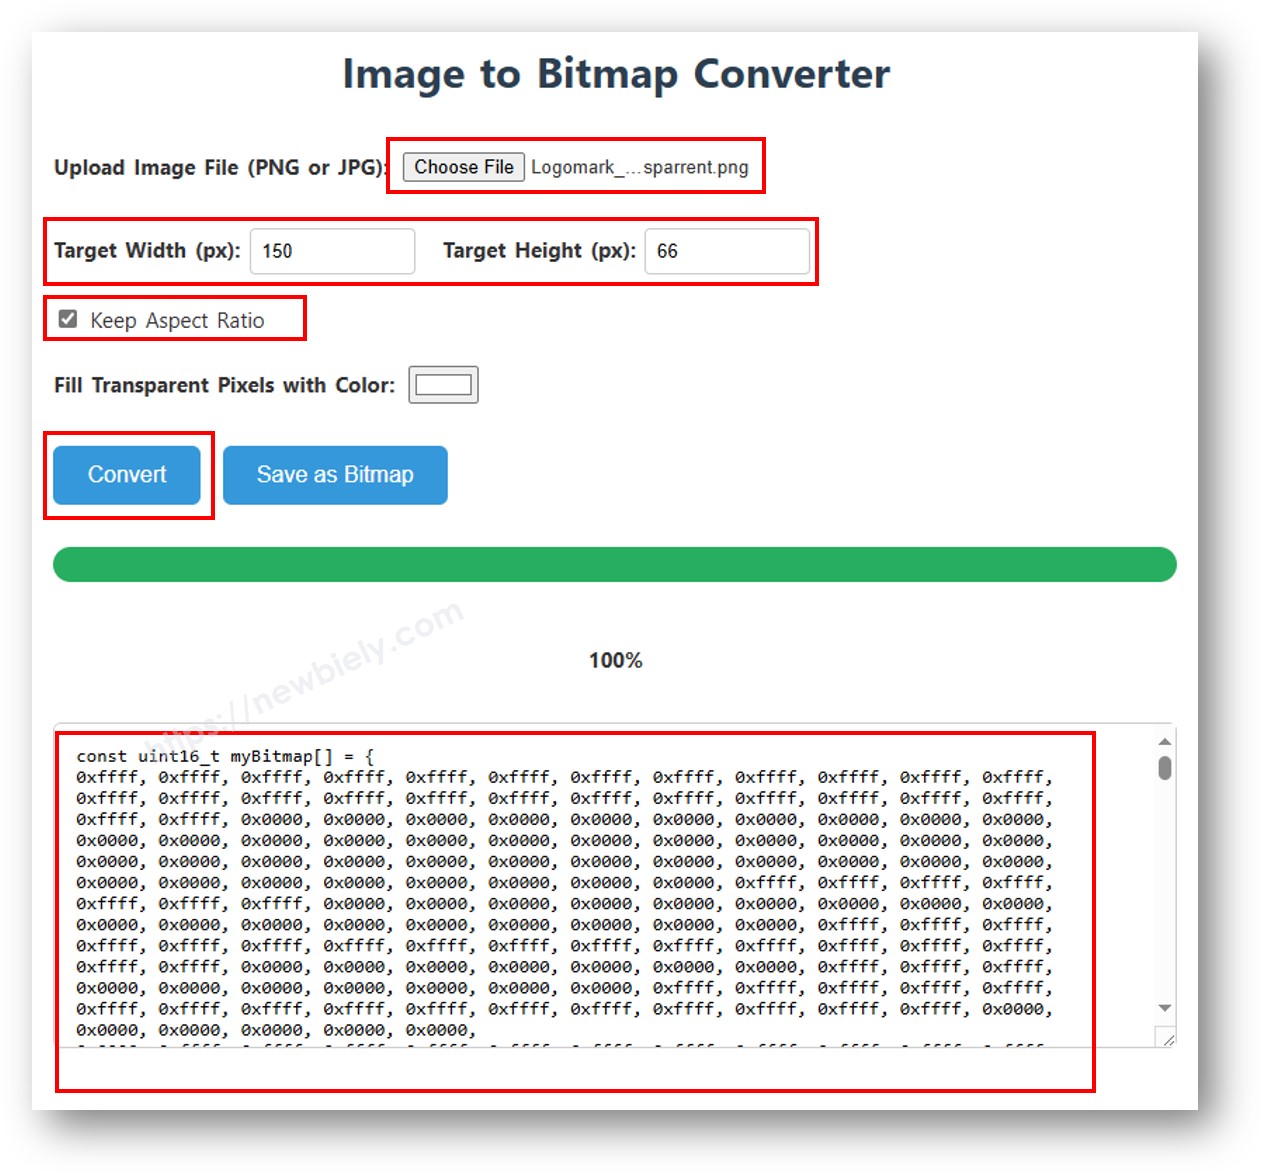
The example below alternates between a 16×16 heart icon and a full-width DIYables logo:
※ NOTE THAT:
- The bitmap dimensions must not exceed the screen resolution (128×64 for the 2.42 inch module).
ESP32 Code — Contrast and Dim on SSD1309 OLED
The SSD1309 supports 256 levels of contrast (0–255). The DIYables library provides setContrast() for fine-grained control and dim() for a quick toggle between minimum brightness and the previously-configured level.
ESP32 Code — Custom External Fonts on SSD1309 OLED
The Adafruit GFX library ships with dozens of scalable FreeFont typefaces (Serif, Sans, Mono — each in Regular, Bold, Italic, and four sizes). You can activate any of them on the SSD1309 display by including the corresponding header and calling setFont().
※ NOTE THAT:
- When an external font is active, the cursor Y coordinate refers to the text baseline, not the top-left corner. This is different from the built-in 5×7 font.
- External fonts are stored in flash (PROGMEM). The ESP32 has ample flash memory, so feel free to use multiple font files in your project.
SSD1309 OLED Troubleshooting with ESP32
If nothing appears on the 2.42 inch SSD1309 OLED after uploading your sketch, work through these checks:
- Verify wiring — confirm SDA, SCL, VCC and GND are connected to the correct ESP32 pins.
- Confirm the driver chip — this library is designed for the SSD1309. If your module uses a different controller (e.g. SH1106), it will not respond correctly.
- Check the I2C address — most SSD1309 modules default to 0x3C, but some use 0x3D. Run the I2C scanner sketch below to detect the actual address:
Expected Serial Monitor output when the SSD1309 is detected:
- Ensure display() is called — the SSD1309 uses a frame buffer. Drawing functions only modify the buffer in RAM; nothing appears on screen until you call oled.display().
- Check power supply — the 2.42 inch module draws more current than smaller OLEDs. Ensure your power source can deliver sufficient current (typically 20–40 mA at full brightness). If using USB power, this is usually not an issue with ESP32.
- Custom I2C pins (optional) — If you need to use non-default I2C pins, initialize Wire with Wire.begin(SDA_PIN, SCL_PIN) before calling display.begin().
Wrap Up
This guide has covered all the essentials for using the 2.42-inch SSD1309 OLED display (128×64) with ESP32, including:
- Hardware connections and I2C wiring
- Text and number display with multiple sizes
- Shape drawing (rectangles, circles, triangles)
- Bitmap image rendering
- Hardware scrolling in four directions
- Contrast and brightness control
- Custom external fonts
The DIYables_OLED_SSD1309 library simplifies SSD1309 programming by providing high-level functions for text, graphics, and display control while leveraging Adafruit GFX for extended drawing capabilities.
For more ESP32 projects and tutorials, visit esp32io.com